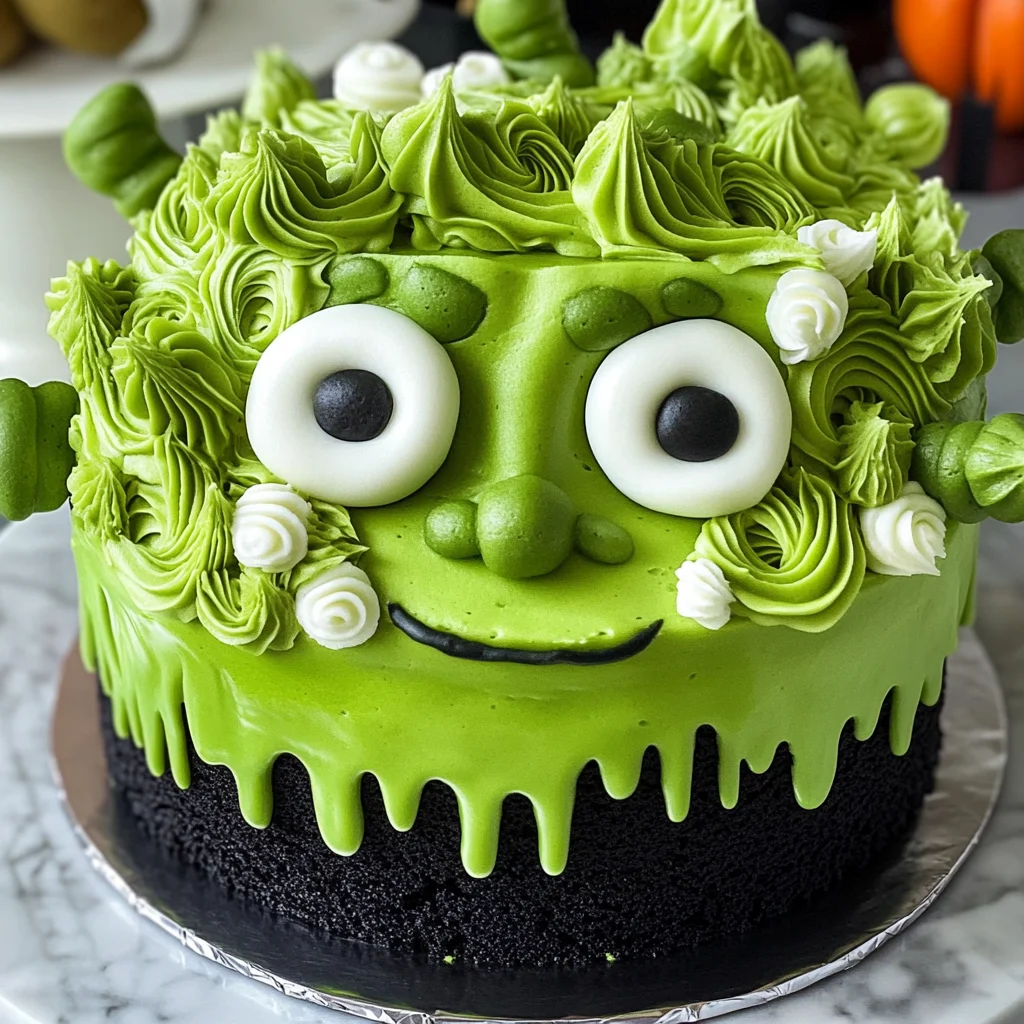
Frankenstein Cake
If you’re looking for a show-stopping dessert that will have everyone talking at your next Halloween gathering, look no further than this Frankenstein Cake! It’s not only a feast for the eyes with its vibrant green layers and playful decoration, but it also delights the taste buds with its moist, velvety texture and creamy buttercream. This cake is perfect for family gatherings, spooky get-togethers, or even just to make a regular day feel special. Trust me, once you serve this cake, it will become an instant favorite!
What makes this Frankenstein Cake so special is how easy it is to whip up. With simple ingredients and straightforward steps, you’ll feel like a baking pro in no time. Whether you’re a seasoned baker or just starting out, this recipe will bring joy to your kitchen and smiles all around the table.
Why You’ll Love This Recipe
- Fun and Festive: The vibrant green color and whimsical design make this cake perfect for Halloween celebrations!
- Deliciously Moist: The combination of buttermilk and oil results in cake layers that are incredibly soft and flavorful.
- Creamy Buttercream Bliss: The cream cheese buttercream adds a rich and tangy sweetness that pairs perfectly with the cake.
- Family-Friendly Fun: Kids love helping decorate this cake, making it a great bonding activity as well as a treat!
- Easy to Customize: With some simple tweaks, you can make this cake your own or cater to different tastes.
Ingredients You’ll Need
Let’s gather our ingredients! This Frankenstein Cake is made with simple, wholesome ingredients that you probably already have in your pantry. Here’s what you’ll need:
For the Cake Layers
- 2 1/2 cups cake flour (300g)
- 2 Tbsp unsweetened cocoa powder, sifted (10g)
- 1 tsp baking soda (6g)
- 1/2 tsp fine salt (3g)
- 1/2 cup unsalted butter, room temperature (113g)
- 1 3/4 cups granulated sugar (350g)
- 2 large eggs, room temperature (112g)
- 1 1/4 cups buttermilk, room temperature (300g)
- 2/3 cup vegetable or canola oil (145g)
- 2 squirts of green gel food coloring (or 1 Tbsp liquid food coloring)
- 2 tsp vanilla extract or vanilla bean paste (8g)
- 1 tsp white vinegar (4g)
For the Cream Cheese Buttercream
- 1 1/2 cups unsalted butter, room temperature (339g – 3 sticks)
- 1/2 cup full-fat cream cheese, room temperature (113g or 4 oz.)
- 1 Tbsp vanilla extract or vanilla bean paste (12g)
- 1 tsp fine salt (6g)
- 8 cups powdered sugar (1000g)
- 2 Tbsp heavy whipping cream, room temperature (30g)
For Decoration
- Electric Green Gel Food Coloring
- Black Gel Food Coloring
Tools You’ll Need
- 10-inch greaseproof cake board
- Spinning Cake Stand
- Small offset spatula
- 1 Large Piping Bag
- 3 Small Piping Bags
- 2 Large Round Piping Tips (like a Wilton 2A)
- 1 Small Round Piping Tip (like a Wilton 12)
- 1 Tiny Piping Tip (like a Wilton 3)
Variations
This Frankenstein Cake is super flexible! Here are some fun ideas to mix things up:
- Change the Color: Swap out the green for orange or purple gel food coloring for other festive looks!
- Add Flavor: Mix in some almond extract or citrus zest into the batter for an extra flavor boost.
- Layer it Up: Create more layers by dividing the batter into three smaller pans instead of two – more layers mean more fun!
- Make it Gluten-Free: Substitute the cake flour with a gluten-free blend to accommodate different dietary needs.
How to Make Frankenstein Cake
Step 1: Prepare Your Baking Pans
Start by preheating your oven to 350°F (175°C). Grease your cake pans with butter or non-stick spray and line them with parchment paper. This ensures that your cakes come out easily without sticking.
Step 2: Mix Dry Ingredients
In a medium bowl, whisk together the cake flour, cocoa powder, baking soda, and salt. This step is crucial as it evenly distributes the leavening agents throughout the flour.
Step 3: Cream Butter and Sugar
In a large mixing bowl, beat the unsalted butter and granulated sugar until light and fluffy. This process incorporates air into the mixture which helps create that lovely light texture in your cake.
Step 4: Add Eggs and Wet Ingredients
Next, add the eggs one at a time while continuing to mix. Then slowly incorporate the buttermilk and oil until combined. Don’t forget to add those vibrant squirts of green gel food coloring!
Step 5: Combine Dry and Wet Ingredients
Gradually add your dry mixture to the wet ingredients until just combined. Overmixing can lead to dense cakes, so be gentle!
Step 6: Bake
Divide your batter evenly between prepared pans. Bake for about 28 minutes or until a toothpick inserted comes out clean. Allow them to cool completely before frosting.
Step 7: Prepare Cream Cheese Buttercream
While your cakes cool down, whip up that delicious cream cheese buttercream! Beat together softened butter and cream cheese until smooth. Gradually add powdered sugar followed by vanilla extract and whipping cream until light and fluffy.
Step 8: Assemble Your Cake
Place one layer on your greaseproof cake board. Spread a generous amount of cream cheese buttercream on top before placing the second layer on top. Use remaining frosting to coat the entire cake smoothly.
Step 9: Decorate
Time for some fun! Use piping bags fitted with different tips to create monster features like eyes and scars using black gel food coloring. Don’t be shy; let your creativity shine!
And there you have it—a delightful Frankenstein Cake ready to impress! Enjoy every bite of this spooky yet scrumptious treat!
Pro Tips for Making Frankenstein Cake
Creating the perfect Frankenstein cake can be a fun and rewarding experience, especially with a few handy tips to guide you along the way!
- Use Room Temperature Ingredients: Ensuring your butter, eggs, and buttermilk are at room temperature allows for better emulsification and a smoother batter, resulting in a moist and fluffy cake.
- Don’t Overmix the Batter: Mixing just until combined helps maintain the cake’s light texture. Overmixing can lead to a dense cake that doesn’t rise as beautifully.
- Level Your Cake Layers: After baking, use a serrated knife to level your cake layers. This gives you a more professional-looking finish and makes stacking easier.
- Chill the Buttercream: If your cream cheese buttercream feels too soft, pop it in the refrigerator for about 15 minutes before frosting. This will make it easier to spread and pipe onto your cake.
- Experiment with Colors: Feel free to get creative with colors! You can add purple or orange accents to celebrate Halloween even more vibrantly.
How to Serve Frankenstein Cake
Presenting your Frankenstein cake can be just as delightful as making it! A little creativity goes a long way in impressing your guests.
Garnishes
- Chocolate Sprinkles: A sprinkle of chocolate adds a contrasting texture that complements the sweet cream cheese buttercream beautifully.
- Edible Eyes: You can find these fun decorations at craft stores or bakeries. Placing them on top gives your cake that spooky touch!
- Mint Leaves: Fresh mint leaves not only add color but also provide a refreshing contrast to the rich flavors of the cake.
Side Dishes
- Spooky Fruit Salad: A mix of seasonal fruits like oranges, apples, and grapes can balance out the sweetness of the cake while adding a festive touch.
- Pumpkin Soup: This warm and creamy soup is perfect for fall gatherings and serves as an excellent appetizer before indulging in dessert.
- Cheesy Garlic Breadsticks: Crunchy on the outside and soft on the inside, these savory breadsticks are great for those who want something hearty alongside their sweet treat.
- Roasted Vegetable Medley: A colorful assortment of roasted vegetables adds healthy variety to your table and offers a nice contrast to the richness of the cake.
With these tips and serving suggestions, your Frankenstein cake will not only taste amazing but will also be a showstopper at any Halloween gathering! Enjoy every spooky bite!

Make Ahead and Storage
This Frankenstein Cake is not only a showstopper for Halloween but also a fantastic option for meal prep! You can prepare components in advance, making it easier to assemble when you’re ready to serve.
Storing Leftovers
- Store leftover cake slices in an airtight container at room temperature for up to 3 days.
- If you prefer, refrigerate leftovers to extend freshness for up to a week.
- To prevent the frosting from getting too hard in the fridge, consider covering the cake with plastic wrap.
Freezing
- Wrap individual slices tightly in plastic wrap and place them in a freezer-safe bag or container.
- The cake can be frozen for up to 3 months.
- For best results, thaw overnight in the refrigerator before enjoying.
Reheating
- If you want to enjoy warm pieces of your cake, microwave individual slices on low power for about 10-15 seconds.
- Alternatively, you can let them come to room temperature before serving if frozen.
FAQs
Here are some common questions you might have about making this delightful Frankenstein Cake!
Can I use a different color for the Frankenstein Cake?
Absolutely! While green is traditional for a Frankenstein Cake, feel free to get creative with colors. You could use any gel food coloring that fits your theme or preference.
How do I make a gluten-free version of Frankenstein Cake?
To convert this recipe into a gluten-free one, substitute the all-purpose flour with a 1:1 gluten-free baking blend. Be sure it contains xanthan gum or add it separately according to package instructions.
What makes this Frankenstein Cake special?
This Frankenstein Cake stands out due to its moist green velvet layers and creamy buttercream that perfectly balances sweetness and richness. It’s not only visually appealing but also incredibly delicious!
How should I decorate my Frankenstein Cake?
You can unleash your creativity! Use black gel food coloring for facial features and other decorations. Consider adding candy eyes or sprinkles to enhance the spooky effect!
Final Thoughts
I hope you’re as excited as I am about creating this charming Frankenstein Cake! It’s perfect for gatherings and will surely be a hit among friends and family. Enjoy every step of the process, from mixing the vibrant batter to watching your creation come alive. I can’t wait for you to try this recipe—happy baking!
Frankenstein Cake
Get ready to impress your guests with a delightful Halloween masterpiece: the Frankenstein Cake! This vibrant green dessert combines moist, velvety layers with a rich cream cheese buttercream that will have everyone talking. Perfect for family gatherings or spooky celebrations, this cake is as fun to create as it is to eat. With its playful design and delicious flavor, it’s destined to become a favorite for years to come. Easy to make and customizable, this cake offers a creative outlet for bakers of all skill levels. So gather your ingredients and let’s bring this whimsical treat to life!
- Prep Time: 30 minutes
- Cook Time: 28 minutes
- Total Time: 58 minutes
- Yield: Serves approximately 12 slices 1x
- Category: Dessert
- Method: Baking
- Cuisine: American
Ingredients
- 2 1/2 cups cake flour
- 2 Tbsp unsweetened cocoa powder, sifted
- 1 tsp baking soda
- 1/2 tsp fine salt
- 1/2 cup unsalted butter, room temperature
- 1 3/4 cups granulated sugar
- 2 large eggs, room temperature
- 1 1/4 cups buttermilk, room temperature
- 2/3 cup vegetable or canola oil
- 2 squirts of green gel food coloring
- 2 tsp vanilla extract or vanilla bean paste
- 1 tsp white vinegar
- 1 1/2 cups unsalted butter, room temperature (for frosting)
- 1/2 cup full-fat cream cheese, room temperature
- 1 Tbsp vanilla extract or vanilla bean paste (for frosting)
- 1 tsp fine salt (for frosting)
- 8 cups powdered sugar
- 2 Tbsp heavy whipping cream, room temperature
Instructions
- Preheat oven to 350°F (175°C). Grease and line two cake pans with parchment paper.
- In a bowl, whisk together cake flour, cocoa powder, baking soda, and salt.
- In a large mixing bowl, beat the unsalted butter and granulated sugar until light and fluffy.
- Add eggs one at a time, mixing well after each addition. Then mix in buttermilk, oil, and green food coloring.
- Gradually combine dry ingredients with wet ingredients until just mixed.
- Divide the batter between the prepared pans and bake for about 28 minutes or until a toothpick comes out clean.
- Cool cakes completely before frosting.
- For the cream cheese buttercream, beat butter and cream cheese until smooth; gradually add powdered sugar followed by vanilla extract.
- Assemble the cake by layering with frosting in between and around the sides; decorate as desired.
Nutrition
- Serving Size: 1 slice
- Calories: 420
- Sugar: 45g
- Sodium: 250mg
- Fat: 20g
- Saturated Fat: 10g
- Unsaturated Fat: 8g
- Trans Fat: 0g
- Carbohydrates: 60g
- Fiber: 1g
- Protein: 4g
- Cholesterol: 55mg