Halloween Witch Hat Cookies
If you’re looking for a fun and festive treat to celebrate Halloween, these Halloween Witch Hat Cookies will be the star of your spooky soirée! They are not just adorable; they are also a delightful project to share with your kids. Who wouldn’t love creating delicious witch hats that look just as good as they taste? These cookies bring a smile to everyone’s face, making them perfect for parties or family gatherings.
What makes this recipe special is its versatility. You can customize the colors and decorations to suit your style, making each cookie unique. Plus, with simple ingredients and straightforward instructions, you’ll find that whipping up these Halloween Witch Hat Cookies is an enjoyable experience for the whole family!
Why You’ll Love This Recipe
- Easy to Make: With simple steps, even novice bakers can create impressive treats.
- Family-Friendly Fun: Kids will love helping out with the decorating, turning baking into a memorable bonding activity.
- Customizable Designs: Use different colors and toppings to create your perfect witch hat.
- Perfect for Parties: These cookies are sure to impress at any Halloween gathering or school event.
- Deliciously Decadent: The combination of chocolate cookies with creamy icing creates a delightful treat that everyone will enjoy.
Ingredients You’ll Need
Gathering these ingredients is half the fun! They are all simple and wholesome, making it easy to dive right into this creative baking adventure.
- Favorite Cake Mix or Try Wilton’s Chocolate Cake Recipe
- Store Bought Chocolate Cookies or Try This Recipe from Wilton
- Lemon Yellow Icing Color
- Black Color Mist Food Coloring Spray
- Rose Icing Colors Pink Food Coloring
- Violet Icing Color, Gel Food Coloring
- Golden Yellow Icing Color
- Orange Icing Color
- Sugar Cones
- Creamy White Decorator Icing, 4 lb. Tub
Variations
This recipe is wonderfully flexible, allowing you to put your own twist on the classic witch hats! Here are some ideas:
- Change Up the Colors: Use different food coloring to match your party theme or personal favorites.
- Add Sprinkles: Top your cookies with festive sprinkles for extra flair and texture.
- Use Different Cookies: Switch out chocolate cookies for vanilla or gingerbread for a unique flavor twist.
- Try Other Toppings: Get creative by adding candy eyes or edible glitter for that magical touch.
How to Make Halloween Witch Hat Cookies
Step 1: Prepare & Bake the Cones
Start by preparing the cake mix according to your chosen recipe’s instructions. Place the Cupcake Cones Baking Rack on a cookie sheet and insert sugar cones into it. Fill each cone with about two tablespoons of cake batter. Bake them as per the timing instructions until they rise beautifully. Let them cool completely before continuing.
Step 2: Spray the Cones
After baking, if any cake has risen above the cone top, use a knife to trim it down. Position the cones wide side down on parchment paper. Now comes the fun part! With Black Color Mist food spray, give each cone a spooky black coat and let them dry for about 10 to 15 minutes.
Step 3: Tint the Icing & Prepare the Bags
It’s time to add some color! Tint one cup of creamy white decorator icing orange and another cup purple using violet and rose icing colors. Prepare two decorating bags fitted with tip 2B for these colors. Additionally, tint ¼ cup of icing yellow by mixing golden yellow and lemon yellow icing colors, placing it in its bag with tip 3 attached.
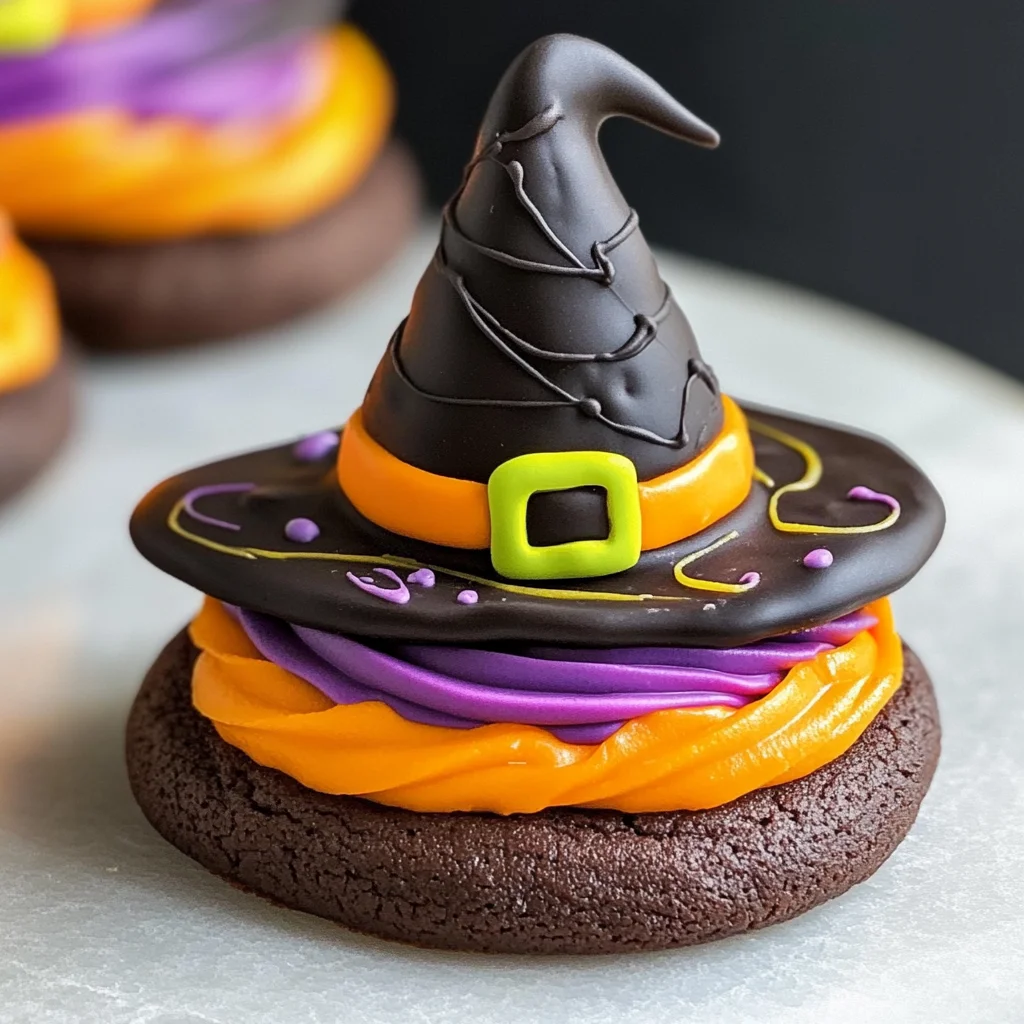
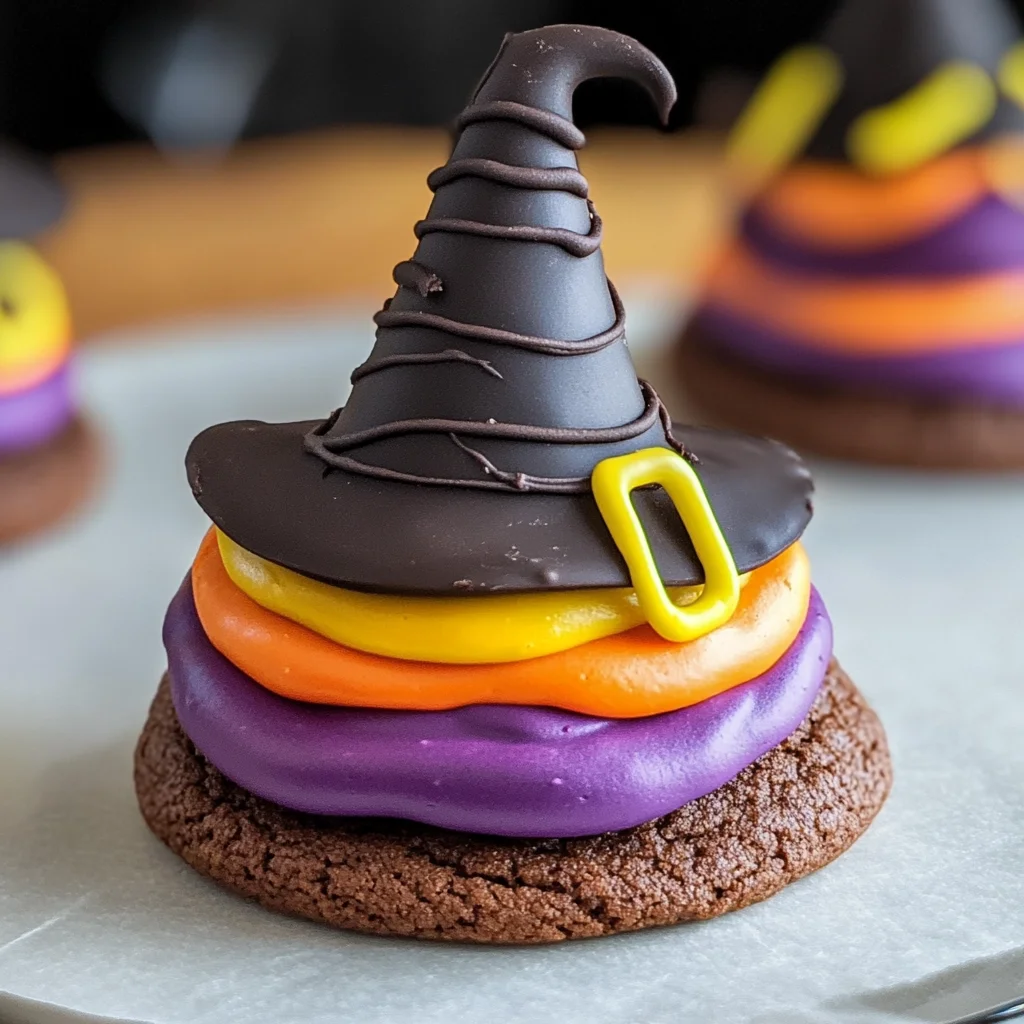
Step 4: Assemble the Witch Hats
Begin assembling those cute hats! Pipe a small dab of orange icing in the center of a cookie and place one cone on top. Then, using tip 2B with orange icing, pipe a decorative band around the wide end of half of your cones and smooth it out using a spatula. Repeat this process with purple icing on the other half. Allow them all to set for about 15 to 20 minutes before finishing off by piping yellow icing around each band as buckles. Let them set again for another 15 to 20 minutes before indulging!
Enjoy every bite of these whimsical Halloween Witch Hat Cookies! They’re sure to become a cherished tradition in your home during this spooky season!
Pro Tips for Making Halloween Witch Hat Cookies
Creating these delightful cookies can be a fun and rewarding experience. Here are some helpful tips to make your baking adventure even more enjoyable!
- Use Fresh Ingredients: Fresh cake mixes and icing will yield better flavor and texture. Always check the expiration dates on your ingredients for the best results.
- Piping Technique Matters: When piping the icing, hold the bag at a 45-degree angle and apply gentle pressure. This ensures even distribution and a clean finish, making your witch hats look professionally made.
- Let Them Set: After assembling the cones and cookies, allow them to set properly before moving them. This helps the icing firm up and keeps everything in place, preventing any mishaps during serving.
- Customize with Colors: Don’t hesitate to get creative with colors! You can mix different shades of icing or add edible glitter for a magical touch that will enchant both kids and adults alike.
- Keep It Fun: Involve your little ones in the decorating process! Letting them choose colors and create their own designs makes it a memorable activity, enhancing the joy of baking together.
How to Serve Halloween Witch Hat Cookies
These Halloween Witch Hat Cookies are not just delicious; they also make for an eye-catching presentation at any Halloween gathering. Here are some ideas to serve them up in style!
Garnishes
- Edible Glitter: A sprinkle of edible glitter adds a whimsical touch that makes these cookies sparkle like magic.
- Candy Eyes: Place candy eyes on top of the cones for an extra spooky effect that will delight children (and adults) alike.
Side Dishes
- Pumpkin Spice Muffins: These moist muffins bring a warm fall flavor that complements the sweetness of the cookies beautifully.
- Apple Slices with Caramel Dip: Crisp apple slices provide a refreshing contrast to the rich cookies, while caramel dip adds a sweet indulgence.
- Vegetable Platter with Hummus: A colorful array of veggies paired with hummus offers a healthy balance alongside your sugary treats, perfect for those who prefer savory options.
- Hot Chocolate or Pumpkin Spice Latte: Warm beverages enhance the cozy fall atmosphere and pair wonderfully with sweet treats, making for an inviting dessert table.
Happy baking! Enjoy creating these enchanting Halloween Witch Hat Cookies, perfect for sharing with friends and family or simply indulging yourself.
Make Ahead and Storage
These Halloween Witch Hat Cookies are perfect for meal prep! You can make them ahead of time and store them, ready to impress your family or friends when Halloween rolls around.
Storing Leftovers
- Place the cookies in an airtight container at room temperature.
- Keep them away from direct sunlight and moisture to maintain freshness.
- Enjoy within 3-5 days for the best taste!
Freezing
- If you want to make these cookies ahead of time, freeze them before decorating.
- Wrap each cookie tightly in plastic wrap and then place them in a freezer-safe bag.
- They can be frozen for up to 2 months. Thaw at room temperature before decorating.
Reheating
- These cookies are best enjoyed fresh, but if you’ve stored them, you can gently warm them.
- Preheat your oven to 300°F (150°C).
- Place the cookies on a baking sheet and heat for about 5-7 minutes until slightly warm.
FAQs
Here are some common questions about making Halloween Witch Hat Cookies.
Can I use any cake mix for Halloween Witch Hat Cookies?
Absolutely! You can use your favorite cake mix or opt for Wilton’s Chocolate Cake Recipe. The choice is yours!
How long do Halloween Witch Hat Cookies last?
When stored properly in an airtight container, these delightful cookies can last for about 3-5 days. For longer storage, consider freezing them before decorating.
What decorations can I use besides icing?
Feel free to get creative with other edible decorations such as sprinkles, candy eyes, or edible glitter to give your Halloween Witch Hat Cookies a unique twist!
Can I make Halloween Witch Hat Cookies gluten-free?
Yes! You can substitute regular cake mix with a gluten-free version. Just ensure that all other ingredients are also gluten-free.
Final Thoughts
I hope you find joy in making these Halloween Witch Hat Cookies! They not only taste delicious but also bring a festive spirit to your celebrations. Whether you’re hosting a spooky gathering or just looking to treat your family, this recipe is sure to be a hit. Happy baking, and may your kitchen be filled with laughter and fun!
Halloween Witch Hat Cookies
Celebrate Halloween in style with these enchanting Halloween Witch Hat Cookies! Fun to make and delightful to eat, these whimsical treats are perfect for parties, school events, or family gatherings. The combination of chocolate cookies and colorful icing will surely bring smiles to both kids and adults alike. With easy-to-follow instructions, this baking project is a fantastic opportunity for quality family time, allowing everyone to unleash their creativity by customizing colors and decorations. Get ready to impress your guests with these spooky yet delicious cookies that embody the spirit of the season!
- Prep Time: 30 minutes
- Cook Time: 15 minutes
- Total Time: 45 minutes
- Yield: Approximately 12 cookies
- Category: Dessert
- Method: Baking
- Cuisine: American
Ingredients
- Favorite cake mix or Wilton’s Chocolate Cake Recipe
- Store-bought chocolate cookies or Wilton’s recipe
- Sugar cones
- Creamy white decorator icing (4 lb. tub)
- Food colorings: lemon yellow, black mist, rose pink, violet, golden yellow, orange
Instructions
- Preheat oven as per cake mix instructions. Prepare sugar cones by inserting them into a baking rack on a cookie sheet. Fill each cone with 2 tablespoons of cake batter and bake until risen. Cool completely.
- Trim any excess cake from the cone tops if necessary. Spray cones with black color mist and let dry.
- Divide creamy white icing into portions; tint some orange and purple using food colors. Prepare piping bags fitted with appropriate tips.
- Assemble cookies by placing a cone on top of each cookie using orange icing as glue. Decorate accordingly with colored icing bands and buckles.
Nutrition
- Serving Size: 1 cookie (50g)
- Calories: 220
- Sugar: 18g
- Sodium: 90mg
- Fat: 9g
- Saturated Fat: 3g
- Unsaturated Fat: 5g
- Trans Fat: 0g
- Carbohydrates: 34g
- Fiber: 1g
- Protein: 2g
- Cholesterol: 10mg