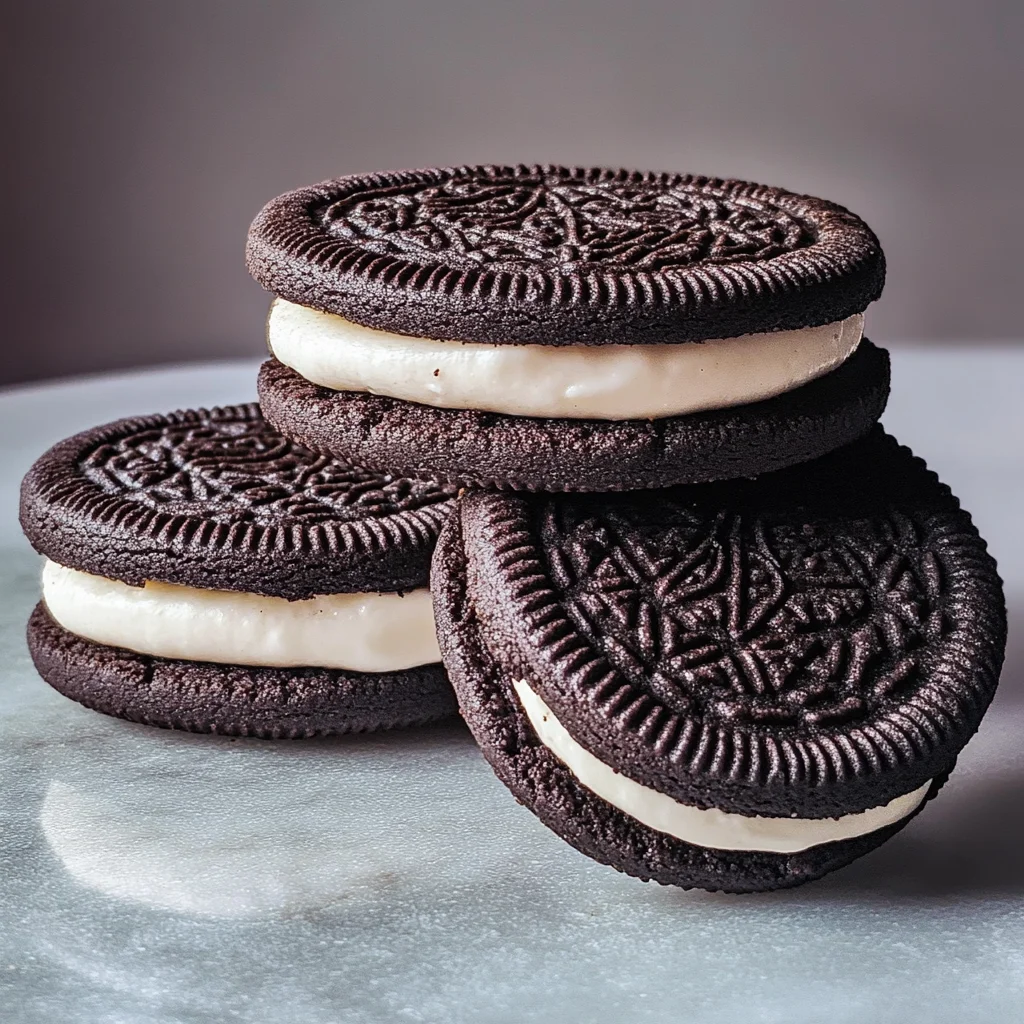
Homemade Oreo Cookies
If you’re looking for a delightful treat that brings back the nostalgia of childhood, you’ve come to the right place! Homemade Oreo Cookies are not just a copycat of the store-bought version; they take everything you love about those classic sandwich cookies and elevate it to a new level. The rich chocolate flavor combined with a creamy filling makes these cookies irresistible. Plus, they’re perfect for any occasion, whether you’re having a cozy family night or need a sweet surprise for a gathering.
Baking these cookies is also a wonderful way to spend time in the kitchen. You can easily whip them up on busy weeknights or make them ahead for weekend fun. Trust me, once you taste these Homemade Oreo Cookies, you’ll never want to go back to the store-bought version!
Why You’ll Love This Recipe
- Easy to Make: With just a few simple steps, you can create delicious cookies that everyone will love!
- Customizable Filling: Feel free to experiment with different flavors for the filling—why not try mint or peanut butter?
- Perfect for Sharing: These cookies are great for gatherings and will impress your friends and family.
- Great for Any Occasion: Whether it’s a birthday party or a casual get-together, they fit right in.
- A Fun Baking Project: Get the kids involved! Decorating and assembling the cookies is a blast.
Ingredients You’ll Need
You won’t need anything fancy for this recipe—just some simple, wholesome ingredients that you likely already have in your pantry. Gather these items to get started on your delicious Homemade Oreo Cookies!
For the Cookies:
- 1 1/4 cups (159 grams) all-purpose flour
- 1/2 cup (43 grams) Dutch-process cocoa powder or Black cocoa powder
- 1 teaspoon baking soda
- 1/4 teaspoon baking powder
- 1/4 teaspoon fine sea salt
- 1 cup (200 grams) granulated sugar
- 10 tablespoons (142 grams) unsalted butter, at a cool room temperature, cut into chunks
- 1 large egg, at room temperature
For the Filling:
- 1 stick (113 grams) unsalted butter, at a cool room temperature
- 2 ½ teaspoons pure vanilla extract
- 2 1/2 cups (313 grams) powdered sugar, sifted
- 1/8 teaspoon fine sea salt
Variations
One of the best things about this recipe is its flexibility! You can easily switch things up to suit your tastes or occasions. Here are some fun variation ideas:
- Swap the Cocoa: Try using different types of cocoa powder for distinct flavors—dark chocolate lovers might enjoy using more intense cacao.
- Make It Minty: Add peppermint extract to the filling for a refreshing twist that’s perfect around the holidays!
- Peanut Butter Delight: Substitute half of the filling with peanut butter for an indulgent flavor combo.
- Add Sprinkles: Make them festive by adding colorful sprinkles to your filling when assembling!
How to Make Homemade Oreo Cookies
Step 1: Prepare Your Dough
Start by preheating your oven to 350°F (175°C). In a large bowl, mix together your dry ingredients: flour, cocoa powder, baking soda, baking powder, and sea salt. Whisking these together ensures even distribution of flavors and helps prevent clumping.
Step 2: Cream Your Butter and Sugar
In another bowl, cream together the granulated sugar and chunks of unsalted butter until light and fluffy. This step is crucial because it incorporates air into your dough, giving your cookies that delightful texture we all love.
Step 3: Combine Wet Ingredients
Add in your egg and vanilla extract to the creamed mixture. Mix until everything is well combined. This creates the base flavor that enhances every bite of your cookie.
Step 4: Bring it Together
Gradually add your dry mixture into the wet ingredients until fully incorporated. Don’t overmix; just combine until there are no visible streaks of flour left. The dough should be soft but not sticky.
Step 5: Shape and Bake
Scoop tablespoon-sized portions of dough onto a baking sheet lined with parchment paper. Leave enough space between each cookie as they will spread while baking. Bake in your preheated oven for about 10 minutes or until set but still soft in the center.
Step 6: Prepare Your Filling
While your cookies cool down on a wire rack, beat together softened butter, sifted powdered sugar, vanilla extract, and sea salt in another bowl until smooth and creamy. This filling is what makes these Homemade Oreo Cookies truly special!
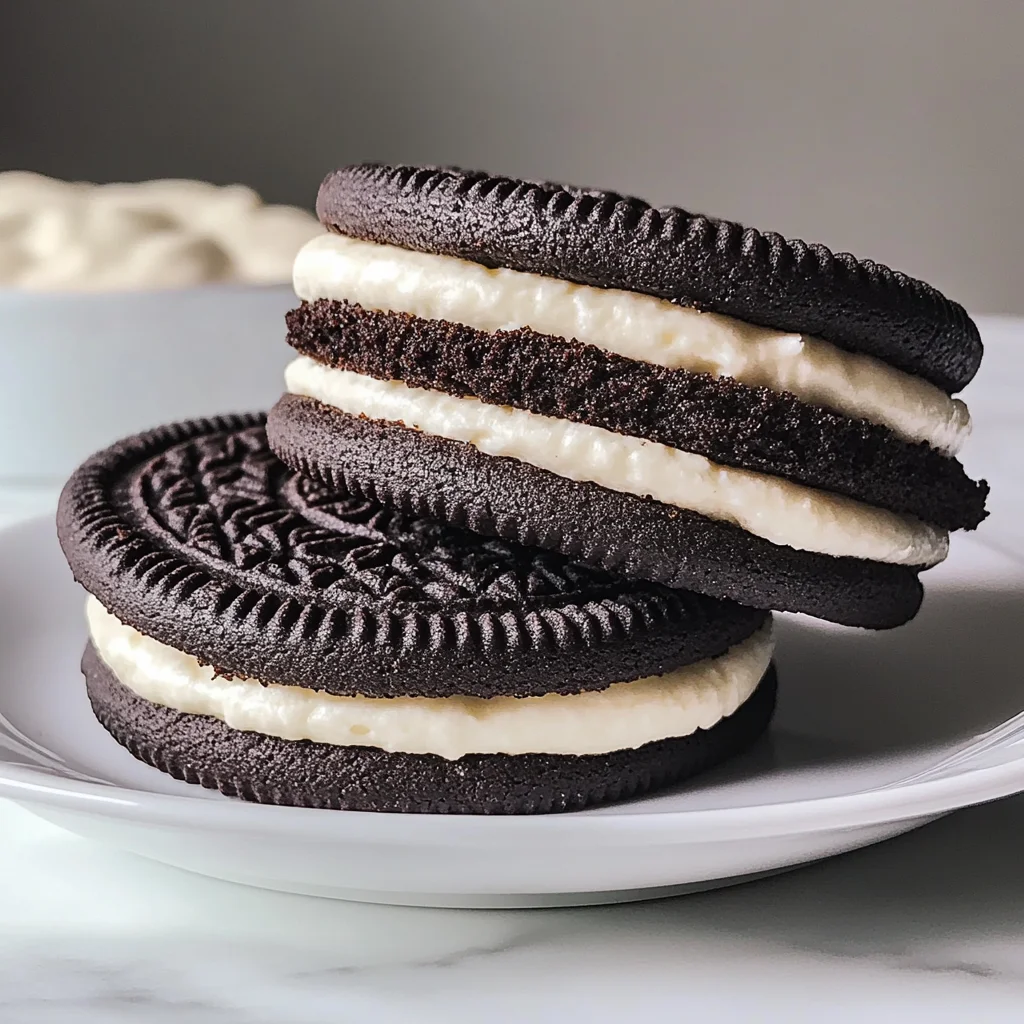
Step 7: Assemble Your Cookies
Once cooled completely, spread or pipe generous amounts of filling onto one cookie before topping it with another. Press gently so they stick together nicely.
Enjoy every bite of these delightful Homemade Oreo Cookies! They are sure to bring smiles all around!
Pro Tips for Making Homemade Oreo Cookies
Making the perfect homemade Oreo cookies is all about the little details, so here are some pro tips to ensure your baking experience is a success!
- Use room temperature ingredients: This helps the butter cream together more evenly and creates a smooth, creamy filling. It’s especially important for achieving that perfect texture in both the cookies and the filling.
- Chill the dough: If you find the dough too sticky to handle, refrigerate it for about 30 minutes. Chilling helps firm up the dough, making it easier to roll out and cut into shapes without becoming a messy situation.
- Don’t overbake: Keep an eye on your cookies while they bake! They should be set but still soft in the center. Overbaking can lead to dry cookies, which won’t give you that delightful sandwich cookie experience.
- Experiment with fillings: While this recipe features a classic vanilla filling, feel free to play around with different flavors such as mint, almond, or even chocolate! Just make sure any additional flavors complement the rich cocoa of the cookies.
- Store properly: To keep your homemade Oreos fresh, store them in an airtight container at room temperature for up to a week. For longer storage, consider freezing them—just make sure to separate layers with parchment paper!
How to Serve Homemade Oreo Cookies
These delightful cookies are not just tasty; they’re also visually appealing! Here are some fun ways to present them that will surely impress your guests.
Garnishes
- Powdered sugar dusting: A light sprinkle of powdered sugar on top not only looks beautiful but adds a touch of sweetness.
- Chocolate drizzle: Melt some dairy-free chocolate and drizzle it over the top for an elegant touch that enhances their chocolaty goodness.
- Crushed Oreos: For a playful presentation, crush up some extra homemade Oreos and sprinkle them on top of your filled cookies before serving.
Side Dishes
- Vanilla almond milk: This creamy beverage pairs perfectly with homemade Oreos. The nutty flavor complements the chocolate beautifully.
- Fresh fruit salad: A refreshing side of seasonal fruits balances out the richness of the cookies and adds a burst of color to your dessert spread.
- Coffee or tea: Serving these cookies alongside a warm cup of coffee or herbal tea makes for a cozy afternoon treat that friends and family will love.
- Dairy-free ice cream: For an indulgent twist, serve your homemade Oreos with a scoop of your favorite dairy-free ice cream on the side—perfect for warm days!
With these tips and serving suggestions, you’ll be well on your way to creating delightful memories around your kitchen table. Happy baking!
Make Ahead and Storage
These Homemade Oreo Cookies are perfect for meal prep! You can whip up a batch ahead of time and enjoy them throughout the week or even share them with friends. Here’s how to store and preserve your cookies for maximum freshness.
Storing Leftovers
- Allow cookies to cool completely before storing.
- Place them in an airtight container at room temperature.
- They will stay fresh for up to one week.
Freezing
- To freeze, ensure that your cookies are fully cooled.
- Layer parchment paper between cookies in an airtight container or freezer bag to prevent sticking.
- They can be frozen for up to three months.
Reheating
- If you prefer warm cookies, you can reheat them in the oven.
- Preheat your oven to 350°F (175°C).
- Place cookies on a baking sheet and heat for about 5 minutes until warmed through.
FAQs
Have questions about making these delightful Homemade Oreo Cookies? Here are some common inquiries!
Can I make these Homemade Oreo Cookies gluten-free?
Yes! You can substitute all-purpose flour with a gluten-free baking blend. Just ensure the blend is suitable for one-to-one substitution.
How long will my Homemade Oreo Cookies last?
Stored in an airtight container, these cookies can last up to one week at room temperature. For longer storage, consider freezing them as outlined above.
Can I use different fillings for my Homemade Oreo Cookies?
Absolutely! Feel free to experiment with various flavored creams like mint, peanut butter, or even chocolate ganache. The possibilities are endless!
Final Thoughts
I hope you enjoy making these Homemade Oreo Cookies as much as I do! They bring a touch of nostalgia while being so easy to prepare. Whether you’re indulging yourself or sharing with loved ones, these cookies are sure to bring smiles all around. Happy baking!
Homemade Oreo Cookies

Indulge in the nostalgia of your childhood with these Homemade Oreo Cookies, a delightful twist on the beloved classic. With their rich chocolate flavor and creamy filling, these cookies elevate your dessert game to a whole new level. Perfect for family gatherings or cozy nights in, this easy-to-follow recipe makes it simple to whip up a batch any time you crave something sweet. Customize the filling with flavors like mint or peanut butter for an extra special treat. Once you taste these homemade delights, store-bought versions will be a thing of the past!
- Prep Time: 20 minutes
- Cook Time: 10 minutes
- Total Time: 30 minutes
- Yield: Makes approximately 20 cookies 1x
- Category: Dessert
- Method: Baking
- Cuisine: American
Ingredients
- 1 1/4 cups all-purpose flour
- 1/2 cup Dutch-process cocoa powder
- 1 teaspoon baking soda
- 1/4 teaspoon baking powder
- 1/4 teaspoon fine sea salt
- 1 cup granulated sugar
- 10 tablespoons unsalted butter, at room temperature
- 1 large egg, at room temperature
- For the Filling:
- 1 stick unsalted butter, at room temperature
- 2 1/2 teaspoons pure vanilla extract
- 2 1/2 cups powdered sugar, sifted
- 1/8 teaspoon fine sea salt
Instructions
- Preheat your oven to 350°F (175°C). In a bowl, mix flour, cocoa powder, baking soda, baking powder, and salt.
- In another bowl, cream together sugar and butter until light and fluffy.
- Add the egg and vanilla extract; mix until combined.
- Gradually add dry ingredients to wet mixture until just combined.
- Scoop tablespoon-sized portions onto a baking sheet lined with parchment paper and bake for about 10 minutes.
- For the filling, beat softened butter, powdered sugar, vanilla extract, and salt until smooth.
- Once cookies are cool, spread or pipe filling between two cookies.
Nutrition
- Serving Size: 1 serving
- Calories: 110
- Sugar: 10g
- Sodium: 90mg
- Fat: 5g
- Saturated Fat: 3g
- Unsaturated Fat: 2g
- Trans Fat: 0g
- Carbohydrates: 15g
- Fiber: <1g
- Protein: <1g
- Cholesterol: <5mg