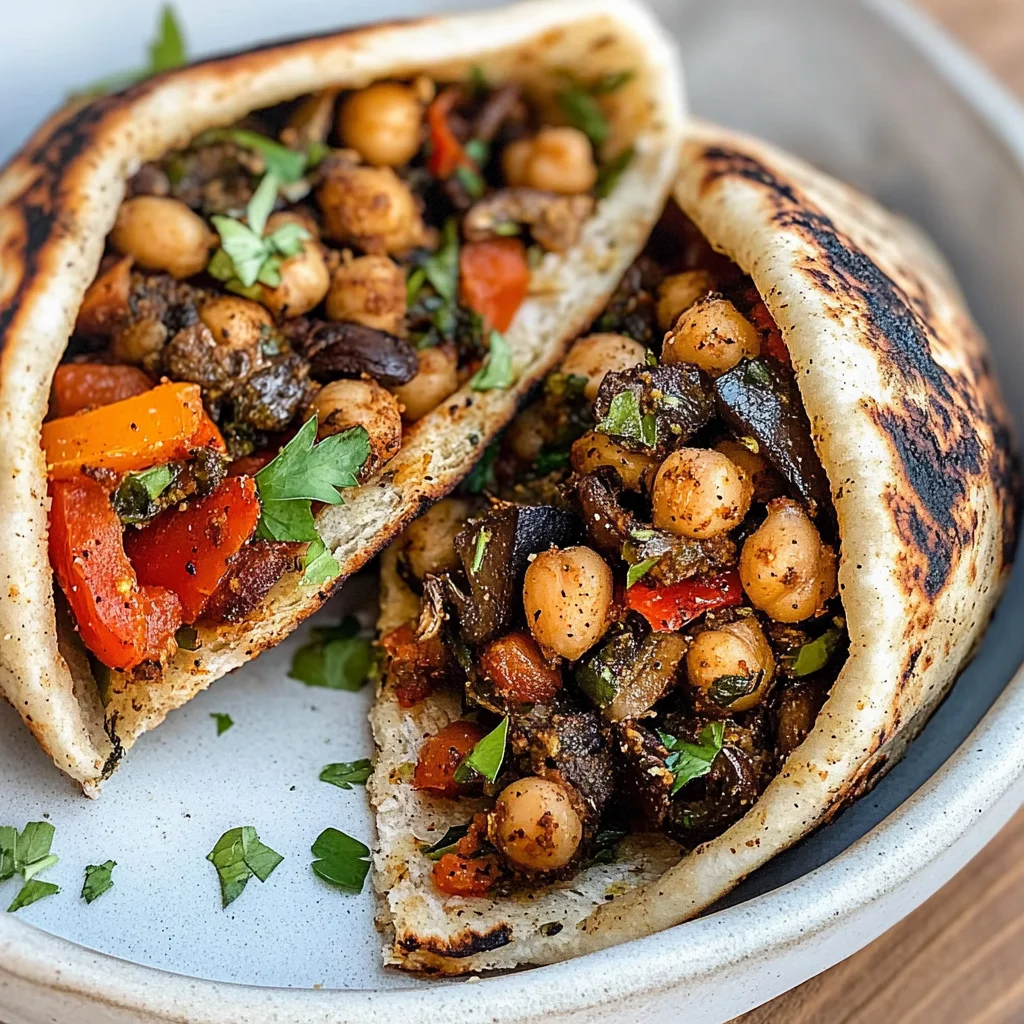
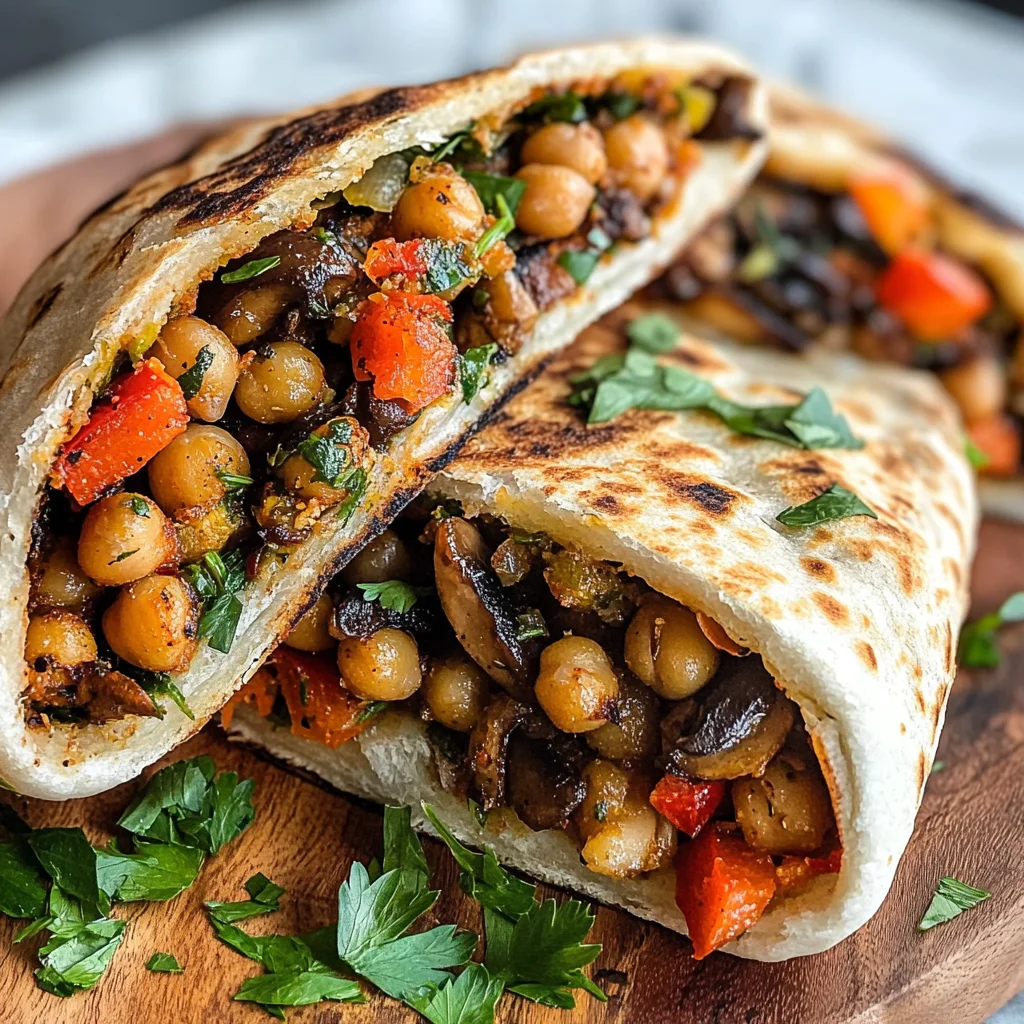
Grilled Chickpea Veggie Pita
If you’re looking for a quick, delicious meal that packs a punch of flavor, you’ve come to the right place! The Grilled Chickpea Veggie Pita is not only satisfying but also incredibly nutritious. With the perfect blend of spices and fresh veggies, this recipe is a favorite in my household. Whether it’s a busy weeknight or a casual family gathering, these pitas are always a hit. They’re easy to make, and everyone can customize their fillings just the way they like.
This dish is all about bringing good food to the table without spending hours in the kitchen. Plus, it’s packed with protein and fiber from the chickpeas, making it a wholesome option that will keep you full and energized. Let’s dive into why you’ll love this recipe!
Why You’ll Love This Recipe
- Quick to Prepare: You can whip these up in just 40 minutes, making them perfect for those hectic evenings.
- Family-Friendly: Everyone loves a good pita! You can set out toppings so everyone can customize their own.
- Healthy Ingredients: With high protein and fiber content, this meal is as nutritious as it is delicious.
- Perfect for Meal Prep: Make extra filling ahead of time to enjoy throughout the week.
- Flavorful and Satisfying: The za’atar spice blend and fresh veggies create a taste sensation that you won’t forget.
Ingredients You’ll Need
These ingredients are simple and wholesome, making your cooking experience enjoyable and stress-free. Gather the following items for your Grilled Chickpea Veggie Pitas:
- 2 tbsp avocado oil, divided
- 1, 15 oz can chickpeas, rinsed and drained
- 1/2 yellow onion, finely diced
- 1 red bell pepper, finely diced
- 4 oz of mushrooms, finely diced
- 5 cloves garlic, minced or crushed
- 1 tbsp tomato paste
- 1/2 tbsp soy sauce or coconut aminos
- 2 tsp za’atar
- 1/2 tsp ground cumin
- 1/2 tsp ground coriander
- 1/4 tsp fennel seeds
- 1/4 cup parsley, minced
- Salt and pepper to taste
- 3 whole grain pitas
- 1/2 cup plain, unsweetened vegan Greek-style yogurt or your favorite thick vegan yogurt
- Juice of half a lemon
- Salt and pepper to taste
- 1 clove garlic, crushed or finely grated
- 1/4 cup cilantro, finely minced
- 2 tsp extra virgin olive oil, optional
Variations
The beauty of the Grilled Chickpea Veggie Pita is its flexibility! You can easily tweak it based on what you have on hand or your personal preferences. Here are some fun ideas:
- Swap the protein: Replace chickpeas with black beans or lentils for a different flavor profile.
- Add more veggies: Toss in spinach, zucchini, or even roasted eggplant for added nutrition.
- Change up the spices: If za’atar isn’t available, try using Italian herbs or taco seasoning for a new twist.
- Top with fresh ingredients: Add slices of avocado or some pickled onions right before serving for extra zing.
How to Make Grilled Chickpea Veggie Pita
Step 1: Prepare the Chickpeas
Start by placing your chickpeas in a bowl and roughly mashing them with a fork. This crumbles them into smaller pieces without turning them into mush. Setting this aside allows the flavors to meld perfectly later on.
Step 2: Sauté Your Vegetables
In a sauté pan over medium heat, add one tablespoon of avocado oil. Then toss in the onions, bell peppers, and mushrooms. Give them a quick stir and let them sit for about 2–3 minutes to release moisture. This step enhances their natural sweetness as they cook down beautifully.
Step 3: Add Flavor
Once your veggies are softened, stir in the minced garlic until fragrant. Follow with the tomato paste, mashed chickpeas, soy sauce (or coconut aminos), za’atar, cumin, coriander, and fennel seeds. Sauté everything together for another couple of minutes; this helps all those wonderful flavors get acquainted!
Step 4: Mix in Fresh Herbs
Stir in the minced parsley at this point. Give it a taste test—add salt and pepper according to your preference! Set this mixture aside while you prepare your pitas.
Step 5: Grill Your Pitas
Preheat your griddle for maximum crispiness! Carefully cut each pita in half and open up the pockets. Stuff each one generously with your chickpea filling—don’t be shy! Brush or spray lightly with remaining oil before placing them filling side down on the grill for about 3–4 minutes until those lovely grill marks appear.
Step 6: Make Your Yogurt Sauce
To whip up that delightful yogurt sauce, combine all yogurt ingredients in a bowl—yogurt, lemon juice, garlic (if desired), cilantro—and whisk until smooth. Season with salt and pepper to taste.
Step 7: Serve
Serve those gorgeous grilled pitas warm with your homemade yogurt sauce on the side. Feel free to add any fresh veggies you love—crisp lettuce or juicy cucumber would be fantastic!
Enjoy creating these tasty Grilled Chickpea Veggie Pitas; I know they’ll become an instant favorite!
Pro Tips for Making Grilled Chickpea Veggie Pita
Creating the perfect grilled chickpea veggie pita is all about the little details. Here are some tips to ensure your meal is a hit every time!
- Use Fresh Ingredients: Fresh veggies not only enhance flavor but also add vibrant colors and nutrients to your dish, making it visually appealing and wholesome.
- Adjust Spice Levels: Feel free to modify the amount of za’atar or other spices based on your taste preference. This way, you can personalize the flavors to suit your palate, ensuring every bite is delightful.
- Don’t Overstuff: While it might be tempting to pack in as much filling as possible, overstuffed pitas can tear easily. A moderate amount allows for easy handling and a better grilling experience.
- Preheat Your Grill Well: Ensuring your grill or griddle is hot before adding the pitas helps achieve those beautiful grill marks and a crispy exterior while keeping the filling warm and soft inside.
- Experiment with Fillings: Try adding different vegetables or legumes based on what you have on hand. This flexibility keeps the recipe exciting and allows you to use what’s fresh or seasonal.
How to Serve Grilled Chickpea Veggie Pita
Presenting your grilled chickpea veggie pita beautifully makes the meal even more enjoyable! Here are some thoughtful serving suggestions to elevate your dining experience.
Garnishes
- Fresh Herbs: A sprinkle of chopped cilantro or parsley adds a burst of freshness that complements the flavors beautifully.
- Lemon Wedges: Serving lemon wedges alongside gives guests the option to squeeze fresh juice over their pitas, enhancing the flavor with a zesty kick.
- Sliced Avocado: Adding slices of creamy avocado not only elevates the visual appeal but also adds richness and healthy fats.
Side Dishes
- Cucumber Salad: A refreshing cucumber salad with diced tomatoes, red onion, and a drizzle of olive oil offers a crisp contrast that balances the hearty pita.
- Roasted Vegetables: Seasonal roasted veggies like zucchini, bell peppers, and eggplant bring a sweet and savory element that pairs wonderfully with the pita’s flavors.
- Chickpea Salad: A light chickpea salad mixed with cucumbers, tomatoes, red onion, and a lemon-tahini dressing serves as a delicious companion that echoes similar ingredients used in the pitas.
- Hummus Platter: Serve alongside a variety of hummus flavors (like roasted red pepper or garlic) for dipping. This adds an extra layer of flavor and makes for an engaging appetizer option.
With these tips and serving ideas, your grilled chickpea veggie pita will not only taste fantastic but will also impress everyone at your table! Enjoy crafting this nutritious delight!
Make Ahead and Storage
This Grilled Chickpea Veggie Pita recipe is perfect for meal prep! You can easily prepare the filling and yogurt sauce ahead of time, making it a convenient option for busy weeknights.
Storing Leftovers
- Store any leftover chickpea filling in an airtight container in the refrigerator for up to 3 days.
- Keep the yogurt sauce in a separate container to maintain its freshness; it will last about a week.
- If you have leftover pitas, store them in a sealed bag at room temperature for up to 2 days.
Freezing
- The chickpea filling freezes well. Place it in an airtight container or freezer bag and freeze for up to 3 months.
- For best results, defrost the filling in the refrigerator overnight before reheating.
- Avoid freezing the yogurt sauce, as it may change texture when thawed.
Reheating
- To reheat the chickpea filling, warm it on the stovetop over low heat until heated through.
- For pitas, you can grill or toast them briefly to restore some crispiness after freezing.
- Serve with freshly made yogurt sauce and enjoy!
FAQs
Here are some common questions about the Grilled Chickpea Veggie Pita recipe.
Can I make Grilled Chickpea Veggie Pita gluten-free?
Yes! Simply use gluten-free pita bread or wraps to enjoy this delicious recipe without gluten.
How can I customize my Grilled Chickpea Veggie Pita?
Feel free to add any of your favorite veggies, like spinach or zucchini, to the chickpea filling for extra flavor and nutrition!
Can I prepare the Grilled Chickpea Veggie Pita filling in advance?
Absolutely! The filling can be made ahead of time and stored in the fridge or freezer until you’re ready to grill your pitas.
What should I serve with my Grilled Chickpea Veggie Pita?
These pitas pair wonderfully with fresh salads or roasted vegetables for a complete meal.
Final Thoughts
I hope you enjoy making these delightful Grilled Chickpea Veggie Pitas as much as I do! Not only are they nutritious and satisfying, but they also bring a burst of flavors that will brighten your day. Whether it’s for lunch or dinner, this recipe is sure to become a favorite in your home. Happy cooking, and don’t hesitate to share your experience!
Grilled Chickpea Veggie Pita
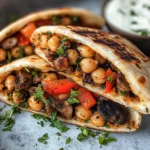
If you’re in search of a quick yet satisfying meal, the Grilled Chickpea Veggie Pita is a must-try! This wholesome dish combines za’atar-spiced chickpeas with fresh vegetables, all nestled in warm, toasty whole grain pitas. Perfect for busy weeknights or casual family meals, these customizable pitas ensure everyone can enjoy their favorite fillings. Packed with protein and fiber, this recipe not only fuels your body but also tantalizes your taste buds with its vibrant flavors. Whether enjoyed as a hearty lunch or a delightful dinner, these pitas are sure to impress!
- Prep Time: 20 minutes
- Cook Time: 20 minutes
- Total Time: 40 minutes
- Yield: Serves 3
- Category: Main
- Method: Grilling
- Cuisine: Mediterranean
Ingredients
- 2 tbsp avocado oil, divided
- 1, 15 oz can chickpeas, rinsed and drained
- 1/2 yellow onion, finely diced
- 1 red bell pepper, finely diced
- 4 oz of mushrooms, finely diced
- 5 cloves garlic, minced or crushed
- 1 tbsp tomato paste
- 1/2 tbsp soy sauce or coconut aminos
- 2 tsp za’atar
- 1/2 tsp ground cumin
- 1/2 tsp ground coriander
- 1/4 tsp fennel seeds
- 1/4 cup parsley, minced
- Salt and pepper to taste
- 3 whole grain pitas
- 1/2 cup plain, unsweetened vegan Greek-style yogurt or your favorite thick vegan yogurt
- Juice of half a lemon
- 1 clove garlic, crushed or finely grated
- 1/4 cup cilantro, finely minced
- 2 tsp extra virgin olive oil, optional
Instructions
- In a bowl, roughly mash the chickpeas with a fork and set aside.
- Sauté diced onions, bell peppers, and mushrooms in avocado oil until softened.
- Add garlic, tomato paste, mashed chickpeas, soy sauce (or coconut aminos), za’atar, cumin, coriander, and fennel seeds; sauté for 2 more minutes.
- Stir in minced parsley and season with salt and pepper to taste.
- Preheat the grill; cut pitas in half and stuff them with the chickpea mixture. Brush lightly with oil and grill for 3–4 minutes.
- For the yogurt sauce, combine yogurt, lemon juice, garlic (if desired), cilantro; whisk until smooth and season to taste.
Nutrition
- Serving Size: 1 serving
- Calories: 350
- Sugar: 3g
- Sodium: 450mg
- Fat: 12g
- Saturated Fat: 2g
- Unsaturated Fat: 10g
- Trans Fat: 0g
- Carbohydrates: 48g
- Fiber: 11g
- Protein: 12g
- Cholesterol: 0mg