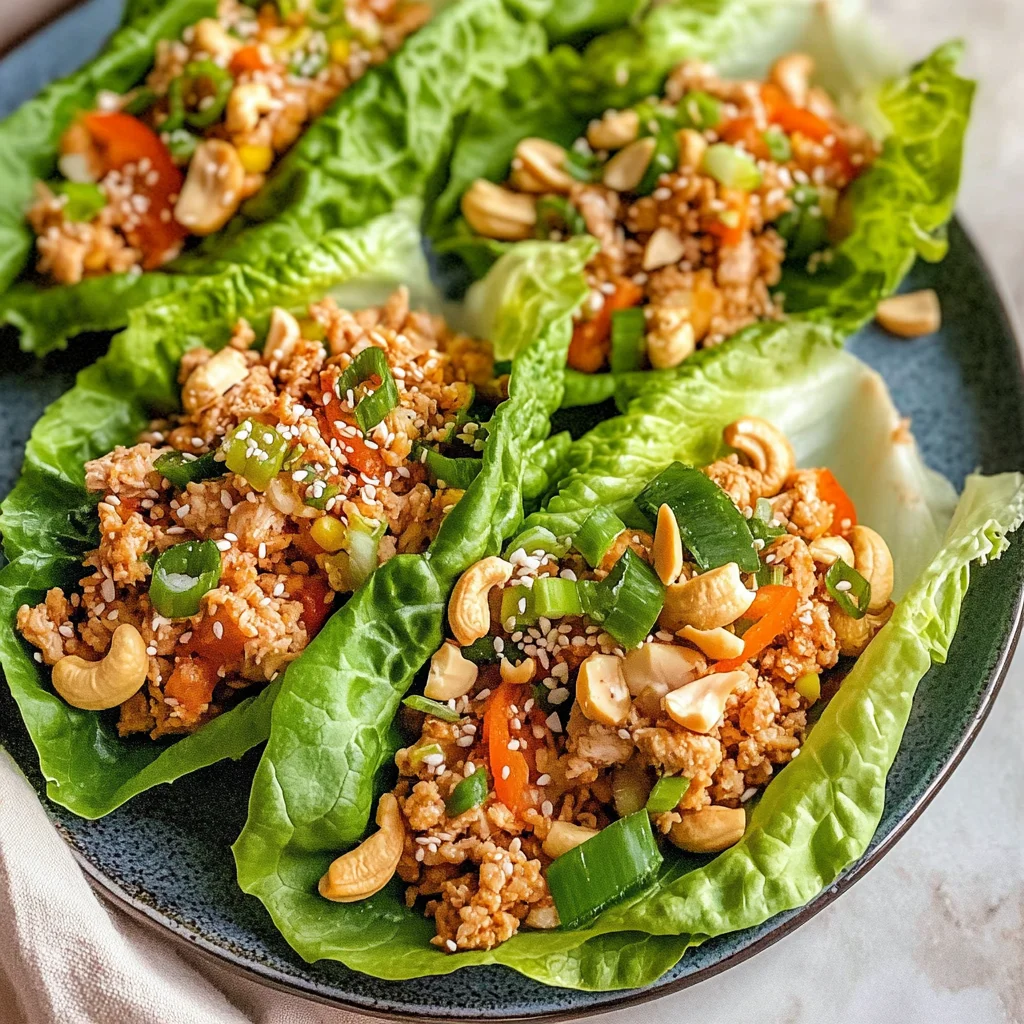
Thai Chicken Lettuce Wraps
There’s something incredibly special about the experience of cooking—it’s more than just putting ingredients together; it’s a heartfelt journey that connects us to our culture, memories, and loved ones. When I think of Thai Chicken Lettuce Wraps, I’m reminded of lively gatherings with friends, where laughter mingles with the tantalizing aroma of savory spices wafting through the air. Each bite is a burst of flavor, a delightful blend that dances on the palate. These wraps are not merely food; they are an invitation to savor every moment, to enjoy both the process and the product. With their crisp lettuce leaves cradling a warm, seasoned filling, these wraps embody a symphony of flavors that will leave you longing for more.
As we dive into this culinary adventure together, let me assure you that making these Thai Chicken Lettuce Wraps is not just about following a recipe; it’s about embracing the joy of cooking. You’ll find that each step is infused with love and excitement, transforming simple ingredients into something truly extraordinary. Trust me when I say that once you try your hand at these delicious wraps, they’ll become a cherished go-to for gatherings or even cozy weeknight dinners at home. So grab your apron and let’s embark on this flavorful journey!
Ingredients:
Before we jump into the cooking process, let’s gather our ingredients for these vibrant Thai Chicken Lettuce Wraps. Each component plays a vital role in creating that unforgettable taste experience.
- 1 Tablespoon sesame oil. This golden elixir is essential for infusing your dish with its rich, nutty flavor. When heated, sesame oil releases an aroma that’s nothing short of intoxicating—it’s like a warm hug for your senses! Always opt for toasted sesame oil if you can find it; it brings an unparalleled depth to your dish compared to regular sesame oil. It’s also great for frying because it has a high smoke point, ensuring that our garlic and ginger sauté beautifully without burning.
- ¼ cup onion (diced; I used yellow). Onions are the foundation of many dishes, providing sweetness and depth as they caramelize during cooking. Yellow onions are particularly versatile—they’re sweet when cooked but still hold their structure well in sautéed dishes like ours. If you’re in a pinch or prefer something milder in flavor, white onions work just as well! Their presence adds layers to our filling while harmonizing perfectly with the other bold ingredients.
- 2 cloves of garlic. Garlic is what transforms good food into great food! It provides an aromatic kick and elevates every dish it graces with its pungent sweetness when sautéed. Fresh garlic is ideal here—mincing it will release its oils and juices, amplifying its flavor profile as it cooks down into our mixture.
- 1 tablespoon fresh minced ginger (or ginger paste). Ginger brings warmth and zest to our wraps—it’s like adding sunshine to our culinary creation! Fresh ginger is best because it has that vibrant zing; however, if time is tight or fresh isn’t available, ginger paste can be a handy alternative. Its slightly peppery undertones will add complexity to our filling that’s truly delightful.
- 10 oz ground chicken. The star protein of our dish! Ground chicken is mild yet juicy—a perfect canvas for absorbing all those rich flavors we’re layering in throughout the cooking process. If you’re looking for alternatives based on dietary preferences or availability, ground turkey or even plant-based meat substitutes could work beautifully here!
- ¼ cup Tamari (low sodium) (or soy sauce or coconut aminos). Tamari offers all the umami goodness you’d expect from soy sauce but with less sodium—an important consideration if you’re watching your salt intake! The savoriness it imparts enhances our chicken filling dramatically while balancing out the sweetness from other components.
- 2 Tablespoons Thai sweet red chili sauce (we love Trader Joe’s!). This sticky-sweet ingredient packs quite the punch! It provides not just sweetness but also a subtle heat that keeps you coming back for more with each bite. If you can’t find Thai sweet chili sauce in stores, consider using homemade versions or similar sauces available online—they’ll provide similar flavor profiles!
- Juice of 1 lime. Ahh… lime juice—the bright spark that ties everything together! The acidity cuts through the richness of the chicken filling while bringing out all those lovely flavors in harmony—it’s absolutely non-negotiable! Make sure to use fresh lime juice for optimal brightness; pre-packaged versions just can’t compare!
- 1 teaspoon maple syrup (or honey or agave). A touch of sweetness goes a long way in balancing flavors—maple syrup adds depth without being overly cloying and pairs beautifully with both savory and spicy notes.
- ⅓ cup cashews (chopped – raw or roasted/salted). Cashews add delightful crunch and richness to our wraps—they contribute creaminess without any dairy involved! Whether you choose raw or roasted depends on your preference; roasted cashews bring extra flavor while raw cashews showcase their natural sweetness.
- ¼ cup scallions (chopped). These green beauties add freshness and brightness as well as a mild onion-like flavor that complements everything splendidly! Scallions are perfect here because they won’t overpower like regular onions might but instead enhance every bite.
- ¼ cup cilantro (fresh, chopped). Cilantro adds an aromatic flair that’s distinctively refreshing—it’s like adding springtime on your plate! If you’re not fond of cilantro’s unique taste (I get it!), feel free to substitute with fresh basil or mint instead—they’ll bring their own lovely herbaceous notes!
- ¼-½ cup carrots (shredded). Shredded carrots add texture along with natural sweetness—a truly wonderful contrast against the savory chicken mixture we’re crafting here! Plus, they bring a vibrant pop of color—a feast for both eyes and palate!
- Sesame seeds for topping. These tiny seeds may seem inconsequential at first glance but trust me—they elevate your dish visually while offering an additional layer of nuttiness when sprinkled atop those beautiful lettuce wraps!
- 1 head butter lettuce – leaves removed (rinsed and dried). Butter lettuce leaves are tender yet sturdy enough to cradle our delectable filling without tearing easily—they’re ideal vessels for delivering all those bold flavors straight into your eager mouth! Just make sure they’re well-rinsed beforehand so no grit remains.
Equipment You’ll Need:
Cooking can be such a joyful experience when you have the right tools by your side—it makes everything flow smoothly and allows creativity to thrive! You don’t need fancy gadgets here; just some basic essentials will do wonders in crafting these Thai Chicken Lettuce Wraps.
- Large skillet – A sturdy skillet is vital for achieving that perfect sauté on your onions, garlic, ginger, and ground chicken! It distributes heat evenly so everything cooks uniformly—no one likes unevenly cooked food after all! Choose one made from stainless steel or cast iron if possible; they retain heat exceptionally well.
- Wooden spoon or spatula – These trusty utensils will help you break up the ground chicken as it cooks while also allowing gentle stirring without scratching up any non-stick surfaces you might be using!
- Cutting board & knife – A solid cutting board paired with a sharp knife will make chopping those veggies effortless—not only does this save time but ensures safety too since dull knives can be more dangerous than sharp ones!
- Mixing bowl – You’ll need somewhere to combine all those wonderful sauce ingredients before pouring them over your sizzling chicken mixture—this bowl becomes instrumental in creating balanced flavors so don’t skip out on having one handy!
Now that we’ve gathered everything we need—from ingredients down through equipment—let’s move onto preparing these scrumptious Thai Chicken Lettuce Wraps that’ll surely impress everyone around your table!
Step 1: Crafting Your Flavor-Packed Base
To begin this exciting culinary adventure, start by heating up your large skillet over medium-high heat until it’s hot enough to sizzle when oil touches its surface—this ensures proper sautéing magic occurs later on! Once ready, add one tablespoon of sesame oil into the pan—it should shimmer immediately if heated correctly—and then toss in those diced yellow onions like confetti at a celebration! Let them dance around in that liquid gold for about 2–3 minutes until they soften slightly; you’ll know they’re ready when they begin turning golden brown around the edges while becoming translucent throughout.
Next comes my favorite part: introducing freshly minced garlic and ginger into this fragrant mixture! Toss them together gently—their aromas mingle ever so beautifully as they cook down further over low heat for another couple minutes until fragrant yet not burnt—that’s key here since burnt garlic can ruin everything we’ve worked towards thus far!
This step lays down such crucial groundwork by building layers upon layers within our dish—the sweetness from caramelized onions combined with pungent aromatics creates an intoxicating smell that’ll have everyone eagerly waiting nearby!
Step 2: Cooking Up That Chicken Goodness
With those aromatics now dancing harmoniously within our pan let’s welcome ten ounces of ground chicken into this flavorful haven—we want it broken apart gently using either your wooden spoon or spatula as soon as it hits this glorious medley already sizzling away beneath us! Season lightly with salt & pepper because seasoning early helps enhance flavors right from start till finish—we want each morsel bursting forth goodness after all!
As you continue stirring frequently over medium heat watch closely—you’ll see signs indicating progress: initial pinkness fading away after approximately three-four minutes accompanied by golden browning emerging across pieces ensuring no bit remains uncooked—that’s precisely how we know we’re headed towards deliciousness ahead…
Step 3: Creating Our Irresistible Sauce
While keeping an eye on that wonderfully cooked chicken let’s take this opportunity to whip up an irresistible sauce which will seamlessly meld together every component later on down line thus elevating things even further beyond expectations… In small mixing bowl combine equal parts twenty-five milliliters each tamari plus two tablespoons Thai sweet chili sauce alongside juice extracted from one zesty lime—all contributing elements blend exquisitely forming creamy consistency resembling liquid gold waiting patiently behind scenes until called upon later…
Now sprinkle over teaspoon maple syrup providing subtle sweetness complementing complex balance achieved by salty tamari combined alongside tangy acidity found within lime juice itself—it’s crucial adding these contrasting notes harmoniously working together toward delicious climax awaiting us once assembled final product awaits…
Step 4: Marrying Flavors Together
Returning back now toward pan filled previously prepared succulent chicken goodness allow sprinkling handful chopped cashews across entire surface area ensuring crunch present whenever consumed later… Drizzle prepared harmonious sauce directly above then mix thoroughly ensuring every last piece gets coated evenly whilst still maintaining texture throughout—I promise you’ll thank me later once tasting results achieved through careful attention paid during assembly stage…
Lower temperature down low allowing contents simmer gently amidst bubbling sounds reaching ears around kitchen creating anticipatory atmosphere lingering thick enough meanwhile letting sit undisturbed few moments longer allowing flavors meld together beautifully resulting finally allowing everyone gathered partake joyous occasion soon approaching ahead…
Now remove off heat afterwards giving slight cooling period allowing stir-ins added next before final wrapping begins…
And there you have it—the first steps taken towards crafting unforgettable Thai Chicken Lettuce Wraps filled bursting forth delightful flavors guaranteed impress anyone lucky enough partake joyous occasion awaiting ahead next time thrown gathering inviting friends family alike share experiences memories create through culinary delights shared amongst one another…
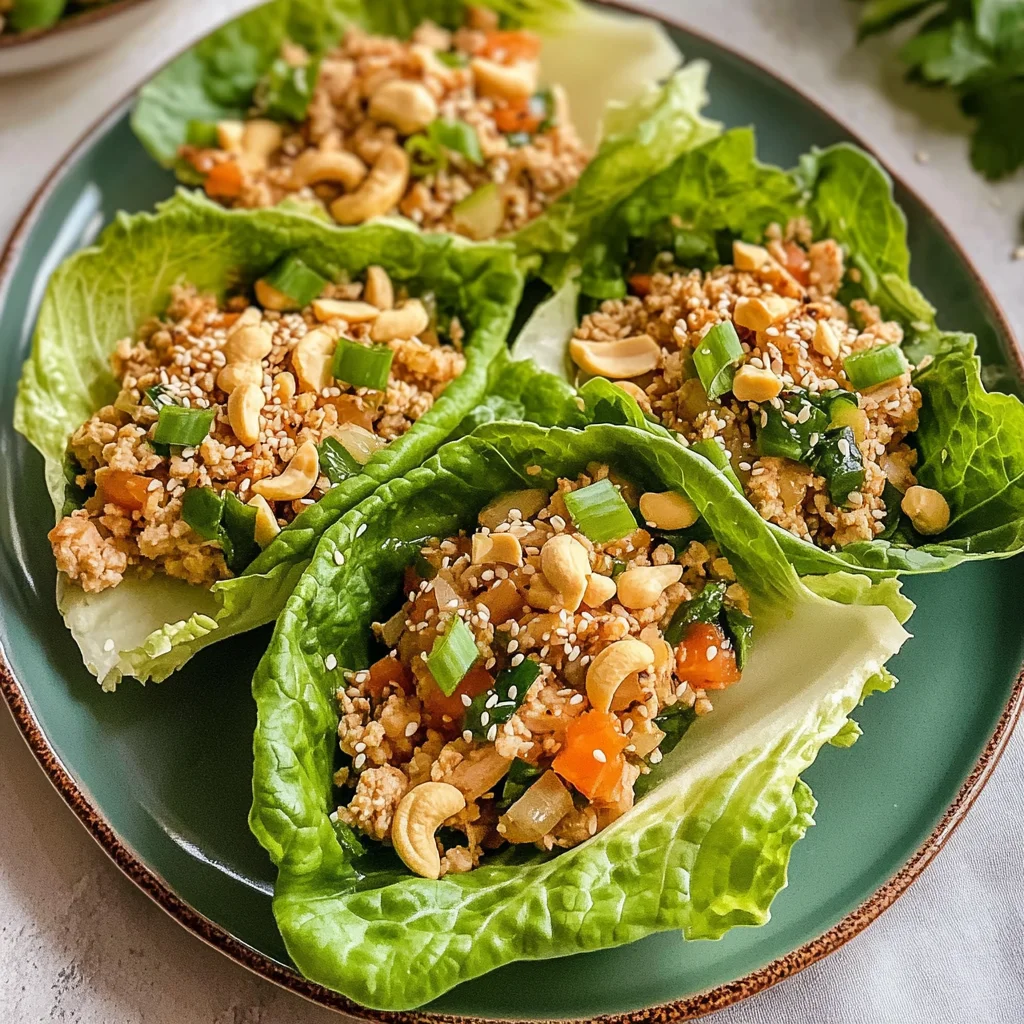
Thai Chicken Lettuce Wraps: A Flavorful Journey
These Thai chicken lettuce wraps are not just a dish; they are a celebration of vibrant flavors and fresh ingredients, all wrapped in the delicate embrace of crisp lettuce. Picture this: as you take a bite, the crunch of that fresh lettuce mingles with the savory chicken, a whisper of garlic, and the tangy notes of lime. It’s an experience that dances on your palate and leaves you craving more. Trust me, once you try these wraps, they’ll become a staple in your kitchen!
Step 5: The Magic of Combining Flavors
Now that your chicken is beautifully cooked to a golden brown, it’s time to elevate those flavors even further by adding our delectable sauce. In a small bowl, combine ¼ cup of Tamari or soy sauce (I love the umami punch it brings!), 2 tablespoons of Thai sweet red chili sauce, the juice of one zesty lime, and 1 teaspoon of maple syrup for a hint of sweetness. This concoction is so much more than just sauce; it’s a symphony of flavors where each ingredient plays its part. The salty depth from the Tamari perfectly balances the sweetness from the chili sauce and maple syrup while the lime adds that refreshing acidity which brightens up everything.
Once mixed well—give it a gentle whisk until you see that gorgeous, cohesive blend—set it aside for just a moment. Why? Because we want those flavors to meld together before they meet our chicken. This step is absolutely paramount! By allowing them to sit for even just a minute or two, the flavors begin to communicate with one another, creating an intoxicating aroma that will have your mouth watering in anticipation.
Step 6: Marrying Chicken and Sauce
With your chicken ready and waiting in the pan, it’s time to pour that beautiful sauce over it! Gently sprinkle those chopped cashews over your chicken first; this adds such a delightful crunch and nutty flavor that complements our savory filling perfectly. Now, pour in the sauce mixture and give everything a good toss—this is where all those lovely flavors come together! Reduce your heat to low; we want everything to simmer gently so that those sauces can infuse into the chicken without burning or drying out.
As you toss everything together, keep an eye on it for about two minutes. You’re looking for that moment when the sauce thickens slightly and clings lovingly to each piece of chicken—oh my goodness, it’s going to smell divine! This isn’t just cooking; this is alchemy at work right before your eyes. When done right, you should see no pink left in the chicken with each piece glistening from that luscious pan sauce. And remember: don’t rush this step; let them cozy up together!
Step 7: The Fresh Finish
Now comes one of my favorite parts—adding freshness! Once you’ve removed your pan from heat (trust me on this), allow it to cool for just a few minutes before stirring in your shredded carrots (about ¼-½ cup) along with ¼ cup each of finely chopped scallions and cilantro. The warmth from the chicken will gently soften these fresh ingredients without wilting them entirely; they’ll maintain their crunch and vibrancy while adding layers of texture and brightness.
This step is crucial because it brings contrast not only in flavor but also in texture. The crunchy carrots pop against the tender chicken while the scallions add an aromatic kick alongside the fragrant cilantro—each bite becomes an uplifting burst of freshness! Once combined, you’ll find yourself utterly enchanted by how these simple additions transform your dish into something truly extraordinary.
Step 8: Crafting Your Lettuce Wraps
Now comes perhaps one of the most exciting moments—the assembly! Grab your head of butter lettuce and gently peel away whole leaves; rinse them thoroughly under cold water then pat them dry with a clean kitchen towel or paper towel. The beauty here lies in using butter lettuce—it’s soft yet sturdy enough to cradle all those incredible fillings without tearing apart easily.
To assemble each wrap, take one glorious leaf and spoon in a generous portion of your delightful chicken mixture—don’t be shy here! Top this heavenly mound with some additional pan sauce drizzled on top (because who could resist more flavor?) followed by a sprinkle of sesame seeds for that final flourish. As you roll up each wrap, feel free to experiment with how much filling you want per leaf; everyone has their preference!
And here’s my little tip: if some wraps feel too full or unwieldy when rolling them up, simply use smaller leaves or adjust how much filling you include. Trust me on this—you want every bite to feel like a perfect balance between crunchy lettuce and flavorful filling!
Final Touches
As we wrap things up (pun absolutely intended!), I encourage you to take a moment before diving into these stunning Thai chicken lettuce wraps—you’ve put so much love into crafting this meal! Set your table beautifully or plate them up individually for friends or family gatherings; presentation matters!
Step 9: The Grand Finale!
Before serving these beauties, consider garnishing with additional herbs or even some extra lime wedges on the side for squeezing over just before eating—it adds an extra zing that elevates everything beautifully! Each bite will be bursting with flavor—a true testament to why these Thai chicken lettuce wraps are not just food but rather an experience filled with joy.
So there you have it—a simple yet utterly satisfying journey through making Thai chicken lettuce wraps right at home! I promise you once you share these tantalizing bites with loved ones (or enjoy them solo!), they will understand why I am so passionate about this recipe—and hopefully become as captivated as I am by its vibrant colors and irresistible taste. Happy cooking!
Storage and Enjoyment Tips for Your Thai Chicken Lettuce Wraps
Now that you’ve whipped up a batch of these utterly delightful Thai chicken lettuce wraps, it’s time to revel in their fantastic flavors! Trust me, there’s nothing quite like the crunch of fresh lettuce cradling that savory, aromatic chicken mixture. However, if you find yourself with some leftovers—or if you’re planning ahead for a busy week ahead—let’s talk about how to preserve this deliciousness so you can enjoy it even longer!
Storing Leftover Thai Chicken Lettuce Wraps
To keep your Thai chicken lettuce wraps as fresh as possible, I recommend using airtight containers or glass meal prep containers. These not only lock in flavor but also prevent any moisture from sneaking in and ruining that delightful crunch of the lettuce. You can store them in the fridge for up to 3 days, but I promise you they taste best when enjoyed fresh! To maintain quality, one little pro tip is to place a paper towel inside the container; this will absorb excess moisture and help keep your wraps crispier for longer. When it comes to reheating, I suggest warming just the chicken filling in a skillet over low heat until heated through, then serve it in new lettuce leaves—they’ll be as vibrant as when you first made them!
Freezing Components for Later
If you’re looking to stock up on some future meals, freezing is an excellent option! You can freeze the cooked chicken mixture without the lettuce. Just allow it to cool completely before transferring it into freezer-safe bags or containers. It can stay good in the freezer for up to 2 months. When you’re ready to enjoy your wraps again, simply thaw the filling overnight in the fridge and then reheat on the stove. This approach not only saves time but also means you have a flavorful meal waiting for you whenever those cravings hit! Think about those busy weeknights when you just want something easy yet satisfying—you’ll be so glad you have these tucked away!
With these storage tips, I’m thrilled that you’ll be able to savor every bite of your Thai chicken lettuce wraps, whether fresh or frozen.
Dinner
Thai Chicken Lettuce Wraps
Discover the vibrant flavors of Thai Chicken Lettuce Wraps, a delightful dish that combines savory ground chicken with aromatic spices and fresh vegetables, all wrapped in crisp lettuce leaves. Perfect for gatherings or a cozy weeknight dinner, these wraps are not just about eating; they are an experience that brings friends and family together around the table. Each bite is a delicious explosion of taste and texture, making them an instant favorite for any occasion. Easy to prepare and healthy, these wraps will quickly become a staple in your home!
- Prep Time: 15 minutes
- Cook Time: 15 minutes
- Total Time: 30 minutes
- Yield: Serves approximately 4 people 1x
- Category: Appetizer/Main
- Method: Sautéing
- Cuisine: Thai
Ingredients
- 1 Tablespoon sesame oil
- ¼ cup onion (diced)
- 2 cloves garlic (minced)
- 1 tablespoon fresh minced ginger
- 10 oz ground chicken
- ¼ cup Tamari (or soy sauce)
- 2 Tablespoons Thai sweet red chili sauce
- Juice of 1 lime
- 1 teaspoon maple syrup
- ⅓ cup cashews (chopped)
- ¼ cup scallions (chopped)
- ¼ cup cilantro (chopped)
- ¼ cup carrots (shredded)
- 1 head butter lettuce
Instructions
- Heat the sesame oil in a large skillet over medium-high heat. Add diced onion and sauté for about 2–3 minutes until softened.
- Stir in minced garlic and ginger, cooking for another minute until fragrant.
- Add ground chicken to the skillet, breaking it up with a spoon. Cook until no longer pink, about 4 minutes.
- In a small bowl, mix together Tamari, Thai sweet red chili sauce, lime juice, and maple syrup. Pour this sauce over the cooked chicken mixture and stir well to combine.
- Reduce heat to low and allow the mixture to simmer for about 2 minutes until heated through.
- Remove from heat and fold in chopped cashews, scallions, cilantro, and shredded carrots.
- To assemble, spoon the chicken filling into butter lettuce leaves and enjoy!
Nutrition
- Serving Size: 1 wrap (approximately 85g)
- Calories: 210
- Sugar: 4g
- Sodium: 580mg
- Fat: 12g
- Saturated Fat: 2g
- Unsaturated Fat: 8g
- Trans Fat: 0g
- Carbohydrates: 12g
- Fiber: 3g
- Protein: 14g
- Cholesterol: 60mg