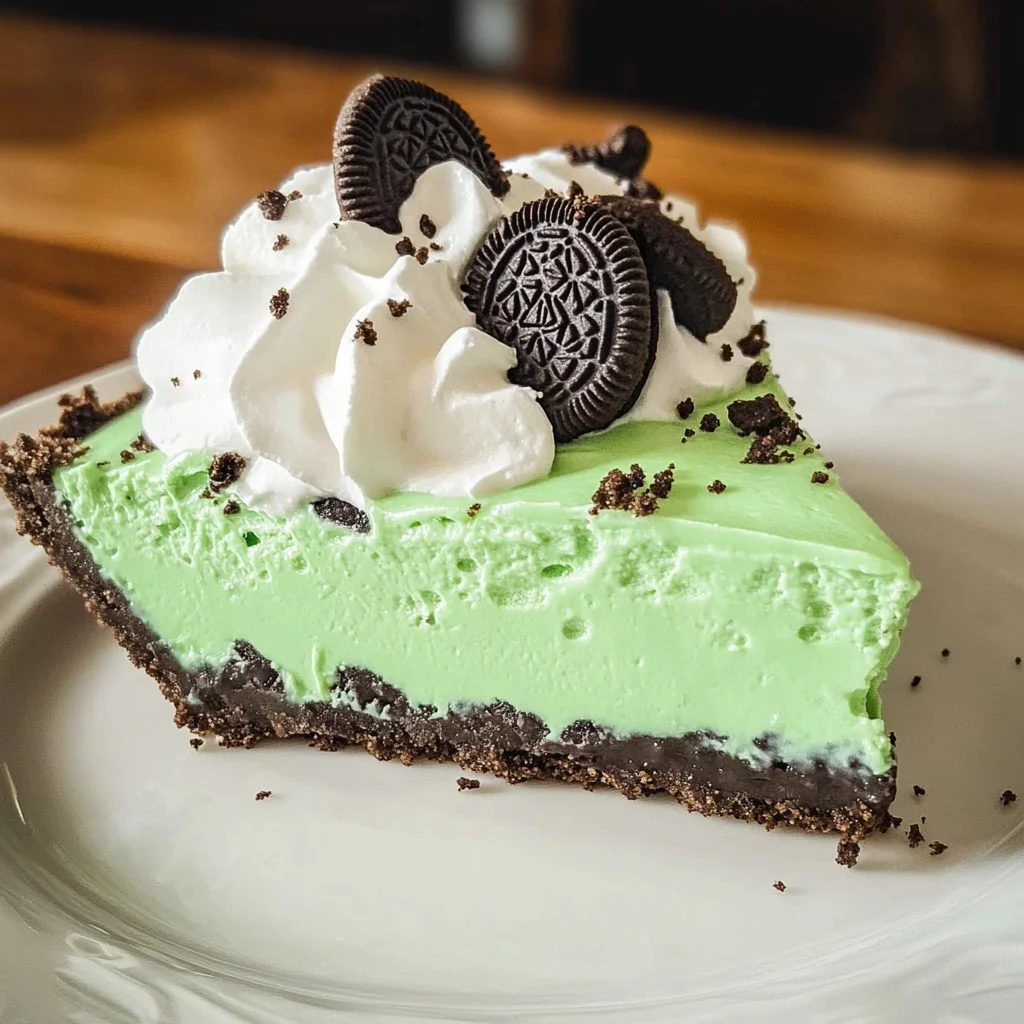
No Bake Grasshopper Pie
There’s something undeniably magical about gathering around a table with loved ones, sharing stories, laughter, and, of course, delicious food. This No Bake Grasshopper Pie is not just a dessert; it’s an experience that evokes childhood memories of summer evenings spent under twinkling stars and the sweet thrill of indulgence. Imagine slicing into a perfectly chilled pie, revealing layers of creamy mint filling set atop a rich Mint Oreo crust—each bite is like a refreshing breeze on a warm day, transporting you to carefree moments. The vibrant green hue isn’t just a feast for the eyes; it signals the delightful minty flavor that awaits, promising to awaken your senses and tickle your taste buds.
I’ve always been captivated by no-bake desserts—they’re so simple yet so impressive! This particular Grasshopper Pie has earned its place in my heart (and kitchen) because it beautifully marries the nostalgic flavors of mint and chocolate with a modern twist that’s perfect for any occasion. Whether you’re celebrating a birthday, hosting a summer barbecue, or simply craving something sweet on a Tuesday evening, this pie is the answer. Trust me when I say that once you serve this stunning dessert, everyone will be asking for the recipe—it’s truly extraordinary!
No Bake Grasshopper Pie: A Refreshingly Minty Delight
Let’s dive into the wonderful world of this No Bake Grasshopper Pie! With its dreamy filling and decadent crust, it’s bound to become one of your go-to recipes when you want to impress without heating up the kitchen.

Ingredients:
As we embark on this culinary journey together, let’s take a moment to appreciate each ingredient’s role in crafting our pie. Every element plays an integral part in creating that perfect balance of flavors and textures that make this dessert so special.
- 26 Mint Oreo cookies (plus extra for topping). These little gems are the foundation of our pie’s crust. Their chocolatey crunch combined with mint flavor creates an utterly intoxicating base that holds everything together beautifully. When selecting your Oreos, look for freshness—stale cookies won’t yield that delightful crumbly texture we want. Plus, using extra cookies for topping adds an appealing visual element while enhancing that minty-chocolate goodness.
- 5 Tablespoons unsalted butter (melted). Butter is crucial here as it acts as the glue binding our cookie crumbs into a cohesive crust. I recommend using unsalted butter to keep control over the saltiness in our dessert; after all, we want those bright minty notes to shine through without any distractions! Ensure your butter is melted but not overly hot—this helps achieve a crumbly yet firm crust when pressed into the pie plate.
- 1 ½ cups heavy cream. This liquid gold is what gives our filling its luxurious texture. Heavy cream whips up beautifully to create lightness; its high-fat content ensures stability while offering that creamy mouthfeel we crave in desserts like this one. When whipping cream, chill your mixing bowl and beaters beforehand for optimal results—you’ll notice how much easier it whips up into those lovely stiff peaks!
- 8 ounces cream cheese (softened). Soften your cream cheese before using it; this step is non-negotiable if you want a smooth filling without lumps! Cream cheese brings richness and tanginess to our pie—it perfectly complements the sweetness from other ingredients and balances out those vibrant mint flavors beautifully.
- 1 ½ cups confectioners sugar. This fine sugar dissolves quickly and smoothly into our mixture, ensuring we achieve that velvety texture we desire in our filling. I promise you—it makes all the difference! If you’re ever in need of an alternative due to dietary restrictions or preferences, feel free to substitute with powdered coconut sugar for a slightly different flavor profile.
- ½ teaspoon mint extract. This concentrated essence amplifies the natural mint flavor from our Oreos and gives our filling that refreshing kick we adore in grasshopper desserts! It’s essential to use extract instead of oil here—extracts are more potent and easily combine with other ingredients without separating or altering textures.
- Pinch salt. Just a pinch goes such a long way! Salt enhances all flavors present in our pie—it rounds out sweetness and elevates every bite into something truly unforgettable.
- Green gel food coloring (optional). While purely aesthetic, adding just a drop or two can elevate your pie’s appearance from lovely to stunning! It adds vibrancy and reinforces those fresh mint vibes—perfect for impressing guests at gatherings or celebrations!
- Cool Whip (optional topping). Although optional, I can’t help but recommend adding Cool Whip around the edges before serving—it creates an elegant appearance while contributing additional fluffiness alongside those crushed Oreos sprinkled on top!
Equipment You’ll Need:
Before we dive into making this scrumptious No Bake Grasshopper Pie, let’s gather some essential tools that will help us along the way! Having these items ready will streamline your cooking experience and keep everything organized as you work through each step.
- Food processor – A must-have tool for quickly turning our Mint Oreo cookies into fine crumbs with minimal effort! If you don’t have one on hand, placing them inside a resealable bag and crushing them with a rolling pin works too—just be sure not to leave any large chunks behind!
- 9-inch pie plate – The right size matters when forming our crust; this classic dish allows enough space for all those luscious fillings while providing structure during freezing time too.
- Stand mixer or hand mixer – Either option works wonders when whipping heavy cream into peaks or blending cream cheese until smooth! With attachments designed specifically for whisking tasks like these at hand (or rather attached), achieving fluffy textures becomes effortless!
Now that we’ve gathered our ingredients and tools together let’s get ready to make magic happen in the kitchen!
Step 1: Crushing Those Cookies
Start by taking your 26 Mint Oreo cookies—the star of our crust—and crush them into fine crumbs using your food processor. This process might seem mundane at first glance but trust me; it’s absolutely paramount for achieving that desired crunch factor! Once ground down properly (think sand-like consistency), transfer them into a mixing bowl before moving on to step two.
Step 2: Forming Our Crust
Next up is mixing those cookie crumbs with 5 tablespoons of melted unsalted butter until they’re well combined—a mixture that should resemble wet sand awaiting sculpting! Pour it all into your prepared 9-inch pie plate while pressing firmly against the bottom and sides (don’t rush this step!). You want an even layer that holds its shape during freezing time; once it’s all smoothed out nicely—pop it in the freezer while we prepare our filling!
Step 3: Whipping Up Our Cream
While waiting patiently for our crust to chill, let’s turn attention toward whipping together 1 ½ cups of heavy cream until stiff peaks form—this process takes just several minutes but yields incredible results! Using either stand mixer fitted with whisk attachment or trusty handheld variety works great here; however don’t forget about chilling both bowl & beaters beforehand—it makes achieving fluffy whipped cream much easier while minimizing risk associated with over-whipping!
Step 4: Blending The Filling
In another bowl (preferably large!), beat softened cream cheese until silky-smooth before introducing confectioners sugar alongside half teaspoon mint extract—a hint of pinch salt also goes in here too! Mix everything thoroughly until well combined—I promise you it’s worth taking time here because proper blending directly impacts final texture quality later down line!
Stay tuned as we continue building layers upon layers of deliciousness in this delightful No Bake Grasshopper Pie…
Creating Your Luscious No Bake Grasshopper Pie
Now that we’ve laid the foundation of our delightful dessert with that rich Mint Oreo crust, it’s time to dive into the filling that will make this No Bake Grasshopper Pie truly unforgettable. This is where the magic happens, and trust me, the creamy mint filling is not just an afterthought; it’s what elevates this pie from good to absolutely extraordinary. So, let’s roll up our sleeves and get started!
Step 5: Whip It Good – Creating the Creamy Mint Filling
First things first, we need to whip the heavy cream. If you’re using a stand mixer, fit it with the whisk attachment—this is key for incorporating air into the cream, which will give our filling that light and airy texture. Pour in 1 ½ cups of heavy cream and start mixing on medium speed. As you watch it transform from liquid to fluffy clouds of deliciousness, you’ll notice that after several minutes (around 3 to 5), stiff peaks will form. What does that mean? It means when you lift your whisk out of the bowl, the cream holds its shape beautifully without collapsing back into the bowl. This step is absolutely paramount because it provides structure to our filling—without those stiff peaks, you’d end up with a sad mixture that’s more like soup than a pie filling.
Once you’ve achieved those glorious peaks, set your whipped cream aside gently; we want to keep all that lovely air we’ve just incorporated. In a separate bowl (a large one!), beat 8 ounces of softened cream cheese until it becomes luxuriously smooth and creamy—this typically takes about 2 minutes. The reason for softening the cream cheese beforehand is so it blends seamlessly without leaving behind any lumps. Next, add in 1 ½ cups of confectioners sugar, ½ teaspoon of mint extract, and a pinch of salt. The sugar adds sweetness and helps counterbalance the minty freshness, while salt enhances all those flavors beautifully. Mix everything together until well combined—you should have a smooth, creamy mixture with a lovely pale green hue from your gel food coloring.
Step 6: Folding in Magic – Bringing It All Together
Now comes my favorite part—the gentle folding. This technique is crucial because we want to combine our whipped cream with the cream cheese mixture without deflating all that wonderful air we’ve just whipped into existence! Take your whipped cream and add about one-third of it into the bowl with your creamy mixture. Use a spatula or wooden spoon to gently fold it in by scraping along the sides and bottom of the bowl while turning your wrist in a circular motion—almost like cradling a delicate soufflé! You want to incorporate it until there are no streaks left but be careful not to overmix; otherwise, you’ll lose that delightful fluffiness.
Once you’ve folded in the first third, now you can add in the rest of your whipped cream. Repeat this gentle folding process until everything is perfectly united into a luscious mint green concoction that smells utterly intoxicating! You might find yourself wanting to dive right in with a spoon at this point—I know I do! But hang tight; we’re almost there! This folding step not only combines flavors but also aerates our filling further, giving us that dreamy texture when set.
Step 7: Time for Transformation – Filling Your Crust
With our ethereal mint filling ready to go, it’s time to pour this magic into our prepped Mint Oreo crust! Carefully transfer your creamy delight into the chilled crust you’ve so lovingly prepared earlier; use an offset spatula or the back of a spoon to spread it evenly across. Take your time here—don’t rush this step because smoothing out the top gives your pie a beautiful finish when it’s time for serving. Picture how gorgeous it’ll look once it’s fully set; you want every slice to be Instagram-worthy!
Once you’ve smoothed out the filling beautifully (and maybe taken just one tiny taste—who could resist?), cover your pie tightly with plastic wrap or aluminum foil. Now comes an exercise in patience: place your pie in the freezer for at least 6 hours, but if you’re anything like me and can wait overnight, that’s even better! Why freeze? This chilling phase allows all those flavors to meld together wonderfully while giving our pie its signature frozen texture—trust me when I say this makes all the difference when you cut into it later!
Step 8: The Grand Finale – Garnishing Your Masterpiece
After patiently waiting for those long hours (or overnight), it’s finally time for some fun—the garnishing! Remove your No Bake Grasshopper Pie from its frosty abode and take off any covering gently. If you’re feeling extra fancy—and who wouldn’t be?—it’s time to pipe some Cool Whip around the edges for an added layer of decadence and visual appeal. I love using a piping bag fitted with a star tip for a pretty finish; it turns something simple into something truly spectacular!
Now for my favorite part: topping! Grab some additional crushed Mint Oreos (or chop them coarsely) and sprinkle them generously over the top—this not only adds an extra crunch but also enhances that beautiful minty chocolate flavor we’re celebrating here! Picture each slice revealing both creamy mint goodness and crunchy bits—it’s simply mouthwatering.
Finally, before serving up slices of this delightful dessert masterpiece to friends or family (or indulging solo if you prefer!), let it sit at room temperature for about 10-15 minutes before slicing; this helps soften those icy edges just enough so you can cut through smoothly without losing any precious filling.
Conclusion:
As we wrap up our journey through crafting this sensational No Bake Grasshopper Pie, I hope you’re feeling inspired and eager to bring this recipe into your own kitchen. From the moment you crush those Mint Oreos into fine crumbs to the final flourish of whipped topping, every step is filled with joy and anticipation. What makes this pie truly special is how each layer harmonizes together—the crunch of the cookie crust against that velvety mint filling creates a symphony of flavors that dances delightfully on your palate, leaving you utterly enchanted.
This recipe isn’t just about satisfying your sweet tooth; it’s an experience that brings people together. Picture yourself pulling this stunning dessert from the freezer at your next gathering—everyone’s eyes lighting up with excitement! Whether it’s a birthday party, holiday celebration, or simply a sunny day spent with friends, this pie shines brightly at any occasion. It’s not only easy to make but also incredibly versatile; feel free to play around with toppings or even mix in some chocolate shavings if you’re feeling adventurous!
Imagine savoring one of these decadent slices alongside a steaming cup of coffee for an afternoon pick-me-up or enjoying it after dinner while reminiscing about fond memories with family. For an even more indulgent experience, serving it with fresh mint leaves or a drizzle of chocolate sauce elevates each bite beyond ordinary dessert status! And if you’re looking for ways to customize your pie further, consider adding crushed candy canes during the holidays or swapping out the mint extract for other flavors like almond or vanilla—this recipe is wonderfully adaptable!
Feeling adventurous? This No Bake Grasshopper Pie invites creativity and experimentation! Perhaps you’ll try incorporating layers of different flavored fillings or even create individual mini pies in jars—a fun twist that’s perfect for parties! Each variation opens doors to new experiences and flavors that could become cherished family traditions. So gather your ingredients, invite loved ones into your kitchen, and create something magical together—I can’t wait to hear how yours turns out! Share your experience with me; let’s connect over our love for cooking delicious food!
No Bake Grasshopper Pie
Indulge in the refreshing delight of our No Bake Grasshopper Pie, a dessert that effortlessly combines nostalgia with modern flavors. This easy-to-make pie features a crunchy Mint Oreo crust layered with a creamy mint filling, perfect for any occasion—from summer barbecues to cozy family gatherings. Each slice is a celebration of minty freshness and rich chocolate flavor, making it an instant crowd-pleaser. Plus, this no-bake recipe means you can create something extraordinary without turning on the oven! Enjoy this delightful dessert chilled and watch as it transports you to carefree summer nights under the stars.
- Prep Time: 30 minutes
- Cook Time: None
- Total Time: 0 hours
- Yield: Serves approximately 8 slices 1x
- Category: Dessert
- Method: No bake
- Cuisine: American
Ingredients
- 26 Mint Oreo cookies
- 5 tablespoons unsalted butter (melted)
- 1 ½ cups heavy cream
- 8 ounces cream cheese (softened)
- 1 ½ cups confectioners sugar
- ½ teaspoon mint extract
- Pinch salt
- Green gel food coloring (optional)
Instructions
- Crush the Mint Oreo cookies in a food processor until fine crumbs form. Mix with melted butter.
- Press the mixture into the bottom and sides of a 9-inch pie plate to form the crust. Freeze for 15 minutes.
- Whip heavy cream until stiff peaks form; set aside.
- In another bowl, beat softened cream cheese until smooth, then add confectioners sugar, mint extract, and salt. Mix until combined.
- Gently fold in whipped cream until fully incorporated.
- Pour filling into the chilled crust and smooth the top. Cover and freeze for at least 6 hours or overnight.
- Before serving, garnish with Cool Whip and crushed cookies if desired.
Nutrition
- Serving Size: 1 slice - approximately 150g
- Calories: 410
- Sugar: 32g
- Sodium: 200mg
- Fat: 30g
- Saturated Fat: 17g
- Unsaturated Fat: 10g
- Trans Fat: 0g
- Carbohydrates: 36g
- Fiber: 2g
- Protein: 4g
- Cholesterol: 70mg