Sourdough Discard Irish Soda Bread
There’s something utterly magical about baking bread, isn’t there? The way the aroma envelops your kitchen, the warmth that fills your heart as you knead the dough, and the sheer joy of pulling a golden loaf from the oven. Today, I want to share with you a recipe that is not just about satisfying hunger; it’s about connection, tradition, and using up that precious sourdough discard you’ve been saving. This Sourdough Discard Irish Soda Bread is a celebration of flavors and textures that will transport you straight to the rolling hills of Ireland, where fresh bread is more than a meal—it’s a ritual. And trust me, this recipe is not just an ordinary quick bread; it’s an experience waiting to happen!
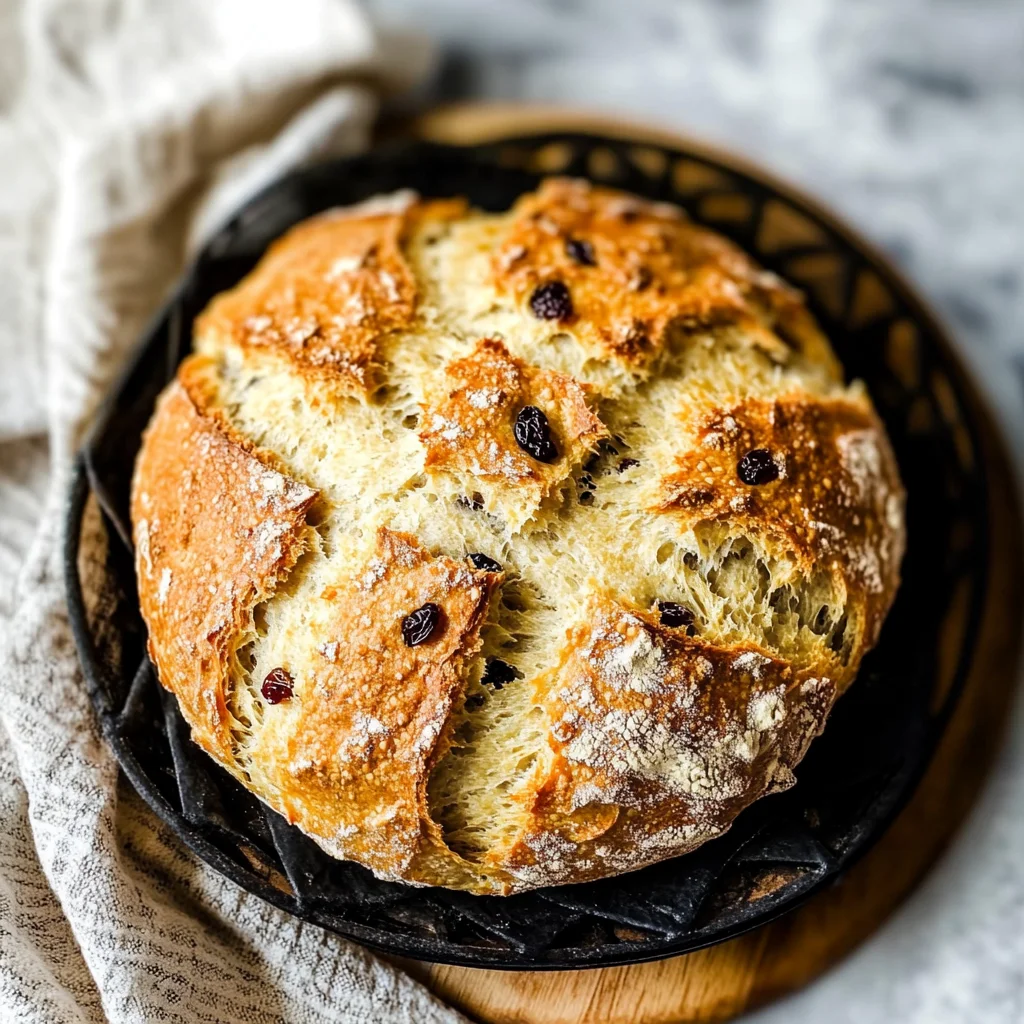
Imagine slicing into a warm loaf with a crackling crust that gives way to an incredibly tender crumb speckled with sweet raisins. Each bite is like a hug from an old friend—a delightful balance of savory and sweet that pairs wonderfully with everything from hearty stews to your morning coffee. Whether you’re planning for St. Patrick’s Day or simply craving something comforting on a chilly evening, this Sourdough Discard Irish Soda Bread has got you covered! It’s simple yet profoundly satisfying, taking mere minutes to prepare but delivering flavor and nostalgia in every bite.
Sourdough Discard Irish Soda Bread: A Slice of Tradition
This recipe is deeply rooted in Irish culture; soda bread has long been cherished for its simplicity and heartiness. But what makes my version stand out is the use of sourdough discard—a resourceful way to avoid waste while adding depth and character to the bread. You see, every time you feed your sourdough starter, you’re left with a bit of discard—an underappreciated treasure! Integrating it into this Irish soda bread not only reduces waste but also lends it that unique tanginess characteristic of sourdough. Trust me on this: once you try it, you’ll never look at sourdough discard the same way again!
Now let’s gather our ingredients and embark on this culinary journey together. With each ingredient contributing its own magic, we’ll create something truly extraordinary.
Ingredients:
As we dive into making this Sourdough Discard Irish Soda Bread, let me tell you about each ingredient—because every single one plays a vital role in crafting that perfect loaf.
- 3 ½ cups All-Purpose Flour: This is the foundation of our bread! All-purpose flour provides just the right amount of gluten strength needed for structure while still allowing for tenderness in our final product. When choosing flour, look for brands that are finely milled—this will yield a lighter texture in your bread. If you’re feeling adventurous or seeking added nutrition, consider substituting part of it with whole wheat flour; it brings in nutty flavors but be mindful that too much can make the bread denser.
- 1 teaspoon Salt: Ahh, salt—the unsung hero of our kitchen! Salt does more than just season our bread; it strengthens gluten strands and enhances the overall flavor profile by balancing sweetness found in other ingredients like honey and raisins. Always opt for fine sea salt here because it dissolves easily into our dry mix without leaving any gritty textures behind.
- 1 teaspoon Baking Soda: This ingredient is crucial since we’re making soda bread instead of yeast-leavened bread! Baking soda acts as a leavening agent when combined with acidic ingredients like buttermilk and sourdough discard. This reaction produces carbon dioxide bubbles which help our loaf rise beautifully without lengthy fermentation times.
- ¼ cup Salted Butter (cold): Cold butter adds richness while creating flakiness throughout our lovely loaf. When cutting cold butter into flour until it resembles coarse crumbs, you’re incorporating tiny pockets of fat that will melt during baking—resulting in tender layers within your bread. If you prefer not to use salted butter or have dietary restrictions, feel free to use unsalted butter instead; simply adjust salt accordingly.
- 1 cup Raisins (seedless): The sweet little gems! Raisins add bursts of natural sweetness and moisture to each bite while creating a delightful contrast to the savory elements in our dough. Don’t skip coating them lightly in flour before mixing them into the dough—that small step prevents clumping together later on!
- 1 ¼ cups Buttermilk: Buttermilk gives our dough its tangy flavor while also contributing moisture needed for a beautiful crumb structure. If you don’t have buttermilk on hand or want a dairy-free option, simply mix regular milk (or plant-based milk) with one tablespoon of vinegar or lemon juice; let it sit for about five minutes before using—it works wonders!
- ½ cup Sourdough Discard: Here’s where we bring all those lovely sour notes into play! The sourdough discard adds complexity and depth to our flavor profile while ensuring we’re reducing waste at home—what’s not to love? Just make sure it’s at room temperature so it blends seamlessly into our wet ingredients.
- 1 large Egg (lightly beaten): Eggs provide richness and help bind everything together cohesively while contributing moisture during baking as well. They also give our crust that gorgeous golden hue when baked—who doesn’t love some visual appeal along with deliciousness?
- 1 tablespoon Honey: A touch of liquid gold! Honey rounds out flavors beautifully by adding subtle sweetness without overpowering other ingredients’ characteristics. While any sweetener could replace honey if desired (like maple syrup), I find this adds just enough warmth without being cloying.
Now that we’ve gathered all these wonderful components together let’s move on to equipping ourselves for success!
Equipment You’ll Need:
Before we jump into mixing up our dough, having the right tools can make all the difference between effortless baking experiences versus frustrating ones! Think of these items as essential partners on this culinary adventure—we’re going to create something fabulous together.
- Large Mixing Bowl: A sturdy bowl is essential for combining all those dry ingredients first before bringing in wet ones later on. Look for one that’s big enough so you don’t end up with flour flying everywhere while mixing—it’s no fun cleaning up after an explosion!
- Whisk: Perfect for blending dry ingredients uniformly before adding any moisture; whisking ensures even distribution which leads us toward consistent results across every slice later on.
- Pastry Cutter or Fork: These handy tools come into play when cutting cold butter into flour—this technique breaks down fat perfectly without overworking gluten too much! If neither tool is available at home? Simply use your fingers (and yes—they work beautifully too!).
- Wooden Spoon: An essential tool when folding together wet & dry mixes gently; wooden spoons are durable enough not only for stirring but also won’t scratch up your mixing bowls if they’re non-stick coated either!
- Sharp Knife: A good quality knife serves two purposes here; first—to score deep crosses atop loaves before baking which helps steam escape during cooking leading toward ideal texture & second—to slice through finished loaves cleanly afterward without squishing anything down unintentionally!
With these tools at hand—and excitement brewing—we’re ready to prepare this delicious Sourdough Discard Irish Soda Bread together!
Step 1: Preheat Your Oven & Prepare Your Baking Sheet
Before diving into mixing those beautiful ingredients together, let’s start by preheating our oven to 425°F (that’s about 220°C). This step might seem trivial but trust me—it’s absolutely paramount! Preheating ensures that once we place our lovingly crafted loaf inside, we receive immediate heat which encourages an optimal rise right from the get-go—nothing worse than dense bread due to insufficient heat distribution during baking! While that’s happening, line your half-sized baking sheet with parchment paper or silicone mat; greasing could work too if parchment isn’t available—but I find parchment allows for easy cleanup afterward while preventing sticking issues down below as well!
Step 2: Whisk Together Dry Ingredients
Once everything’s set up nicely around us—including oven preheating—we can move forward by adding those dry ingredients together! In your large mixing bowl, combine 3½ cups all-purpose flour along with 1 teaspoon salt and 1 teaspoon baking soda using your whisk until everything feels uniform throughout—about thirty seconds should do! This process isn’t just about mixing though; it’s crucial because evenly distributing these key components now means less chance later on for clumps forming within dough itself—which could lead toward uneven texture across baked slices later!
Step 3: Cut In The Cold Butter
Next comes one of my favorite steps—cutting in cold butter! Take your chilled salted butter cubes (remember they should be about half-inch pieces), toss them gently into the flour mixture then grab either pastry cutter (or fork/fingers) depending upon preference here—and cut away until mixture resembles coarse crumbs resembling small peas size-wise overall—not too fine though! This process known as “cutting” creates those airy pockets within finished product which leads towards flaky texture everyone loves upon biting down onto freshly baked slice later!
Step 4: Add Raisins & Create Well
Once you’ve achieved those lovely coarse crumbs full-of-butter goodness—it’s time now add sweetness factor via raisins tossed lightly beforehand ensuring they don’t clump together either during mixing process ahead! After stirring them gently through flour mixture—use fingers next create well directly within center area formed by dry mix surrounding this new addition—the goal here being creating space where wet components will soon flow smoothly downward blending harmoniously across everything else present surrounding them afterwards so consistency remains intact through entirety entire procedure henceforth moving forward thereafter…
I’m so eager for you all to continue crafting this divine creation alongside me—but let’s pause here before pressing forward further still through next series steps involved without rushing things along too quickly altogether instead appreciating nuances wrapped tightly inside each phase unfolding beautifully ahead waiting patiently towards final reveal moment soon approaching head-on now shortly thereafter…
Stay tuned as we’ll dive deeper into incorporating wet elements shortly thereafter allowing magic unfold naturally next few stages ahead following suit perfectly aligning ourselves effortlessly onward throughout entire experience awaiting us both eagerly expecting outcome soon arriving momentarily directly thereafter…
Step 5: Creating a Well in the Dough Mixture
Now that you’ve mixed the dry ingredients together, it’s time to create a well—this step is crucial because it helps incorporate your wet ingredients into the dry mixture more effectively. Using your fingers, gently push the flour mixture aside to form a small cavity in the center, almost like making a nest. This well will be where all those delicious wet ingredients come together with the flour. Trust me on this; by doing so, you’re allowing for better hydration of the flour and ensuring that every grain gets coated in that luscious buttermilk and sourdough discard mixture, which is essential for achieving that tender crumb we all love in soda bread.
As you push aside the flour, take a moment to appreciate how the butter has created those beautiful coarse crumbs, which will give your bread its lovely flaky texture. This is not just about mixing; it’s about coaxing out flavors and textures that turn ordinary ingredients into something extraordinary! The well also provides a space for you to pour in your wet ingredients without causing too much mess—so it’s both practical and effective. Once you’ve formed your well, you’re ready to introduce those wonderful wet ingredients.
Step 6: Whisking Together Your Wet Ingredients
In a separate bowl, combine your buttermilk, sourdough discard, lightly beaten egg, and honey. Now, I want you to whisk this mixture together until it’s smooth and uniform; it should look like creamy liquid gold just waiting to be infused into your dough. This step might seem simple, but don’t underestimate its importance. Each component plays a vital role: the buttermilk adds tanginess and moisture; the sourdough discard contributes that signature depth of flavor we crave; the egg enriches the bread’s texture and color; while honey introduces a touch of sweetness that beautifully balances everything out.
Once your wet ingredients are mixed thoroughly, take a moment to admire their glossy appearance before pouring them into your well of dry ingredients. It’s almost poetic—the blending of flavors from two distinct worlds coming together to create something magical! Don’t rush this step; allow yourself to savor the anticipation of what’s about to happen as you stir everything together.
Step 7: Mixing Wet and Dry Ingredients
Now comes the fun part—it’s time to combine those wet and dry ingredients! Grab a sturdy wooden spoon or spatula and begin gently folding the wet mixture into the dry. Picture it as if you’re cradling each ingredient together with care rather than stirring aggressively. You want to ensure that every bit of flour gets moistened without overworking the dough. Overmixing can lead to gluten development, which will cause your bread to become tough instead of tender—definitely not what we want here!
As you mix, you’ll notice that things are starting to come together beautifully. The dough will begin forming into a shaggy mass, looking somewhat rustic yet inviting. It might still seem a bit crumbly or dry at this stage—that’s perfectly okay! Be attentive here; if you notice it’s too stiff and resistant to coming together smoothly, don’t hesitate to add just a tiny splash more buttermilk. A little moisture goes a long way! Remember, this isn’t traditional yeast bread—it should feel drier than what you’re used to working with.
Step 8: Kneading with Care
Once you’ve combined everything into a rough dough ball (it should still be fairly stiff), it’s time for some gentle kneading—a technique that’s vital for bringing everything together without compromising texture. Dust your workspace liberally with flour—generously enough so that nothing sticks—and turn out your dough onto the surface. With floured hands, gently knead it for about 1-2 minutes until it feels cohesive but remember: restraint is key! You’re not trying to develop gluten here; instead, you’re simply working it enough so that it holds its shape without being overly manipulated.
If at any point during this process you feel like your dough is too sticky or still too crumbly after mixing, don’t hesitate to sprinkle in more flour or add another splash of buttermilk cautiously—it’s all about achieving that perfect balance! When kneading is done correctly—you’ll know because when you poke at it gently with your finger, it should bounce back slightly as if saying “I’m ready!” Also keep an eye out for any cracks forming on its surface; that’s normal as well since we’re aiming for rustic charm here.
Conclusion:
As we reach the end of our culinary journey together with this Sourdough Discard Irish Soda Bread recipe, I hope you’re feeling as excited as I am! Baking this bread invites you into a world where rustic simplicity meets extraordinary flavor—a true testament to how humble ingredients can create something profoundly satisfying. Each bite carries a symphony of textures: from the crispy crust enveloping a tender inside studded with sweet raisins. The addition of sourdough discard adds an unexpected layer of complexity that elevates this bread beyond mere comfort food—it’s what makes it truly special!
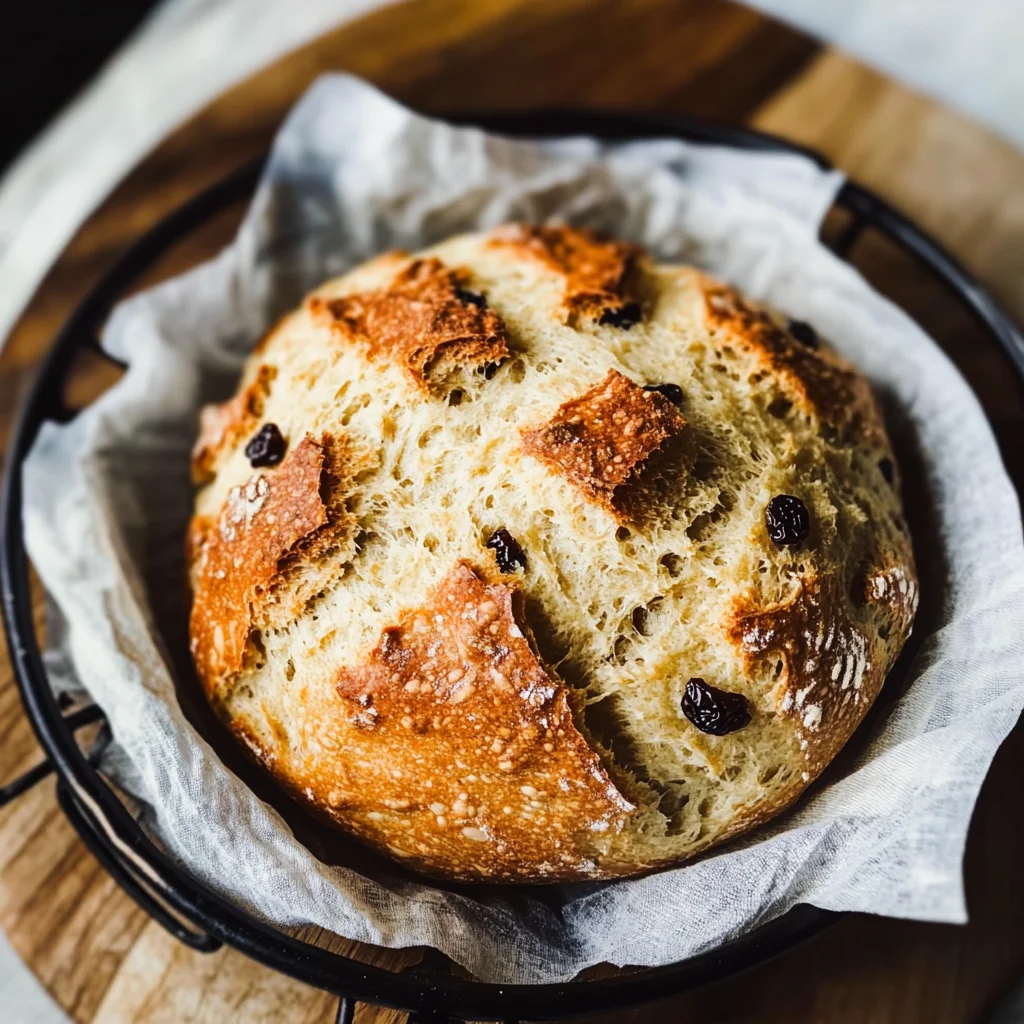
This recipe is an absolute must-try not just because of its delicious taste but also due to the joy that comes from making it yourself. It’s incredibly accessible too; whether you’re sharing it on St. Patrick’s Day or enjoying cozy family dinners throughout winter, this soda bread shines on all occasions. Imagine pulling it from the oven—its golden crust glistening like liquid gold—and slicing into its soft center while warm steam escapes into the air; it’s an experience that brings happiness and warmth into any home.
For serving suggestions that will make your heart sing, picture savoring a slice toasted with butter melting into every crevice—pure bliss! For an afternoon pick-me-up, serve it alongside a cup of tea or coffee; there’s something magical about indulging in homemade treats while sipping your favorite hot beverage. And if you’re feeling adventurous for dinner? Pair it with hearty soups or stews—the savory flavors complement each other beautifully and create a comforting meal that’s simply unforgettable.
Feeling adventurous? This recipe is wonderfully adaptable! You could swap out raisins for dried cranberries or apricots for a fruity twist that adds zing and vibrancy to each bite. If you wish to experiment further, consider incorporating spices like cinnamon or nutmeg for warmth on chilly evenings—or even some chopped nuts for added crunch! The possibilities are endless! I wholeheartedly encourage you to try this recipe out and share your delightful creations with friends and family; let them fall in love with baking just like I did!
Sourdough Discard Irish Soda Bread
Discover the joy of baking with this Sourdough Discard Irish Soda Bread, a warm and inviting quick bread that marries tradition with sustainability. As you prepare this delightful loaf, you’ll delight in the tangy flavor brought by sourdough discard and the sweetness of raisins, all enveloped in a beautifully golden crust. Perfect for any occasion—be it breakfast, afternoon tea, or a comforting side to your favorite stew—this recipe is as easy to make as it is delicious. Embrace the magic of homemade bread and elevate your baking skills with this simple yet satisfying recipe!
- Prep Time: 15 minutes
- Cook Time: 45 minutes
- Total Time: 1 hour
- Yield: Approximately 12 servings 1x
- Category: Bread
- Method: Baking
- Cuisine: Irish
Ingredients
- 3 ½ cups all-purpose flour
- 1 teaspoon salt
- 1 teaspoon baking soda
- ¼ cup cold salted butter
- 1 cup seedless raisins
- 1 ¼ cups buttermilk (or plant-based alternative)
- ½ cup sourdough discard
- 1 large egg (lightly beaten)
- 1 tablespoon honey
Instructions
- Preheat oven to 425°F (220°C) and line a baking sheet with parchment paper.
- In a large mixing bowl, whisk together flour, salt, and baking soda.
- Cut in cold butter until mixture resembles coarse crumbs.
- Stir in raisins and create a well in the center.
- In a separate bowl, whisk together buttermilk, sourdough discard, egg, and honey.
- Pour wet ingredients into the well and gently mix until just combined.
- Knead gently on a floured surface for about 1-2 minutes until cohesive.
- Shape into a round loaf and place on the prepared baking sheet.
- Score a deep cross on top of the loaf with a sharp knife.
- Bake for 40-45 minutes or until golden brown and hollow when tapped.
Nutrition
- Serving Size: 1 slice (60g)
- Calories: 180
- Sugar: 4g
- Sodium: 220mg
- Fat: 6g
- Saturated Fat: 3g
- Unsaturated Fat: 3g
- Trans Fat: 0g
- Carbohydrates: 30g
- Fiber: 2g
- Protein: 4g
- Cholesterol: 30mg