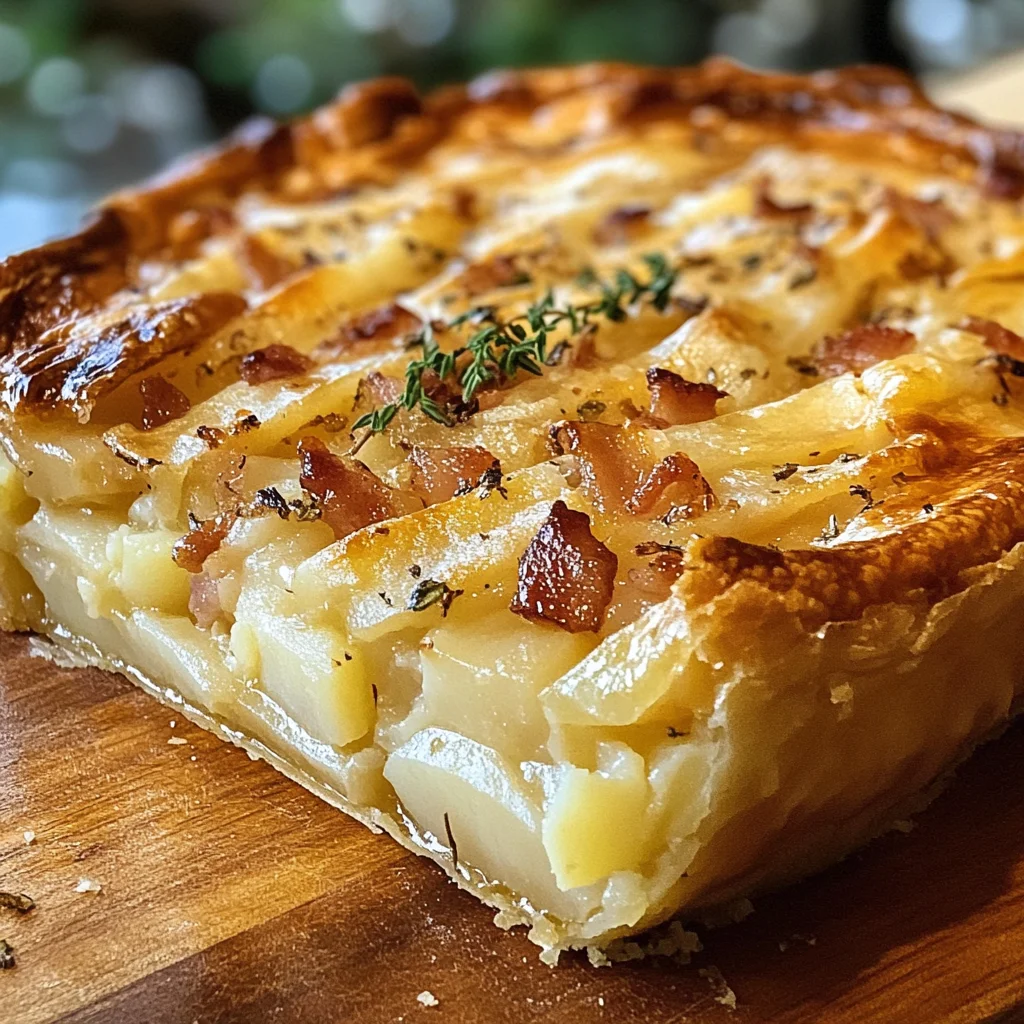
Irish Potato Pie
There’s something truly magical about the comfort of a home-cooked meal, and today, I want to share with you a recipe that embodies warmth, love, and a touch of nostalgia: the Irish Potato Pie. This dish is not just food; it’s an experience that brings people together around the table, evoking memories of laughter-filled dinners and heartfelt conversations. Imagine the aroma of buttery potatoes mingling with sharp Irish cheddar wafting through your kitchen, promising a slice of heaven in every bite. As we embark on this culinary journey together, I promise you, this Irish Potato Pie will become a cherished family favorite that you’ll want to make again and again.
What makes this pie so special? It’s the harmonious blend of creamy mashed potatoes, rich butter, and the unmistakable bite of sharp cheddar cheese nestled in a flaky crust. Each ingredient plays its part like members of an orchestra, creating a symphony of flavors that is both deeply satisfying and utterly comforting. Whether it’s a cozy family dinner or a festive gathering with friends, this dish is perfect for any occasion. Trust me; once you serve it up, you’ll see smiles all around as everyone savors each delicious mouthful.
Irish Potato Pie: A Warm Hug on Your Plate
This Irish Potato Pie is not just about layering flavors; it’s about embracing traditions while adding your personal touch. Every forkful delivers creamy goodness paired with the nutty richness of cheese—a combination that wraps you in a warm hug. So let’s roll up our sleeves and dive into this delightful recipe together!
Ingredients:
As we gather our ingredients for this heartwarming pie, remember that each component contributes to the overall experience we’re crafting. Let’s explore these elements in detail so you understand their significance and how they work together.
- 4 large russet potatoes, peeled and cubed. These starchy beauties are the backbone of our pie, providing that creamy texture we crave once mashed. Russets are ideal because they break down beautifully when cooked, becoming fluffy and soft rather than waxy—absolutely paramount for achieving that dreamy filling. Look for potatoes that are firm with no blemishes; they should feel heavy for their size. If russets aren’t available, Yukon Golds can be a wonderful alternative due to their buttery flavor.
- 1/2 cup unsalted butter, divided. Butter acts as liquid gold in our recipe; it enriches the potato filling while also helping to create that perfectly flaky crust if you’re using homemade dough. Using unsalted butter gives you complete control over the saltiness of your dish—this is crucial! Be sure to soften your butter at room temperature before using it; cold butter won’t integrate well into your mixture.
- 1 cup heavy cream. The cream adds lusciousness to our mashed potatoes, making them silky smooth and utterly indulgent. It also helps bind the filling together while elevating the overall flavor profile to something truly extraordinary! When buying heavy cream, opt for one with at least 36% fat content for best results—it will whip up beautifully if you ever decide to use some as a topping later!
- 1 cup shredded sharp Irish cheddar cheese. Ahh, now we arrive at one of my favorite ingredients! The sharpness of Irish cheddar brings an unforgettable tanginess that cuts through the richness of the pie beautifully. This cheese melts wonderfully and contributes to that gooey consistency we all adore. When choosing your cheddar, look for freshly shredded options rather than pre-packaged ones since they often have anti-caking agents that can affect melting.
- 1 small onion, finely chopped. Onions bring depth and sweetness to our filling as they caramelize during cooking—adding another layer of flavor that’s simply irresistible! Make sure to chop them finely so they blend seamlessly into the potato mixture; larger pieces might disrupt that smooth texture we’re aiming for.
- 2 cloves garlic, minced. Garlic adds an aromatic quality that enhances our savory pie magnificently! Fresh garlic infuses its distinct flavor into every bite—it’s one ingredient I never skimp on when cooking! For maximum flavor release, chop your garlic just before adding it to prevent oxidation from diminishing its potency.
- 1/2 cup cooked bacon, chopped (optional). While bacon adds a smoky richness that’s hard to resist, feel free to omit it if you’d rather keep things vegetarian or if you’re avoiding pork altogether. You could substitute it with sautéed mushrooms or even crispy plant-based bacon for added texture without compromising on taste!
- 1 tablespoon fresh thyme leaves. Thyme is one herb I often turn to when looking for something earthy yet brightening—a non-negotiable addition here! Its slight mintiness complements our creamy filling perfectly while enhancing other flavors without overpowering them.
- Salt and pepper to taste. Seasoning is essential! Salt enhances flavors while pepper provides just enough warmth without being overwhelming—so don’t shy away from tasting as you go along!
- 1 pre-made pie crust (store-bought or homemade). The crust serves as our vessel for all this deliciousness—a flaky foundation supporting every layer within! If you choose store-bought for convenience (which I completely understand), opt for one made with quality ingredients for best results; however, if you’re feeling adventurous today—making homemade pastry can elevate this dish even further!
- 1 egg beaten (for egg wash). Brushing the edges of your crust with egg wash ensures those beautiful golden hues develop during baking—it’s like giving your pie a lovely sun-kissed glow! This step is simple yet incredibly effective in making your creation look professional!
Equipment You’ll Need:
Now that we’ve gathered all our wonderful ingredients let’s talk about the tools you’ll need to make this culinary masterpiece come together seamlessly! Having the right equipment can transform your cooking experience from daunting into delightful.
- Large pot: A sturdy large pot is essential for boiling those potatoes evenly so they’ll cook through without any sticking or burning at the bottom—this step sets us up nicely for smooth mashing later on!
- Potato masher or ricer: A good-quality masher will help break down those boiled potatoes into creamy perfection—but if you want an ultra-smooth texture akin to clouds on your plate? A ricer is absolutely worth investing in!
- Skillet: You’ll need a reliable skillet for sautéing onions and garlic—they both need enough space to cook properly without overcrowding which could lead them steaming instead.
- Mixing bowl: Choose one large enough to accommodate all those mashed potatoes plus additional fillings—we want ample space when folding everything together without making too much mess!
- 9-inch pie dish: Opting for glass allows you visibility during baking; you’ll be able to see how beautifully golden brown your crust gets while ensuring even cooking throughout!
Now we’re ready to dive into preparing this delightful Irish Potato Pie together—let’s get started on those steps!
Step 1: Preheat Your Oven
First things first: let’s get your oven preheating at 400°F (200°C). Placing your oven rack in the center position ensures even heat distribution throughout baking—which means perfectly cooked crusts every time! Don’t skip this step because placing cold dough into a hot oven is crucial—it activates gluten development within flour leading towards an airy texture instead of soggy bottoms!
Step 2: Boil Those Potatoes
Next up: let’s focus on boiling our cubed russet potatoes until tender! Place them in your large pot along with enough cold water just covering them by about an inch—this ensures thorough cooking without any raw pieces left behind afterwards! Bring everything up to boil over medium-high heat then reduce heat slightly allowing gentle simmer until fork-tender—around 15-20 minutes should do it nicely! Once done draining promptly returns them back into pot but off heat so they don’t continue cooking—nobody wants mushy potatoes here!
Step 3: Mash Until Smooth
Now comes my favorite part—the mashing process! Add ¼ cup softened butter alongside heavy cream directly into drained potatoes then grab either masher or ricer depending on desired texture—you’ll want these babies nice & smooth after all! Combine everything thoroughly until fully incorporated stirring gently but firmly—it should feel almost like liquid silk flowing under pressure…trust me when I say there’s nothing quite like achieving perfect potato mash which sets foundation beneath layers upon layers coming next!
Step 4: Sauté Onion & Garlic
In another skillet warmed over medium heat melt remaining butter before adding finely chopped onions alongside minced garlic followed closely by optional crispy bacon bits if using—a heavenly aroma fills air instantly enticing everyone nearby already anticipating what’s next happening within kitchen walls…after about five minutes onions should become translucent stirring occasionally preventing burning but allowing natural sweetness emerge gradually from within too—this step builds incredible depth enhancing overall flavor profile immensely ultimately leaving guests wanting seconds…maybe even thirds?
Stay tuned as we continue crafting this remarkable Irish Potato Pie filled with love and passion—that’s where true magic happens when aromas mingle together creating unforgettable memories shared around dinner tables everywhere!
The Art of Creating Your Irish Potato Pie
Step 5: A Flavorful Union – Combining the Elements
Now comes the moment where all your hard work begins to pay off. You’ve sautéed the onions and garlic in that luscious melted butter, creating a fragrant base that will bring your Irish Potato Pie to life. Trust me, this step is absolutely paramount! The sweetness of the onions combined with the aromatic garlic will infuse your pie filling with an irresistible depth of flavor. Once you’ve cooked these ingredients until the onions are soft and translucent—about five minutes or so—you’ll want to fold in any optional bacon at this point, stirring for another two minutes to allow those flavors to meld beautifully. But if you’re skipping the bacon (which I totally understand), don’t worry! Your pie will still be stunningly delicious.
Next, take your cooled mashed potatoes and gently fold in that beautiful sautéed mixture along with your shredded sharp Irish cheddar cheese. This is where the magic happens; as you mix everything together, you’ll notice how each ingredient starts to complement one another, transforming into a creamy, cheesy dream. The cheese will begin melting slightly from the warmth of the potatoes, creating a wonderfully indulgent texture. Taste your mixture at this stage—don’t be shy! Adjust the seasoning with salt and pepper as needed; this is your chance to make it just right for you. The balance of creaminess and sharpness from the cheese is what makes this pie truly extraordinary!
Step 6: Crafting a Cozy Crust – Assembling Your Pie
Now let’s talk about assembling your pie and turning that delightful filling into a comforting masterpiece! Roll out your pre-made pie crust on a lightly floured surface until it’s about an eighth of an inch thick—a little thicker if you’re feeling ambitious! Gently place it into a 9-inch pie dish, ensuring it fits snugly into all those lovely corners without stretching or tearing. This step is crucial because a well-fitted crust will hold all that creamy goodness inside while baking, creating that perfect harmony between crust and filling.
Once your crust is in place, take the potato-cheese mixture and generously fill it into the crust, smoothing down the top with a spatula. Look at how beautifully rich and inviting it appears! Don’t rush this step; take a moment to appreciate what you’ve created. It’s important that you smooth out the top because when baked, any uneven surfaces can lead to uneven cooking or bubbling over—definitely not something we want! Next, grab that beaten egg—this golden liquid gold will elevate your pie’s appearance beyond measure. Brush it gently along the edges of your crust; not only does this create an appealing golden sheen once baked, but it also helps seal the crust perfectly against any potential leakage from your filling.
Step 7: The Baking Ritual – Transforming Ingredients into Comfort
With everything assembled and looking divine, it’s time for our Irish Potato Pie to take its journey into the oven! Preheat yours to 400°F (200°C)—this temperature is absolutely ideal for achieving that crispy golden crust while ensuring your filling heats through without becoming overly dry. Place your lovingly crafted pie on the center rack of your preheated oven; positioning matters here because it allows for optimal heat circulation around the entire pie.
You’ll want to bake it for about 35-40 minutes—a little less or more depending on how hot your oven runs (and trust me, each oven has its personality!). Keep an eye out during those last few moments; what you’re looking for is that glorious golden-brown color enveloping your crust—it should be absolutely stunning! As it bakes, you’ll notice tantalizing aromas wafting through your kitchen—the kind that draws family members near like moths to a flame. This step transforms our simple ingredients into something profoundly satisfying and utterly intoxicating!
Step 8: The Anticipation – Cooling Before Slicing
Once you’ve reached that glorious point where golden meets brown, carefully remove your Irish Potato Pie from the oven and allow it to cool slightly—about ten minutes should do the trick. Yes, I know patience can be tough when you’re practically drooling over this delicious creation! But I promise you—it’s essential not to rush this cooling phase. If you slice into it too soon, all that creamy filling might ooze out instead of holding its shape beautifully on your plate.
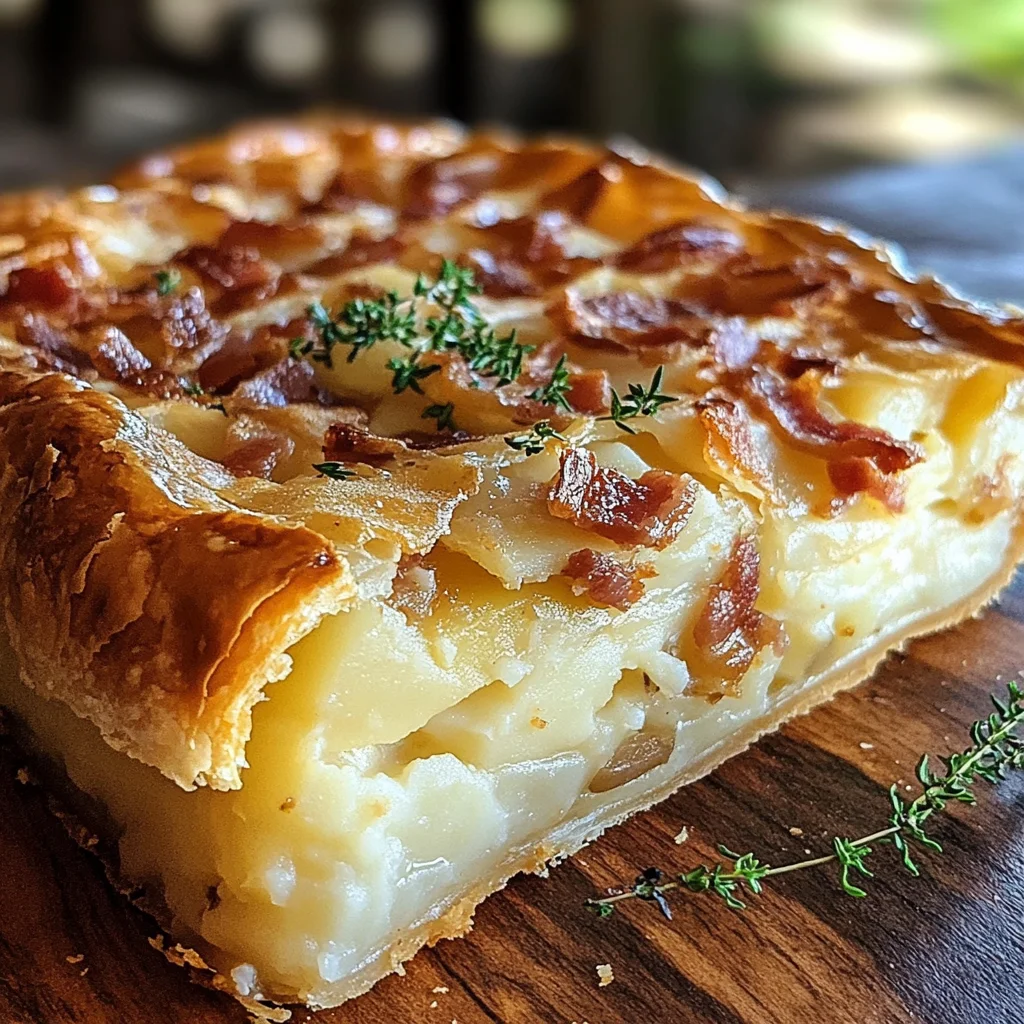
During those precious moments of anticipation, relish in what you’ve accomplished—the smell alone should be enough to make anyone weak at the knees! After letting it rest for about ten minutes, use a sharp knife to cut through that flaky crust and serve yourself a generous slice while it’s still warm. As you lift each piece onto a plate, admire how perfectly defined those layers are—the smooth potato filling contrasting against that crisp exterior is nothing short of mesmerizing.
Final Touches – Serving Your Masterpiece
Step 9: Plating Perfection – Time to Serve!
Now comes perhaps my favorite part—serving up this incredible Irish Potato Pie! As you plate each slice, consider adding fresh herbs like chopped chives or parsley as a garnish; not only does this add a beautiful pop of color but also enhances those earthy flavors we’ve built throughout our cooking process. A dollop of sour cream or crème fraîche can also add an extra layer of richness if you’re feeling indulgent!
As everyone gathers around the table with eager anticipation etched on their faces, take a moment to soak in all that love you’ve put into making this meal. Each bite should echo comfort and warmth—the creamy potato mingling seamlessly with sharp cheese wrapped in that flaky crust creates an experience that’s simply hard to describe without tasting firsthand. And remember—this isn’t just food; it’s tradition simmered down through generations brought alive by every person who shares in its enjoyment.
I hope this recipe becomes as cherished in your household as it has been in mine over countless gatherings filled with laughter and joy. So go ahead—take pride in serving up slices of happiness with each piece of Irish Potato Pie shared among friends and family alike! Bon appétit!
Storage and Enjoyment Tips for Your Irish Potato Pie
Now that you’ve crafted this delightful Irish Potato Pie, let’s talk about how to savor every last bite and ensure that its rich, creamy goodness doesn’t go to waste! This pie is not just a dish; it’s an experience that can be enjoyed over several days or even frozen for future indulgence. The flavors meld beautifully as they rest, making leftovers just as exciting as the first delicious slice. And trust me, every moment spent with this pie is worth its weight in golden, cheesy comfort!
Storing Leftover Irish Potato Pie
When it comes to storing your leftover Irish Potato Pie, the key is to choose the right container to keep all that creamy goodness intact. I recommend using an airtight container or wrapping it tightly in plastic wrap before placing it in the fridge. This way, it will stay fresh for about 3-4 days—though I doubt it’ll last that long once everyone gets a whiff of its irresistible aroma! If you want to maintain the moisture and avoid any drying out, my little trick is to place a slice of bread in with the pie; it acts like a sponge, absorbing excess moisture while keeping your pie perfectly tender. When reheating, I suggest warming individual slices in a preheated oven at 350°F (175°C) for about 15 minutes until warmed through—this method revives that crispy crust and creamy filling beautifully! The flavors deepen even more after storage, so each bite might surprise you with its delightful intensity.
Freezing Irish Potato Pie for Later
If you’re thinking ahead and want to enjoy this comforting dish later on, freezing is such a fabulous option! To freeze your Irish Potato Pie properly, make sure it’s completely cooled first. Then, wrap it tightly in aluminum foil or place it in a freezer-safe container; this will protect against freezer burn and preserve all those luscious flavors. You can store it this way for up to three months. When you’re ready to indulge again, simply thaw it overnight in the fridge before reheating as you would with leftovers or bake straight from frozen at 375°F (190°C), adding some extra time to ensure it’s heated through. The convenience of having a homemade meal ready at your fingertips makes cooking worthwhile—I promise you’ll thank yourself later when you’re craving that comforting taste of home!
Irish Potato Pie

Indulge in the warmth of homemade Irish Potato Pie, a comforting dish that brings rich flavors and heartwarming memories to your table. This delightful pie features creamy mashed russet potatoes, sharp Irish cheddar cheese, and a buttery crust that envelops each layer of goodness. Whether it’s a cozy family dinner or a festive gathering with friends, this potato pie is sure to impress everyone with its inviting aroma and satisfying taste. With every slice, you’re not just serving food; you’re sharing an experience filled with love and nostalgia.
- Prep Time: 20 minutes
- Cook Time: 40 minutes
- Total Time: 1 hour
- Yield: Serves 8
- Category: Main
- Method: Baking
- Cuisine: Irish
Ingredients
- 4 large russet potatoes, peeled and cubed
- 1/2 cup unsalted butter, divided
- 1 cup heavy cream
- 1 cup shredded sharp Irish cheddar cheese
- 1 small onion, finely chopped
- 2 cloves garlic, minced
- 1 tablespoon fresh thyme leaves
- Salt and pepper to taste
- 1 pre-made pie crust (store-bought or homemade)
- 1 egg beaten (for egg wash)
Instructions
- Preheat oven to 400°F (200°C).
- Boil the cubed potatoes in a large pot until fork-tender (15-20 minutes). Drain and return to pot.
- Mash the potatoes with 1/4 cup butter and heavy cream until smooth.
- In a skillet, melt remaining butter; sauté onions and garlic until translucent.
- Fold sautéed mixture into mashed potatoes along with cheddar cheese. Season with salt and pepper.
- Roll out the pie crust in a pie dish; fill it with the potato-cheese mixture and smooth the top.
- Brush edges with beaten egg for a golden finish.
- Bake for 35-40 minutes or until the crust is golden brown.
Nutrition
- Serving Size: 1 slice (145g)
- Calories: 320
- Sugar: 2g
- Sodium: 500mg
- Fat: 18g
- Saturated Fat: 11g
- Unsaturated Fat: 6g
- Trans Fat: 0g
- Carbohydrates: 32g
- Fiber: 3g
- Protein: 8g
- Cholesterol: 55mg