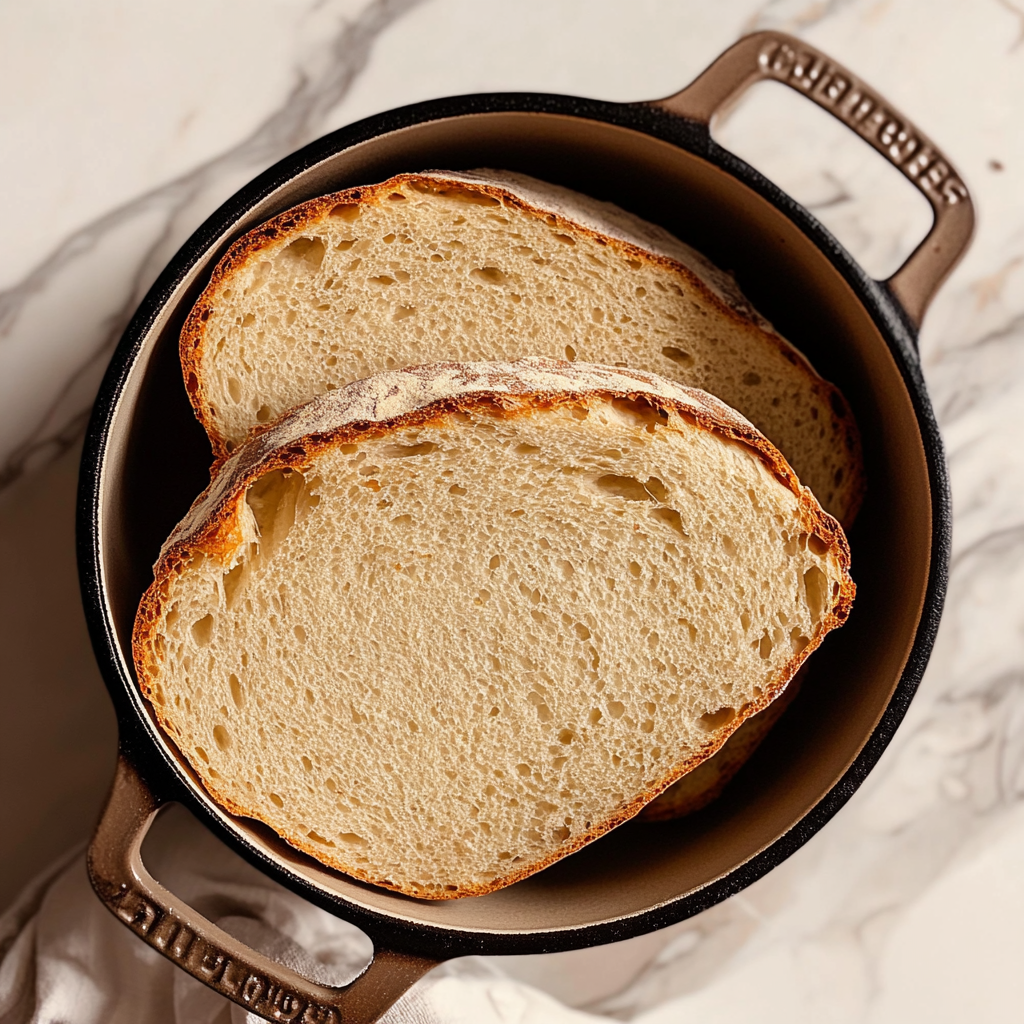
Dutch Oven Sourdough Bread (Master Recipe)
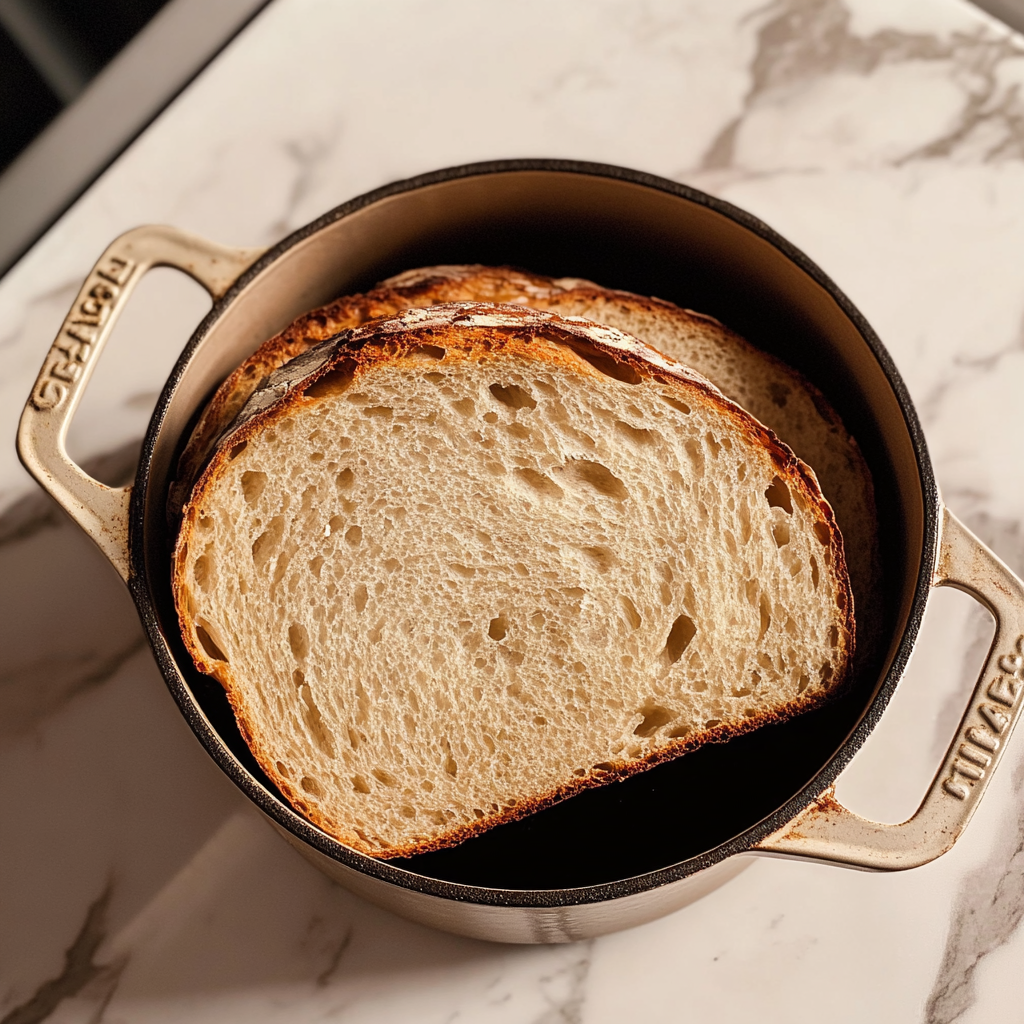
There’s something truly magical about the first bite of freshly baked bread. It’s not just food; it’s a warm embrace, a heartfelt connection to our ancestors who have baked for generations. This Dutch Oven Sourdough Bread (Master Recipe) is more than just a loaf; it’s an experience waiting to unfold in your kitchen. As the crust crisps up and transforms into a symphony of golden-brown perfection, the aroma wafts through your home, wrapping you in nostalgia and comfort. Imagine slicing into that crusty exterior, revealing the soft, airy crumb inside—it’s simply irresistible! I promise you, once you master this recipe, it could become your go-to for any occasion, from a cozy family dinner to an elegant gathering with friends.
The beauty of sourdough is its delightful unpredictability alongside its profound simplicity. With just four ingredients—organic bread flour, water, sourdough starter, and sea salt—you can create something utterly extraordinary. This recipe serves as my master guide to Dutch oven sourdough bread. The whole process is filled with anticipation and joy as you witness the dough transform under your hands—a true testament to the power of fermentation and time. Whether you’re looking to impress guests or simply want to indulge in homemade goodness, this bread will undoubtedly elevate your culinary repertoire.
Dutch Oven Sourdough Bread (Master Recipe): A Journey Through Time
Ah, my dear friend! As we embark on this adventure together, let’s gather our ingredients and prepare for an enriching experience that will fill our homes with warmth and love. There’s nothing quite like the satisfaction of making your own bread from scratch—it’s like breathing life into a simple mix of flour and water. Each step carries its weight in tradition while allowing room for personal expression.
Ingredients:
As we dive into this baking journey, let’s take a moment to appreciate each ingredient that plays a pivotal role in our Dutch Oven Sourdough Bread (Master Recipe). These components are not mere items on a list; they are essential players in creating that perfect loaf.
- 500 grams Organic Bread Flour. This flour is the backbone of our recipe; it’s high in protein which translates into gluten strength—the secret behind that beautiful rise and chewy texture of sourdough. When purchasing flour, look for organic options free from additives; they yield better flavor and quality. If you find yourself without bread flour, you can substitute with all-purpose flour but expect slightly different results in texture and rise.
- 300 grams Water. Water might seem simple enough, but it’s crucial for hydration and activating gluten development within the dough. I recommend using filtered or spring water if possible—tap water can contain chlorine or other chemicals that might inhibit yeast activity. The temperature of the water should be cool but not cold; around room temperature works beautifully as it encourages fermentation without shocking your starter.
- 100 grams Sourdough Starter. Your sourdough starter is like a living organism—it’s a blend of wild yeast and bacteria that gives sourdough its signature tangy flavor profile. Make sure your starter is active and bubbly before using it; this ensures that your dough rises beautifully during fermentation. If you’re new to sourdough baking, there are plenty of resources available to help you cultivate a strong starter at home!
- 10-15 grams Sea Salt. Salt enhances flavor but also plays an important role in regulating yeast activity during fermentation. Too much salt can inhibit rising while too little can lead to bland bread. Opt for fine sea salt as it’s easier to dissolve throughout the dough compared to coarse varieties; this ensures even flavor distribution.
Equipment You’ll Need:
Before we get our hands dirty kneading dough, let’s talk about some key equipment that will make our baking process smoother and infinitely more enjoyable! While these tools aren’t ingredients per se, they serve as invaluable aids on our journey toward crafting the perfect loaf of Dutch oven sourdough.
- Dutch Oven: This heavy pot retains heat beautifully during baking, creating an ideal environment for baking bread by trapping steam released from the dough. The steam helps develop that coveted crispy crust while maintaining moisture within the loaf—something no ordinary pan can achieve! If you don’t have a Dutch oven on hand, you could use any oven-safe pot with a lid or even bake on a pizza stone placed inside a preheated oven.
- Mixing Bowl: A large mixing bowl is essential for combining your ingredients without worrying about spilling over the edges! Opt for glass or stainless steel bowls as they’re non-reactive and won’t alter flavors over time.
- Parchment Paper: This handy tool makes transferring your shaped dough into the hot Dutch oven easier while minimizing sticking risks! It also aids in clean-up afterward—win-win!
- Kitchen Scale: Trust me when I say this is non-negotiable! Baking is all about precision; measuring ingredients by weight yields far more reliable results than volume measurements alone.
With our ingredients gathered and equipment ready at hand, let’s dive deeper into preparing our wonderful Dutch Oven Sourdough Bread (Master Recipe).
Step 1: The Beautiful Beginnings
It’s best to start this exciting process before 9 am so we have ample time for fermentation magic to happen throughout the day! Begin by taking out your mixing bowl—a large one will give us room to work—and combine your active sourdough starter along with organic bread flour, sea salt, and water right inside it. Use a sturdy spoon or spatula initially until everything comes together into one cohesive mixture resembling shaggy dough—the kind that feels just slightly sticky under your fingertips but not overly wet!
This step matters because it lays down the foundation upon which everything else builds; mixing these components effectively activates gluten formation within our dough right off the bat—essentially setting us up for success later on when we knead! Don’t worry if it looks messy at first; trust me when I say some chaos now leads straight towards an exquisite loaf later!
Step 2: Kneading Into Perfection
Once combined into one mass resembling rough dough balls clinging together yet still somewhat tacky—you’ll want to knead carefully until smoothness emerges from within those creases! Turn out this mixture onto your clean countertop (which we’ll mist lightly beforehand!) so things don’t stick too badly while working through each fold gently yet decisively with both palms pressing against opposing sides intermittently until fully formed into one sleek ball after several minutes—around eight should do nicely!
Kneading isn’t merely physical activity—it’s where magic happens! As we engage those muscles working through this pliable mass repeatedly until elasticity becomes apparent beneath fingertips—not only does it help build structure within strands created via hydration—but also lends itself further towards developing flavors as natural fermentation occurs more actively during rest times following subsequent folds later down our timeline here too!
Step 3: The Resting Phase
After kneading diligently (and perhaps enjoying the tactile nature involved), place that lovely ball back into its bowl—don’t forget to mist both sides lightly—to ensure hydration maintains throughout its resting phase ahead over shorter intervals separated by stretches/folds thereafter every thirty minutes leading up until two hours pass by comfortably before checking back again soon thereafter!
Allowing ample time for resting allows gluten structures created earlier space needed without excess tension building unnecessarily within them either—this means less risk cropping up regarding tearing away once shaping occurs later down road ahead too! Remember though: patience pays off immensely here since each passing minute builds flavor depth significantly while helping those air pockets expand gradually forming lighter textures ultimately revealed once baked properly too!
Step 4: Repetition Makes Mastery
Now comes time again after letting sit undisturbed briefly whilst keeping eyes peeled closely throughout intervals marking two-hour spans until another round arrives upon concluding stretches/folds repeated similar manner described above previously mentioned earlier efforts applied diligently toward dough reforming cycles established here today altogether resulting finally becoming gorgeous forms witnessed nearby…
With every stretch & fold executed correctly ensuring all elements incorporated thoroughly throughout entire batch means achieving lofty heights promised ahead yielding great taste ultimately delivering satisfaction worth remembering fondly afterward long past final bites enjoyed together forevermore shared amongst loved ones gathered ‘round table sharing stories shared over meals prepared lovingly prepared meticulously crafted expertly done just right every single time guaranteed happiness achieved through hard work invested thoroughly here today…
And there you have it—the first few steps toward mastering your own Dutch Oven Sourdough Bread (Master Recipe)! Each step taken builds upon itself as we continue forward together further down road ahead bringing us closer towards creating something truly extraordinary worth celebrating endlessly along way… Stay tuned because there’s so much more good stuff yet awaiting discovery just around corner ahead soon enough!
Step 5: The Art of Stretching and Folding
Ah, stretching and folding! This step is where the magic begins to happen. It’s not just a method; it’s a dance between you and your dough, an intimate exchange that helps develop strength in your loaf without the need for excessive kneading. After letting your dough rest for 30 minutes, it’s time to get your hands messy again. Gently mist your countertop with water, then turn out your dough, which should feel soft yet slightly tacky—a sign that the fermentation process is beginning to work its wonders. Now, with slightly wet hands (a trick to prevent sticking), stretch the top of the dough over itself toward the center, then fold one side over the other like you’re tucking it into bed. This technique is crucial because it creates surface tension that will help your bread rise beautifully later on.
What you’re achieving here is a gradual strengthening of gluten—those magical proteins that give bread its structure and chewiness. As you perform this stretch-and-fold routine every 30 minutes over the next several hours, you’re allowing air pockets to form within the dough, enhancing its texture and flavor immensely. I promise you; this is where patience pays off! Watching your dough transform from a shaggy mass into a smooth, supple ball is a profoundly satisfying experience. Just remember: each fold brings life to your bread, so take your time and embrace this stage fully.
Step 6: The Importance of Resting
Now that you’ve given your dough some love through stretching and folding, it’s time for another well-deserved rest—this time for two whole hours. You might be wondering why we need all this resting time. Well, think of it as allowing the dough to catch its breath after all that hard work! During this period of fermentation, the yeast continues to multiply and create carbon dioxide gas, which gives rise to those lovely air pockets we adore in sourdough bread. The longer you allow it to rest, the more complex flavors develop thanks to fermentation byproducts.
As you let the dough rest in its bowl (be sure it’s still seam side down), resist any urge to rush things! Give yourself permission to savor this moment; perhaps enjoy a cup of tea or dive into a good book. Just keep an eye on it—after two hours, you should see visible signs of growth; it might have doubled in size or at least puffed up nicely. If not, don’t fret! Every kitchen is different due to temperature and humidity variations. Each little bubble forming in that dough is like a promise waiting to be fulfilled!
Step 7: Repeat for Success
After letting your dough bask in its glory for another two hours post-resting session, we’re back at it with more stretching and folding! Yes, this may seem repetitive but trust me—this repetition builds character in your loaf! Don’t forget about using that trusty spray bottle again; mist both your countertop and the dough’s surface before turning it out onto the wet counter once more. With flour lightly dusted on top of everything (including your hands), gently stretch and fold again just as you did before.
This step isn’t just about physical manipulation; it’s about coaxing out flavor while developing gluten strands further until they weave together into something truly extraordinary—a glorious network capable of holding all those beautiful bubbles created during fermentation. By employing these folds multiple times throughout our process today, we’re ensuring that our final product has incredible structure along with captivating taste notes infused from our starter’s unique personality. So go ahead—embrace repetition like an old friend!
Step 8: Preparing for the Bake
As we approach baking day (or rather baking night!), prepare yourself for an exhilarating phase that will yield intoxicating aromas wafting through every corner of your home! Before diving into preheating that dutch oven at 450°F (232°C)—the ideal temperature for creating a perfect crust—you’ll want everything meticulously set up so there are no hiccups as we transition from proofing basket to oven.
To start off this transformative journey toward golden-brown perfection: sprinkle some flour onto both your counter surface and generously coat any proofing baskets you’re using if desired (I love adding seeds or grains here for added texture!). Once preheating begins—don’t skip this crucial detail—allow at least 30 minutes so all parts reach optimal heat levels consistently throughout when we finally place our beloved boule inside later on.
Just imagine it now: when this loaf emerges from its steamy cocoon about an hour later—we’re talking about crusty exteriors contrasting with pillowy interior goodness—that tantalizing crackle as you slice through will captivate everyone around you! So once again: patience is key here—trust me on this one!
Conclusion:
As we wrap up our journey through mastering this Dutch oven sourdough bread recipe together, I’m filled with excitement thinking about how you’re going to create your very own loaf at home! There’s something truly magical about this process—the way simple ingredients transform into a stunning piece of artisan bread filled with flavor and character. The combination of crispy crust and soft interior creates an experience that’s profoundly satisfying; it really elevates any meal or moment shared around the table. This recipe isn’t just about baking; it’s about creating memories and savoring life’s small joys.
I wholeheartedly believe this Dutch oven sourdough bread is a must-try for everyone—not only for its unparalleled taste but also for the joy of crafting something by hand. Imagine pulling a golden-brown boule from the oven; it’s not just any loaf—it’s an expression of love and dedication! Whether you’re serving it during family gatherings, enjoying it with friends over brunch, or simply indulging in a quiet evening snack with butter melting into warm slices, this bread shines on every occasion.
For serving suggestions that will take your experience to another level, imagine savoring one with creamy avocado spread topped with sea salt and chili flakes—a match made in heaven! For an afternoon pick-me-up, pair slices of this delightful sourdough with rich roasted tomato soup or perhaps even some homemade hummus sprinkled with fresh herbs. And if you’re seeking something indulgent? A toasted piece slathered with garlic herb butter is simply divine! Each bite offers layers of flavor that dance harmoniously on your palate.
Feeling adventurous? This recipe is wonderfully adaptable—you could try adding herbs like rosemary or thyme right into the dough for an aromatic twist or incorporate seeds such as sunflower or pumpkin for added texture and nutrition. If you’re in the mood for something sweet, consider mixing dried fruits like cranberries or apricots into the dough before baking; they bring an utterly intoxicating sweetness that contrasts beautifully against the hearty base. I invite you to explore these variations and put your unique spin on this master recipe. I can’t wait to hear about your experiences—so dive into this adventure of baking and share your creations! Let’s connect over our love for good food!
Dutch Oven Sourdough Bread (Master Recipe)
Experience the joy of baking with this Dutch Oven Sourdough Bread, a recipe steeped in tradition yet simple enough for beginners. With just four key ingredients—organic bread flour, water, sourdough starter, and sea salt—you’ll create a loaf that boasts a crispy crust and airy crumb, perfect for any occasion. As it bakes, the tantalizing aroma will fill your kitchen, inviting everyone to gather around. This master recipe not only teaches essential baking techniques but also allows for creativity; feel free to add herbs or seeds to personalize your loaf. Whether it’s a cozy family dinner or an elegant gathering with friends, this sourdough bread will elevate your culinary repertoire.
- Prep Time: 30 minutes
- Cook Time: 60 minutes
- Total Time: 1 hour 30 minutes
- Yield: Approximately 12 servings 1x
- Category: Bread
- Method: Baking
- Cuisine: Traditional
Ingredients
- 500 grams Organic Bread Flour
- 300 grams Water
- 100 grams Sourdough Starter
- 10–15 grams Sea Salt
Instructions
- In a large mixing bowl, combine the active sourdough starter with organic bread flour and sea salt. Gradually add water until you achieve a shaggy dough.
- Knead the dough on a lightly floured surface for about 8 minutes until smooth and elastic.
- Place the dough in a lightly misted bowl, cover it, and let it rest for two hours, performing stretch-and-fold techniques every 30 minutes.
- Preheat your Dutch oven to 450°F (232°C). Once ready, gently shape the dough and place it on parchment paper.
- Score the top of the loaf before transferring it into the hot Dutch oven. Bake covered for 30 minutes then uncovered for an additional 20-30 minutes until golden brown.
- Allow to cool completely before slicing to ensure optimal texture.
Nutrition
- Serving Size: 1 slice (50g)
- Calories: 130
- Sugar: 0g
- Sodium: 180mg
- Fat: 0.5g
- Saturated Fat: 0g
- Unsaturated Fat: 0g
- Trans Fat: 0g
- Carbohydrates: 27g
- Fiber: 1g
- Protein: 4g
- Cholesterol: 0mg