Brown Sugar Pop Tart Cookies: A Delicious Twist on a Classic Treat
There’s something magical about baking, isn’t there? It’s not just about mixing flour and sugar; it’s a heartfelt experience that envelops your senses, igniting nostalgia and creating new memories. When I think about my childhood, I can still recall the intoxicating aroma of freshly baked cookies wafting through the air, beckoning me into the kitchen like a warm hug. Today, I’m beyond excited to share with you a delightful recipe that perfectly marries tradition with a modern twist: Brown Sugar Pop Tart Cookies: A Delicious Twist on a Classic Treat. These cookies are not just confections; they embody joy and comfort, transforming any ordinary moment into something extraordinarily sweet.
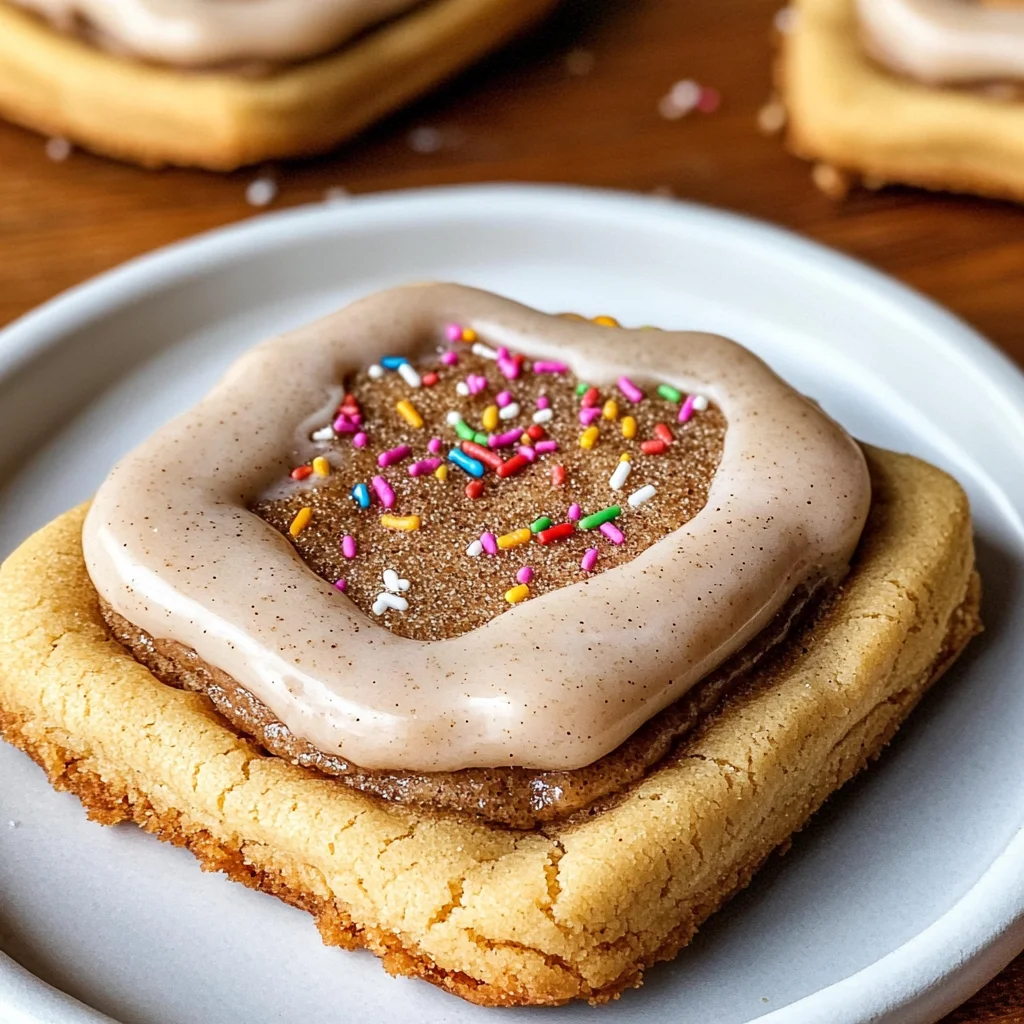
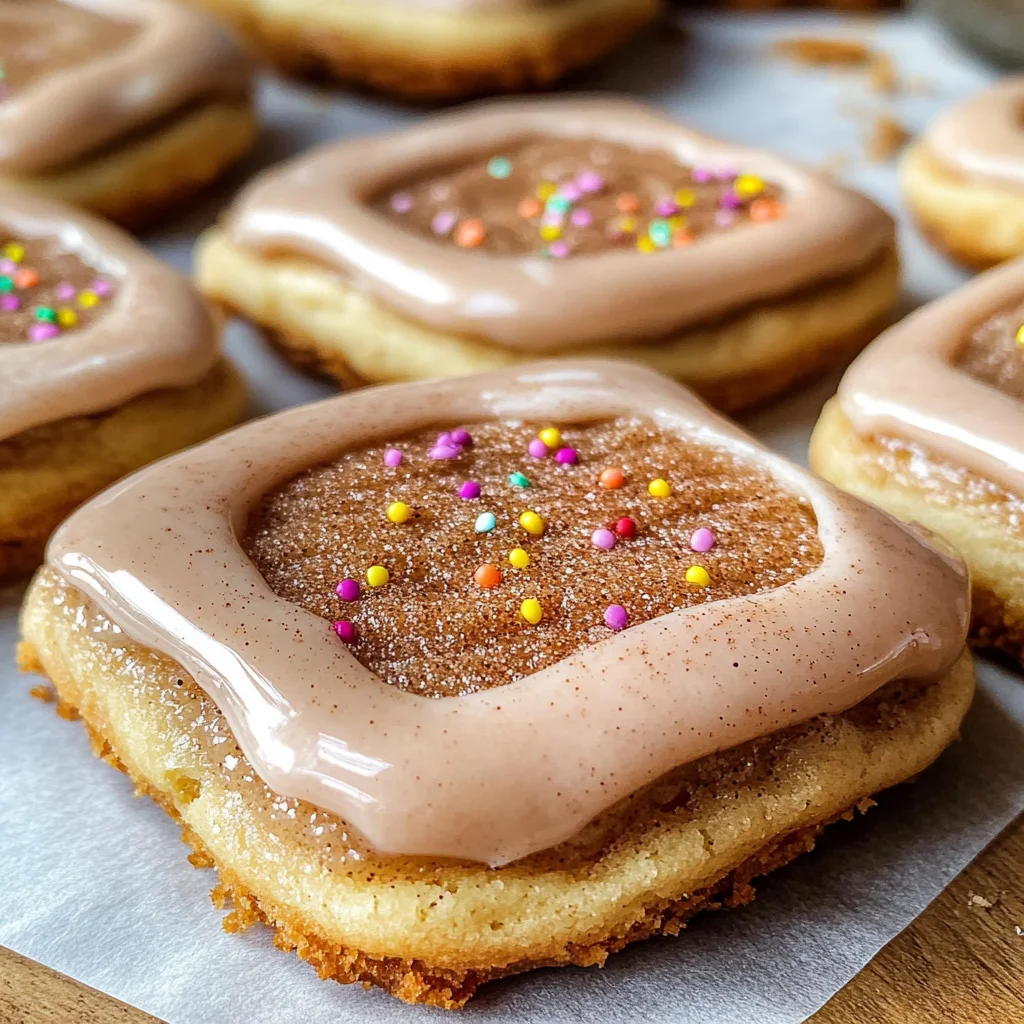
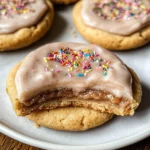
Now, imagine biting into a soft cookie that melts in your mouth, revealing a gooey brown sugar and cinnamon filling that dances on your taste buds. Topped with a luscious icing and perhaps a sprinkle of colorful decor, these cookies are perfect for gatherings or simply to indulge yourself after a long day. The greatest part? They’re easy to make and will have your friends raving about them long after the last crumb has disappeared. So let’s embark on this delicious journey together!
Ingredients:
Before we dive into the enchanting world of baking these Brown Sugar Pop Tart Cookies, let’s take a moment to gather our ingredients. Each component is crucial to crafting this delightful treat, so pay close attention as we explore what makes each one special.
- 1 cup (2 sticks or 226g) unsalted butter, softened to room temperature. This ingredient is absolutely paramount in achieving that light and airy texture we’re aiming for in our cookies. When you cream the butter properly with the sugars—allowing them to meld into that fluffy goodness—it creates tiny air pockets that will expand during baking, resulting in cookies that are perfectly tender yet hold their shape beautifully. If your butter is too cold, it won’t cream effectively; if it’s melted, your cookies may spread too much. Opt for high-quality butter when possible; European-style butter has higher fat content and can elevate your cookies to new heights.
- 1 cup brown sugar, packed. Brown sugar brings profound depth and moisture to our cookies. Its rich molasses flavor not only sweetens but also adds that quintessential chewiness we all adore. Be sure to pack it tightly in the measuring cup; this ensures you get the right balance between sweetness and structure. You could use light or dark brown sugar based on your preference—the darker variety will impart even more caramel notes.
- 1/2 cup granulated sugar. This sugar provides sweetness while helping achieve that coveted crisp edge around each cookie. The combination of granulated sugar with brown sugar creates an intriguing contrast in texture and flavor that makes each bite irresistible.
- 2 large eggs. Eggs play an essential role in binding the ingredients together while adding moisture. They also contribute to the cookie’s structure during baking, allowing them to rise beautifully without collapsing into flat discs of disappointment! Room temperature eggs mix more easily into batters—don’t rush this step by using eggs straight from the fridge.
- 1 teaspoon vanilla extract. Ahh, vanilla—the magic potion of baking! This extract enriches the overall flavor profile of our cookies by adding warmth and depth that’s simply unmatched. Always choose pure vanilla extract over imitation for its superior quality; trust me when I say it makes all the difference.
- 3 cups all-purpose flour. Flour is our main building block here; it provides structure while ensuring we achieve that perfect balance between soft and chewy textures. Make sure you spoon it into your measuring cup instead of scooping directly from the bag—this prevents packing too much flour which can lead to dry cookies.
- 1 teaspoon baking powder. Baking powder acts as our leavening agent here, creating those lovely fluffy textures we crave in cookies by producing bubbles as they bake. Make sure it’s fresh—old baking powder won’t give you that lift we’re after!
- 1/2 teaspoon baking soda. Similar to baking powder but working differently within our dough, this ingredient helps with browning while contributing an extra touch of lift as well.
- 1/2 teaspoon salt. Salt balances out sweetness like nothing else can—it highlights flavors and prevents everything from tasting flat or overly sugary.
- 1 cup brown sugar (for filling). Yes! We need brown sugar again for our delectable filling! Just like before, it contributes moisture and flavor but this time it becomes gooey goodness when mixed with cinnamon—a match made in dessert heaven!
- 1 tablespoon cinnamon. Cinnamon is where we add warmth and spice; it transports us straight into cozy autumn afternoons filled with laughter and love around family tables.
- 1/4 cup milk. Milk serves multiple purposes here: it moistens our filling while ensuring it’s spreadable—but be cautious not to make it too runny!
- 1 cup powdered sugar (for icing). This sweet dusting transforms our otherwise simple cookie into something extraordinary! It adds sweetness without overwhelming flavors—plus who doesn’t love a drizzle of icing?
- 1–2 tablespoons milk (for icing consistency). Just like before with regular milk—this helps achieve that silky smooth texture necessary for drizzling over each cookie flawlessly.
- Sprinkles (optional, for decoration). While sprinkles aren’t necessary for flavor—they bring such joy visually! They transform these cookies from delightful treats into celebratory bites worth sharing at any gathering!
Equipment You’ll Need:
Now that we’ve gathered our ingredients—the heart of this recipe—let’s talk about what tools you’ll need to make this experience smoother and more enjoyable! Having the right equipment is essential in achieving success when you’re crafting something as delightful as Brown Sugar Pop Tart Cookies: A Delicious Twist on a Classic Treat.
- **Mixing Bowls – A good set of mixing bowls is crucial for organizing your ingredients correctly during prep time—you want enough space to whisk up those eggs without sending them flying everywhere! Look for medium-sized bowls made from stainless steel or glass since they won’t react negatively with acidic ingredients like vinegar if needed later down the line.”
- **Electric Mixer – While you could mix by hand using a spatula or wooden spoon (which can certainly build arm strength), an electric mixer saves time—and energy! Creaming butter takes some serious elbow grease if done manually; trust me—it’s worth investing in one if you plan on doing any serious baking.”
- **Measuring Cups & Spoons – Precision is key when it comes down measuring ingredients accurately before combining them together! Invest in both dry measuring cups (for flour/sugar) along with liquid measuring cups designed specifically for liquids like milk.”
- **Rolling Pin – For rolling out dough evenly between two sheets of parchment paper—this tool ensures uniform thickness across all layers so they bake evenly!
- **Baking Sheet – A sturdy baking sheet lined with parchment paper ensures even heat distribution while preventing sticking issues during transfer from oven-to-cooling rack!”
With everything prepared—the stage is set—we are closer than ever now toward indulging ourselves in these heavenly Brown Sugar Pop Tart Cookies: A Delicious Twist on a Classic Treat!
Step 1: Creaming Butter & Sugars
Let’s start by creaming together our softened unsalted butter along with both brown sugar and granulated sugar until light and fluffy—a process known as creaming which is vital for achieving those airy textures throughout every bite! This should take around 2–3 minutes using an electric mixer set at medium speed until you see pale yellow streaks forming—a sign indicating air has been incorporated successfully into this mixture already!
As tempting as it might be—resist rushing through this step! Properly creamed butter helps create those lovely little pockets necessary during baking which leads towards fluffiness rather than dense cookie disasters later down line…you’ll thank me once you bite down onto one of these beauties!
Step 2: Adding Eggs & Vanilla
Next up—we’ll be adding eggs one at time followed closely by vanilla extract stirring until fully incorporated after each addition—which adds richness alongside bringing flavors together harmoniously within batter itself.”
This step plays another key role since eggs provide moisture along binding properties required ensuring stability during baking plus helping achieve delectable chewiness throughout final product!
Step 3: Combining Dry Ingredients
In separate bowl—combine all-purpose flour alongside salt along both leavening agents namely baking powder & soda whisking gently until evenly distributed throughout mixture before gradually incorporating slowly into wet mixture with mixer running at low speed allowing everything come together seamlessly without creating any lumps whatsoever!”
Watch closely here—you want dough just combined rather than overmixing which could lead towards tough result later down line…(nobody wants tough cookies!).
Step 4: Preparing Filling
In small bowl meanwhile combine remaining amount (for filling)of brown-sugar alongside ground cinnamon pouring over prepared surface area where we’ll soon place assembled rectangles ready fill delicious gooey concoction inside!”
This step adds another layer complexity flavor-wise while ensuring exciting surprise awaits anyone fortunate enough discover hidden treasures safely tucked away within each cookie once baked!”
Step 5: Rolling Out the Dough – The Heart of Your Cookies
Now that you’ve crafted your delightful cookie dough, it’s time to transform it into something truly spectacular. Take one of the portions of dough and place it on a well-floured surface. The flour is crucial here; it prevents sticking and allows for easy handling. As you begin to roll out the dough, aim for about a ¼-inch thickness—this is the sweet spot! If your dough feels a bit sticky, don’t hesitate to sprinkle a little more flour on top. This step is more than just flattening; it’s about creating a canvas that will hold your filling.
Why is the thickness so important? A too-thin cookie can lead to crispness rather than that soft, chewy bite we crave, while too thick can mean undercooked centers. So take your time with this! Use gentle, even pressure as you roll, moving from the center outward. You want to maintain an even shape—after all, those perfectly rectangular cookies will not only look stunning but will also bake uniformly. Once you have achieved that beautiful thickness and shape, grab a sharp knife or pizza cutter and cut them into rectangles measuring about 3 by 4 inches—perfect for holding all that luscious filling! Trust me on this; having uniform sizes helps them bake evenly and ensures every bite is just as delicious as the last.
Step 6: Creating the Cinnamon Filling – A Flavor Explosion
Now that we have our cookie rectangles ready, let’s turn our attention to that utterly intoxicating cinnamon filling! In a small bowl, combine 1 cup of brown sugar with 1 tablespoon of ground cinnamon. Mix these two ingredients together until they are fully incorporated; this will ensure that every single bite bursts with flavor. Why brown sugar? Its rich molasses undertones provide depth and complexity to the filling that granulated sugar simply cannot replicate. It’s like liquid gold when combined with cinnamon—it brings warmth and sweetness in perfect harmony.
Once you’ve mixed your filling, let’s talk about assembly! Make sure you keep this mixture handy because it’ll be crucial for layering between your cookie rectangles. I promise you, taking the time to ensure an even distribution of this filling when assembling will make all the difference in flavor—you want every nook and cranny filled with this symphony of sweetness! Just remember not to overfill; about a tablespoon in the center of each rectangle should do the trick, allowing room for expansion as they bake without spilling over.
Step 7: Assembling Your Cookies – The Art of Creation
This is where your Brown Sugar Pop Tart Cookies really start to take shape! Lay one rectangle down on your prepared surface and add approximately one tablespoon of that delectable cinnamon filling right in the center—don’t go too close to the edges; we want our cookies sealed tight! Next, gently place another rectangle on top and press down around the edges to seal them together securely. This step is absolutely paramount because sealing prevents any leakage during baking and creates that perfect pocket of gooey goodness inside.
To be extra cautious—and trust me, this effort pays off—use a fork to crimp along the edges of each assembled cookie. Not only does this create an adorable decorative touch reminiscent of traditional pop tarts, but it also reinforces those seals even further. As you crimp away, you’ll notice how satisfying it feels when those edges come together snugly—it’s like giving each cookie a warm hug before they embark on their baking adventure!
Step 8: Baking Your Perfect Brown Sugar Pop Tart Cookies
Now comes the moment we’ve all been waiting for: baking these beauties! Preheat your oven to 350°F (175°C) if you haven’t already done so—it’s crucial for achieving that ideal golden-brown color while ensuring they bake evenly throughout. Line your baking sheet with parchment paper; this not only prevents sticking but also allows for easy clean-up after indulging in these delightful treats.
Place your assembled cookies onto the baking sheet with enough space in between them (about two inches apart) because they will spread slightly during baking—a normal occurrence! Bake them for about 12-15 minutes until they are lightly golden around the edges but still soft in the center; remember, they’ll firm up as they cool down on the sheet afterward! Don’t rush this step—taking them out at just the right moment is vital for achieving that perfect balance between chewy and crispy.
While they’re baking away and filling your kitchen with an utterly intoxicating aroma—seriously, I wish you could smell it—you can prepare yourself for what comes next: icing those glorious cookies!
Final Touches: Icing Your Brown Sugar Pop Tart Cookies
Once those cookies have cooled on the baking sheet for about five minutes (allowing them to set just enough), carefully transfer them onto a wire rack to cool completely. I know it’s tempting to dig in right away—but patience here means achieving a smooth icing finish that’s both beautiful and delicious! For our icing, whisk together 1 cup of powdered sugar with 1-2 tablespoons of milk until smooth; you’re aiming for a consistency that’s thick enough to coat but not so runny that it drips off.
Once combined perfectly (a sign that you’ve nailed it is when it falls from your whisk in ribbons), drizzle or spread generously over each cooled cookie using either a spoon or piping bag if you’re feeling fancy—go wild with creativity here! And if you’re like me and enjoy a bit of fun, top off your cookies with colorful sprinkles—they add such joy and whimsy! After all that effort crafting these treats, seeing their vibrant colors makes my heart sing!
So there you have it—your Brown Sugar Pop Tart Cookies are now ready to be devoured! Whether it’s a cozy gathering or simply treating yourself after a long day, these cookies bring joy in every bite. I promise you won’t regret making an extra batch because everyone will ask for seconds—or thirds! Enjoy every crumb; they’ve earned their place at your table!
Storage and Enjoyment Tips for Your Brown Sugar Pop Tart Cookies: A Delicious Twist on a Classic Treat
Now that you’ve created these irresistible Brown Sugar Pop Tart Cookies, it’s time to revel in the joy of sharing, savoring, and even storing some for later enjoyment. I can just imagine the smiles on your friends’ faces as they take their first bite! But let’s be real—sometimes we find ourselves with a few leftovers. Don’t fret; these cookies are just as delightful days later, if you store them correctly!
Storing Leftover Brown Sugar Pop Tart Cookies: A Delicious Twist on a Classic Treat
To keep your cookies fresh and delectable, I recommend using an airtight container. This is essential because it locks in that soft, chewy texture and prevents them from becoming stale. Store them at room temperature for up to five days, but trust me—you might find they disappear faster than that! For an extra tip to maintain their moisture, consider adding a slice of bread into the container. It may sound quirky, but the bread will absorb any excess air and help keep your cookies wonderfully soft. As for taste after storage, they retain their incredible flavors beautifully; the cozy notes of brown sugar and cinnamon intensify over time, creating an even more profound experience with each bite. If you want to enjoy them warm again, pop them in the microwave for about 10-15 seconds—just enough to bring back that freshly baked feeling!
Freezing Brown Sugar Pop Tart Cookies for Later
If you find yourself with an abundance of cookies—or simply want to prepare ahead—freezing is a fantastic option! To freeze them properly, make sure they’re completely cooled first; then layer them between sheets of parchment paper in an airtight container or freezer bag. This method prevents them from sticking together and makes it easy to grab just one (or two… or three) when the craving strikes! They’ll keep well in the freezer for up to three months without losing their flavor or texture. When you’re ready to indulge again, simply let them thaw at room temperature or warm them up in the oven for a few minutes. Honestly, there’s something so satisfying about having a stash of these cookies tucked away for those late-night cravings or surprise guests! The convenience factor is absolutely unbeatable—who doesn’t love being able to whip out homemade cookies whenever they desire?
Brown Sugar Pop Tart Cookies: A Delicious Twist on a Classic Treat
Indulge in Brown Sugar Pop Tart Cookies: A Delicious Twist on a Classic Treat that combines sweet filling and creamy icing. Bake today!
- Prep Time: 20 minutes
- Cook Time: 15 minutes
- Total Time: 35 minutes
- Yield: Approximately 24 cookies 1x
- Category: Dessert
- Method: Baking
- Cuisine: American
Ingredients
- 1 cup unsalted butter, softened
- 1 cup brown sugar, packed
- 1/2 cup granulated sugar
- 2 large eggs
- 1 teaspoon vanilla extract
- 3 cups all-purpose flour
- 1 teaspoon baking powder
- 1/2 teaspoon baking soda
- 1/2 teaspoon salt
- 1 cup brown sugar (for filling)
- 1 tablespoon cinnamon
- 1/4 cup milk (for filling)
- 1 cup powdered sugar (for icing)
- 1–2 tablespoons milk (for icing consistency)
- Sprinkles (optional)
Instructions
- Preheat oven to 350°F (175°C).
- Cream together softened butter, brown sugar, and granulated sugar until light and fluffy.
- Add eggs one at a time and mix in vanilla extract.
- In a separate bowl, whisk together flour, baking powder, baking soda, and salt. Gradually mix into wet ingredients until combined.
- Roll out dough to about a ¼-inch thickness; cut into rectangles measuring approximately 3 by 4 inches.
- For the filling, combine brown sugar and cinnamon in a bowl. Place filling in the center of half of the cookie rectangles; top with remaining rectangles and seal edges using a fork.
- Bake for about 12–15 minutes or until lightly golden.
- Cool on wire racks before icing with a mixture of powdered sugar and milk.
Nutrition
- Serving Size: 1 cookie (40g)
- Calories: 180
- Sugar: 14g
- Sodium: 90mg
- Fat: 7g
- Saturated Fat: 4g
- Unsaturated Fat: 2g
- Trans Fat: 0g
- Carbohydrates: 26g
- Fiber: <1g
- Protein: 2g
- Cholesterol: 30mg