2-Ingredient Biscoff Mousse Recipe
There’s something truly magical about the way certain recipes can evoke memories and feelings, isn’t there? You know, that rush of nostalgia when you taste something that reminds you of a happy moment—maybe a family gathering or a cozy night in with friends. The 2-Ingredient Biscoff Mousse Recipe is one of those enchanting creations that captures the essence of indulgence while being so incredibly simple to make. The moment you take your first bite, it’s like being wrapped in a warm embrace; it’s creamy, rich, and possesses an utterly intoxicating flavor that dances on your palate. And the best part? It only takes ten minutes to whip up this decadent delight! Imagine serving this at your next gathering; I promise you it will leave everyone guessing how you managed to create something so extraordinary with just two ingredients.
This mousse isn’t just a dessert; it represents a delightful evolution of flavors inspired by the beloved Biscoff cookies we all know and love. Those crispy little wonders have taken the world by storm with their caramelized sweetness and subtle spice, and now, combined with silky whipped cream, they transform into an airy cloud of bliss. This recipe is perfect for any occasion—be it an intimate dinner for two or an elaborate celebration with friends. It’s an exquisite way to showcase how simple ingredients can lead to profound satisfaction in the kitchen. Trust me on this: once you try making this mousse, you’ll find yourself daydreaming about its luscious texture and comforting taste long after the last spoonful has disappeared.
2-Ingredient Biscoff Mousse Recipe: A Delightful No-Bake Wonder
What could be more delightful than creating a dessert that feels both gourmet and effortless? This 2-Ingredient Biscoff Mousse Recipe is exactly that—a no-bake wonder that comes together in mere moments yet tastes like it belongs in a five-star restaurant. Whether you’re treating yourself after a long week or surprising someone special with a sweet gesture, this mousse will undoubtedly bring joy to your table.
Ingredients:
As we embark on this culinary journey together, let’s explore the essential ingredients that make this mousse such a heavenly treat. Each component plays a crucial role in crafting its creamy texture and irresistible flavor.
- 2 cups heavy cream. This is absolutely paramount for achieving the light and airy texture we desire in our mousse. Heavy cream not only provides rich creaminess but also whips beautifully to form those lovely peaks that give our dessert its structure. When selecting heavy cream, look for options that are labeled as “whipping cream” or “heavy whipping cream” with at least 36% fat content—this fat is key for stability and mouthfeel. If you’re looking for substitutes, coconut cream can work wonders as a non-dairy alternative while still delivering that luxurious consistency.
- 1 cup Biscoff spread + more for topping. Ahh, the star of our show! Biscoff spread is essentially liquid gold—it’s made from crushed Biscoff cookies blended into a smooth, velvety spread that’s sweet and slightly spiced. The unique flavor profile adds depth to our mousse without overwhelming it; instead, it acts as a delicate partner to the heavy cream. When choosing your Biscoff spread, ensure it’s fresh—check for oils separating at the top as this may indicate it’s past its prime. If you’re feeling adventurous, you could even experiment with other cookie spreads like gingerbread or speculoos if you’re looking to switch things up!
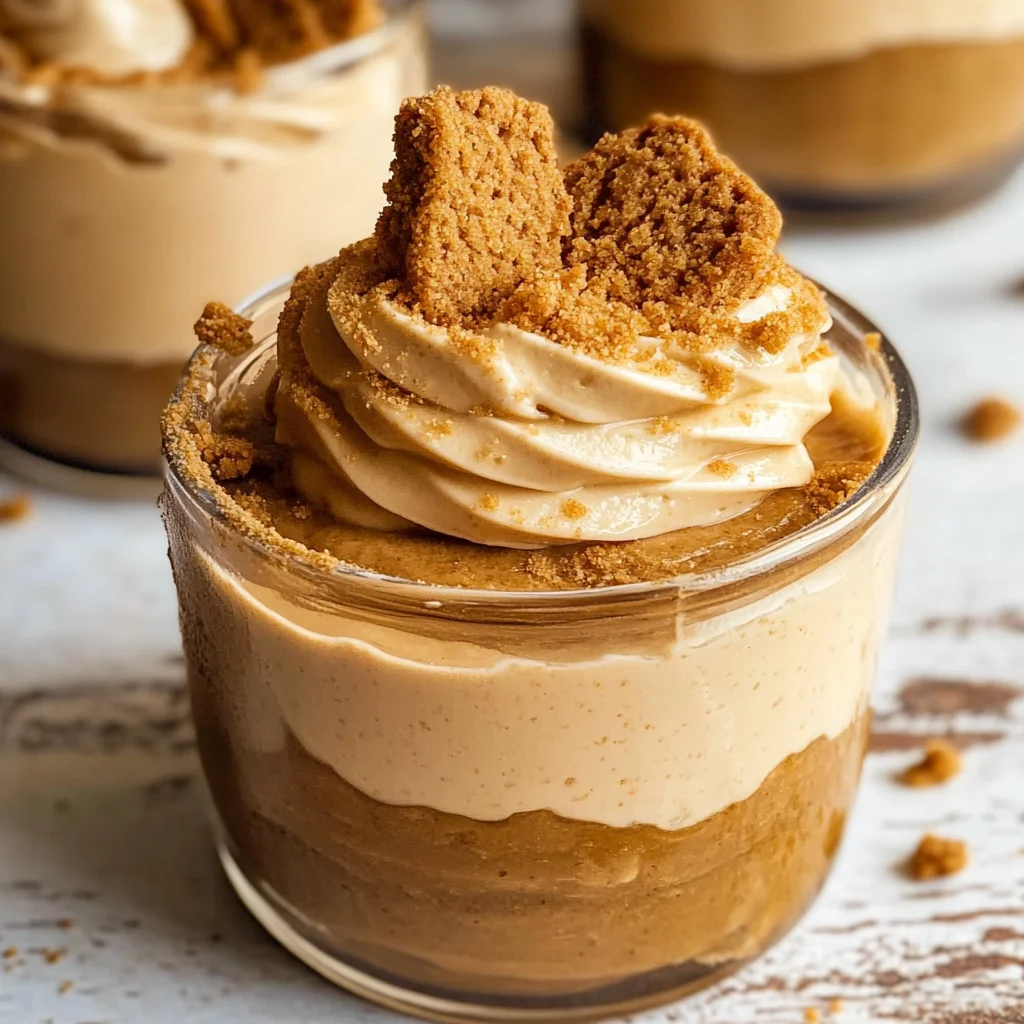
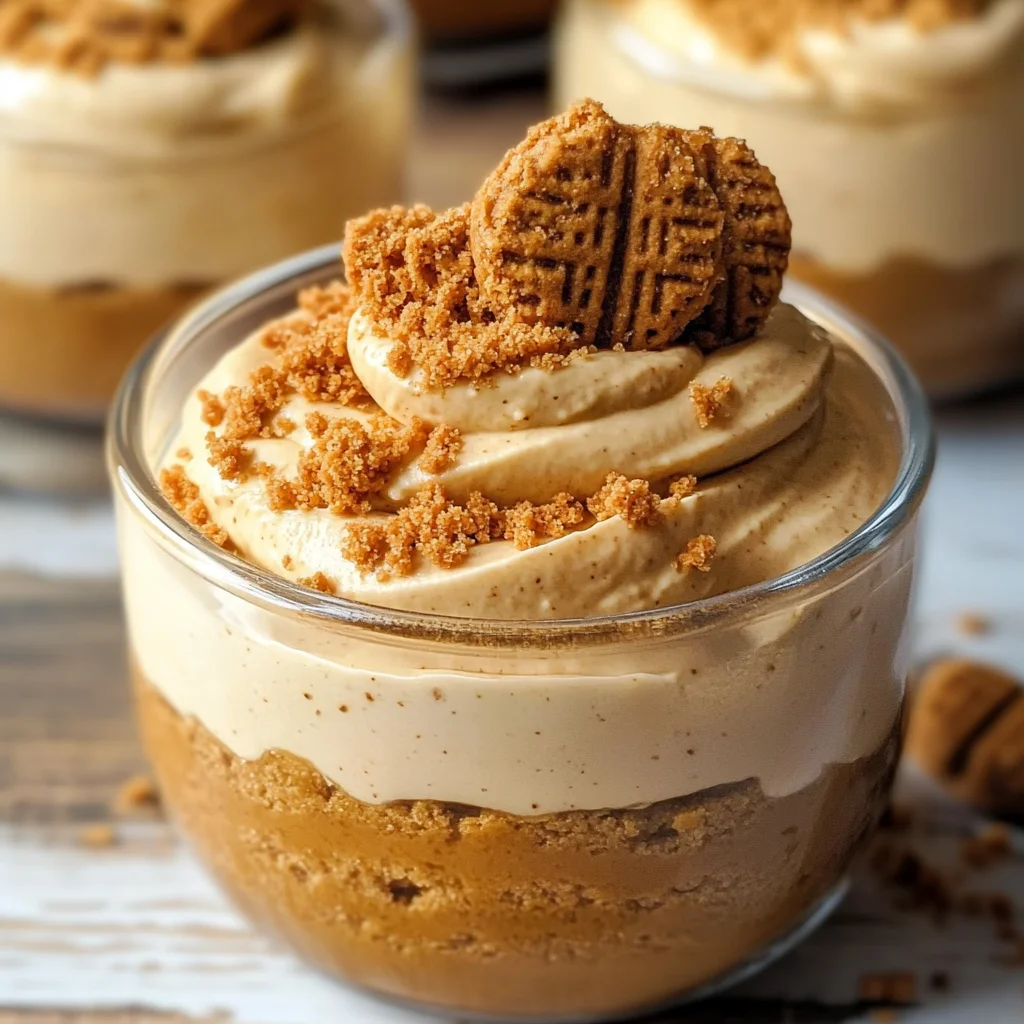
- Optional: Biscoff cookies for garnish. While not required, these little treats elevate your presentation from delightful to downright stunning! Crushed or whole cookies sprinkled atop each serving add not only visual appeal but also textural contrast against the smooth mousse—it’s like adding tiny little bites of happiness right on top! Plus, who doesn’t love an extra touch of decadence?
Equipment You’ll Need:
Having the right tools in your kitchen makes all the difference between an enjoyable cooking experience and one filled with frustration. Each piece of equipment we use here plays its part like trusted companions on this delicious adventure.
- Mixing bowl – A sturdy mixing bowl is essential for whipping our heavy cream into fluffy submission! Opt for one that’s large enough to give us plenty of room to maneuver as we beat those luscious peaks into shape—trust me; it’ll save you from splatters everywhere!
- Hand mixer or stand mixer – While you can whip cream by hand (if you’re up for quite the workout!), having either a hand mixer or stand mixer makes life infinitely easier and allows us to achieve those desired medium peaks without breaking a sweat. I recommend using either on medium speed; this balance helps incorporate air without overbeating—a crucial point since overwhipping can lead to separation.
- Spatula – A flexible spatula will be your best friend when folding together our whipped cream and Biscoff spread gently—this gentle motion preserves airiness while ensuring every bit is well combined.
- Serving dishes – Choose beautiful glasses or bowls for serving; after all, we eat with our eyes first! Transparent dishes allow layers and textures to shine through while inviting guests (or yourself!) into anticipation before taking that first bite.
Preparing the 2-Ingredient Biscoff Mousse Recipe
Step 1: Whipping Up Creamy Bliss
Let’s dive right into making our mousse! Start by pouring those lovely two cups of heavy cream into your mixing bowl—it should feel like liquid silk as it glides into place! Turn on your mixer at medium speed; watch as it begins transforming before your eyes into frothy clouds! This process is known as whipping; what we’re doing here is incorporating air into the cream—a vital step that creates that lightness we adore in mousses. Keep an eye out for visual cues: when soft peaks begin forming (this means you can lift the whisk out of the mixture and see peaks holding their shape but still drooping), it’s time to add in one cup of deliciously smooth Biscoff spread!
Step 2: Folding Flavors Together
Once you’ve added your Biscoff spread into the whipped cream, lower your mixer speed slightly so we don’t deflate all those beautiful bubbles we’ve worked so hard to create! You want to blend until everything’s fully incorporated but still fluffy—this should resemble thickened clouds dancing around each other rather than turning into butter (an unfortunate fate if overbeat). Take care during this step; gently fold using your spatula until no streaks remain visible—this delicate balance is non-negotiable because it ensures every spoonful is packed full of flavor!
Step 3: Transferring Your Creation
Now comes another exciting part: transferring this glorious concoction into your chosen dishware! Use that trusty spatula again—you’ll want to scoop everything from your mixing bowl gently so none goes wasted. As you scrape down along the sides and bottom (don’t forget those hidden pockets!), feel free to pop any lingering bubbles along the way—you’ll want every bit lovingly nestled inside its new home waiting patiently for chilling magic.
Step 4: Chill Time!
Once everything’s neatly nestled away in their containers, it’s time for some patience (I know—it’s hard!). Refrigerate them for at least thirty minutes or until cool—you’ll find chilling gives flavors time to meld beautifully while allowing mousses’ textures firm up ever so slightly without losing their airy charm! Trust me on this step; skipping might lead you toward sad puddles instead of luscious goodness—which would be such a shame because we’re aiming high here!
Stay tuned as we edge closer towards unveiling our delectable masterpiece—and I assure you it’ll be worth every second spent waiting!
Step 5: Chill to Perfection
Now that your mousse is beautifully whipped and has reached that perfect medium peak stage—think luxurious clouds of sweetness—it’s time to let it rest in the refrigerator. Chilling is not just a casual suggestion; it’s absolutely paramount for achieving that creamy, velvety texture we all crave. The cool temperature will help the mousse set just right, allowing all those flavors to meld together into a harmonious blend that will make your taste buds sing. I recommend covering your bowl or containers with plastic wrap to prevent any fridge odors from sneaking in and altering the delicate flavor of your masterpiece.
You’ll want to chill the mousse for at least 30 minutes, but trust me, if you can hold off for an hour, it’s worth the wait! During this time, the Biscoff spread’s caramelized notes will deepen, enveloping every bite in a rich embrace that feels like being wrapped in a cozy blanket on a chilly evening. Be patient during this step; great things take time! When you retrieve your mousse from the fridge, it should be cool to the touch and slightly firmer than when you first mixed it. This transformation is crucial—without it, you risk ending up with a dessert that’s too airy and lacks that satisfying density.
Step 6: The Art of Plating
Once your mousse has chilled and is ready for its grand debut, it’s time to think about presentation! After all, we eat with our eyes first, don’t we? Using an elegant serving dish or individual cups can elevate this simple dessert into something truly extraordinary. If you’re feeling creative (and I know you are!), consider layering your mousse with crushed Biscoff cookies for some delightful texture contrast. Just imagine scooping through layers of fluffy mousse and crunchy cookie—absolute bliss!
To transfer the mousse without making a mess, use a spatula or spoon to gently scoop out portions—you want to keep as much air in there as possible while maintaining its lovely shape. If you’re using clear glasses or cups, don’t shy away from showing off those beautiful layers! It’s also a good idea to have extra Biscoff spread on hand for drizzling on top. This adds not only visual appeal but also an extra punch of flavor that’ll have everyone coming back for seconds (or thirds!). Remember, presentation is key; take your time here because a well-plated dessert can transform an ordinary meal into an unforgettable experience.
Step 7: The Finishing Touches
Now comes one of my favorite parts—the toppings! Think of this as giving your mousse its crown jewels. A dollop of extra Biscoff spread on each serving creates a luscious finish that invites your guests in for an indulgent treat they won’t soon forget. You can simply spoon it on top or even use a piping bag if you’re feeling fancy. I promise you; every mouthful will be enhanced by this additional layer of sweet goodness.
If you’re looking to add some crunch and visual interest, consider crumbling some Biscoff cookies over the top as well. Not only does this provide a delightful textural contrast against the smoothness of the mousse, but it also makes for an eye-catching presentation that’s sure to impress anyone who lays eyes on it. As you sprinkle those crumbs over the top, take a moment to appreciate how these simple elements—a few cookies and some spread—can elevate such an easy recipe into something that feels luxurious and special.
Step 8: Serve with Love
Finally, it’s time for the most rewarding part—serving your creation! Gather around the table with friends and family because food is meant to be shared, and this Biscoff mousse is no exception. As you dish out servings, take pride in what you’ve created; each spoonful represents not just ingredients but love and effort poured into making something special.
When serving, remind everyone to savor each bite slowly; I encourage them (and yourself!) to really experience the symphony of flavors—the caramel notes from Biscoff melding beautifully with the rich creaminess of whipped cream. Each taste should evoke warmth and happiness—it’s not just dessert; it’s a celebration! You might find yourself smiling as people dig in; their reactions will tell you everything—you’ve turned two simple ingredients into pure magic.
Conclusion:
As we wrap up our journey through crafting this 2-Ingredient Biscoff Mousse Recipe, I hope you’ve felt my excitement and passion radiating through each paragraph! This recipe is truly remarkable—not just because of its simplicity but because of how effortlessly it captivates every palate. The union of whipped cream and velvety Biscoff spread creates an utterly intoxicating experience that transcends ordinary desserts. It’s rich yet light, indulgent yet simple—each bite is like embracing a warm hug from an old friend.
This mousse isn’t merely delicious; it’s an invitation to explore creativity in the kitchen with ease and joy! Whether you’re preparing a romantic dinner for two or bringing something sweet to a potluck with friends, this recipe shines in every setting. The satisfaction of creating something so delightful with just two ingredients is nothing short of magical—a testament to how sometimes less truly is more. Imagine serving it at your next gathering; I can guarantee you’ll witness eyes lighting up with delight as they experience this little piece of heaven!
When thinking about how best to enjoy your mousse, consider pairing it with fresh berries for a burst of tartness or some crunchy granola if you’re feeling adventurous—imagine savoring one with ripe strawberries layered within each spoonful or drizzled with chocolate sauce for extra decadence! For an afternoon pick-me-up during those busy days, serve it alongside a steaming cup of coffee or tea—the combination elevates both experiences into something memorable. And don’t forget about those crumbled Biscoff cookies sprinkled on top; they add that perfect crunch which contrasts beautifully with the softness of the mousse.
Feeling adventurous? This recipe is wonderfully adaptable—why not try folding in crushed nuts for added texture or stirring in some caramel sauce? Each variation offers new layers of flavor while keeping true to what makes this mousse so special. I encourage you to experiment and make this recipe your own; perhaps even create seasonal versions by incorporating pumpkin spice in fall or peppermint extract during winter holidays! Whatever direction you choose, please share your experiences—I’d love to hear how your own creations unfold!
2-Ingredient Biscoff Mousse Recipe

Indulge in the decadent delight of this 2-Ingredient Biscoff Mousse Recipe—an effortless, no-bake dessert that transforms simple ingredients into pure magic! With its creamy texture and rich flavor profile inspired by beloved Biscoff cookies, this mousse is perfect for any occasion, from intimate dinners to festive gatherings. In just ten minutes, you can whip up a luxurious treat that will have everyone guessing your secret. Each spoonful delivers a velvety embrace of sweetness, leaving you daydreaming about its comforting taste long after the last bite. Get ready to impress your guests with this stunning dessert that showcases how easy it can be to create something extraordinary!
- Prep Time: 10 minutes
- Cook Time: None
- Total Time: 0 hours
- Yield: Serves approximately 4 (1/2 cup each) 1x
- Category: Dessert
- Method: No-Bake
- Cuisine: American
Ingredients
- 2 cups heavy cream (or coconut cream for a non-dairy option)
- 1 cup Biscoff spread
- Optional: Crushed Biscoff cookies for garnish
Instructions
- In a mixing bowl, pour 2 cups of heavy cream and whip on medium speed until soft peaks form.
- Gently fold in 1 cup of Biscoff spread using a spatula until fully incorporated and fluffy.
- Transfer the mousse into serving dishes using the spatula.
- Refrigerate for at least 30 minutes to set and enhance flavors.
- Serve chilled, topped with extra Biscoff spread and crushed cookies if desired.
Nutrition
- Serving Size: 1 serving
- Calories: 380
- Sugar: 24g
- Sodium: 40mg
- Fat: 34g
- Saturated Fat: 20g
- Unsaturated Fat: 12g
- Trans Fat: 0g
- Carbohydrates: 27g
- Fiber: 0g
- Protein: 3g
- Cholesterol: 90mg