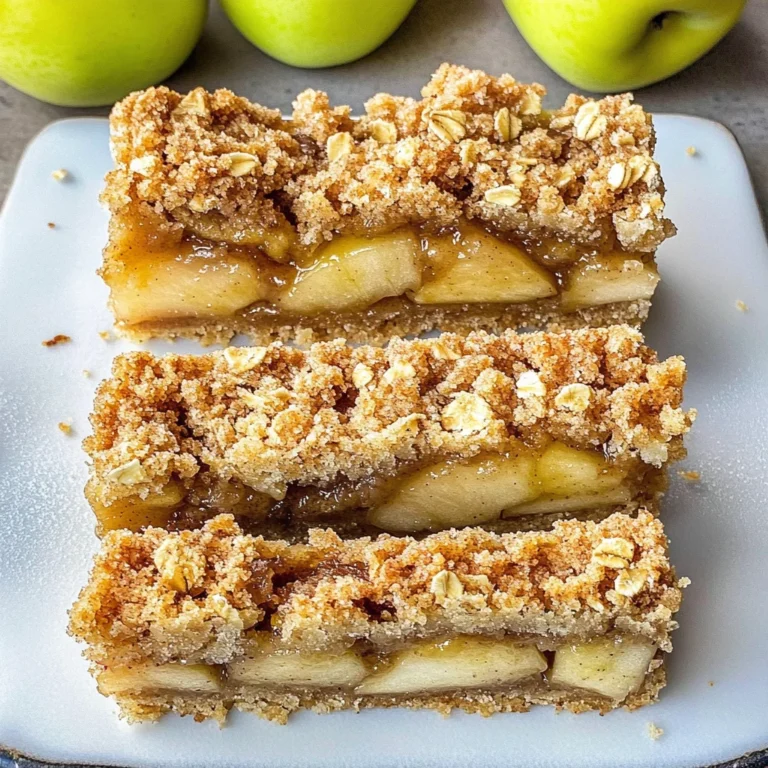
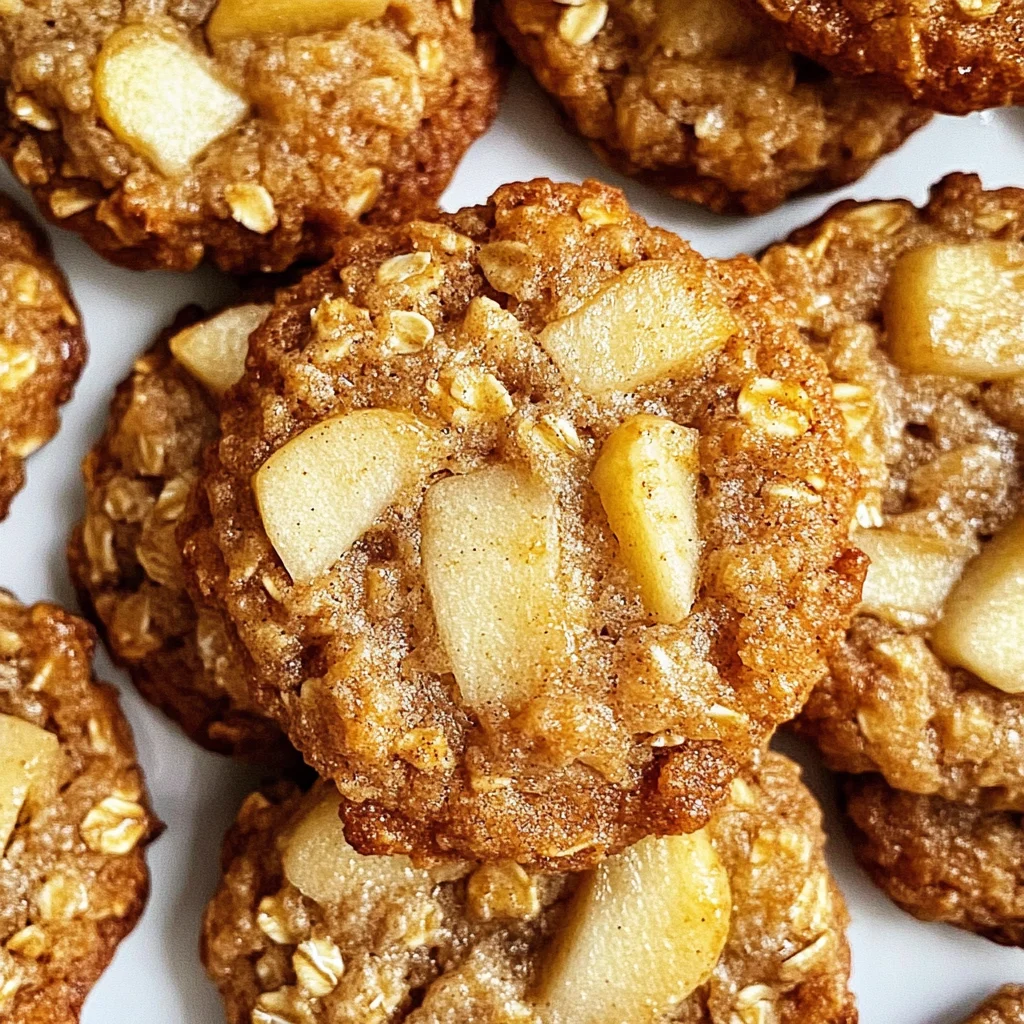
Apple Cinnamon Oatmeal Cookies
There’s something truly magical about baking, isn’t there? The way the air fills with warmth and sweet aromas, wrapping around you like a cozy blanket on a crisp autumn day. When I think of my favorite fall treats, my mind instantly wanders to these Apple Cinnamon Oatmeal Cookies. They aren’t just cookies; they’re a celebration of the season, an experience that encompasses the essence of comfort and nostalgia. Imagine biting into a soft, chewy cookie bursting with tender chunks of Granny Smith apples and enveloped in the warm embrace of cinnamon and nutmeg—utterly intoxicating! Each bite transports me back to family gatherings where laughter mingled with the scents of fresh-baked goods, infusing the atmosphere with love.
Baking these cookies is not just about satisfying a sweet tooth; it’s about creating memories. It’s a simple act that brings people together, whether it’s sharing them with friends over coffee or enjoying them solo while savoring a moment of peace after a long day. The combination of oats and apples makes each cookie satisfying yet light enough to indulge in without guilt. Plus, they are incredibly versatile—perfect for any occasion, from holiday gatherings to quiet evenings at home. Trust me when I say that once you take your first bite, you’ll find yourself making these delightful Apple Cinnamon Oatmeal Cookies time and time again.
Apple Cinnamon Oatmeal Cookies: A Heartwarming Delight
If you’re looking for a cookie that encapsulates the essence of comfort food while still being packed with wholesome ingredients, then look no further! These Apple Cinnamon Oatmeal Cookies are here to win your heart (and your taste buds). With their soft texture and delightful flavor profile, they’re sure to become a beloved staple in your baking repertoire. So grab your mixing bowl and let’s embark on this culinary adventure together!

Ingredients:
As we prepare to dive into this delicious recipe, let’s take a closer look at the ingredients that will come together to create our heavenly cookies. Each component plays an essential role in crafting that perfect balance of flavors and textures.
- 2 cups (260g) all-purpose flour: This ingredient acts as the backbone of our cookies, providing structure and stability. All-purpose flour is versatile and easy to work with—it absorbs moisture well while allowing for a soft texture in our final product. When measuring flour, it’s important not to pack it down into the cup; instead, spoon it lightly into your measuring cup for accuracy. If you’re looking for an alternative, you can experiment with whole wheat flour for a nuttier flavor and added fiber.
- 2 cups (175g) uncooked quick cook oats: These oats bring not only texture but also heartiness to our cookies. Quick oats blend seamlessly into the dough without dominating each bite, adding chewiness that complements the tender apple pieces beautifully. They soak up moisture during baking, which helps keep our cookies soft. If you prefer a little crunch or have rolled oats on hand instead, feel free to substitute them—just note they might give your cookies a bit more chewiness.
- 3/4 tsp baking soda: This little hero is responsible for our cookies’ rise and lightness. Baking soda reacts with the acids in our ingredients (like brown sugar) to produce carbon dioxide bubbles that help leaven our dough as it bakes. Make sure your baking soda is fresh! An expired box may leave you with flat cookies—a scenario we definitely want to avoid.
- 1 3/4 tsp ground cinnamon: Ahh, cinnamon—the spice that adds warmth and depth! Its sweet aroma wafts through your kitchen as it mingles with apples during baking, creating an irresistible fragrance that beckons everyone nearby. Cinnamon elevates these cookies from ordinary to extraordinary by enhancing their natural sweetness without overpowering other flavors.
- 1/2 tsp ground nutmeg: A pinch of nutmeg adds complexity and an earthy richness to our cookie dough. This spice complements the sweetness of both apples and sugar wonderfully while providing that nostalgic feeling associated with cozy fall treats. Use freshly grated nutmeg if possible; its flavor is much brighter than pre-ground versions!
- 1/2 tsp salt: While it may seem counterintuitive to add salt in sweet recipes, this ingredient is absolutely paramount! Salt enhances all flavors present in our cookies—from sweetness to spices—creating a more balanced taste experience overall.
- 3/4 cup (168g) unsalted butter, room temperature: Butter is where we build flavor! Using unsalted butter gives us control over how much salt goes into our cookies while allowing its creamy richness to shine through in every bite. Room temperature butter creams beautifully with sugars, creating air pockets that help achieve that soft texture we’re aiming for in these delightful treats.
- 3/4 cup (168g) packed light brown sugar: Brown sugar brings moisture along with its caramel undertones thanks to its molasses content—this keeps our cookies soft and chewy longer than granulated sugar would allow alone! Make sure you pack it firmly into your measuring cup so you get every last bit of moisture-rich goodness.
- 1/2 cup (104g) sugar: Regular granulated sugar adds sweetness while contributing slight crispness around the edges as they bake up golden brown—a delightful contrast against the soft centers filled with apple goodness.
- 2 large eggs: Eggs bind everything together while adding richness too! They contribute structure through proteins which firm up as they cook—important when balancing all those delicious fillings we’ll be adding later on!
- 2 tsp vanilla extract: Vanilla extract works wonders by rounding out flavors within baked goods—it’s like giving them an extra hug! When selecting vanilla extracts, opt for pure rather than imitation whenever possible for maximum aroma impact—trust me when I say it’s worth it!
- 2 cups (213g) peeled, cored and diced Granny Smith apples: Finally—the star ingredient! Granny Smith apples add tartness which balances perfectly against all those sweet components we’ve assembled here; their firm texture holds up beautifully during baking without turning mushy—which means every bite will be bursting with juicy apple chunks!
Equipment You’ll Need:
Before we dive headfirst into mixing up these delightful cookies, let’s gather some essential tools that’ll make your baking experience smoother—and trust me; having the right equipment makes all the difference! Each piece serves as an invaluable partner throughout this journey towards cookie perfection.
- Mixing bowls – A set of various-sized mixing bowls will be crucial for combining dry ingredients separately from wet ones before merging them later on; using different sizes allows clearer organization throughout each step!
- Electric mixer or whisk – An electric mixer simplifies creaming butter and sugars together until light fluffy perfection—or if you’re feeling adventurous (and have strong arms!), whisking by hand works too but may require more elbow grease!
- Measuring cups and spoons – Accurate measurements are non-negotiable in baking; invest in good quality measuring tools for consistent results every time—you’ll thank yourself later!
- Baking sheets lined with parchment paper or silicone mats – Properly prepared surface ensures even browning while preventing unwanted sticking issues; both options work wonders but provide slightly different finishes—parchment yields crisper edges whereas silicone offers softer results overall.
Now that we’ve gathered everything we need let’s embark on preparing these delectable Apple Cinnamon Oatmeal Cookies together!
Step 1: Preheat & Prepare Your Space
First things first—set your oven temperature at 350°F (180°C). This initial step is crucial because preheating ensures even cooking throughout each batch—we want those beautiful golden edges paired perfectly alongside chewy centers! While waiting for the oven heat up momentarily line two baking sheets either using parchment paper or silicone mats; this prevents any stickiness during removal later on plus helps distribute heat evenly across cookie bottoms ensuring no one side gets burnt while others remain undercooked!
Step 2: Combine Dry Ingredients
Next up grab yourself another mixing bowl where we’ll combine our dry components—the all-purpose flour along with quick-cook oats followed by baking soda alongside those aromatic spices like cinnamon & nutmeg sprinkled generously throughout—and don’t forget about salt either! Whisk gently until thoroughly blended before setting aside momentarily as we focus now on creaming butter/sugar mixture next step below…
Step 3: Cream Butter & Sugars Together
In another larger bowl fitted onto electric mixer beat softened unsalted butter alongside packed brown sugar until mixture transforms into pale fluffiness resembling clouds kissed by sunshine—this process known as creaming creates air pockets essential for achieving light-and-fluffy textures desired within finished product itself! Do this over medium speed taking care not rush through it; patience pays off greatly here leading us closer towards ultimate cookie bliss ahead…
Step 4: Incorporate Eggs & Vanilla Extract
Once you’ve got that lovely airy mixture achieved it’s time welcome eggs one at-a-time mixing well between additions until fully incorporated followed by fragrant splash vanilla extract added next too—this additional layer amplifies flavor profile significantly bringing everything harmoniously together resulting symphony notes dancing across palate upon tasting finished creations themselves…
I hope you’re feeling excited because we’re just getting started on this scrumptious journey through making Apple Cinnamon Oatmeal Cookies! Stay tuned as we continue diving deeper into each step until those warm delights emerge from oven ready share among loved ones or simply treat yourself deserving indulgence after long day ahead…
Step 5: The Magic of Creaming
Now that you’ve prepped your dry ingredients, it’s time to move on to one of the most vital steps in cookie-making: creaming the butter and sugars together. This process is not just about combining ingredients; it’s where the magic begins! In a large mixing bowl, combine 3/4 cup (168g) of unsalted butter—make sure it’s at room temperature for optimal mixing—and the 3/4 cup (168g) of packed light brown sugar along with 1/2 cup (104g) of granulated sugar. Turn your mixer to medium speed and cream them together until the mixture transforms into a light, fluffy cloud of sweetness, usually around 2-3 minutes. You’ll know it’s ready when the color shifts from a deep yellow to a pale golden hue, and the texture becomes airy. This step is crucial because incorporating air into your butter creates a lovely lift in your cookies, resulting in that wonderfully tender texture we all adore.
Don’t rush this stage; be patient and let the mixer do its work! The transformation from dense to fluffy is not just aesthetic—it’s science at play! As you cream, those tiny air pockets form which will expand during baking, giving your cookies that irresistible rise. Remember to scrape down the sides of your bowl occasionally with a spatula to ensure even mixing. If you skip this step, you might end up with lumps of sugar or butter that don’t blend well into your cookie dough. I promise you, taking this extra moment will pay off in delicious dividends!
Step 6: Adding the Eggs—Binding It All Together
Next up is an essential component that brings everything together: adding in two large eggs, one at a time. This method ensures each egg is fully incorporated before adding the next, which helps maintain the structure of our cookie dough. As you mix after each addition, you’ll notice how the mixture smoothens out beautifully—this is precisely what we want! Eggs are vital here as they act as binding agents, helping to hold all our ingredients together while also adding moisture. Without them, your cookies might crumble apart rather than stay soft and chewy.
As you watch the batter transform into a cohesive blend, take a moment to embrace that delightful aroma wafting through your kitchen—a sign that something wonderful is on its way! Make sure not to overmix once the eggs are added; just enough until everything looks uniform is what we’re aiming for. Trust me on this: overmixing can lead to tough cookies rather than soft ones. So keep an eye on it—your senses will guide you!
Step 7: Infusing Flavor with Vanilla
Now comes one of my favorite parts—the addition of 2 teaspoons of vanilla extract! This ingredient is like a warm hug for your cookies; it adds depth and complexity that rounds off all those beautiful flavors we’re building. Simply pour in the vanilla extract and mix until just combined—it should only take about 30 seconds. The sweet aroma of vanilla will envelop you like an old friend’s embrace; it’s truly intoxicating!
Why is this step so important? Well, vanilla doesn’t just add sweetness; it enhances other flavors present in our cookie dough, making each bite feel profoundly satisfying. Just imagine how the warm notes of cinnamon will dance alongside that rich vanilla; it’s nothing short of spectacular! Like before, avoid overmixing here too—just enough until everything looks beautifully blended.
Step 8: The Dry Ingredients & Their Secret Power
Now we’re ready for an important integration—the dry ingredients! Carefully take your previously mixed dry ingredients—those lovely 2 cups (260g) of all-purpose flour, 2 cups (175g) of uncooked quick cook oats, 3/4 teaspoon baking soda, 1 3/4 teaspoons ground cinnamon, 1/2 teaspoon ground nutmeg, and 1/2 teaspoon salt—and gradually add them into your wet mixture. Here’s a little tip: sprinkle them in rather than dumping them all at once! This gentle approach allows for more even distribution throughout the dough, ensuring every bite bursts with consistent flavor.
Mix on low speed until everything comes together—this should take no longer than about 30 seconds or so. Here’s where patience plays its part again: if you overmix at this stage, you risk developing gluten in the flour which can lead to tough cookies instead of delightfully soft ones. You want your dough just combined so it’s thick but still slightly sticky; this consistency is what makes our Apple Cinnamon Oatmeal Cookies so luscious!
Next Major Phase – Stirring In Those Apples
Step 9: Stirring In Your Apple Chunks—A Fruity Surprise
Finally, let’s introduce our star ingredient—the apples! Gently fold in 2 cups (213g) of peeled, cored, and diced Granny Smith apples into your cookie dough using a spatula or wooden spoon. This step isn’t just about tossing them in; it’s about embracing these delightful morsels that will bring an extra layer of moisture and flavor to our cookies. The tartness of Granny Smith apples complements the sweetness perfectly while their texture offers bites of juicy goodness amidst the chewy oats.
As you mix these apple chunks into your dough—imagine how they’ll soften further during baking and create those lovely pockets of flavor within each cookie! Don’t worry if your dough feels thick at this point; it’s normal due to those hearty oats and vibrant apples working harmoniously together. You might find some stickiness—that’s absolutely okay! If you’d like, now’s also a great time to chill your dough briefly in the refrigerator for about 20-30 minutes before scooping it out onto your baking sheets.
Step 10: Scooping Out Cookie Dough
Once you’ve allowed some chilling time—or if you’re eager like I often am—let’s get those cookies onto our prepared baking sheets lined with parchment paper or silicone mats. Using a tablespoon or ice cream scoop (about 30g per ball), portion out generous mounds of dough onto each sheet approximately two inches apart. Why so much space? Because as they bake, these beauties are going to spread out a bit while still retaining their delightful shape.
If you’ve chilled your dough beforehand and find it slightly firm when scooping, fear not! It should soften beautifully as it bakes—a little warmth goes a long way here! Keep an eye on those portions though; remember that larger mounds may require additional baking time so adjust accordingly if necessary.
Final Touches – Baking Your Perfect Apple Cinnamon Oatmeal Cookies
Step 11: Baking—the Transformation Begins!
Preheat your oven to 350°F (180°C) if you haven’t already done so—this is crucial as we want our cookies to start baking immediately upon hitting those hot oven walls for maximum spread and texture contrast between crispy edges and soft centers! Bake for about 9-12 minutes, but keep an eye on them after about eight minutes because oven times can vary slightly based on individual appliances.
You’ll know they’re nearing completion when the edges turn lightly golden brown while maintaining their puffy centers—they may seem underbaked initially but trust me here—not overbaking is absolutely paramount for achieving that chewy goodness everyone raves about! When they’re done baking, remove them from the oven but resist diving straight into them—let them cool on their sheets for about 4-5 minutes first before transferring them onto wire racks to cool completely.
These Apple Cinnamon Oatmeal Cookies are best enjoyed fresh but can be stored in an airtight container for up to three days though they’ll continue getting softer thanks to those glorious apples providing moisture as they sit—a delicious problem if I ever heard one!
So there you have it—the recipe that’s steeped in tradition yet brimming with warmth and love perfect for any occasion whether cozy afternoons or playful gatherings with friends! Enjoy every bite knowing you’ve crafted something truly extraordinary from scratch!
Storage and Enjoyment Tips for Your Apple Cinnamon Oatmeal Cookies
Now that you’ve crafted these magnificent Apple Cinnamon Oatmeal Cookies, I can hardly contain my excitement for you to dig in! The warm, inviting aroma wafting through your kitchen is just the beginning of this delightful journey. Each cookie is a symphony of flavors—sweet apples, aromatic cinnamon, and hearty oats melding together in perfect harmony. But let’s talk about how to savor these little treasures for as long as possible because trust me, you won’t want them to disappear too quickly!
Storing Leftover Apple Cinnamon Oatmeal Cookies
To keep your cookies fresh and delicious, transfer them into an airtight container right after they cool completely. This simple step is crucial because it locks in the moisture from the apples while keeping those lovely cookies soft and tender. Ideally, store them at room temperature—they’ll last about 2-3 days like this, but let me tell you, if they somehow last that long, the flavors only deepen over time! If you’re concerned about them becoming too soft or losing their delightful chewiness, try slipping a slice of bread into the container with them; it’s a neat trick that helps maintain their texture. The moment you bite into one after a day or two will still be profoundly satisfying; they take on an even richer flavor as they meld together. And if you find yourself wanting a warm cookie—simply pop one in the microwave for about 10 seconds to revive that cozy warmth!
Freezing Apple Cinnamon Oatmeal Cookies for Later
If you want to extend your enjoyment even further (which I wholeheartedly recommend), consider freezing some of your cookies! To do this properly, allow them to cool completely before placing them in a single layer on a baking sheet and freezing until solid. Once frozen, transfer the cookies to an airtight freezer bag or container. They can hold up beautifully for up to three months in the freezer! When you’re ready to indulge again, simply remove however many you desire and let them thaw at room temperature for about 30 minutes or so; if you’re feeling fancy, give them a quick bake at 350°F (180°C) for about 5 minutes to restore that freshly baked warmth and aroma. Freezing cookies is such a fantastic option because it allows you to enjoy homemade treats anytime without any fuss. Just imagine pulling out a batch of these delightful cookies during a chilly afternoon with friends—pure bliss!
Apple Cinnamon Oatmeal Cookies

Indulge in the warm, comforting flavors of Apple Cinnamon Oatmeal Cookies, a delightful treat perfect for any occasion. These cookies combine chewy oats with tender chunks of Granny Smith apples, enveloped in a cozy blend of cinnamon and nutmeg. Each bite is like a hug from fall, bringing back memories of family gatherings and cozy afternoons. Not only are they delicious, but they’re also easy to prepare, making them an ideal choice for both novice bakers and seasoned pros. Enjoy these cookies fresh from the oven or save some for later—they’re sure to become a favorite in your baking repertoire!
- Prep Time: 15 minutes
- Cook Time: 12 minutes
- Total Time: 27 minutes
- Yield: Approximately 24 servings 1x
- Category: Dessert
- Method: Baking
- Cuisine: American
Ingredients
- 2 cups all-purpose flour
- 2 cups quick-cook oats
- 3/4 tsp baking soda
- 1 3/4 tsp ground cinnamon
- 1/2 tsp ground nutmeg
- 1/2 tsp salt
- 3/4 cup unsalted butter, room temperature
- 3/4 cup packed light brown sugar
- 1/2 cup granulated sugar
- 2 large eggs
- 2 tsp vanilla extract
- 2 cups peeled, cored, and diced Granny Smith apples
Instructions
- Preheat your oven to 350°F (180°C). Line two baking sheets with parchment paper.
- In a bowl, combine flour, oats, baking soda, cinnamon, nutmeg, and salt; set aside.
- In a large bowl, cream together butter, brown sugar, and granulated sugar until fluffy. Mix in eggs one at a time followed by vanilla extract.
- Gradually add dry ingredients to wet mixture until just combined.
- Fold in diced apples gently.
- Scoop out dough onto prepared baking sheets about two inches apart.
- Bake for 9–12 minutes until edges are golden but centers remain soft.
- Let cool on baking sheets for a few minutes before transferring to wire racks.
Nutrition
- Serving Size: 1 cookie (30g)
- Calories: 130
- Sugar: 9g
- Sodium: 80mg
- Fat: 6g
- Saturated Fat: 4g
- Unsaturated Fat: 2g
- Trans Fat: 0g
- Carbohydrates: 18g
- Fiber: 1g
- Protein: 2g
- Cholesterol: 20mg