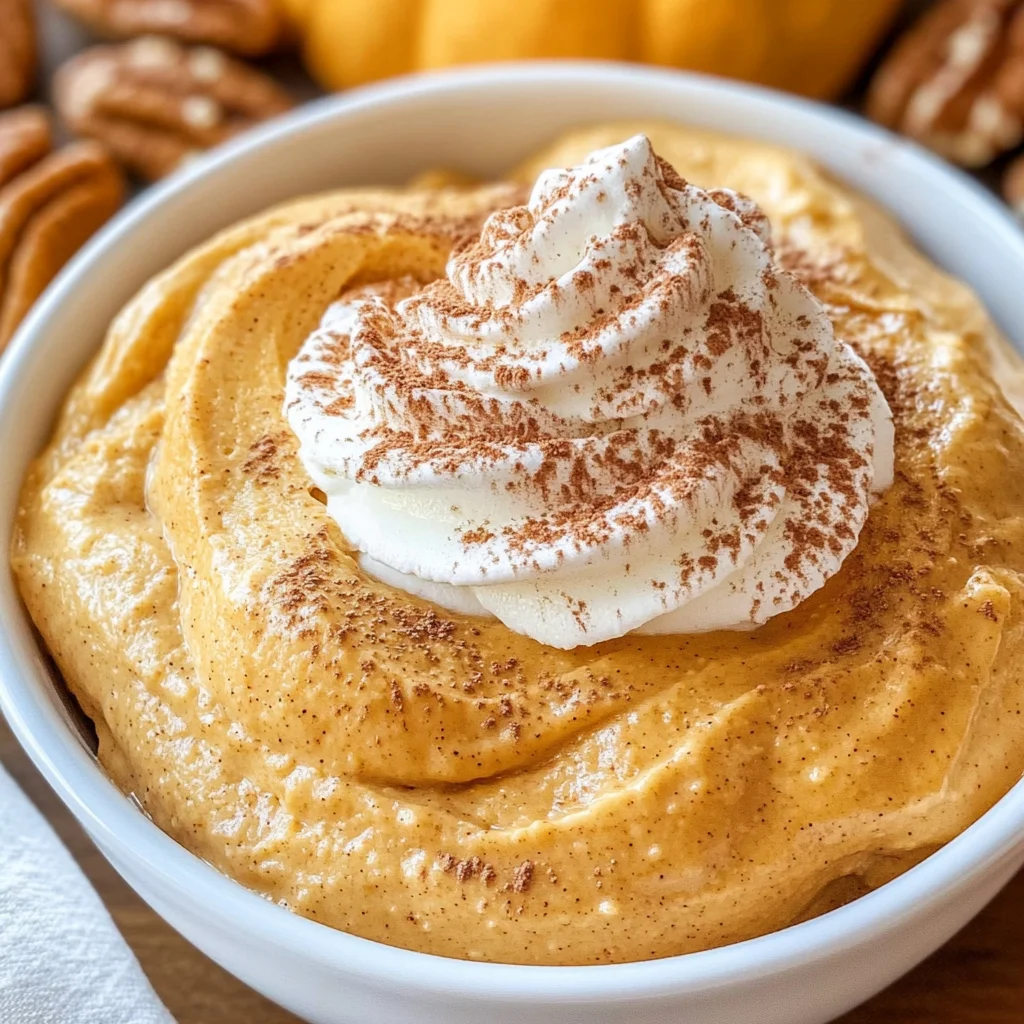
Pumpkin Fluff
There’s something utterly magical about the arrival of fall, isn’t there? The air turns crisp, leaves transform into a tapestry of vibrant colors, and the scent of pumpkin spice seems to waft from every corner of our lives. This Pumpkin Fluff recipe is more than just a dessert; it’s a delightful embrace of the season that captures all those warm, cozy feelings we cherish. Imagine spooning through a creamy, dreamy concoction that tastes like autumn itself—sweet, spiced, and oh-so-satisfying. Each bite is like a hug from the inside out, making it perfect for sharing with loved ones or enjoying solo while curled up with your favorite book.
I promise you, this Pumpkin Fluff is the epitome of easy indulgence. It’s quick to whip up—seriously, you can have it ready in just five minutes (not including chill time)! The beauty of this dish lies in its simplicity and lightness; it’s made with wholesome ingredients that let you revel in the flavors without any guilt. Whether you’re hosting a gathering or simply treating yourself after a long day, this fluffy delight brings joy to every occasion. Plus, it’s entirely adaptable—feel free to get creative with toppings or pairings! Let’s dive into this delicious journey together and uncover how to make this truly extraordinary Pumpkin Fluff.
Pumpkin Fluff: A Heavenly Autumn Treat
This easy pumpkin fluff recipe will quickly become your go-to sweet treat when fall rolls around! With its light ingredients and comforting flavors, you’ll never feel guilty indulging in this delightful dessert.
Ingredients:
As we embark on this culinary journey together, let’s take a moment to appreciate each ingredient that makes our Pumpkin Fluff not only delicious but also special. Every component plays a vital role in crafting that heavenly texture and flavor balance we all crave during the cooler months.
- 1 can (15 oz) pumpkin puree: This is key to the recipe and serves as the foundation for our Pumpkin Fluff. Look for 100% pure pumpkin puree rather than pumpkin pie filling, which contains added sugars and spices that could overwhelm our delicate balance. The rich earthiness of pumpkin adds depth while providing essential nutrients like beta-carotene and fiber. When mixed into our fluff, it creates that velvety texture that feels luxurious on your palate.
- 1 box (1 oz) sugar-free instant vanilla pudding mix: This little box holds magical powers! It acts as a thickening agent while infusing sweetness and creaminess without adding extra calories. Instant pudding mix is particularly handy here because it dissolves easily into our pumpkin puree mixture—no cooking or heating required! Plus, the vanilla flavor elevates everything beautifully by enhancing the natural sweetness of the pumpkin.
- 2 teaspoons pumpkin pie spice: Ahh, the quintessential blend of warm spices! This mix typically includes cinnamon, nutmeg, ginger, and sometimes allspice or cloves. Each spice adds its unique warmth and aromatic quality that evokes memories of holiday gatherings and cozy nights spent by the fireplace. I recommend using fresh spices whenever possible since they have a more vibrant flavor profile; trust me, it makes all the difference!
- 1 teaspoon vanilla extract: While we already have vanilla from our pudding mix, adding pure vanilla extract amplifies those lovely sweet notes and rounds out the flavors beautifully. It’s important to use pure extract rather than imitation for an authentic taste experience—this small detail is absolutely paramount! The complexity it brings will make your Pumpkin Fluff truly shine.
- 1 container (8 oz) sugar-free Cool Whip, thawed: This is our secret weapon for achieving that fluffy texture without heavy cream or whipping ourselves into a frenzy! Cool Whip provides lightness and airiness that feels indulgent while keeping calories in check. Ensure it’s fully thawed before folding it into your mixture; rushing this step could lead to clumps instead of a smooth consistency.
Equipment You’ll Need:
Having the right tools at your fingertips can transform cooking from a chore into an absolute joy! They’re not just “ingredients”—they’re essential partners in creating something wonderful together.
- Medium-sized mixing bowl: A must-have for combining your ingredients effortlessly! Opt for one with enough space to whisk vigorously without worrying about spills—it’ll save you time on cleanup later!
- Whisk: This tool is perfect for blending your ingredients into a smooth mixture. A good whisk will help incorporate air as you mix, ensuring your fluff becomes light and airy—a crucial element for achieving that delightful texture!
- Spatula: A flexible spatula is invaluable when folding in your Cool Whip gently. It allows you to maintain airiness without overmixing—a non-negotiable step if we want our fluff to stay fluffy!
Step 1: Combine Your Foundations
In a medium-sized mixing bowl, start by whisking together one can of pumpkin puree with the sugar-free instant vanilla pudding mix until they are beautifully smooth and well combined. You’ll want to give yourself about 30 seconds to really integrate these two—they need to be best friends in this bowl! The vibrant orange hue should come alive as you blend them together; it’s like watching autumn unfold right before your eyes!
Step 2: Spice It Up
Next up comes my favorite part—the spices! Sprinkle in those two teaspoons of pumpkin pie spice along with one teaspoon of vanilla extract. Take a moment to inhale deeply; let those warm aromas envelop you! Stir until everything is harmoniously blended—this step is essential because we want every bite of our Pumpkin Fluff to be infused with those comforting flavors. Trust me on this—it’s absolutely worth taking your time here!
Step 3: Fold In Your Whipped Wonder
Now comes the fun part—gently fold in your thawed Cool Whip using your spatula. Start by adding about half of it first; this helps lighten up the heavier pumpkin mixture before incorporating everything else smoothly. Remember not to rush this step; gentle motions are key here as we don’t want to deflate all that marvelous air we’ve built up already! Aim for an even distribution where no streaks remain visible—you’ll know you’re done when everything looks like creamy dreaminess.
Step 4: Chill Out
Once you’ve achieved that luscious consistency (seriously though—how good does it look?), spoon your incredible creation into individual serving jars or a larger dish if you’re feeling generous! Cover them tightly with plastic wrap or lids—they need some time in the fridge so their flavors meld beautifully together. Allow at least two hours for chilling; I know waiting can be tough but trust me—it’s absolutely worth it when you finally dig in!
And there you have it—the beginning steps toward crafting an unforgettable Pumpkin Fluff that’s destined to become one of your fall favorites! Each stage builds upon itself with intention and care; I hope you’re feeling inspired as we continue on this flavorful journey together.
Step 5: Whisking Together the Base Flavors
Now that you have your ingredients lined up, it’s time to create the luscious base for your Pumpkin Fluff. In a medium-sized mixing bowl—trust me, a bowl that’s too small will make this process messy—add one can of pumpkin puree. This isn’t just any puree; it’s a golden treasure chest filled with nutrients and flavors that scream autumn. To this velvety base, sprinkle in an entire box of sugar-free instant vanilla pudding mix. The pudding mix is not merely for sweetness; it’s going to work its magic by thickening the mixture and giving it that silky texture we crave in a dessert. With a sturdy whisk in hand, blend these two together until they’re beautifully combined, smooth as silk, and devoid of any lumps. You want to see a rich orange color—a telltale sign that everything is well integrated.
Next, let’s elevate this mixture further by adding two teaspoons of pumpkin pie spice and one teaspoon of vanilla extract. Oh, the aroma that wafts up at this stage is nothing short of intoxicating! The pumpkin pie spice brings warmth and depth, while the vanilla adds a touch of nostalgia—the essence of cozy family gatherings around the table. Stir gently but thoroughly; this step is crucial because it ensures every single bite will be bursting with flavor. You can think of this as creating a canvas for your Pumpkin Fluff masterpiece where each ingredient plays its part in harmony.
Step 6: Folding in the Cool Whip
With your pumpkin mixture ready, it’s time to introduce the pièce de résistance: the sugar-free Cool Whip! This fluffy delight is what transforms our pumpkin concoction from a mere filling into an airy, delightful dessert that feels like you’re spooning clouds into your mouth. Gently take your spatula or wooden spoon and scoop out the thawed Cool Whip, folding it into your pumpkin base with care. The technique here is essential—folding rather than stirring preserves the lightness of the Cool Whip, ensuring our dessert remains airy and ethereal rather than dense. You’ll want to incorporate it until you see no streaks of white remaining; trust me when I say that this final blend creates an utterly enchanting texture.
As you fold, take a moment to appreciate how this mixture transforms before your eyes. It goes from being a homogenous orange paste to something wonderfully fluffy and inviting—almost like a dreamy sunset captured in a bowl! Keep an eye on consistency here; you want it smooth yet still airy enough to hold its shape when served. This step is paramount because once combined correctly, every spoonful will melt away beautifully on your tongue—a truly extraordinary experience!
Step 7: Spoon and Serve
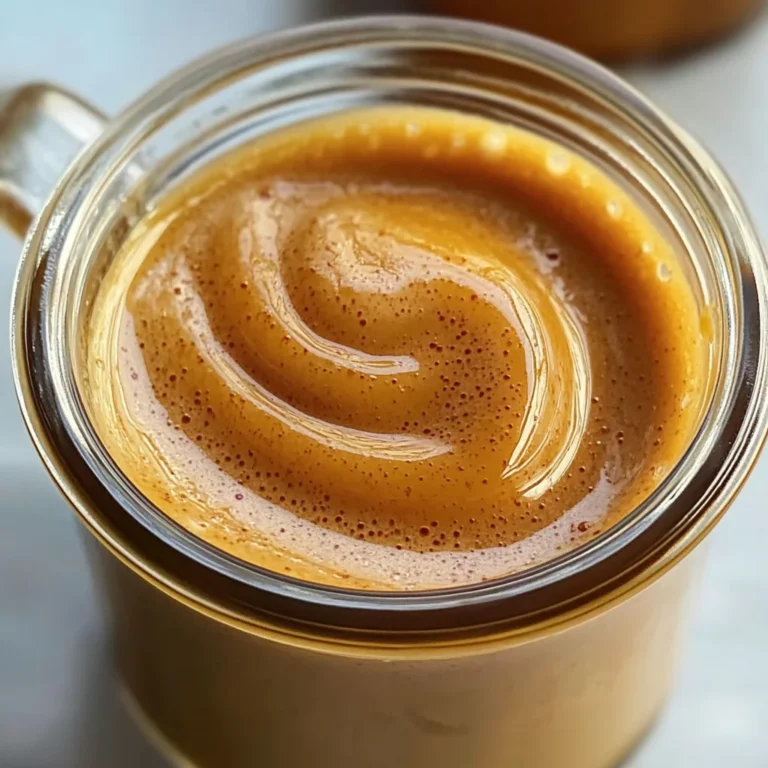
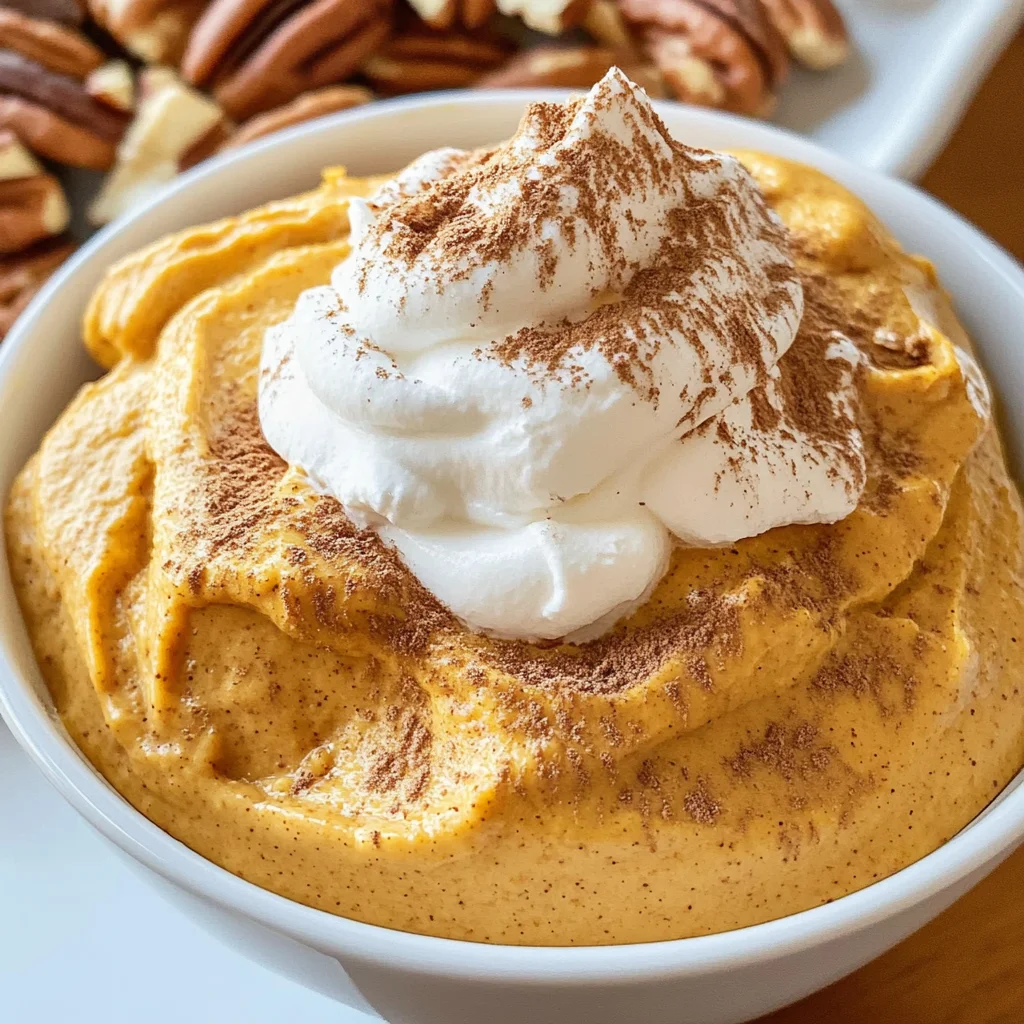
Now comes one of my favorite parts—the plating! Carefully spoon your Pumpkin Fluff into individual jars or a larger serving dish if you’re planning on sharing (or keeping all to yourself—no judgment here!). If using jars, I find it charming to layer them for visual appeal; just imagine seeing those vibrant orange hues through clear glass—a feast for both your eyes and taste buds! Take care not to overfill each jar; leave some space at the top for any toppings you might choose later. This presentation elevates even the simplest desserts into something special.
The beauty of Pumpkin Fluff lies not only in its taste but also in how it invites creativity through presentation. Placing these jars on a rustic wooden platter or even lining them up along your kitchen counter can really set the mood for fall gatherings or cozy nights at home. Plus, there’s something so satisfying about seeing your hard work come together visually—it’s like capturing joy in every jar! And remember, patience pays off here; allow yourself just a moment to admire what you’ve created before moving on.
Step 8: The Chilling Transformation
Let’s talk about chilling—the waiting game that makes all the difference! Cover your Pumpkin Fluff with plastic wrap or a lid if you’re using jars—and place them gently into the refrigerator for at least two hours. I know waiting can be tough when something smells so delightful; however, I promise you this time spent chilling is absolutely non-negotiable if you want that perfect texture. During these couple of hours, all those lovely flavors meld together beautifully while allowing the fluff to firm up just enough so that each spoonful holds its structure without becoming too dense.
While waiting may feel like torture (and let’s be honest—it often does), think about what happens during this chill time: moisture evaporates slightly, making every bite more concentrated in flavor while cooling also helps set the pudding mixture properly. Trust me when I say tasting it right after mixing doesn’t do justice compared to enjoying it cold—you’ll find each spoonful feels refreshing yet comforting all at once! So take advantage of this time—maybe brew yourself some tea or curl up with a good book as you anticipate indulging in your creation later.
And there you have it—a simple yet profoundly satisfying journey towards creating delicious Pumpkin Fluff that’s sure to become a cherished recipe in your home just like it has in mine! Happy cooking!
Storage and Enjoyment Tips for Your Pumpkin Fluff
Now that your delightful Pumpkin Fluff is nestled in its serving dish, it’s time to revel in the anticipation of that first bite! The beauty of this recipe lies not just in its rich, creamy texture and the warm spices that dance on your palate, but also in how it fits seamlessly into your life. Whether you’re serving it at a cozy fall gathering or indulging solo while enjoying a good book, there’s something profoundly satisfying about digging into a bowl of this heavenly fluff. But what if you find yourself with leftovers? Fear not, my friends, because I’m here to help you store it like a pro!
Storing Leftover Pumpkin Fluff
To keep your Pumpkin Fluff fresh and utterly scrumptious, the best way to store it is in an airtight container—think glass jars or plastic containers with secure lids. This simple step is crucial because it prevents any unwanted air from seeping in and compromising the luscious texture you’ve worked so hard to achieve. Ideally, you’ll want to pop your fluff into the refrigerator where it’ll stay delicious for up to three days. But here’s a pro tip: if you’ve added any toppings like whipped cream or pecans before storing, I recommend keeping those separate until you’re ready to serve again. This way, they’ll remain crunchy and as appealing as when you first made them! After chilling, you might notice that the flavors have melded beautifully, creating a taste experience that’s even more profound than when it was freshly made—trust me on this one! When you’re ready to enjoy again, simply spoon it out and indulge—it doesn’t need reheating; it’s best served chilled.
Freezing Pumpkin Fluff for Later
If you find yourself dreaming about Pumpkin Fluff beyond its typical three-day lifespan—or if you’re just preparing for future cravings—freezing is an excellent option! To freeze properly, scoop your fluff into freezer-safe containers or resealable bags—just be sure to leave some room for expansion as it freezes. You can enjoy your delightful creation for up to two months when stored this way! When you’re ready to dive back into this creamy goodness, simply transfer the container from the freezer to the refrigerator and let it thaw overnight. The convenience factor here is absolutely paramount; imagine having a healthy sweet treat waiting for you at a moment’s notice! It’s perfect for unexpected guests or when a sweet craving hits after dinner. Just think about how wonderful it will be to pull out a jar of Pumpkin Fluff from your freezer and watch everyone’s eyes light up at this lovely seasonal treat!
Pumpkin Fluff
Indulge guilt-free with this easy Pumpkin Fluff recipe—a healthy sweet treat perfect for fall! Try it today and delight everyone at your table.
- Prep Time: 5 minutes
- Cook Time: 0 minutes
- Total Time: 5 minutes
- Yield: Serves approximately 4 (1/2 cup servings) 1x
- Category: Dessert
- Method: No cooking required
- Cuisine: American
Ingredients
- 1 can (15 oz) pumpkin puree
- 1 box (1 oz) sugar-free instant vanilla pudding mix
- 2 teaspoons pumpkin pie spice
- 1 teaspoon vanilla extract
- 1 container (8 oz) sugar-free Cool Whip, thawed
Instructions
- In a medium mixing bowl, whisk together pumpkin puree and instant vanilla pudding mix until smooth.
- Add pumpkin pie spice and vanilla extract; stir until well combined.
- Gently fold in thawed Cool Whip until no streaks remain.
- Spoon into serving jars or a larger dish; cover and chill for at least two hours before serving.
Nutrition
- Serving Size: 1/2 cup (120g)
- Calories: 80
- Sugar: 5g
- Sodium: 120mg
- Fat: 0g
- Saturated Fat: 0g
- Unsaturated Fat: 0g
- Trans Fat: 0g
- Carbohydrates: 16g
- Fiber: 2g
- Protein: 1g
- Cholesterol: 0mg