Coconut Cake
There’s something incredibly special about baking a Coconut Cake from scratch; it feels like weaving together threads of tradition and love into a delicious tapestry of flavor. The aroma of coconuts enveloping your kitchen is enough to transport you to sun-drenched beaches, where the gentle sound of waves crashing and laughter fills the air. This isn’t just any cake—this Coconut Cake is a fluffy, moist marvel that embodies the essence of celebration. With each bite, you experience a symphony of textures and tastes: the sweetness of shredded coconut mingling with creamy frosting creates an utterly intoxicating delight. Trust me when I say, serving this cake at your next gathering will not only impress your guests but will also create lasting memories, making every occasion feel just a bit more special.
The beauty of this recipe lies in its simplicity—crafted with just a few humble ingredients that come together to form something truly extraordinary. I’ve always been captivated by the idea that baking can transform basic staples into culinary masterpieces. Each element in this Coconut Cake plays a pivotal role, from the rich coconut milk that infuses moisture to the delicate balance of extracts that intensify the flavor profile. It’s perfect for birthdays, holidays, or simply because you deserve a slice of joy today! So grab your apron and let’s embark on this delightful journey together; I promise you won’t regret it!
Coconut Cake: A Tropical Escape in Every Bite
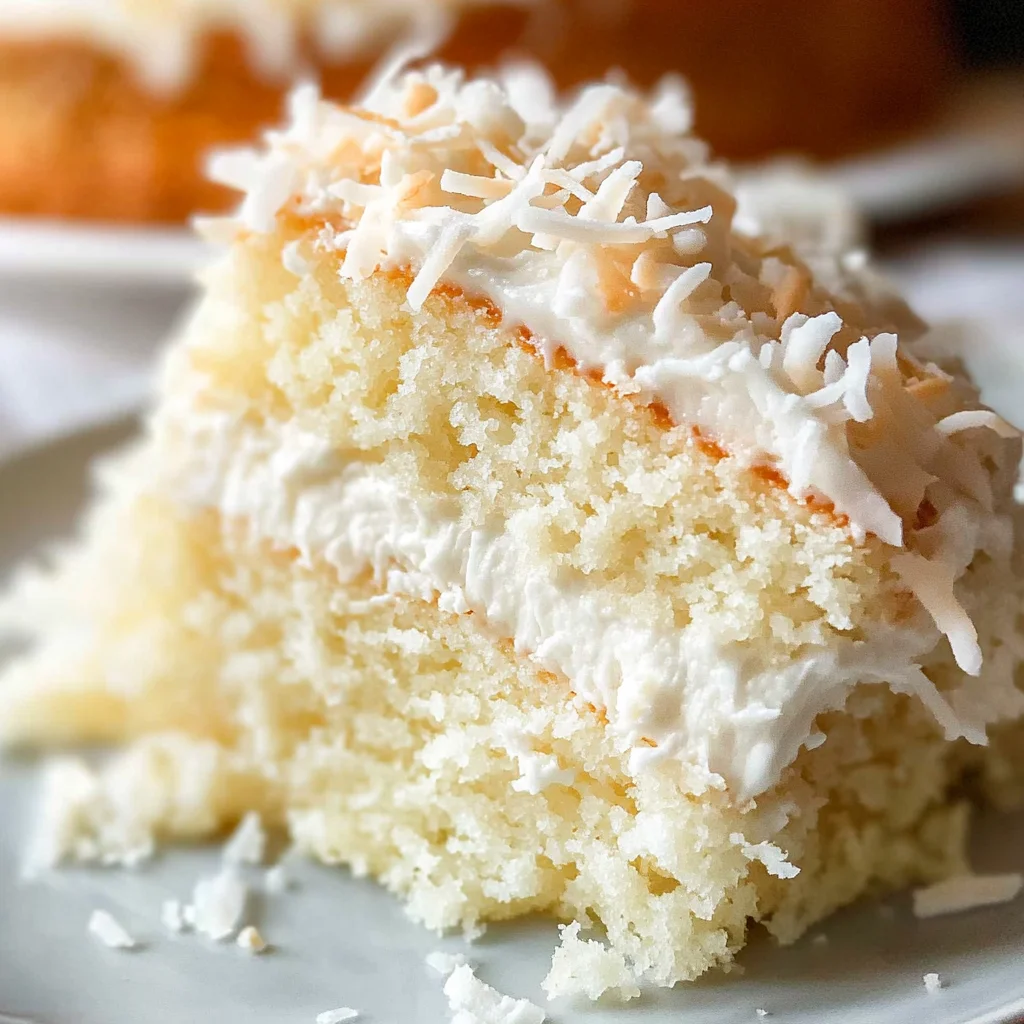
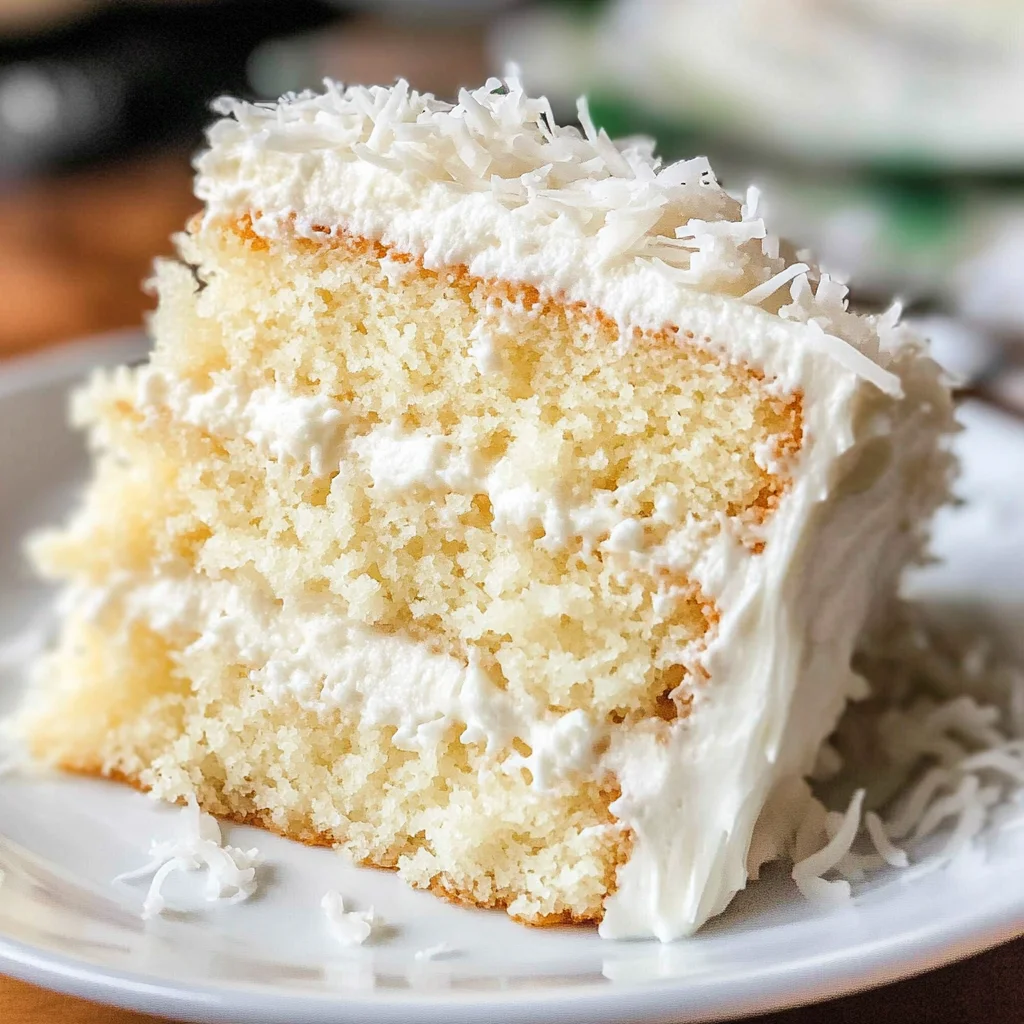
Let me tell you about this Coconut Cake! It’s fluffy, moist, and bursting with coconut flavor, truly made from scratch with love and care. This cake has become my go-to for celebrations big and small—its light texture paired with a coconut cream cheese frosting makes it irresistible. There’s something about decorating it with sweetened shredded coconut that not only adds visual appeal but also heightens that coconut experience in every mouthful. Honestly, once you serve this beauty, you’ll find everyone clamoring for seconds!
Ingredients:
As we prepare to create this delectable Coconut Cake, let’s gather our ingredients. Each one contributes uniquely to the overall experience, ensuring we achieve that fluffy texture and rich coconut flavor.
- 1 cup salted butter (softened) (227g) – Butter is the heart of our cake; it brings richness and flavor while creating that tender crumb we all adore. Softening the butter is absolutely paramount as it allows for proper creaming with sugar, which introduces air into our batter. If you can find European-style butter or even grass-fed varieties, they offer higher fat content for a more flavorful result.
- ¼ cup vegetable oil – The addition of vegetable oil keeps our cake incredibly moist without weighing it down. While butter contributes flavor, oil enhances moisture retention due to its liquid state at room temperature. You could substitute canola or even melted coconut oil if you’re feeling adventurous!
- 1¾ cups granulated sugar (350g) – Sugar does more than just sweeten; it helps create structure and tenderness in our cake by hygroscopic properties—drawing moisture into the batter. When selecting sugar, go for fine granulated sugar as it dissolves easily during mixing.
- 2 large eggs (room temperature) – Eggs are vital here as they provide structure through their proteins while also contributing moisture and richness. Room temperature eggs combine better with other ingredients, leading to a smoother batter; if they’re cold from the fridge, they can cause clumping.
- 4 egg whites (room temperature) – Using additional egg whites adds lightness without overwhelming richness; they help create those airy bubbles essential for our fluffy Coconut Cake texture. Just like with whole eggs, room temperature whites will whip up beautifully!
- 1 teaspoon vanilla extract – Vanilla extract enhances all other flavors; it’s like a warm hug for your taste buds! Always opt for pure vanilla extract over artificial versions—it will elevate your cake’s flavor profile significantly.
- 1 teaspoon coconut extract – This extract is what gives our cake its true coconut essence! It serves as an amplifier for the natural flavors found in our shredded coconut and milk.
- 3 cups cake flour (375g) – Cake flour has lower protein content compared to all-purpose flour, which results in a tender crumb that’s ideal for cakes. If you can’t find cake flour, you can make your own by replacing some all-purpose flour with cornstarch—just remember to sift!
- 1 Tablespoon baking powder – This leavening agent is crucial; it gives our cake lift and helps achieve that delightful fluffiness we crave! Be sure to check expiration dates on your baking powder—freshness is key!
- ½ teaspoon salt – Salt may seem simple but it’s absolutely essential—it enhances sweetness and balances flavors throughout our cake.
- 1 cup coconut milk – This liquid gold not only lends moisture but also infuses tropical flavor into every bite! Full-fat coconut milk provides creaminess while ensuring no compromise on taste.
- 1 cup shredded sweetened coconut – The star ingredient! Sweetened coconut adds texture and bursts of sweetness throughout our moist cake layers. When choosing shredded coconut, look for unsulfured options as they’re less processed.
- 1 (8-ounce) package cream cheese (softened) – Cream cheese forms the base of our luscious frosting; its tanginess pairs perfectly with sweetness while providing that creamy consistency we want when spreading over our beautiful layers.
- 1 cup salted butter (softened) – Just like before! We need another round of softened butter here to ensure our frosting is rich yet spreadable without being overly sweet.
- 5 cups powdered sugar – Powdered sugar is what gives us that smooth consistency we desire in frosting—it also sweetens up nicely without graininess when whipped properly.
- 1 teaspoon vanilla extract – Yes! Another splash of vanilla because who doesn’t want more aromatic goodness? It ties everything together beautifully in both flavor and fragrance.
- 1 teaspoon coconut extract – Here it is again! A second helping ensures every element sings harmoniously while reinforcing our beloved coconut theme throughout both cake and frosting.
- 2 Tablespoons coconut milk (or heavy cream as needed) – This optional addition allows us to adjust frosting consistency based on preference—more liquid means easier spreading while keeping everything wonderfully creamy!
- 3 cups shredded sweetened coconut (for decorating) – More coconuts? Absolutely yes! This final touch transforms our frosted masterpiece into an inviting visual treat while adding delightful crunch!
Equipment You’ll Need:
Having the right tools makes all the difference when baking—trust me on this one! These essentials will help guide you smoothly through each step of creating your Coconut Cake masterpiece:
- Mixing bowls – A set of mixing bowls in various sizes will be your best friend throughout this process. They allow you to mix dry ingredients separately from wet ones before combining them seamlessly—a crucial step for achieving even texture!
- Electric mixer – An electric mixer will save time and energy while ensuring perfect aeration during creaming stages. Whether standing or handheld works wonders—you’ll appreciate how much easier life becomes when making frostings too!
- Measuring cups & spoons – Accurate measurements are non-negotiable here! Investing in quality measuring tools ensures precise ratios which lead directly towards success—every single time.
- Rubber spatula – A sturdy rubber spatula is indispensable when scraping down bowls or folding delicate mixtures gently so nothing goes wasted. It’s all about maximizing flavor potential!
- Cake pans (two 9-inch round) – Invest in good-quality non-stick pans—they’ll help produce clean edges on your cakes while preventing sticking disasters upon removal from their molds post-bake!
Preparing the Coconut Cake
Step 1: Creaming Butter & Sugar
Begin by placing your softened salted butter into a large mixing bowl along with granulated sugar; now comes one of my favorite parts—the creaming process! Using your electric mixer fitted with paddle attachment or beaters on medium speed, beat these two together until light and fluffy—this usually takes about 3–5 minutes depending on mixer strength. What you’re aiming for here is a pale yellow mixture that’s airy yet still holds shape—a sign you’ve successfully incorporated air bubbles important for rise later during baking! Remember not to rush this step; patience pays off big time! Scraping down sides frequently helps ensure everything blends evenly too.
Step 2: Adding Eggs & Extracts
Once you’ve achieved that dreamy creaminess, it’s time to introduce your room-temperature eggs one at a time—this gradual addition allows them to emulsify fully rather than curdle against cold fat which could happen otherwise if added all at once! Beat until fully blended after each addition before moving forward—don’t forget those lovely extracts coming next: vanilla followed by wonderful coconut essence—which contribute immensely toward building depth within flavors later alongside other ingredients used further down road!
Step 3: Combining Dry Ingredients
In another bowl—a medium-sized one preferably—we’ll whisk together flour mixed alongside baking powder plus salt until evenly blended prior bringing these dry goods back over towards wet mixture prepared earlier now ready awaiting their grand entrance into party happening here soon enough ahead too… Gradually add half portions dry mix alternating between incorporating remaining portion along with luscious creamy goodness provided via full-fat lusciousness known widely across kitchens everywhere—you guessed right: Our glorious liquid gold known simply as coconut milk! Make sure everything gets well incorporated without overmixing though since doing so runs risk developing gluten resulting dense rather than light crumb desired instead…
Step 4: Folding In Shredded Coconut
Finally comes last ingredient worthy spotlight moment—the shredded sweetened coconuts themselves arriving gracefully onto stage now ready show off talents magnificently enhancing overall delightful experience awaiting those lucky enough partake afterwards… Gently fold these beauties into batter using rubber spatula until evenly distributed throughout mixture avoiding vigorous stirring since don’t want deflate air bubbles created earlier during creaming process still intact enabling rise remain intact during bake time ahead next step awaits eagerly approaching soon too…
With these foundational steps laid out beautifully before us now—it won’t be long before indulging fabulous creation unfolding right inside very own oven soon enough shortly afterward too so stay tuned friends because magic happens fast once cakes go inside heat transforming raw elements mere moments ago mere thoughts dreams become tangible reality enjoyed passionately thereafter taking bites savoring sweetness enjoyably shared loved ones around tables filled laughter smiles kindness warmth shared moments unforgettable form bonds cherished dearly felt deeply forevermore…
Step 5: The Art of Mixing Your Batter
Now that we have our ingredients prepped and ready to go, it’s time to bring them together into a glorious batter. Start by creaming the softened butter and vegetable oil in a large mixing bowl using an electric mixer or stand mixer. This is where the magic begins! Creaming introduces air into the mixture, which is crucial for creating a light and fluffy Coconut Cake. You want to beat this mixture until it’s pale and fluffy—about 3 to 5 minutes should do the trick. Visual cues here are essential; look for a texture that appears almost whipped, light enough to float on air but not so airy that it collapses.
Next, gradually add the granulated sugar while continuing to mix. Each grain of sugar contributes sweetness and helps stabilize the structure of your cake. Combine this mixture until it’s well incorporated, which should take another minute or so. Now comes the fun part—add in your eggs one at a time, followed by the egg whites, vanilla extract, and coconut extract. Make sure each egg is fully blended before adding the next; this ensures an even distribution of moisture and fat throughout your batter. Remember, this step is non-negotiable! The emulsification process binds together fat and water molecules, creating a smooth and cohesive batter that will rise beautifully in the oven.
Step 6: Flour Power – Adding Dry Ingredients
Once your wet ingredients are perfectly mixed, it’s time to gently introduce your dry ingredients—the flour, baking powder, and salt. I can’t stress enough how important it is to sift these together before adding them into your wet mixture! Sifting aerates the flour and evenly distributes the baking powder and salt, preventing any clumps that could lead to uneven rising or taste in your final cake. Trust me on this—no one wants clumps of baking powder lurking in their Coconut Cake.
When you add the dry ingredients to your wet mixture, I encourage you to do it gradually. Start by adding about one-third of your flour mixture while alternating with half of the coconut milk—you can mix gently with a spatula or on low speed with your mixer. This method helps maintain the airiness we’ve worked so hard for during creaming while ensuring everything combines smoothly without overmixing, which can create a dense cake texture. Continue alternating until all flour and milk are combined; you want a batter that’s thick but pourable—think of luscious pancake batter! Once everything looks just combined with no visible flour streaks left behind, fold in those beautiful shards of shredded sweetened coconut. This adds an extra layer of flavor and texture that will make each bite absolutely divine!
Step 7: Bake It Like You Mean It!
Now that your batter is bubbling with life from all those wonderful flavors mingling together, it’s time for baking! Preheat your oven to 350°F (175°C) if you haven’t already done so—this initial heat is crucial for achieving that perfect rise as soon as you place your cake pans inside. While it heats up, prepare two 9-inch round cake pans by greasing them well with cooking spray or buttering them generously before lining them with parchment paper. This small step makes all the difference when it comes time to release those cakes from their molds; trust me on this one!
Once your oven has reached temperature and your pans are prepped, divide the batter evenly between them—give each pan a gentle tap on the counter to release any air bubbles trapped within. Bake these beauties for about 25-30 minutes or until they’re golden brown on top and a toothpick inserted into the center comes out clean (or with just a few moist crumbs). As they bake, you’ll be enveloped in an utterly intoxicating aroma wafting through your kitchen—a tantalizing hint of what’s to come! Keep an eye on them towards the end of baking; every oven behaves differently depending on its quirks and characteristics. If you notice they’re browning too quickly around the edges but still look underbaked in the center, consider tenting them lightly with aluminum foil.
Step 8: Cooling – The Patience Game
Once your cakes have finished baking—and I promise they’ll be worth every minute spent waiting—remove them from the oven but don’t rush into frosting just yet! It may be tempting to dive right in while they’re warm (believe me; I’ve been there), but allowing them to cool properly is absolutely paramount for achieving that perfect frosting finish later on. Let those cakes rest in their pans for about 10-15 minutes before transferring them onto cooling racks; this allows steam to escape without making soggy bottoms.
After they’ve cooled slightly, gently run a knife around the edges of each pan before flipping them out onto racks lined with parchment paper or silicone mats—a little extra care here goes a long way in preserving their delicate structure! Letting them cool completely at room temperature (around an hour) ensures that when you apply that luxurious frosting later on, it won’t melt into oblivion but rather cling lovingly around each layer like a warm hug from grandma.
Next Major Phase – Whipping Up Coconut Cream Cheese Frosting
With our delightful cakes now cooled down beautifully and ready for adornment, let’s move on to creating that irresistible coconut cream cheese frosting that will elevate our Coconut Cake from delicious to extraordinary! Grab that softened cream cheese along with another cup of softened salted butter because we’re about to whip up something truly magical!
Storage and Enjoyment Tips for Your Coconut Cake
Now that you’ve crafted this beautiful Coconut Cake, let’s talk about how to savor every last crumb! This cake is not just a delightful treat for immediate enjoyment; it also has the potential to stay delicious for days. You might be surprised at how well it holds up! With just a few simple storage tips, you can maintain its fluffy, moist texture and intoxicating coconut flavor, ensuring that each slice is as divine as the first.
Storing Leftover Coconut Cake
To keep your Coconut Cake fresh and fabulous, storing it correctly is absolutely paramount. I recommend placing any leftover slices in an airtight container to shield it from air exposure, which can dry out the cake. If you’re using an uncovered plate, consider wrapping it tightly with plastic wrap or aluminum foil to seal in that luscious moisture. Stored this way at room temperature, your cake will stay delectable for about three days. But trust me on this—if you want to preserve that creamy frosting and avoid any sogginess, keeping it in the fridge is your best bet; it will last up to a week chilled. Now, if you’re worried about the cake losing its charm over time, here’s a little pro tip: tuck a slice of bread into the container with your cake. The bread will absorb excess moisture while keeping your cake perfectly soft! After storage, when you take a bite of this delightful creation again, you’ll find that the flavors have melded beautifully, creating an even richer taste experience. For serving suggestions after refrigeration, simply let it sit at room temperature for about 30 minutes for that heavenly melt-in-your-mouth sensation.
Freezing Coconut Cake for Later
Ahh, but what if you want to save some of this heavenly Coconut Cake for a later date? Freezing is such a fantastic option! To freeze it properly, wait until your cake has cooled completely and then slice it into portions. Wrap each slice tightly in plastic wrap and place them inside a freezer-safe airtight container or a heavy-duty freezer bag—this prevents freezer burn from ruining that exquisite flavor and texture. When frozen correctly, your Coconut Cake can last up to three months without losing its charm! When you’re ready to indulge again (and trust me—you will be), simply remove a slice from the freezer and let it thaw in the refrigerator overnight or at room temperature for about an hour before enjoying. The convenience of having a delicious homemade dessert ready at your fingertips makes freezing such an appealing option! Imagine pulling out a slice on a cozy afternoon or surprising friends with an unexpected treat—it’s pure joy wrapped in coconut sweetness!
Coconut Cake
Experience the bliss of baking a Coconut Cake that captures the essence of tropical paradise with every bite! This delightful cake is light, fluffy, and infused with rich coconut flavor. Whether you’re celebrating a special occasion or simply indulging in a sweet treat, this homemade Coconut Cake is sure to impress. Layered with creamy coconut frosting and adorned with sweetened shredded coconut, each slice offers an irresistible taste of sunshine. Perfect for birthdays, holidays, or any day that deserves a touch of sweetness, this cake embodies warmth and joy.
- Prep Time: 20 minutes
- Cook Time: 30 minutes
- Total Time: 50 minutes
- Yield: Approximately 12 servings 1x
- Category: Dessert
- Method: Baking
- Cuisine: American
Ingredients
- 1 cup salted butter (softened)
- ¼ cup vegetable oil
- 1¾ cups granulated sugar
- 2 large eggs (room temperature)
- 4 egg whites (room temperature)
- 1 teaspoon vanilla extract
- 1 teaspoon coconut extract
- 3 cups cake flour
- 1 tablespoon baking powder
- ½ teaspoon salt
- 1 cup coconut milk
- 1 cup shredded sweetened coconut
- 8 oz cream cheese (softened)
- 1 cup salted butter (softened)
- 5 cups powdered sugar
- 1 teaspoon vanilla extract
- 1 teaspoon coconut extract
- 2 tablespoons coconut milk (or as needed)
- 3 cups shredded sweetened coconut (for decorating)
Instructions
- Preheat oven to 350°F (175°C). Grease two 9-inch round cake pans.
- In a large mixing bowl, cream together softened butter and vegetable oil until fluffy. Gradually add sugar and mix well.
- Add eggs one at a time along with egg whites, vanilla extract, and coconut extract; blend until smooth.
- In a separate bowl, whisk together cake flour, baking powder, and salt. Gradually add to wet mixture alternating with coconut milk until just combined.
- Gently fold in shredded coconut.
- Divide batter evenly between prepared pans and bake for 25-30 minutes or until golden brown.
- Allow cakes to cool before frosting with the cream cheese mixture.
Nutrition
- Serving Size: 1 slice (100g)
- Calories: 365
- Sugar: 32g
- Sodium: 220mg
- Fat: 20g
- Saturated Fat: 10g
- Unsaturated Fat: 10g
- Trans Fat: 0g
- Carbohydrates: 41g
- Fiber: 1g
- Protein: 4g
- Cholesterol: 65mg