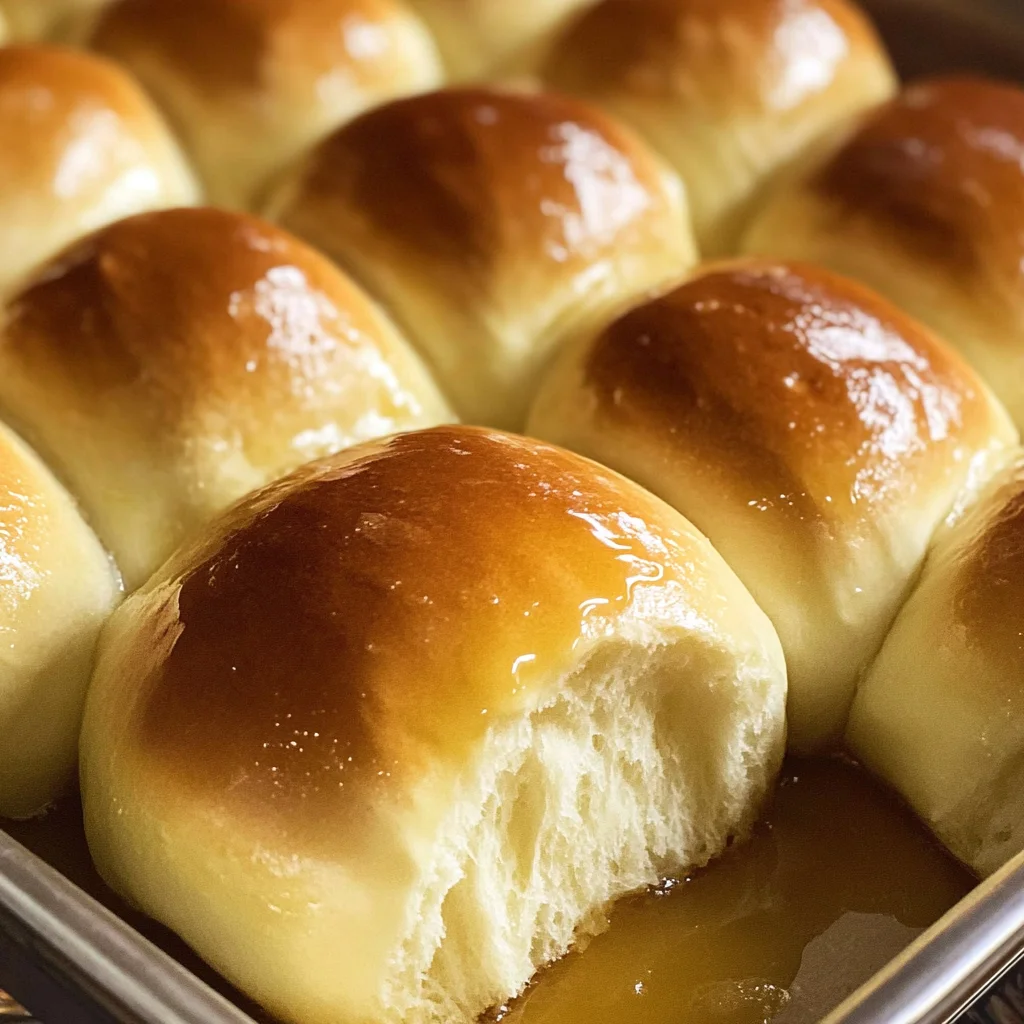
Hawaiian Dinner Rolls
There’s something truly magical about the scent of freshly baked bread wafting through your home, isn’t there? It’s like a warm hug that wraps around you, tugging at the heartstrings and memories of family gatherings, happy moments, and shared meals. These Hawaiian Dinner Rolls are more than just delightful little puffs of goodness; they are a bridge between tradition and innovation, a recipe that brings joy not only to your palate but also to your spirit. When you bite into one, you’ll experience a symphony of flavors—sweetness from the pineapple juice, warmth from the vanilla, and buttery richness that dances on your tongue. Trust me when I say that these rolls will become a cherished staple in your kitchen.
What makes these rolls particularly special is their soft texture and subtly sweet flavor—perfect for mopping up gravy during holiday dinners or as the base for sliders at your next gathering. They are incredibly versatile! Whether served alongside savory dishes or transformed into mini sandwiches with your favorite fillings, their charm is undeniable. My friends often tell me how they can’t resist going back for seconds (or thirds!), and it fills my heart with joy to see them enjoy something I’ve poured my love into. So let’s embark on this culinary adventure together and create some unforgettable Hawaiian Dinner Rolls!
Hawaiian Dinner Rolls: A Taste of Paradise in Every Bite
These Hawaiian Dinner Rolls are not just any bread; they’re fluffy clouds of sweetness that will transport you straight to a sunny beach with palm trees swaying in the breeze. Let’s dive into this recipe together!
Ingredients:
As we gather our ingredients, keep in mind that each one plays a pivotal role in creating these delectable rolls. Quality matters here—every item contributes to the overall flavor and texture.
- ⅔ cup canned pineapple juice (at room temperature). This ingredient is absolutely paramount; it infuses the rolls with a natural sweetness that sets them apart from ordinary dinner rolls. The acidity of pineapple juice also helps to tenderize the dough, resulting in an irresistibly soft texture. When purchasing this ingredient, opt for 100% juice without added sugars or preservatives if possible—it’s worth it for the authentic taste it brings.
- ½ cup non-dairy or regular dairy milk (warmed to 110℉). Milk adds richness and moisture to our rolls, contributing to their tender crumb. Warming it gently helps activate the yeast more effectively so you can achieve that beautiful rise. If you’re using non-dairy options like almond or oat milk, make sure it’s unsweetened to maintain balance without overpowering sweetness.
- ¼ cup light brown sugar (packed). Brown sugar not only provides sweetness but also adds moisture due to its molasses content, which helps keep our rolls soft and fresh longer. This ingredient plays well with the pineapple juice, enhancing the overall flavor profile while giving our rolls that lovely golden hue as they bake.
- 2 ¼ teaspoons active dry yeast (one envelope). Yeast is our secret weapon for achieving those fluffy rolls we all dream about! It’s essential to ensure your yeast is fresh; otherwise, it might not activate properly. When sprinkled over warm liquids like our milk mixture, it should foam after about five minutes—this indicates it’s ready to work its magic.
- 4 cups + 2 Tablespoons all-purpose flour. Flour is the backbone of any bread recipe; it provides structure and stability. Using all-purpose flour strikes a perfect balance between softness and strength in our dough. If you’re looking for gluten-free options, you could experiment with blends designed for baking—but remember that results may vary.
- 1 egg (lightly beaten). This egg acts as both an enriching agent and a binding component in our dough while helping create that beautiful golden crust during baking thanks to its proteins and fat content.
- 1 teaspoon vanilla extract. Ahh, vanilla—the joyful note in every bite! It adds warmth and depth to our Hawaiian Dinner Rolls which perfectly complements the sweetness from the sugar and pineapple juice.
- 1 teaspoon kosher salt. Salt isn’t just for seasoning; it strengthens gluten formation in bread dough while balancing sweetness. A good pinch enhances all other flavors—don’t skip this step!
- 3 Tablespoons unsalted butter (divided). Butter brings richness and flavor while contributing to tenderness within each roll—it’s what makes them so heavenly! Make sure it’s softened but not melted because we want it to mix seamlessly into our dough without altering its consistency drastically.
- 1 egg beaten with 1 Tablespoon water (for egg wash). This mixture provides an appealing shine on top of our baked rolls—a little touch that elevates their presentation beautifully!
- 1 Tablespoon unsalted butter (melted). Brushing melted butter over warm rolls before serving adds an extra layer of indulgence, making them irresistible right out of the pan!
Equipment You’ll Need:
Now let’s chat about having the right tools at hand—it truly makes all the difference! These essentials will partner with you throughout your baking journey:
- Stand mixer with dough hook attachment: A stand mixer saves time and effort by thoroughly kneading your dough without tiring out your arms! The dough hook mimics hand kneading by stretching gluten strands effectively—trust me; you’ll appreciate having this handy when working with bread recipes.
- Large oiled bowl: You’ll need a spacious bowl where our dough can rise comfortably as it doubles in size! Oiling prevents sticking while allowing easy transfer later on—we don’t want any precious dough left behind!
- 9×13-inch baking pan: A classic choice for baking these beautiful rolls evenly—you want them close together so they can rise upwards rather than spread outwards during baking!
- Plastic wrap or clean kitchen towel: Covering rising dough retains warmth while trapping humidity—essential components for successful fermentation!
Now that we’re equipped with knowledge about our ingredients and tools let’s get started on preparing these Hawaiian Dinner Rolls!
Step 1: Mixing It All Together
Begin by combining the pineapple juice, warm milk, and packed light brown sugar in the bowl of your stand mixer fitted with a dough hook attachment. The warmth encourages yeast activation while dissolving sugar creates a syrupy base full of flavor! Once everything’s together, sprinkle those active dry yeast granules atop this mixture and allow it to sit undisturbed for about five minutes until foamy—this is crucial because if nothing happens here, you’ll need fresh yeast! After confirming life has emerged from those tiny granules, add flour gradually along with beaten egg, vanilla extract, and kosher salt into this mixture while keeping an eye on consistency as you pour melted butter slowly into swirling currents below.
Step 2: Kneading To Perfection
Once you’ve created a shaggy dough through mixing on low speed for around two minutes—the moment has come to transfer everything onto slightly floured work surface where tactile sensation reigns supreme! Knead gently yet firmly until smooth (about three-to-four minutes) whilst assessing texture constantly—you want softness but also slight tackiness—not stickiness—that’s important here! Should things feel too dry or wet during kneading process? No worries at all—adjust accordingly by adding either flour or milk one tablespoon at time until desired consistency reaches satisfaction levels fitting enough worthy enough rolling into heavenly spheres later!
Step 3: Letting It Rise
After kneading blissfully comes transfer time—the oiled bowl awaits patiently as we place our beautiful ball o’ dough inside then cover snugly using plastic wrap or kitchen towel ensuring warmth surrounds lovingly—a cozy retreat perfect rising environment awaits ahead! Now comes patience; let this baby rest peacefully undisturbed anywhere between sixty-to-ninety minutes depending upon ambient temperature conditions—it’s quite magical watching volume double during wait period!
Step 4: Shaping Each Roll
When time’s finally up—reveal this glorious sight awaiting us—the risen dough beckons attention now needing division into equal portions—we aim for fifteen delightful pieces total here! Use clean hands liberally dusted lightly against surface tension allowing friction help shape each piece roundly before placing seam-side down within prepared baking pan lined previously brushed lightly melted butter ensuring nothing sticks later once baked… repeat till every last bit neatly nestled close together forming perfect harmony awaiting final rise ahead!
Stay tuned as we continue through this delightful journey creating mouthwatering Hawaiian Dinner Rolls filled with love & excitement at every turn!
Step 5: Shaping the Rolls into Heavenly Bites
Once your dough has risen to a lovely, pillowy state—think of it like a soft cloud waiting to be transformed—it’s time for the next exciting step: shaping those rolls! Gently turn the dough out onto a clean, smooth work surface. This is where the magic begins. You’ll want to divide the dough into 15 equal pieces, which is about 70 grams each if you prefer precision (and who doesn’t love perfectly uniform rolls?). Now, I know measuring can feel tedious, but trust me, this attention to detail will pay off in every roll’s delightful consistency.
Using the palms of your hands, start rolling each piece into a ball. The friction between your palm and the dough will help create that beautiful, smooth exterior we all crave. Place each formed roll seam-side down in your prepared baking pan. This method ensures they stay round and fluffy as they rise again. As you fill the pan, take a moment to appreciate how satisfying it feels to create something so beautiful with your own hands. Remember, when working with dough, slow down and enjoy the process; don’t rush this step! Your patience will be rewarded with rolls that are truly extraordinary.
Step 6: The Second Rise – A Crucial Transformation
Now that your rolls are nestled snugly in the pan, it’s time for them to undergo their second rise. Cover them gently with plastic wrap or a clean kitchen towel—this helps retain moisture and warmth, which are absolutely paramount for achieving that perfect puffiness. Set them aside in a warm spot and let them rise for about 60 minutes. During this time, those little yeast warriors will continue their work, creating air pockets that make your rolls light and airy.
Why is this second rise so important? It allows flavors to deepen while creating that quintessential texture we all adore in Hawaiian Dinner Rolls. You’ll notice them expanding beautifully—don’t be surprised if they almost double in size! Keep an eye on them; they should look puffy and full of promise by the end of this period. If they’re not quite there yet after 60 minutes, give them an extra few minutes—this isn’t an exact science but rather an art form that requires a bit of intuition. Trust me on this; it’s worth every minute!
Step 7: Prepping for Perfection – Preheating and Egg Wash
With your rolls now puffed up like little golden clouds ready for their heavenly journey into the oven, it’s time to preheat your oven to a warm 375℉ (190℃). This step is essential because you want those rolls to hit that perfect temperature for baking right away—no lukewarm starts here! While your oven is heating up, grab that beaten egg mixed with water for an egg wash; this simple mixture is going to elevate those rolls from delicious to utterly intoxicating.
Brush each roll lightly with the egg wash just before placing them in the oven. This step not only adds a beautiful golden-brown sheen during baking but also creates a barrier that keeps moisture inside while promoting even browning on the outside—a non-negotiable element for achieving stunning results. Take care not to overdo it; too much egg wash can lead to overly darkened spots on your rolls. A gentle touch is all you need here! Once they’re brushed and ready, pop them into your preheated oven and get excited—the aroma of freshly baked Hawaiian Dinner Rolls is about to fill your home!
Step 8: Baking Your Perfect Hawaiian Dinner Rolls
As you place your pan into the oven and close that door behind you, let anticipation build! The initial bake will last about 20-25 minutes—a relatively short amount of time considering the delicious reward awaiting you at the end. Keep an eye on those beauties as they bubble away; you want them golden brown across the top with slightly crispy edges while remaining tender inside.
To test for doneness without cutting one open (which would be tempting!), look for visual cues: a lovely golden hue across their tops along with a slight dome shape is what you’re aiming for. If you’re feeling adventurous, you can also gently poke one roll; if it springs back quickly without leaving an indentation, you’re ready for the grand finale! Remember that ovens can vary significantly; if yours tends toward being hotter or cooler than average, adjust accordingly—your senses will guide you here more than any timer ever could.
Final Touches: The Irresistible Butter Brush
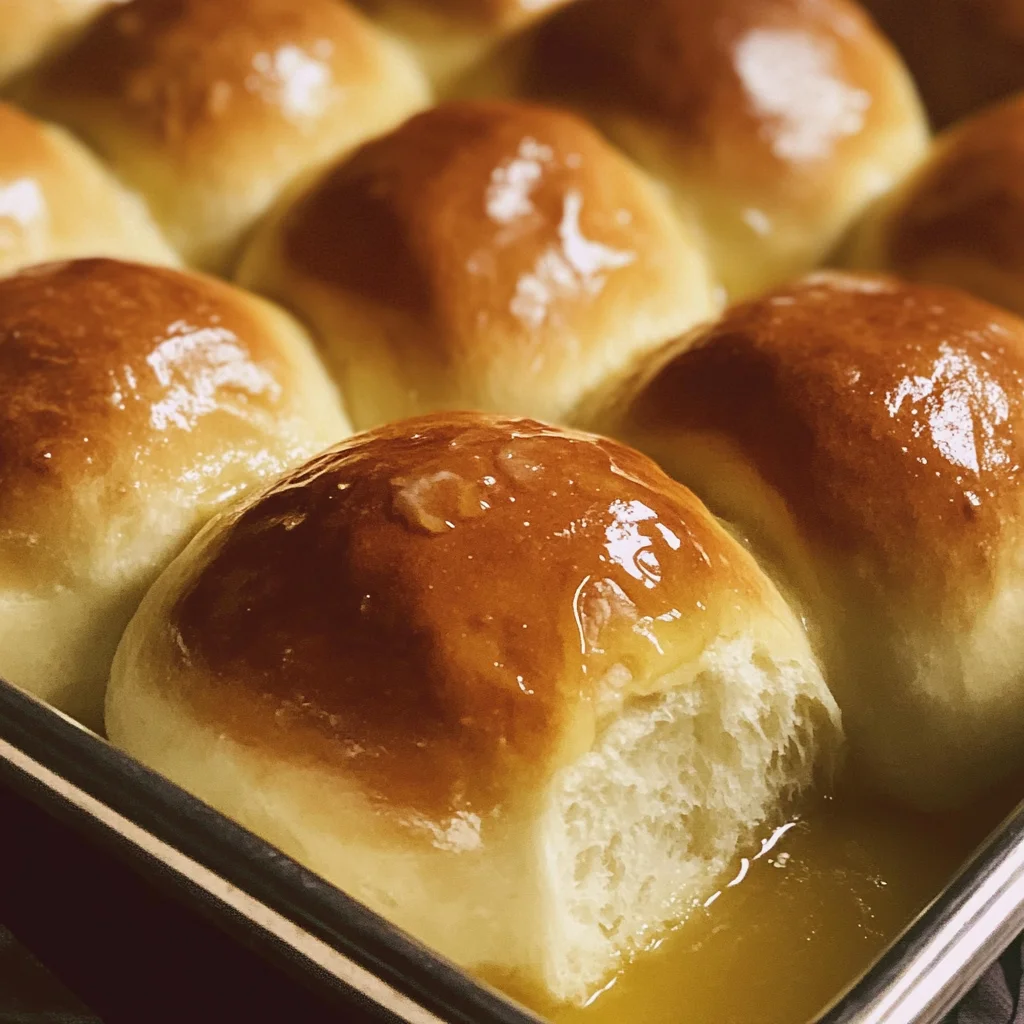
As soon as those rolls emerge from the oven looking like little spheres of joy, resist diving in immediately! Let them cool slightly in the pan—just enough time for their structure to set properly without collapsing under their own weight. While they’re cooling—oh yes—the final touch awaits: brush those warm rolls with melted butter! This is where things get really exciting; brushing them with melted butter adds richness and flavor while giving them that desirable glistening finish.
Think of it as draping a luxurious shawl over these heavenly creations—it enhances both appearance and taste dramatically! As you brush on this liquid gold, take a moment to breathe in deeply; let that irresistible aroma wrap around you like a warm hug from grandma’s kitchen. Once they’ve cooled sufficiently—and trust me when I say you’ll have some very eager friends or family members waiting—you’re ready to serve these delightful Hawaiian Dinner Rolls at any meal or occasion.
These rolls aren’t just food; they’re an experience filled with warmth and love—a true testament to why we gather around tables together. Whether served as an appetizer or alongside dinner or even turned into sliders at lunch, I promise you’ll find these Hawaiian Dinner Rolls become an instant favorite in your household too! What are you waiting for? Roll up those sleeves and get baking!
Storage and Enjoyment Tips for Your Hawaiian Dinner Rolls
Now that your kitchen is filled with the warm, sweet aroma of freshly baked Hawaiian Dinner Rolls, it’s time to savor every last one! These rolls are not just a delightful addition to your meal; they are a celebration of flavor and comfort that can be enjoyed in various ways. But what happens if you have a few left over? Fear not! I’m here to guide you through preserving these little treasures so they can continue to bring joy long after the last bite.
Storing Leftover Hawaiian Dinner Rolls
To keep your Hawaiian Dinner Rolls fresh and delicious, it’s essential to store them properly. I recommend placing them in an airtight container or wrapping them tightly in plastic wrap. This helps lock in that soft, pillowy texture we all adore while preventing them from drying out. If stored this way at room temperature, they will stay fresh for about 2-3 days. For longer storage, consider placing them in the refrigerator, but beware—refrigeration can sometimes dry bread out more quickly than you’d like! To maintain quality, you can even place a slice of bread inside the container with your rolls; this simple trick helps keep everything moist. When you’re ready to enjoy another roll, you’ll find that they’re just as good (if not better!) than on the day they were baked. Reheating them is a breeze; simply pop them in a warm oven for about 5-7 minutes until they’re heated through and the outside is slightly crispy again. Trust me, it’s worth it!
Freezing Hawaiian Dinner Rolls for Later
If you want to extend the life of your wonderful Hawaiian Dinner Rolls even further, freezing is an excellent option! To freeze them properly, let the rolls cool completely after baking; then wrap each one individually in plastic wrap and place them into a zip-top freezer bag. This keeps out air and prevents freezer burn, allowing them to retain their heavenly softness and flavor. They can be stored in the freezer for up to 3 months—just think of all those future meals you’ll get to enjoy! When you’re ready to indulge again, simply take out as many rolls as you desire and let them thaw at room temperature for about an hour or warm them directly from frozen in your oven at 350°F for about 10-15 minutes until warmed through. Isn’t it fantastic how easy it is to have homemade goodness on hand whenever you need it?
Hawaiian Dinner Rolls
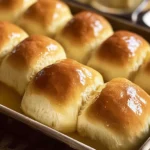
Indulge in the bliss of homemade Hawaiian Dinner Rolls—soft, fluffy, and subtly sweet, they’re a delightful treat that brings warmth to any meal. These rolls are enriched with the natural sweetness of pineapple juice and a hint of vanilla, creating a tropical flavor that will transport you to paradise with each bite. Perfect for mopping up gravy at holiday dinners or transforming into sliders for casual gatherings, these versatile rolls are bound to become a cherished staple in your kitchen. Easy to make and even easier to enjoy, let’s bring the joy of baking into your home!
- Prep Time: 30 minutes
- Cook Time: 25 minutes
- Total Time: 55 minutes
- Yield: Approximately 15 servings 1x
- Category: Bread
- Method: Baking
- Cuisine: Tropical
Ingredients
- ⅔ cup canned pineapple juice (room temperature)
- ½ cup warm milk (110℉)
- ¼ cup packed light brown sugar
- 2 ¼ teaspoons active dry yeast
- 4 cups + 2 tablespoons all-purpose flour
- 1 egg (lightly beaten)
- 1 teaspoon vanilla extract
- 1 teaspoon kosher salt
- 3 tablespoons unsalted butter (divided)
- Egg wash (1 egg beaten with 1 tablespoon water)
Instructions
- In a stand mixer bowl, mix pineapple juice, warm milk, and brown sugar. Sprinkle yeast on top and let sit for about 5 minutes until foamy.
- Gradually add flour, beaten egg, vanilla extract, salt, and melted butter to the mixture while mixing on low speed.
- Knead the dough on a floured surface until smooth and slightly tacky (about 3-4 minutes).
- Place in an oiled bowl, cover with plastic wrap or a towel, and let rise in a warm place for about 60-90 minutes until doubled in size.
- Turn out the dough onto a floured surface and divide into 15 equal pieces. Shape each piece into a ball and place seam-side down in a greased baking pan.
- Cover rolls with plastic wrap or a towel again and allow them to rise for another hour.
- Preheat oven to 375℉. Brush rolls with egg wash before baking for 20-25 minutes until golden brown.
- Brush warm rolls with melted butter before serving.
Nutrition
- Serving Size: 1 serving
- Calories: 130
- Sugar: 5g
- Sodium: 120mg
- Fat: 4g
- Saturated Fat: 2g
- Unsaturated Fat: 2g
- Trans Fat: 0g
- Carbohydrates: 22g
- Fiber: 1g
- Protein: 3g
- Cholesterol: 30mg