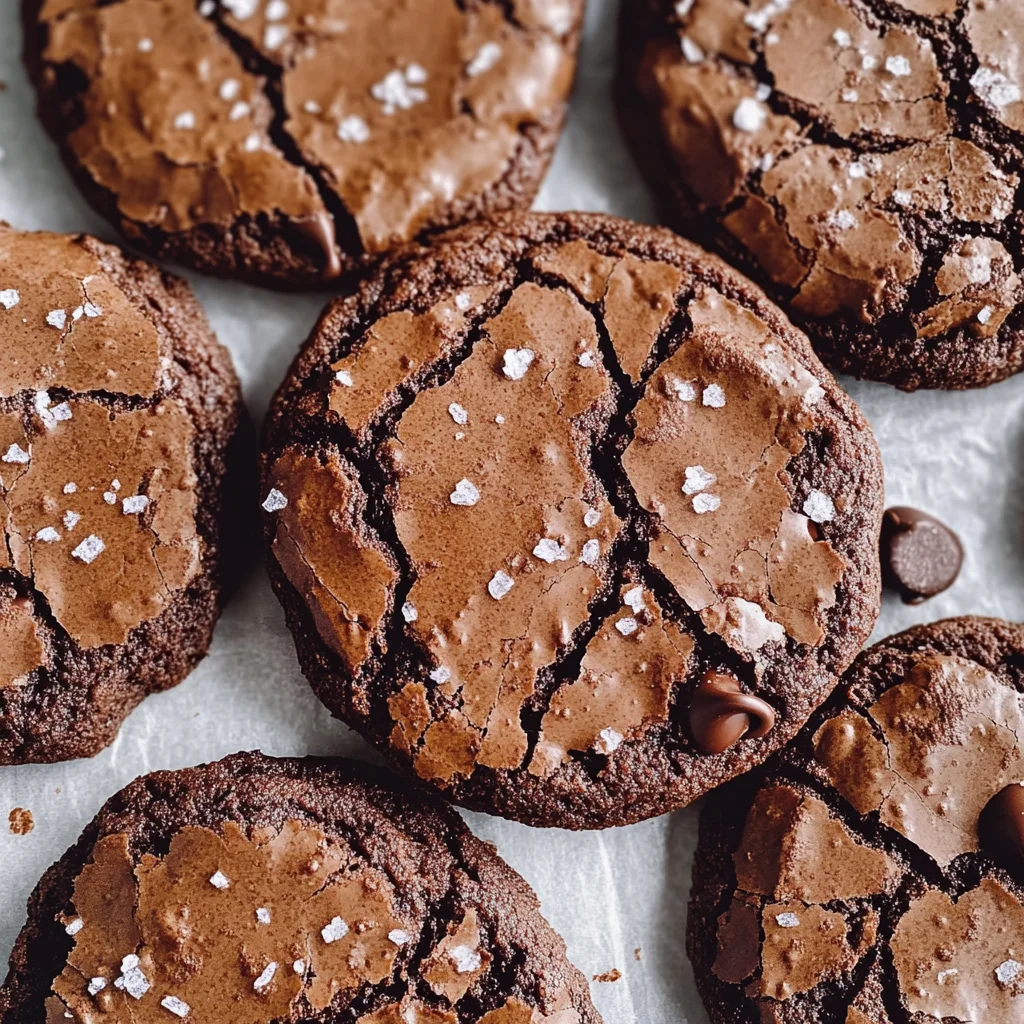
Fudgy Brownie Cookies
Indulge in the rich, chocolatey goodness of fudgy brownie cookies—an exquisite treat that combines the classic flavors of brownies with the convenience of cookies. These decadent bites feature a soft and chewy texture that melts in your mouth, perfectly satisfying your chocolate cravings. With minimal prep time and simple ingredients, you can whip up these irresistible cookies in no time. Whether you’re hosting a gathering or enjoying a sweet escape at home, fudgy brownie cookies are sure to impress everyone. Serve them warm with a scoop of vanilla ice cream or enjoy them straight from the oven for an unforgettable dessert experience.
When I first stumbled upon this recipe, I was captivated by its simplicity and the promise of chocolatey bliss. The idea of merging two beloved treats into one delightful bite was like discovering a hidden treasure in my kitchen. The aroma wafting through the house as these cookies bake is utterly intoxicating; it’s enough to make anyone’s heart skip a beat! Picture this: as you pull them out of the oven, those edges perfectly set while the centers remain delightfully soft—a true testament to their fudgy nature. I promise you, every bite is a symphony of flavors that not only brings joy but also evokes memories of cozy afternoons spent baking with loved ones.
Now let’s dive deeper into what makes these fudgy brownie cookies so special. They embody comfort and nostalgia, reminiscent of childhood days filled with laughter and sweet indulgences. Imagine sharing them with family or friends during movie nights or holiday gatherings—their rich taste and chewy texture will make any occasion feel even more special. And if you’re looking for ways to elevate your cookie game, I encourage you to experiment with mix-ins like nuts or caramel. Trust me on this; it adds an extra layer of richness that will leave everyone asking for seconds!
Fudgy Brownie Cookies: A Chewy Delight
Let’s embark on this culinary journey together! As we gather our ingredients for these fudgy brownie cookies, remember that each one plays a vital role in crafting something extraordinary. The blend of textures and flavors is not just about following a recipe; it’s about creating an experience that warms your heart and fills your belly with happiness.
Ingredients:
- 1 cup all-purpose flour. This ingredient serves as the backbone of our fudgy brownie cookies, providing structure while still allowing for that delightful chewiness we crave. When selecting flour, look for a good quality all-purpose variety—it’s versatile and perfect for baking! If you want to explore gluten-free options, almond flour can be a fantastic alternative here, though it may slightly change the texture.
- ½ cup unsweetened cocoa powder. This is where the magic begins—the cocoa powder gives our cookies their deep chocolate flavor that’s simply irresistible. The quality matters immensely; choose a high-quality cocoa powder to ensure your cookies have that rich, indulgent taste we’re after. Brands like Dutch-processed cocoa can add even more depth to your baked goods. Plus, don’t forget it interacts beautifully with sugar to create that perfect sweetness balance!
- ¾ cup granulated sugar. Sugar isn’t just about sweetness; it’s also essential for achieving that moist texture we desire in our fudgy brownie cookies. Granulated sugar helps create tenderness while also contributing to browning during baking—a crucial element for developing those delicious flavors! If you’re aiming for a less sweet version, consider reducing this amount slightly without losing too much moisture.
- ¾ cup brown sugar. This ingredient brings warmth and complexity to our cookies thanks to its molasses content—think of it as adding a hint of caramel flavor! Brown sugar retains more moisture than granulated sugar, which helps keep our cookies soft and chewy long after they’ve cooled down. Just be sure to pack it well when measuring so you get all that lovely sweetness!
- ½ cup unsalted butter. Butter is non-negotiable when it comes to baking; it not only contributes essential fat but also enhances flavor dramatically! For the best results in our fudgy brownie cookies, use unsalted butter at room temperature so it’s easier to cream with other ingredients—this creates air pockets leading to tender results! If you’re looking for alternatives due to dietary preferences, coconut oil works well too but will impart its own distinct flavor.
- 2 large eggs. Eggs play multiple roles in our recipe—they help bind everything together while also adding richness and moisture! When using eggs in baking, always aim for room temperature as they incorporate better into the batter compared to cold eggs straight from the fridge. If you’re vegan or egg-free, you can substitute each egg with ¼ cup unsweetened applesauce or use flaxseed meal mixed with water as an excellent alternative.
- 1 tsp vanilla extract. Vanilla extract elevates both aroma and flavor profile—it’s like adding a warm hug! Use pure vanilla extract if possible; it’s worth it for that authentic flavor boost! Be cautious of imitation extracts as they often lack depth and richness—this small detail can make all the difference in how your fudgy brownie cookies turn out.
- 1 cup semi-sweet chocolate chips. Finally, we arrive at what truly makes these brownie cookies shine—the chocolate chips! They provide pockets of melted goodness throughout each cookie that’s simply divine when bitten into fresh from the oven! Opting for high-quality chocolate chips will enhance both taste and texture significantly; consider experimenting with dark chocolate varieties if you’re feeling adventurous!
Equipment You’ll Need:
Before we dive headfirst into making these delectable fudge brownie cookies, let’s talk about having the right tools on hand—it makes everything smoother and infinitely more enjoyable! While they may not be ingredients, these tools are essential partners in creating something wonderful.
- Mixing bowls – A good set of mixing bowls is vital since you’ll be combining both dry and wet ingredients separately before merging them together for optimal results. Look for bowls made from glass or stainless steel—they’re durable and easy to clean!
- Whisk – A whisk is indispensable for blending dry ingredients thoroughly without lumps—this step ensures even distribution throughout your dough which leads us closer toward cookie perfection!
- Rubber spatula – This tool helps fold ingredients gently without overmixing—a crucial action when making these fudgy brownie cookies because overmixing can lead them down an undesirable path resulting in tough textures!
- Baking sheets – Invest in sturdy baking sheets lined with parchment paper; this prevents sticking while promoting even heat distribution during baking which leads us towards achieving those beautifully baked edges!
- Cookie scoop or tablespoon – Using either tool ensures uniformity in sizing dough balls—consistency allows all your cookies to bake evenly at once rather than some being undercooked while others might get overly crispy!
Preparing the Fudgy Brownie Cookies
Step 1: Preheat Your Oven
First things first: Preheating your oven is imperative—it sets up the ideal environment needed for proper baking right from the start! Set it at 350°F (175°C), allowing adequate time (around 10 minutes) for even heat circulation before sliding those delicious cookie dough balls inside later on! An adequately preheated oven ensures consistent temperatures throughout cooking time which directly influences how well each batch turns out—trust me on this one!
Step 2: Whisk Together Dry Ingredients
While waiting patiently (and perhaps dreaming about those fudgy brownie cookies!), grab yourself a large mixing bowl where we’ll whisk together our dry ingredients: flour, cocoa powder, granulated sugar, brown sugar, and salt until well combined! This process allows air into mixture leading towards fluffier results yet keeps lumps at bay ensuring smooth dough later on—it’s crucial not only visually appealing but also texturally gratifying when savored bite by delightful bite!
Step 3: Melt Butter & Combine Wet Ingredients
Next up: melting butter! In another bowl (preferably medium-sized), melt half a cup (one stick) over low heat until liquid gold forms before letting it cool slightly before moving onto next part where we’ll mix melted butter alongside eggs plus vanilla extract until fully combined—that luscious glossy appearance signifies readiness signaling transition from liquid state back towards solid form where magic begins happening within batter itself!
Step 4: Merging Wet & Dry
Now comes one exciting moment—it’s time to merge wet & dry mixes together seamlessly by pouring liquid blend directly onto whisked powders previously set aside earlier then gently folding using rubber spatula until just combined—avoid overmixing as it leads us astray creating tougher final product instead striving towards moistness packed goodness we desire so dearly within these fudgy brownie cookies!
Let’s continue crafting this masterpiece together until every step has unfolded perfectly… stay tuned as we move forward diving deeper into folding chocolate chips next!
Step 5: Mixing the Fudgy Goodness
Now, let’s dive into mixing our wet and dry ingredients—a step that’s so crucial to achieving those fudgy brownie cookies we all crave. First, take that luscious mixture of melted butter, eggs, and vanilla extract we prepared earlier. You want to ensure that your butter is just warm enough to be melted but not hot enough to cook the eggs when you add them in. This is an essential balance because if the mixture is too hot, it can lead to scrambled eggs rather than a smooth batter. Gently whisk these together until they form a cohesive blend—trust me, this process is where the magic begins!
Next, it’s time to pour this silky mixture into your bowl of dry ingredients. With a spatula or wooden spoon in hand, gently fold everything together. Remember, we’re not trying to develop gluten here; we want our cookies to remain soft and chewy. This means mixing until just combined—don’t worry if there are a few floury streaks left; they will incorporate as you fold in those delectable chocolate chips in the next step. You’ll start to notice the batter transforming from a dusty mixture into a rich, chocolatey concoction that smells utterly intoxicating. It’s at this moment that you might feel like you’re already winning at dessert!
Step 6: The Chocolate Chip Extravaganza
Ah, chocolate chips—the pièce de résistance in our fudgy brownie cookies! Once your batter is mostly mixed and ready, it’s time to fold in the star of the show: one cup of semi-sweet chocolate chips. I always recommend using high-quality chocolate chips because they melt beautifully and create pools of chocolatey goodness in every bite. As you gently fold them into your batter with a spatula, take a moment to revel in the sight and smell—this combination becomes an alluring symphony of flavors!
This step is not only about adding sweetness; those little morsels will melt slightly during baking, creating pockets of molten chocolate that will send taste buds soaring with joy! Just be careful and fold gently; while it might be tempting to stir vigorously out of excitement (trust me, I’ve been there!), over-mixing can lead to denser cookies instead of the soft and chewy texture we desire. Imagine pulling these cookies out of the oven only to find them thick and cake-like—no thank you! So embrace patience here; treat your dough with care.
Step 7: Scooping Delight
With your batter now gloriously mixed and ready, let’s talk about how best to scoop those cookie delights onto our baking sheets. I recommend using a cookie scoop or tablespoon for uniformity; not only does this ensure even baking but also gives each cookie a lovely round shape that’s oh-so-pleasing to the eye. Picture yourself taking a scoop of that rich dough—so thick yet velvety—that it clings beautifully to your scoop before landing on the parchment paper like little mounds of heaven.
As you place these mounds on your prepared baking sheets, make sure they are spaced about two inches apart. This spacing is absolutely paramount because as they bake, they will spread ever so slightly while keeping their chewy centers intact. Remember: don’t flatten them out! Let them rise naturally; we want those wonderful domes for texture and aesthetics alike. You should see glimmers of chocolate peeking through—this means you’re on your way to cookie perfection!
Step 8: The Baking Transformation
Now comes perhaps one of the most exciting moments—the transformation from raw dough into fudgy brownie cookies! Slide those baking sheets into your preheated oven at 350°F (175°C) and set your timer for about 10-12 minutes. Keep an eye on them as they bake; what you’re looking for are edges that have set nicely while maintaining a soft center—it’s almost like they’re still winking at you from inside!
The key here is understanding how ovens work differently; some may require just a minute or two more or less than others due to variations in temperature or hot spots within your oven (a common foe!). If you’re unsure whether they’re done, give them a gentle poke with your fingertip—the edges should feel firm while the centers should still have some softness when you touch them lightly. Trust me when I say this slight underbaking is non-negotiable if we want that fudgy texture that makes these so special! Once done, remove them from the oven and allow them to rest on the baking sheets for another five minutes before transferring them onto wire racks for cooling.
Final Touches: Allowing Your Cookies to Shine
Step 9: Cooling Down Before Indulgence
As tantalizing as it may be to dive right into those freshly baked fudgy brownie cookies straight from the oven (I get it!), giving them some time to cool is essential for achieving their ideal texture. Place those glorious cookies on wire racks after allowing them a brief rest on their baking sheets—a crucial step that lets steam escape and helps retain their chewy centers while allowing the edges to firm up just right.
During this cooling phase, something magical happens—the heat continues cooking the centers ever so slightly while they retain their luscious softness. I promise you; waiting even five minutes will reward you with cookies that are perfectly set yet irresistibly gooey inside—a truly extraordinary experience! Feel free during this time (if you’re brave enough) to sneak a taste by breaking one apart; watch as melty chocolate oozes out like liquid gold—that’s what we’re striving for!
Once cooled completely—or at least until warm enough not to burn yourself—you can stack these beauties on a plate or store them in an airtight container where they’ll stay fresh for days (if they last that long!). Whether you’re serving guests at an event or indulging quietly by yourself with a glass of milk or coffee (my personal favorite pairing), I hope each bite brings warmth and happiness reminiscent of home-baked love.
So there you have it—your very own batch of fudgy brownie cookies crafted with care and passion! I can’t wait for you all to experience this delightful recipe in your kitchens! Enjoy every delicious moment!
Storage and Enjoyment Tips for Your Fudgy Brownie Cookies
Now that your kitchen is filled with the heavenly aroma of freshly baked fudgy brownie cookies, it’s time to revel in the anticipation of enjoying every last crumb! But what happens when you inevitably have leftovers? Fear not, my friend! These delectable treats can be easily stored so that their rich, chocolatey allure lasts just a little longer. The key is to ensure they stay fresh and delightful for as long as possible, preserving that soft, chewy texture that makes each bite such a profound pleasure.
Storing Leftover Fudgy Brownie Cookies
To keep your fudgy brownie cookies at their best, I recommend placing them in an airtight container at room temperature. If you’re feeling particularly fancy, you can layer them with parchment paper to prevent sticking—this small touch can make all the difference! Stored correctly, these cookies will stay wonderfully fresh for about a week. Trust me on this one; they taste even better after they’ve had a day or two to settle into their flavors—a sort of mellowing process that enhances their sweetness and chocolatey richness. For those who want to maintain maximum freshness, try placing a slice of bread in the container with the cookies; this clever trick helps retain moisture while keeping them soft and chewy. When you’re ready to indulge again, simply pop them in the microwave for about 10 seconds for that warm, gooey experience reminiscent of when they first came out of the oven!
Freezing Fudgy Brownie Cookies for Later
If you find yourself with more fudgy brownie cookies than you can eat (though I have my doubts!), freezing is a fantastic option. Start by letting the cookies cool completely—this step is crucial because it prevents condensation from forming inside your storage bag. Once cooled, place them in a single layer on a baking sheet and freeze until solid; then transfer them to a freezer-safe bag or container for up to three months. This method not only preserves their flavor but keeps their texture intact—just imagine pulling out a frozen cookie and letting it thaw slightly before diving in! When you’re ready to enjoy one (or two), simply let them sit at room temperature for about 15-20 minutes or microwave briefly until they’re warmed through. Freezing these treats is such a convenient way to have homemade goodness on hand whenever you need a sweet pick-me-up!
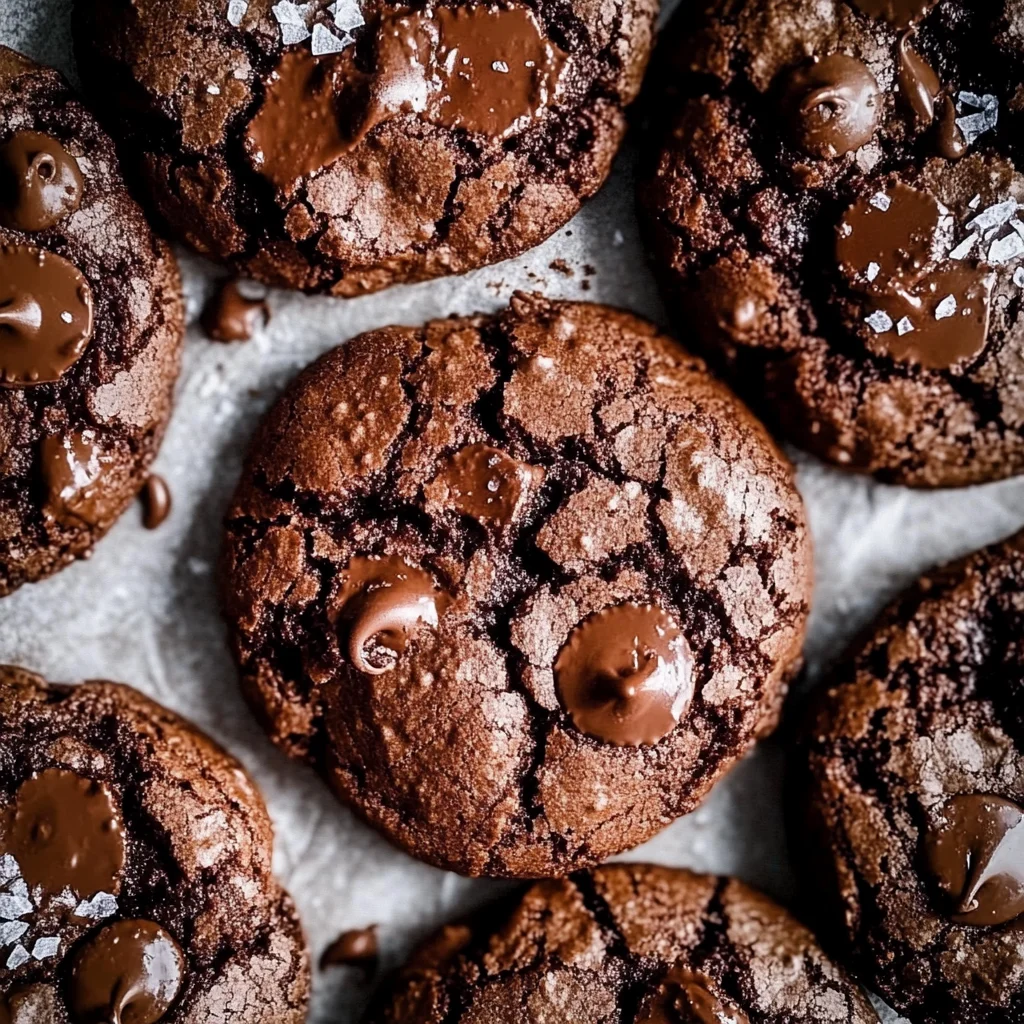
Fudgy Brownie Cookies

Indulge in the rich, chocolatey delight of fudgy brownie cookies—an exquisite fusion of classic brownie flavors and cookie convenience. These decadent treats boast a soft, chewy texture that melts in your mouth, making them an irresistible choice for satisfying your chocolate cravings. With minimal prep time and simple ingredients, you can whip up these delicious cookies in no time. Perfect for gatherings or cozy nights at home, serve them warm alongside a scoop of vanilla ice cream or enjoy them straight from the oven for a truly unforgettable dessert experience.
- Prep Time: 15 minutes
- Cook Time: 12 minutes
- Total Time: 27 minutes
- Yield: About 20 cookies 1x
- Category: Dessert
- Method: Baking
- Cuisine: American
Ingredients
- 1 cup all-purpose flour
- ½ cup unsweetened cocoa powder
- ¾ cup granulated sugar
- ¾ cup brown sugar
- ½ cup unsalted butter (or coconut oil)
- 2 large eggs (or egg substitute)
- 1 tsp vanilla extract
- 1 cup semi-sweet chocolate chips
Instructions
- Preheat your oven to 350°F (175°C). Line baking sheets with parchment paper.
- In a large mixing bowl, whisk together flour, cocoa powder, granulated sugar, brown sugar, and salt until well combined.
- Melt the butter and allow it to cool slightly. In a separate bowl, mix melted butter with eggs and vanilla extract until blended.
- Gently fold the wet mixture into the dry ingredients until just combined; do not overmix.
- Fold in chocolate chips until evenly distributed.
- Scoop dough onto prepared baking sheets, spacing them two inches apart.
- Bake for 10-12 minutes or until edges are set but centers remain soft. Cool on baking sheets for five minutes before transferring to wire racks.
Nutrition
- Serving Size: 1 cookie (30g)
- Calories: 150
- Sugar: 14g
- Sodium: 90mg
- Fat: 7g
- Saturated Fat: 4g
- Unsaturated Fat: 2g
- Trans Fat: 0g
- Carbohydrates: 20g
- Fiber: 1g
- Protein: 2g
- Cholesterol: 25mg