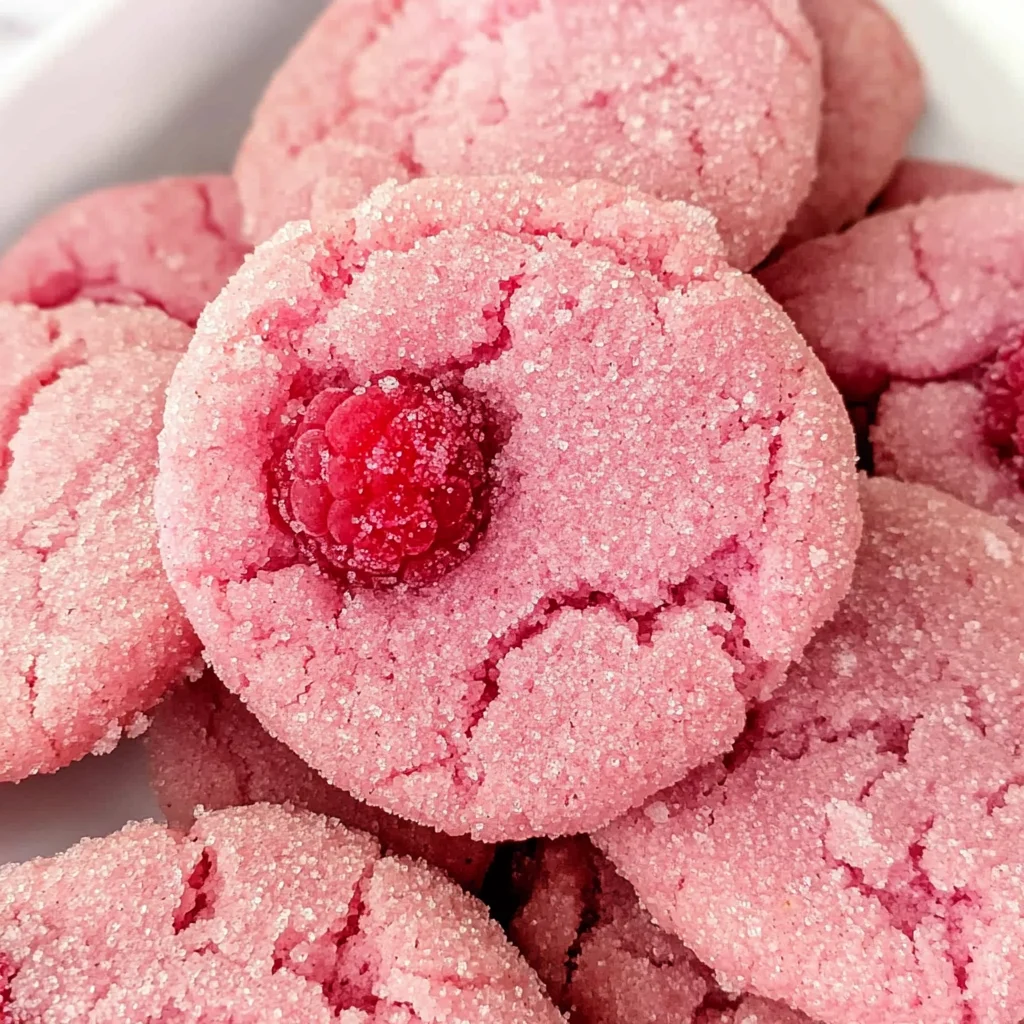
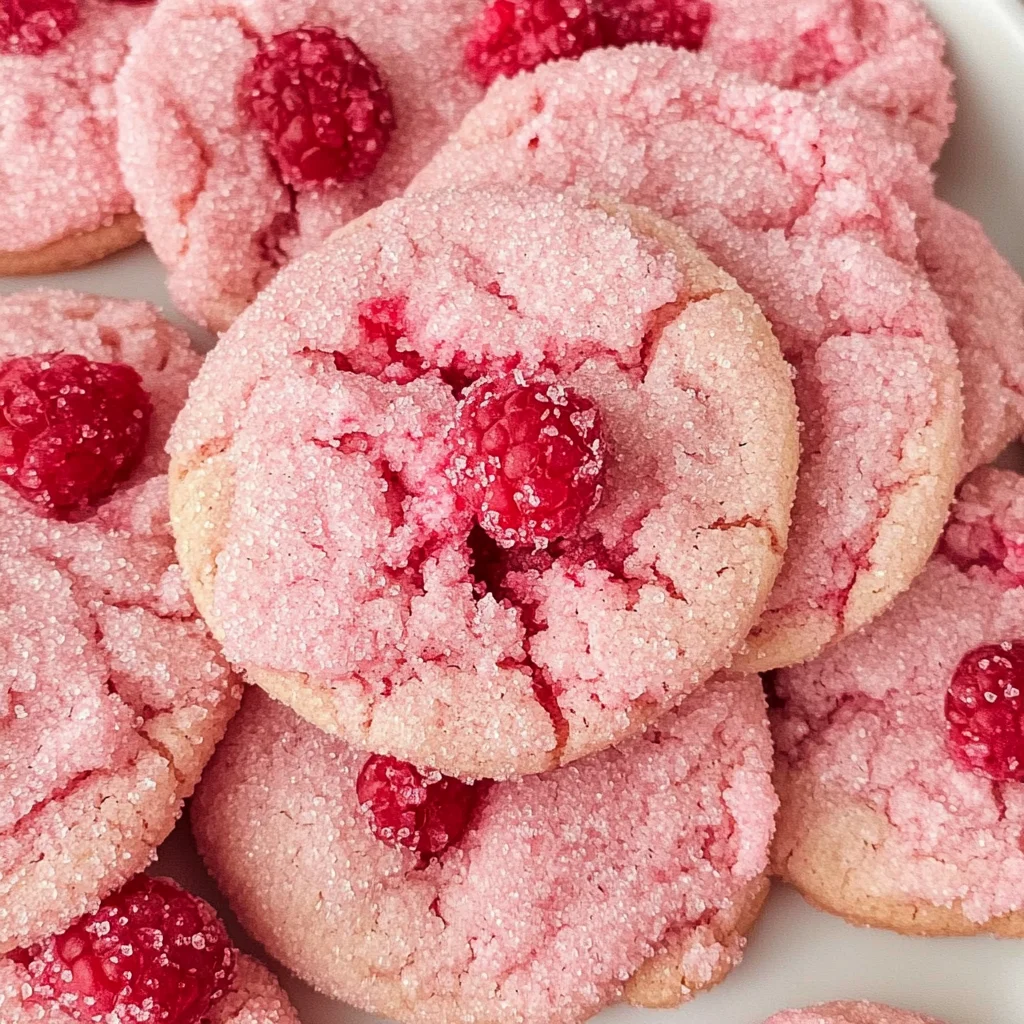
Raspberry Sugar Cookies
There’s something truly magical about baking, isn’t there? It transforms simple ingredients into something so much greater—an experience that fills your home with warmth and the aroma of sweet anticipation. When I think of Raspberry Sugar Cookies, I don’t just envision a delightful treat; I see a moment shared over laughter and joy, perhaps on a sunny afternoon when the world feels just a little lighter. These cookies embody not only the sweetness of ripe raspberries but also the love and care that goes into each bite. They are perfectly pink with charming little chunks of fruit, and every taste is like a delightful trip to a quaint Parisian café. Trust me, these Raspberry Sugar Cookies are more than just dessert; they’re an invitation to savor life’s simple pleasures.
As you embark on this delicious journey with me, I want you to feel the excitement bubbling up inside you. The gentle crunch when you first bite into these cookies gives way to their soft, chewy interiors, bursting with the tartness of fresh raspberries. This cookie recipe stands out because it harmonizes the sweetness of sugar and butter with the refreshing zing of berries. It’s perfect for any occasion—whether you’re celebrating a birthday, having friends over for tea, or simply treating yourself after a long day. So grab your apron, and let’s create something extraordinary together!
Raspberry Sugar Cookies: A Sweet Escape to Berry Bliss
These Raspberry Sugar Cookies are not just any ordinary cookies; they’re a celebration of flavor and texture that will transport you straight to pastry heaven. With their delicate balance between sweet and tangy, these cookies promise to be an unforgettable addition to your dessert repertoire. You’ll find that they are as easy to make as they are delightful to eat!
Ingredients:
Before we dive into the baking process, let’s gather our ingredients! Each one plays an important role in crafting these enchanting cookies.
- 2 cups all-purpose flour. Flour is the foundation of many baked goods, providing structure and stability as your cookies rise in the oven. When selecting flour, look for high-quality all-purpose flour that has sufficient protein content—this contributes to the chewiness we crave in cookies while allowing them to maintain their shape. If you need alternatives, whole wheat flour can add a nutty flavor but may alter the texture slightly, making your cookies denser.
- 1/2 teaspoon baking powder. This little ingredient is absolutely crucial for achieving those perfectly puffed-up edges that make cookies visually appealing—and it helps create that dreamy texture we all love! Baking powder is a leavening agent that releases carbon dioxide when combined with liquid and heat, which helps the cookies rise beautifully in the oven. Make sure it’s fresh; old baking powder can lead to flat cookies that lack personality.
- 1/4 teaspoon salt. Salt may seem minor, but it enhances all other flavors in your cookies—it brings out sweetness while balancing acidity from our luscious fresh raspberries. It’s like the unsung hero of baking! Use fine sea salt for consistency throughout your dough; coarse salt may leave unexpected bursts of flavor if not evenly distributed.
- 3/4 cup unsalted butter, softened. Butter adds richness and moisture; it’s essential for creating that light and fluffy texture we desire in our Raspberry Sugar Cookies. Ensure your butter is at room temperature for optimal creaming with sugar—this step is vital! If it’s too cold or melted, your dough won’t come together properly. The quality matters too—a higher fat content butter will yield an even richer taste.
- 1 cup granulated sugar. Sugar is more than just sweetness; it also influences texture by contributing to browning through caramelization during baking. The granulated sugar will help create those slightly crisp edges while keeping the centers tender—a perfect contrast! You might even consider using organic cane sugar for a more nuanced flavor profile.
- 1 large egg. Eggs provide moisture while also acting as binding agents within our dough—the proteins help hold everything together as they set during baking. For best results, use eggs at room temperature; this promotes even mixing into your batter.
- 1 teaspoon vanilla extract. Ahh, vanilla—the fragrant essence that elevates baked goods from ordinary to extraordinary! It adds warmth and depth without overpowering other flavors. Always opt for pure vanilla extract rather than synthetic options; trust me on this one—the difference in taste is palpable!
- 1/2 cup fresh raspberries, finely chopped. Here’s where we bring those fresh bursts of flavor into our cookies! Raspberries contribute both acidity and sweetness but must be handled gently to avoid turning mushy in the dough; chop them finely so they distribute evenly throughout each cookie while still offering delightful pockets of fruity goodness.
- 1/4 cup powdered sugar (optional for dusting). This delicate touch gives our finished cookies an elegant finish—almost like a soft snow resting atop each cookie! While optional, I highly recommend it for presentation purposes because who doesn’t love gorgeous treats?
- 2-3 drops red food coloring (optional for enhanced color). If you want your cookies to have that vibrant pink hue reminiscent of joyous celebrations or charming bakery displays, adding food coloring can really elevate their visual appeal without affecting taste at all!
Equipment You’ll Need:
Having the right tools makes all the difference in creating beautiful baked goods—think of them as trusty companions on this sweet adventure! Let me guide you through some essentials you’ll want by your side:
- Mixing bowls – A set of mixing bowls in various sizes will serve you well as you combine dry ingredients separately from wet ones before coming together as one lovely dough mixture. Opting for glass or stainless steel bowls allows easy monitoring while adding warmth to your mixing process—a crucial step when incorporating butter!
- Electric mixer or whisk – Whether you choose an electric mixer for efficiency or a classic whisk for nostalgia’s sake—both are fantastic choices! An electric mixer makes creaming butter and sugar easier by saving time and effort while ensuring thorough blending until light and fluffy—you’ll be amazed at how quick it is!
- Baking sheet – A sturdy baking sheet lined with parchment paper will prevent sticking while ensuring even heat distribution during baking—no one wants a burnt bottom on these beauties! Choose heavy-duty sheets that won’t warp under high temperatures—that ensures uniform cooking throughout each batch.
- Parchment paper – This non-stick surface is non-negotiable when it comes to easy cleanup after baking sessions! Simply line your sheets before dropping spoonfuls of dough onto them—this prevents any unwanted sticking while making removal effortless once cooled down.
With these tools ready at hand and heart full of anticipation—we’re almost ready!
Preparing the Raspberry Sugar Cookies
Now comes my favorite part: bringing everything together into delicious harmony! As we dive into making our Raspberry Sugar Cookies step-by-step—remember each action contributes significantly towards crafting something special worth sharing with loved ones (or indulging solo)!
Step 1: Preheat & Prepare
First things first—let’s get our oven preheated to 350°F (175°C). This step is absolutely paramount since starting off with an adequately heated oven ensures proper rising right from the get-go! While that’s happening, line two baking sheets with parchment paper—you’ll thank yourself later when it’s time for cleanup because nothing sticks here! Once you’ve got those sheets ready—and if you’d like some guidance on spacing—aim for about 2 inches apart per cookie drop; they’ll spread out nicely without merging into one another during baking!
Step 2: Combine Dry Ingredients
In one bowl (preferably medium-sized), mix together your 2 cups of all-purpose flour along with ½ teaspoon baking powder and ¼ teaspoon salt using either whisk or spatula until evenly combined—it should resemble fluffy white clouds once done! This step serves two purposes: not only does it ensure uniform distribution among individual components—but also activates gluten development which grants structure once baked!
Step 3: Cream Butter & Sugar
Now we’re moving onto creaming our softened unsalted butter (¾ cup) alongside granulated sugar (1 cup) in another larger bowl using either an electric mixer or handheld whisk until lightened considerably—it should resemble pale yellow ribbons swirling about like sunshine itself within moments’ time! This process known as ‘creaming’ incorporates air bubbles into fats which play crucial roles leading up towards achieving ultimate fluffiness post-baking—don’t rush this step if possible since patience yields bountiful rewards later down line!
Step 4: Adding Egg & Vanilla
Once you’ve achieved heavenly fluffiness from creaming action above—it’s time now add-in large egg along with 1 tsp pure vanilla extract mixing thoroughly until fully incorporated yet again maintaining smoothness throughout mixture—it should smell utterly intoxicating at this point already right? Remember: eggs contribute moisture alongside binding properties ensuring proper cohesion amongst other ingredients leading towards ultimate chewy goodness once baked off properly!
Are you feeling excited yet? With each step completed carefully with intention—we’re getting closer toward enjoying those delightful Raspberry Sugar Cookies together soon enough!
Stay tuned as we continue piecing together these fabulous treats—I promise it’ll be worth every minute spent crafting them lovingly from scratch alongside me here today!
Step 5: Gently Folding in the Raspberry Magic
Now comes a truly enchanting moment in our journey to create these Raspberry Sugar Cookies. After combining your dry and wet ingredients, it’s time to introduce those luscious, finely chopped raspberries into your cookie dough. This step is not just about mixing; it’s about folding in an essence of summer and a burst of flavor that will transform an ordinary sugar cookie into something truly extraordinary. When you fold, which means gently incorporating ingredients without overmixing, you preserve the delicate texture of the raspberries. Trust me on this—overmixing can lead to tough cookies instead of the tender crumb we’re aiming for. So, with a spatula or a wooden spoon, gently lift and turn the dough over itself until the raspberries are evenly distributed.
You’ll want to see little pockets of pink peeking through your dough, hinting at the delicious fruitiness to come. If you’re feeling adventurous and wish for an even more vibrant hue, now is the moment to add those drops of red food coloring. Just a couple of drops will enhance that beautiful blush without overwhelming the natural beauty of your cookies. Remember, though: this color boost is entirely optional; sometimes simplicity speaks volumes! Once folded properly, set your dough aside for just a moment while you prepare for baking—this brief pause allows the flavors to meld together beautifully.
Step 6: Dropping Dough with Love
Now it’s time to bring life to our cookie dough by giving it some shape! Using a spoon—a tablespoon works wonderfully here—scoop out portions of your beautifully vibrant dough and drop them onto your prepared baking sheet lined with parchment paper. Space each dollop about two inches apart; this is crucial as our cookies will spread while they bake, creating that lovely round shape we adore. As you drop each scoop, take a moment to admire the vivid pink flecks of raspberry peeking through; it’s like tiny jewels sparkling in a sea of soft dough!
When you look at your baking sheet filled with these colorful mounds, allow yourself to feel excitement build—it’s all coming together! Don’t rush this step; take care in placing each cookie because how they look before they go into the oven is often how they’ll come out. If any dough seems overly sticky or difficult to handle, consider lightly flouring your hands or spoon; this small tip can make all the difference in achieving perfectly shaped cookies.
Step 7: Baking Until Golden Perfection
Into the preheated oven they go! As you slide that baking sheet inside, take a deep breath and savor this moment—the anticipation is half the fun! Set your timer for 10-12 minutes but don’t wander too far; keep an eye on those cookies as they transform from raw dough into golden delights! You’ll know they’re ready when the edges start turning lightly golden while the centers remain soft yet set. This contrast is what makes these Raspberry Sugar Cookies so delightful; biting into them should feel like sinking your teeth into fluffy clouds.
As they bake, an utterly intoxicating aroma will fill your kitchen—the sweet scent mingling with fruity notes wafting up to greet you like an old friend. Your friends and family won’t be able to resist gathering around as they catch wind of what’s happening in there! Remember that every oven behaves differently; if yours runs hot or cold, adjust accordingly by keeping an eye on that visual cue. If you’re uncertain, err on the side of caution because nobody wants overbaked cookies!
Step 8: Cooling Down and The Art of Patience
Once those delicious Raspberry Sugar Cookies have reached their glorious golden state after 10-12 minutes in the oven, it’s time for some patience—yes, I know we’ve been waiting long enough already but bear with me! Remove them from the oven and let them sit on the baking sheet for about five minutes before transferring them onto a wire rack for cooling completely. This resting period is absolutely paramount because it allows them to firm up just enough so that they retain their shape when moved.
If you try moving them too soon, you may end up with mishap cookies—crumbly pieces instead of beautiful rounds! As they cool on that wire rack (which allows air circulation), you’ll notice how their colors deepen slightly as well; it’s nature’s way of showing off those dazzling raspberry chunks embedded within each cookie. While you’re waiting (impatiently), consider preparing that optional dusting of powdered sugar—it adds not only sweetness but also an elegant touch that transforms these cookies into something fit for any gathering or celebration.
Conclusion:
As we wrap up our delightful journey through this recipe, I hope my enthusiasm has sparked yours! There’s something profoundly satisfying about creating these Raspberry Sugar Cookies—each step is filled with anticipation as the mixture transforms from simple ingredients into a symphony of flavors that pays homage to both classic French pastry and the bright tang of fresh raspberries. The balance between buttery sweetness and tart fruit creates truly extraordinary bites that are far beyond ordinary sugar cookies.
This recipe is an absolute must-try not just for its unique taste but also because it invites joy into the kitchen. Picture yourself pulling tray after tray of these rosy-hued delights from the oven; each cookie radiates warmth and love, perfect for sharing with friends or savoring solo with your favorite cup of tea. Whether it’s an afternoon pick-me-up or a charming dessert at dinner parties, these cookies shine brilliantly on any occasion.
Imagine savoring one with a dollop of whipped coconut cream alongside fresh berries—talk about decadent! For an even richer experience, pair them with dark chocolate or a scoop of vanilla non-dairy ice cream; the creamy textures combined with the fruity notes create blissful harmony on your palate. And don’t forget how wonderful they would be as part of a lovely picnic spread or afternoon tea gathering, bringing smiles all around.
Feeling adventurous? This recipe is wonderfully adaptable too! You could swap out raspberries for blueberries or even chopped strawberries if you’re looking to experiment with different berry flavors—each variation brings its own charm while staying true to the essence of this cookie. Or why not try adding a hint of lemon zest for brightness? The possibilities are endless! So go ahead—bake up these Raspberry Sugar Cookies, share your experience with loved ones, and let me know how they turned out; I can’t wait to hear about your adventures in baking!
Raspberry Sugar Cookies
Experience bliss with these delightful Raspberry Sugar Cookies—perfectly pink and bursting with flavor! Bake today and indulge in sweetness.
- Prep Time: 15 minutes
- Cook Time: 12 minutes
- Total Time: 27 minutes
- Yield: Approximately 24 cookies 1x
- Category: Dessert
- Method: Baking
- Cuisine: American
Ingredients
- 2 cups all-purpose flour
- 1/2 teaspoon baking powder
- 1/4 teaspoon salt
- 3/4 cup unsalted butter, softened
- 1 cup granulated sugar
- 1 large egg
- 1 teaspoon vanilla extract
- 1/2 cup fresh raspberries, finely chopped
- Optional: 1/4 cup powdered sugar for dusting
Instructions
- Preheat your oven to 350°F (175°C) and line two baking sheets with parchment paper.
- In a bowl, mix together flour, baking powder, and salt until well combined.
- In a separate bowl, cream together the softened butter and granulated sugar until light and fluffy.
- Add the egg and vanilla extract to the butter mixture, mixing until smooth.
- Gradually incorporate the dry ingredients into the wet mixture until just combined.
- Gently fold in the chopped raspberries until evenly distributed throughout the dough.
- Scoop tablespoon-sized portions of dough onto prepared baking sheets, spacing them two inches apart.
- Bake for 10-12 minutes or until edges are lightly golden but centers remain soft.
- Allow cookies to cool on the baking sheet for five minutes before transferring them to a wire rack.
Nutrition
- Serving Size: 1 cookie (30g)
- Calories: 150
- Sugar: 8g
- Sodium: 50mg
- Fat: 7g
- Saturated Fat: 4g
- Unsaturated Fat: 2g
- Trans Fat: 0g
- Carbohydrates: 21g
- Fiber: <1g
- Protein: <1g
- Cholesterol: 20mg