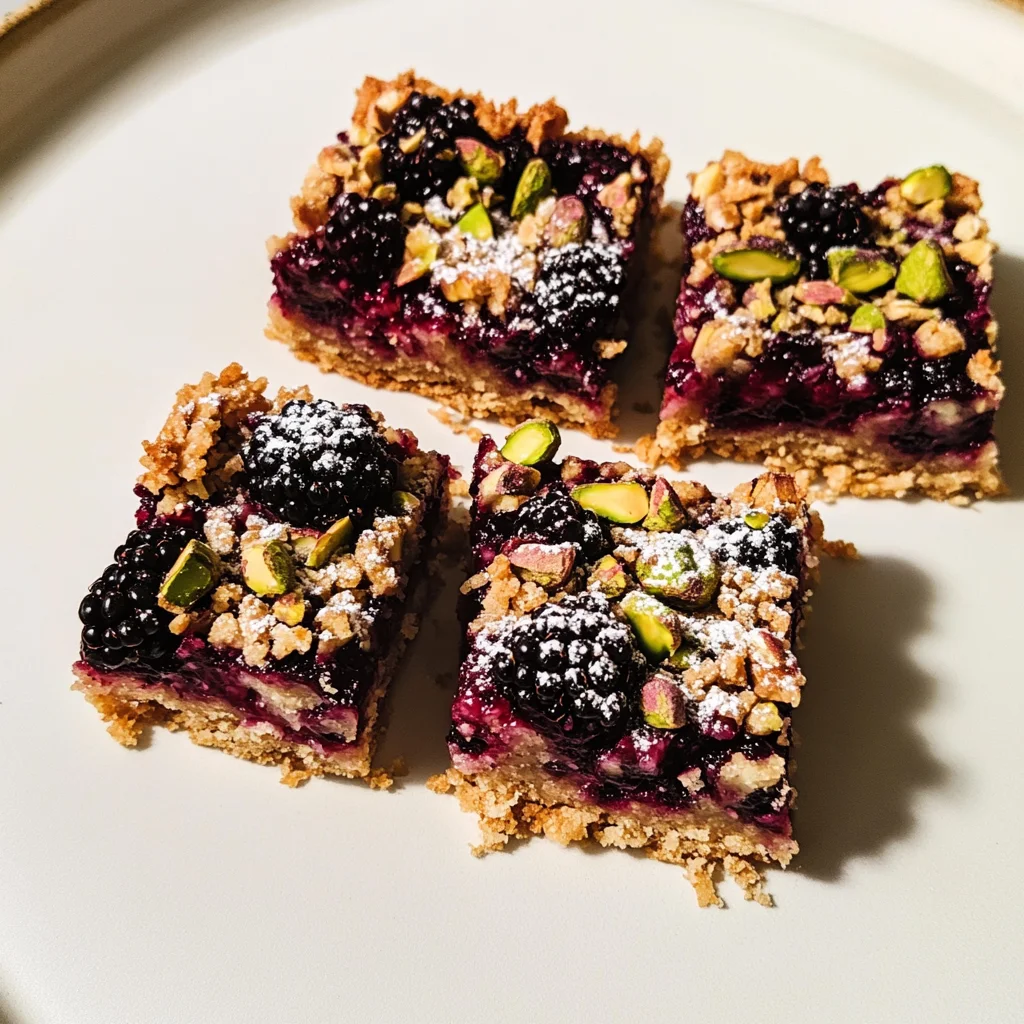
Blackberry Pistachio Dream Bars: An Incredible Ultimate Recipe
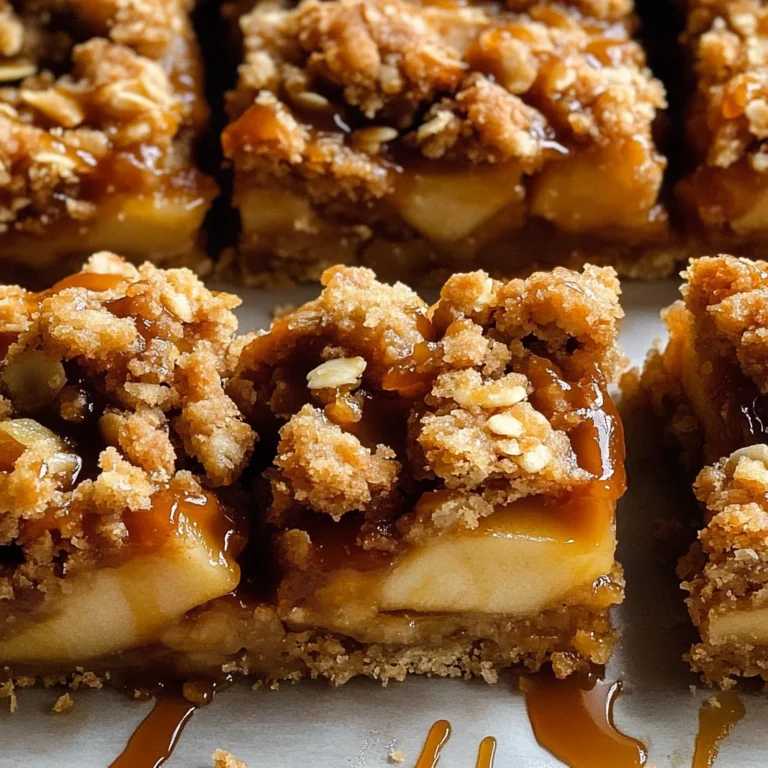
There’s something truly magical about the act of baking, isn’t there? It’s more than just mixing flour and sugar; it’s an experience that nourishes not only the body but also the soul. Today, I’m thrilled to share with you my cherished recipe for Blackberry Pistachio Dream Bars—a delightful combination that marries the tartness of fresh blackberries with the creamy crunch of pistachios, all wrapped in a buttery, oat-studded crust. This dessert is not merely a treat but a celebration of flavors and textures, dancing together in perfect harmony. Imagine biting into one of these bars: you’ll first experience the crisp crust giving way to a luscious blackberry filling, followed by the satisfying crunch of pistachios. Trust me when I say that each bite feels like a warm hug on a chilly day!
These bars are not just delicious; they tell a story. The vibrant blackberries evoke summer days spent picking fruit at local farms, their sweet-tart flavor reminding us that nature has its own rhythm and beauty. And then there are the pistachios—oh, those emerald green gems! They add a delightful twist, bringing both color and an earthy richness to the dish. The contrast between sweet and salty is always mesmerizing to me; it’s like poetry on a plate! Whether you’re planning a casual gathering or simply want an indulgent snack for yourself, these bars are perfect for any occasion. Let’s dive into this recipe together; I promise you won’t regret it!
Blackberry Pistachio Dream Bars: An Incredible Ultimate Recipe – A Symphony of Flavor
Welcome to your new favorite dessert adventure! These Blackberry Pistachio Dream Bars are not just easy to make; they are utterly enchanting with every layer you create. With just a handful of ingredients, you will be whisking your way to baking bliss in no time. So gather your essentials and let’s embark on this culinary journey together!
Ingredients:
As we set out to create these heavenly bars, let’s take a moment to appreciate each ingredient that comes together in this delightful symphony.
- 1 cup all-purpose flour. This humble ingredient is the backbone of our crust. It provides structure and stability while allowing for that tender crumb we all love in dessert bars. When choosing flour, look for quality brands; they often yield better results due to their consistent milling process. If you’re looking for gluten-free options, almond flour or gluten-free all-purpose blends can work wonders as alternatives.
- ½ cup rolled oats. These oats bring not only heartiness but also a lovely chewiness that contrasts beautifully with the soft blackberry filling. They help bind our crust while adding nutritious fiber—definitely a win-win! Make sure you choose old-fashioned rolled oats; quick oats will cook too quickly and might compromise our desired texture.
- ½ cup brown sugar. This rich, moist sugar adds depth and warmth to our dessert. Its molasses content gives our bars that lovely caramel-like flavor while ensuring moisture throughout the baking process. Trust me on this: using brown sugar instead of granulated sugar elevates the taste dramatically.
- ¼ teaspoon salt. It may seem insignificant, but salt is absolutely paramount in enhancing flavors; it brings out the sweetness of our blackberries and balances everything beautifully. Don’t skip this step! Kosher salt works well here because its larger crystals dissolve nicely into the mixture.
- ½ teaspoon baking powder. This little leavening agent is crucial for giving our bars some lift without making them cake-like—what we want here is a delicate balance between chewy and crumbly.
- ½ cup unsalted butter, melted. Butter acts as liquid gold in baking—it enriches our crust with flavor while contributing to that sought-after flaky texture we’re aiming for in these bars. I recommend using unsalted butter so you can control the amount of salt in your recipe more effectively.
- 1 cup fresh blackberries. Ah yes, these vibrant berries are what makes this dessert sing! Their natural sweetness coupled with slight tartness creates an utterly intoxicating filling that bursts with flavor as you take each bite. Look for plump berries with no signs of mold or bruising—quality matters here!
- ¼ cup granulated sugar. We’ll sprinkle this over our blackberries to coax out their juices as they bake—a simple yet effective trick! Feel free to adjust based on how sweet your berries are; nature’s bounty can vary from season to season!
- 1 tablespoon lemon juice. A splash of acidity helps brighten up those berries and enhances their natural flavor profile beautifully—think of it as adding sparkle to your dish! Fresh lemon juice is best here; bottled varieties just don’t capture that vibrant essence.
- ½ cup pistachios, roughly chopped. These nuts add both crunch and earthiness—their unique flavor complements the sweet tanginess of blackberries perfectly! Opt for raw or lightly roasted pistachios without added salt so they blend seamlessly into our dream bars.
- 1 teaspoon vanilla extract. A splash of vanilla does wonders in any dessert—it rounds out flavors and adds warmth without overwhelming other ingredients.
- Optional: powdered sugar for dusting. While not necessary, a light dusting of powdered sugar before serving adds an elegant touch that makes these bars look as special as they taste!
Equipment You’ll Need:
Before we dive into creating these delightful bars, let’s gather some essential kitchen tools that will make your baking experience smoother and more enjoyable!
- 8×8-inch baking dish: This size is perfect for creating thick bars without overcrowding them during baking—a must-have companion on this culinary journey!
- Parchment paper: Line your baking dish with parchment paper (leaving overhang) for easy removal after baking—it’s one small step that guarantees perfect squares every time.
- Mixing bowls: A couple of medium-sized bowls will do nicely for mixing dry and wet ingredients separately before combining them—this ensures even distribution throughout.
- Rubber spatula: You’ll need one to fold ingredients gently without deflating anything precious—we want every bit of air retained!
- Measuring cups and spoons: Precision matters when it comes to baking! Accurate measurements ensure consistent results so don’t skimp on this step.
Now that we have everything ready let’s get started on preparing those delectable Blackberry Pistachio Dream Bars!
Step 1: Preheat Your Oven and Prepare Your Baking Dish
First things first—let’s preheat your oven to 350°F (175°C). This temperature is key because it ensures even cooking throughout your bars without burning any edges or leaving them raw at the center—a common pitfall in home baking! While that’s warming up, grab your trusty 8×8-inch baking dish and line it with parchment paper… Leaving some overhang allows you easy access later when lifting out those luscious squares without any fuss!
Step 2: Prepare Your Crust Mixture
In a mixing bowl (preferably medium-sized), combine your all-purpose flour, rolled oats, brown sugar, salt, and baking powder together thoroughly using a whisk or fork until well-blended—this step ensures even distribution which promotes uniform texture throughout your crust once baked! Next comes one of my favorite steps: pouring melted butter over dry ingredients along with vanilla extract before stirring gently until you form what resembles crumbly dough—it should hold together without being wet or sticky at all!
Step 3: Press Down That Crust
Now comes the fun part—firmly press about two-thirds of this mixture into the bottom layer of your prepared dish using clean hands or back side of measuring cup (my go-to trick!). Make sure it’s evenly distributed across every corner—you want maximum coverage here since this will serve as base foundation holding everything else together later on! Leave aside remaining crumbs—we’ll need them shortly!
Step 4: Prepare Your Blackberry Filling
Moving onto those juicy fresh blackberries… In another bowl (yes!), toss them delicately together with granulated sugar plus lemon juice until coated evenly… You’ll notice their color deepening as juices start mingling with sugar—it’s like magic happening right before our eyes! Spread this glorious mixture evenly atop pressed crust layer—make sure every inch gets covered because who wants uneven bites?
Stay tuned because we’re just getting started—I can hardly wait for you to see how these turn out!
Step 5: The Art of Combining Flavors into a Crumbly Dough
Now that we have our crust components ready to go, it’s time to create that delightful crumbly dough that will serve as the foundation for our Blackberry Pistachio Dream Bars. In your separate bowl, pour the melted butter—this liquid gold is crucial because it brings richness and moisture to our bars. As you whisk in the vanilla extract, take a moment to breathe in the intoxicating aroma; it’s like a warm hug for your senses! With both wet ingredients combined, we’re now ready to merge our two mixtures. Carefully add this buttery blend into the dry ingredients.
Stir gently but purposefully with a spatula or wooden spoon until everything is just combined. You want to see clumps forming; this indicates that the butter is evenly distributed throughout the flour and oats—a crucial step for achieving that perfect texture. Trust me on this: if you overmix, you’ll end up with a dense crust instead of a light and crumbly base that melts in your mouth. So take your time, and really feel how the mixture transforms as you stir. Once you achieve that crumbly consistency, set aside one-third of this dough for later—it will be our delicious topping.
Step 6: Pressing Down for Perfection
With your dough ready, it’s time to bring out those biceps and press down about two-thirds of the dough firmly into your prepared baking dish. The importance of this step cannot be overstated! By pressing down firmly, you ensure that the crust holds together beautifully during baking, providing a solid foundation for those juicy blackberries and crunchy pistachios. I like to use my fingers first and then smooth it out with the back of a measuring cup—this gives an even surface and makes sure there are no air pockets hiding in there.
As you work, think about how each bit is coming together; you’re creating layers here. Ensuring an even spread helps with an even bake and prevents parts from burning while others remain undercooked—a true balancing act! Aim for about half an inch thick; this thickness will give us just enough sturdiness without overwhelming the filling’s flavors.
Step 7: Crafting Your Luscious Blackberry Filling
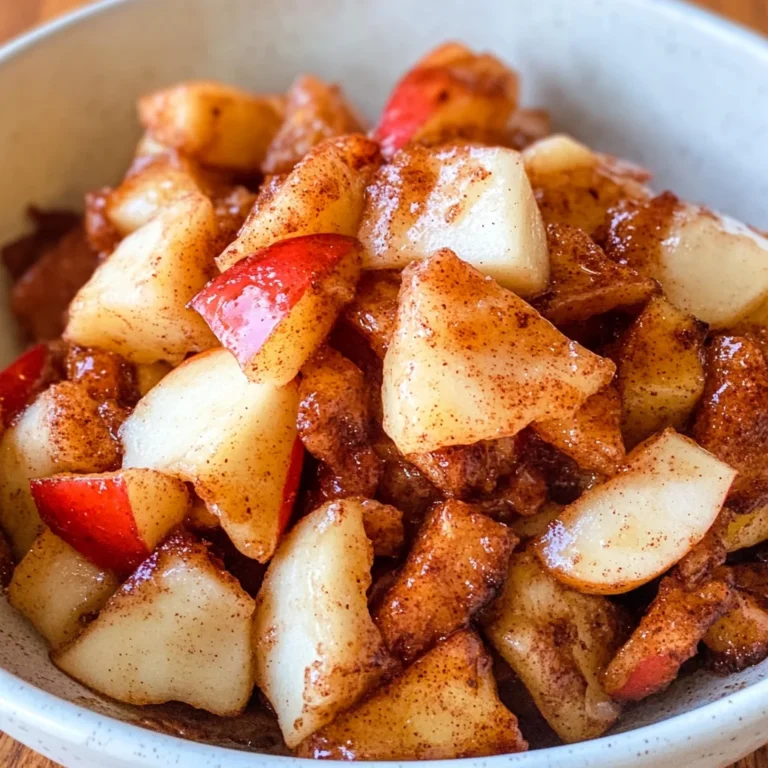
Now comes one of my favorite parts—the blackberry filling! This step not only showcases those beautiful berries but also adds acidity and sweetness to our bars, balancing perfectly against the rich crust. Gently toss your fresh blackberries in a bowl with granulated sugar and lemon juice. The sugar draws out juices from these plump berries while the lemon juice brightens their flavor profile—it’s like magic happening right before your eyes!
As you mix them together, be delicate; you don’t want to crush them too much. Picture each berry bursting with flavor as they mingle with sugar and lemon. Let this mixture sit for about 5 minutes—this resting period allows those juices to accumulate at the bottom of the bowl, ensuring our filling will be both juicy and flavorful when baked. You’ll know it’s ready when you see some syrup forming at the bottom—a beautiful blend of sweet chaos!
Step 8: Layering Those Delicious Components
Now that your crust is pressed down firmly and your blackberry filling has marinated beautifully, it’s time to layer these components together like a pro! Evenly spread that luscious blackberry mixture over the pressed crust with a spatula, making sure every inch gets its fair share of those juicy gems. As you do this, take note of how vibrant and inviting those blackberries look atop the golden base—you can almost taste summer in every bite!
Next comes another essential step: sprinkling over that remaining crumb mixture followed by those roughly chopped pistachios. This topping serves multiple purposes—it creates a textural contrast against the gooey blackberry filling while also adding nutty depth that’s utterly intoxicating! Make sure to distribute them evenly so every bar has its fair share of crunchiness; believe me, biting into one of these bars only to miss out on pistachio goodness would be tragic!
The anticipation builds as you head toward baking—the aroma will soon fill your kitchen—but first, let’s get this beauty in the oven!
Conclusion:
As we wrap up our journey through this incredible recipe for Blackberry Pistachio Dream Bars, I can’t help but feel a swell of excitement bubbling inside me! From the very first moment I laid eyes on these vibrant berries to the final sprinkle of pistachios on top, this recipe has been nothing short of a labor of love. The combination of juicy blackberries paired with crunchy pistachios creates a symphony of textures that’s truly extraordinary. Each bite offers not just sweetness but also that delightful nutty crunch—a contrast that elevates these bars far above anything ordinary.
Why should you make this recipe? Well beyond its deliciousness lies the joy of creating something remarkable from simple ingredients. It’s incredibly accessible yet impressively elegant—perfect for gatherings or simply as a treat for yourself after a long day. Imagine pulling these bars from the oven; your kitchen will fill with an utterly intoxicating aroma that promises comfort and satisfaction. When shared with others, they become a centerpiece of connection and warmth—the kind of dessert that sparks conversations and brightens moods!
Serving suggestions are endless! Imagine savoring one alongside your morning coffee; it adds just the right amount of sweetness to kickstart your day! For an afternoon pick-me-up, pair it with herbal tea—it’s like wrapping yourself in cozy warmth on a chilly day. And if you are feeling indulgent? A scoop of vanilla ice cream atop one warm bar transforms it into an opulent dessert experience that feels like pure bliss.
Feeling adventurous? This recipe is wonderfully adaptable! Consider swapping blackberries for raspberries or even diced peaches during summer months; each fruit brings its unique essence while still harmonizing beautifully with pistachios’ richness. Or how about drizzling some melted dark chocolate over the top before serving? That would add an entirely new layer of decadence! I invite you to explore these variations—don’t hesitate to make it your own! Try this recipe, share your experiences with me, and let’s connect over our love for baking together!
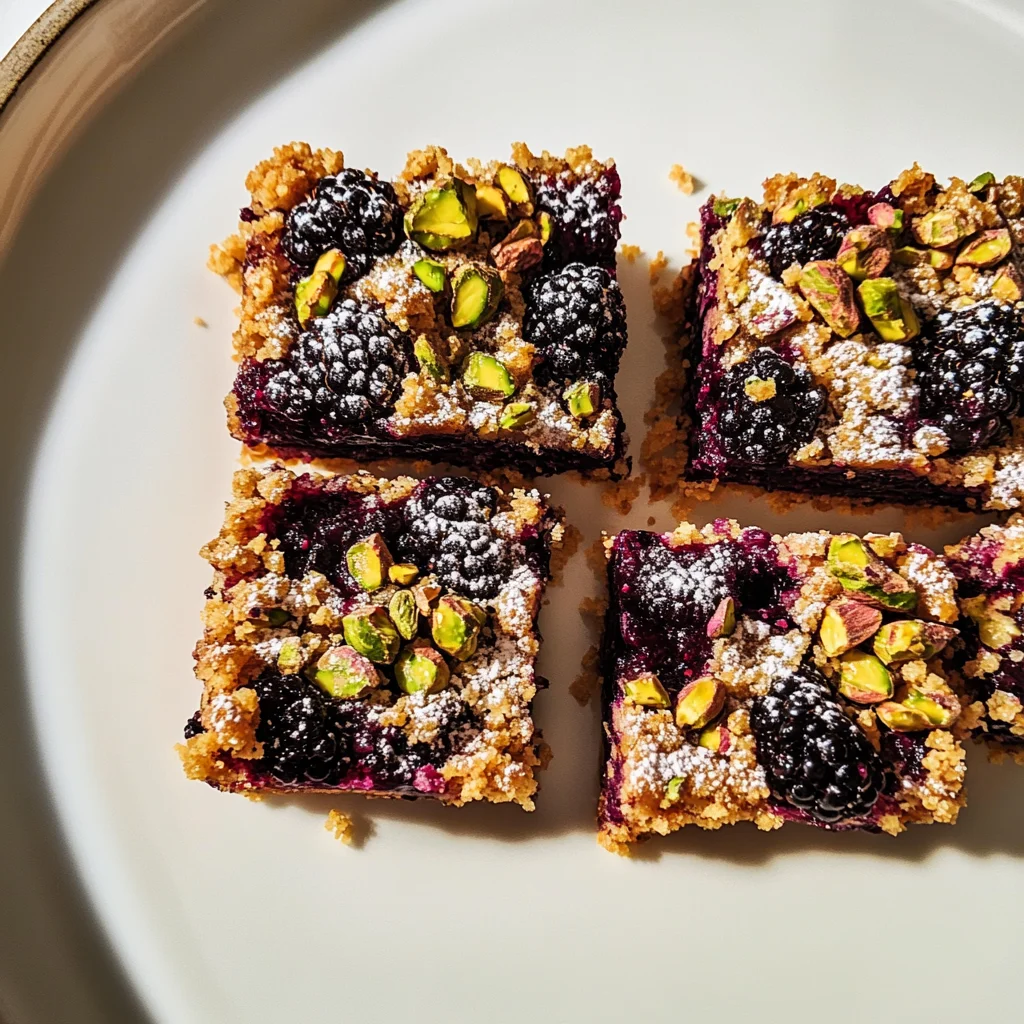
Blackberry Pistachio Dream Bars
Indulge in the delightful flavors of Blackberry Pistachio Dream Bars, where juicy blackberries meet crunchy pistachios in a buttery oat crust. These bars are not only easy to prepare but also create a stunning dessert that will impress your family and friends. Each bite offers a captivating combination of textures and tastes, making them perfect for gatherings or a cozy night in. With fresh ingredients and simple steps, these bars encapsulate the essence of summer and will quickly become your new favorite dessert.
- Prep Time: 15 minutes
- Cook Time: 35 minutes
- Total Time: 50 minutes
- Yield: Serves 16 1x
- Category: Dessert
- Method: Baking
- Cuisine: American
Ingredients
- 1 cup all-purpose flour
- ½ cup rolled oats
- ½ cup brown sugar
- ¼ teaspoon salt
- ½ teaspoon baking powder
- ½ cup unsalted butter, melted
- 1 cup fresh blackberries
- ¼ cup granulated sugar
- 1 tablespoon lemon juice
- ½ cup pistachios, roughly chopped
- 1 teaspoon vanilla extract
Instructions
- Preheat your oven to 350°F (175°C) and line an 8×8-inch baking dish with parchment paper.
- In a medium mixing bowl, combine flour, oats, brown sugar, salt, and baking powder. Mix well.
- Pour the melted butter and vanilla extract into the dry ingredients; stir until crumbly dough forms.
- Press about two-thirds of the mixture firmly into the lined baking dish to create the crust.
- In another bowl, toss blackberries with granulated sugar and lemon juice; then spread evenly over the crust.
- Sprinkle remaining crumb mixture on top along with chopped pistachios.
- Bake for 30–35 minutes until golden and bubbly; let cool before slicing into bars.
Nutrition
- Serving Size: 1 square (45g)
- Calories: 180
- Sugar: 10g
- Sodium: 90mg
- Fat: 8g
- Saturated Fat: 5g
- Unsaturated Fat: 3g
- Trans Fat: 0g
- Carbohydrates: 25g
- Fiber: 2g
- Protein: 3g
- Cholesterol: 15mg