Biscoff Brownies
It’s incredible how food can weave through our lives, isn’t it? It’s more than just sustenance; it’s an experience, a memory, a moment of connection. When I think about my favorite desserts, Biscoff brownies immediately come to mind, and oh boy, do they tell a delightful story! Imagine biting into a rich, fudgy brownie that melts in your mouth, its deep chocolate notes dancing playfully with the unmistakable warmth of spiced cookie butter. The aroma wafting through your kitchen is nothing short of intoxicating—a symphony of scents that beckons friends and family to gather and share in the joy. Each bite is a little revelation, where traditional brownie meets the innovative flair of Biscoff cookie butter. Trust me when I say this: once you make these brownies, you’ll find yourself dreaming about them long after they’ve disappeared!
Biscoff brownies are not just a dessert; they’re an experience that transports you from the everyday to something truly special. They embody the perfect balance of sweet and savory, with layers of gooey cookie butter elevating the fudgy chocolate base into something extraordinary. If you’re looking for a dessert that will impress at gatherings or simply elevate your afternoon coffee break, these brownies are what you need in your life. They are ideal for sharing—though I won’t judge if you decide to keep them all to yourself! So grab your apron and let’s create something spectacular together.
Biscoff Brownies: Decadence Meets Delight
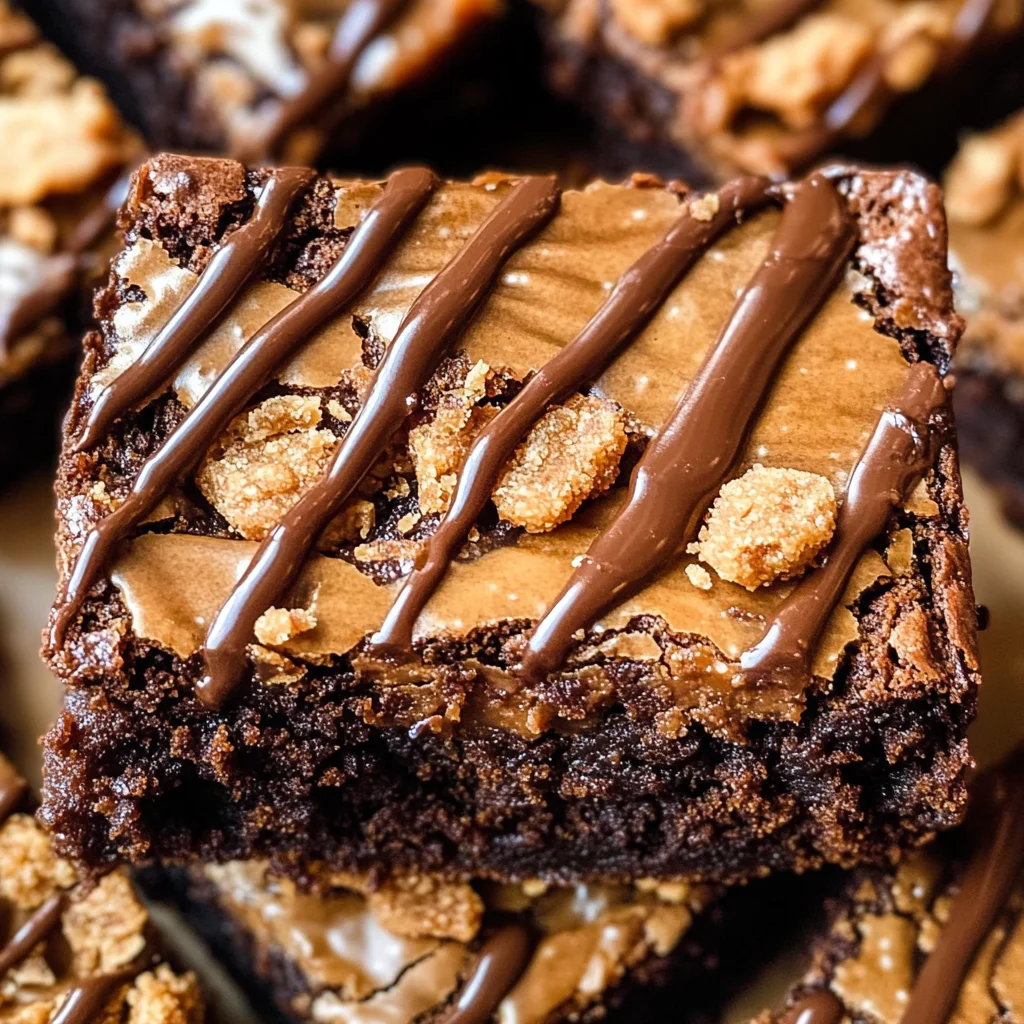
These fudgy Biscoff brownies are packed with Biscoff flavor! With a rich chocolate brownie base enveloping a luscious layer of gooey cookie butter and topped with crunchy Biscoff cookies, they’re sure to become an instant favorite in your home.
Ingredients:
Embarking on this culinary journey is like unwrapping a beautifully wrapped present; anticipation fills the air as we gather everything we need to create our delicious masterpiece! Each ingredient plays a vital role, contributing its unique character to our Biscoff brownies.
- 3/4 cup Biscoff cookie butter. This is the heart and soul of our recipe—the creamy spread that brings those beloved spiced flavors into each bite. Cookie butter is made from crushed Biscoff cookies blended with oils and sugar until it reaches that dreamy consistency. When used in these brownies, it adds richness and moisture while infusing every mouthful with its distinct caramelized flavor profile. If you can’t find Biscoff brand specifically, look for similar cookie butters made from speculoos cookies or other brands that offer comparable flavors.
- 1/2 cup light or dark brown sugar (packed). Brown sugar is essential here because it not only adds sweetness but also brings moisture due to its molasses content. This contributes to that delectable chewy texture we all crave in brownies! Light brown sugar offers milder flavor notes while dark brown sugar has deeper caramel undertones—feel free to use whichever one calls to you! Just remember: packing it firmly into your measuring cup ensures you’re getting just the right amount for perfect results.
- 1/2 cup granulated sugar. Adding granulated sugar helps achieve the classic sweetness we associate with brownies while also contributing to their delightful crust on top. It contrasts beautifully with the moistness from the brown sugar and cookie butter below, creating layers of texture that are absolutely enticing. For an alternative option, consider using coconut sugar; while it brings slightly different flavors, it can lend a lovely caramel note!
- 2 large eggs & 1 large egg yolk. Eggs are critical for structure—they help bind everything together while providing richness and moisture. Using two whole eggs along with an extra yolk gives us that dense fudginess we’re after; the yolk adds even more fat which enhances both flavor and texture. Make sure they’re at room temperature before mixing; this helps them emulsify better into your batter for even results.
- 1 tablespoon vanilla extract. Ahh, vanilla—this magical extract elevates our brownies from good to extraordinary by adding depth and warmth that complements both chocolate and cookie butter beautifully. Always opt for pure vanilla extract over imitation if possible; its nuanced flavors will shine through in every bite!
- 10 tablespoons unsalted butter. Butter is where much of the flavor comes from in baked goods; it helps create that irresistibly rich taste while also contributing to tenderness in our brownies. Ideally, use high-quality unsalted butter so you can control the saltiness yourself later on—it truly makes all the difference! Ensure it’s melted but not too hot when mixing; otherwise, you could risk cooking those precious eggs!
- 2/3 cup + 1/4 cup semi-sweet chocolate chips. Chocolate chips are the stars within this fudge-filled creation! Semi-sweet varieties provide just enough sweetness without overpowering the other flavors at play here—they melt beautifully into pockets of gooey goodness throughout each brownie square. You can also mix things up by using dark chocolate chips if you’re daring enough for an intense chocolate experience!
- 1/4 cup unsweetened Dutch cocoa powder. Cocoa powder is responsible for giving our brownies their deep chocolate color and flavor profile without adding any additional sweetness. Dutch-process cocoa has been treated with alkali to reduce acidity which creates smoother flavors—perfectly complementing our brownie base without being overwhelming.
- 2/3 cup + 1 tablespoon all-purpose flour (see notes below on measuring). Flour provides structure—too much can lead to dry or crumbly brownies while too little will yield an overly wet result! When measuring flour, it’s best practice to spoon it gently into your measuring cup without packing down; this preserves its lightness so we achieve maximum fudginess!
- 1 teaspoon espresso powder. Espresso powder intensifies chocolate flavors immensely—it’s like putting on your favorite sweater when you’re feeling chilly! Even though it’s subtle, you’ll notice how it elevates every element within these brownies without tasting like coffee itself.
- 1/2 teaspoon fine sea salt. Salt might seem like an odd addition in sweet recipes but trust me when I say this step is absolutely crucial! It balances out sweetness while enhancing all other flavors present within our dish—a sprinkle here can transform ordinary desserts into extraordinary ones!
- 4-5 Biscoff cookies (for the top) & Extra cookie butter (for drizzle). Topping these decadent treats with additional crushed cookies not only adds visual appeal but also provides crunch against their soft interior! Drizzling warm cookie butter overtop before serving creates an irresistible finish—it’s like icing on the cake…or should I say brownie?

Equipment You’ll Need:
Having the right tools at hand makes navigating any recipe smoother—and trust me when I say baking should always be enjoyable rather than stressful! Below are some essential partners in crime that will help us craft these delightful Biscoff brownies:
- 8×8-inch square metal baking pan – A sturdy metal pan conducts heat evenly which allows our brownies to bake perfectly throughout without burning edges or undercooked centers—a non-negotiable when crafting rich desserts like this one!
- Parchment paper – This clever tool saves us from sticky situations (pun intended!). Lining our pan allows for easy removal post-baking while providing additional assurance against sticking—no one wants half their precious creation left behind clinging desperately inside!
- Whisk – A good whisk is fundamental when combining ingredients smoothly together—especially important during egg/sugar mixtures where we want everything nicely incorporated without lumps ruining our end product.
- Mixing bowls (various sizes) – Having multiple mixing bowls at hand allows for organized prep work—you’ll appreciate having designated spaces as ingredients get combined thoroughly along different stages throughout baking.
Preparing the Biscoff Brownies
Step 1: Chill Out That Cookie Butter!
First things first: let’s prepare ourselves by pressing a large piece of parchment paper into our square metal baking pan (an 8×8 inch works best). This step ensures easy release later on—you’ll thank yourself when it’s time to cut those delicious squares! Once you’ve creased those edges so they mimic your pan’s outline perfectly, take 3/4 cup of delightful Biscoff cookie butter and evenly spread it inside those creased edges before popping it into your freezer until firm—it typically takes about 15 minutes or so depending upon how cold your freezer runs! Why chill? Cooling solidifies fat molecules which helps keep them intact rather than melting away during baking—this layer becomes crucial as we’ll place brownie batter directly above once set.
Step 2: Prepping Our Pan
While waiting for our heavenly layer of cookie goodness to firm up nicely in its icy abode, let’s line our baking pan again with parchment paper allowing some overhang on all four sides—we want easy removal later after all those hard-earned efforts! Next up? Preheat that oven at 350°F (180°C)—the magic number where deliciousness begins bubbling away inside.
Step 3: Whisk It Good
In one mixing bowl (medium-sized should suffice), combine 1/2 cup packed light or dark brown sugar alongside 1/2 cup granulated sugar along with those two large eggs plus one additional yolk followed by 1 tablespoon vanilla extract until fully combined—this process brings together sweetness alongside creaminess creating an inviting batter base full of potential delight ahead! As tempting as it may be at this stage already smelling those divine aromas wafting upwards—it’s important not rush through whisking thoroughly until everything blends seamlessly together—you want no lumps lurking around waiting patiently just beneath surface!
Step 4: Melting Bliss
Now onto melting magic: take around ten tablespoons unsalted butter alongside two-thirds cup plus an extra quarter measure semi-sweet chocolate chips placing them either in microwave-safe bowl or double boiler setup allowing gentle heating process until smooth consistency achieved (remember stirring occasionally!). Once melted bliss emerges from heat source kindly whisk in quarter-cup unsweetened Dutch cocoa powder introducing rich depths further enhancing overall profile leading us closer towards ultimate success here…
Let’s pause here before diving deeper into creating these wonderfully indulgent treats—they’re already taking shape beautifully don’t you think? Stay tuned for more steps leading us towards luscious perfection soon enough…
Step 5: Folding In the Flour for Fudgy Perfection
Now that you’ve whisked together the luscious melted chocolate mixture and the egg-sugar concoction, it’s time to introduce the flour, espresso powder, and sea salt into this delightful mix. This step is crucial because it transforms your brownie batter from a rich liquid into a thick, fudgy dream. Gently fold in 2/3 cup + 1 tablespoon of all-purpose flour along with 1 teaspoon of espresso powder and 1/2 teaspoon of fine sea salt. The espresso powder is a little secret I love to add; it enhances the chocolate flavor without making your brownies taste like coffee — simply brilliant!
As you fold, use a spatula and gently scoop from the bottom of the bowl to the top, turning your batter over itself rather than stirring vigorously. This technique is crucial because overmixing can lead to tough brownies instead of the tender texture we crave. You want just enough mixing to incorporate all of those dry ingredients without losing the air you’ve created during whisking. When you see no streaks of flour left and everything looks harmoniously combined, stop right there! Trust me on this; patience is key, and allowing that gooey chocolate goodness to shine through will yield brownies that are profoundly satisfying.
Step 6: Building Layers of Bliss
Now comes one of my favorite moments in this baking adventure — layering those flavors! Pour half of your beautifully mixed brownie batter (about 340 grams) into the prepared baking pan. Make sure to spread it evenly right up to those edges; we want every inch of your brownies to have that divine chocolate richness. Once you’ve done this, it’s time for the star of our show — the frozen cookie butter layer!
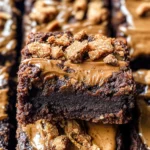
Take that square of chilled cookie butter from your freezer and peel off the parchment paper gently. Place it directly on top of the brownie batter and bask in its glory for just a moment before pouring the remaining brownie batter on top. It’s like tucking in a cozy blanket made of rich chocolate around a heavenly Biscoff surprise! Spread this final layer evenly as well, ensuring no cookie butter peeks through — we want every bite to be a magical experience. This layering technique not only creates that gooey center but also ensures that each piece you cut will have both fudgy brownie and creamy cookie butter swirled together in perfect harmony.
Step 7: Topping It Off with Cookie Crumbles
Let’s take these brownies up another notch by adding some delightful texture on top! Break up about 4-5 Biscoff cookies into rough pieces; think larger chunks rather than fine crumbs — we want that crunch to stand out against the soft brownie base. Sprinkle these pieces generously over your brownie batter as if you’re creating little islands atop a rich sea of chocolate bliss. Don’t rush this step; each crumbled piece adds an intriguing dimension to both flavor and texture when baked.
Next, let’s bring back more cookie butter magic! Warm 2 tablespoons of cookie butter in the microwave for about 15-20 seconds, just until it becomes gloriously runny — but not boiling! Drizzle this golden liquid over those Biscoff cookie pieces like a sweet finishing touch before sending them off to bake. The slight warmth makes it easier to drizzle while infusing even more flavor into our decadent dessert. Remember, every detail counts here; this step ensures that as those brownies bake, they will emerge with an utterly intoxicating aroma wafting through your kitchen!
Step 8: Baking Your Brownies to Chocolatey Perfection
Now comes perhaps one of the most anticipated parts — baking these beauties! Preheat your oven to 350°F (180°C) if you haven’t already done so, as timing is essential here for achieving that perfect fudgy texture. Slide your pan into the oven carefully and set a timer for 30-40 minutes. This range allows for variability depending on your oven’s quirks; each oven has its personality!
For doneness testing, I recommend using a toothpick inserted into the center — but here’s where intuition comes into play: you’re looking for moist crumbs clinging to it rather than wet batter or completely clean results. If it’s too clean, you risk drying out these treasures! The edges should be slightly firm while still giving way when gently pressed; they will continue cooking slightly after being removed from heat due to residual warmth. So don’t rush this step—trust me when I say patience pays off in brownie form!
After baking, allow them to cool completely on a wire rack before attempting removal from their pan home; this cooling period allows them to set properly so they won’t fall apart upon slicing—a common pitfall many encounter! Enjoy this moment filled with anticipation as you watch them transform from gooey batter into glorious Biscoff brownies.
Final Touches: Drizzling & Serving Your Masterpiece
Step 9: The Finishing Touch That Makes All the Difference
Once cooled completely (which takes about an hour if you’re patient!), it’s time for my favorite part: cutting and serving these sensational Biscoff brownies! Before cutting them into delightful squares — which should yield about sixteen generous servings — consider drizzling just a touch more warmed cookie butter over the top for that extra layer of indulgence. It’s absolutely paramount for elevating their presentation and flavor; imagine how inviting they will look with that glossy sheen!
When slicing these brownies, use a sharp knife dipped in warm water between cuts for clean lines — nobody likes ragged edges on such stunning treats! As you cut through, you’ll notice that perfect balance between soft brownie base and creamy cookie butter layer within each slice—oh my goodness! You’ll find yourself unable to resist sneaking bites as you go; I promise you won’t regret it.
Store any leftovers (if there are any!) in an airtight container at room temperature for up to 2-3 days, or freeze them for up to a month if you’re lucky enough not to devour them all immediately. Each bite will remind you why these Biscoff brownies are truly extraordinary—an ode to indulgence that’s bound to become your new favorite recipe.
So gather your loved ones around, share these delights fresh from your kitchen, and watch their faces light up with joy as they dig into what may very well be one of life’s sweetest pleasures! Enjoy every moment—you’ve earned it!
Storage and Enjoyment Tips for Your Biscoff Brownies
Ah, the moment we’ve all been waiting for! Your Biscoff brownies are now golden-brown and tempting, ready to be devoured. But before you dive in, let’s talk about how to store any leftovers—if there are any! I promise you, knowing how to keep these beauties fresh will only enhance your enjoyment and ensure every bite remains as fabulous as the first.
Storing Leftover Biscoff Brownies
To maintain the luscious texture and flavor of your Biscoff brownies after baking, it’s essential to store them correctly. I recommend placing them in an airtight container; this is absolutely paramount for keeping them moist and fudgy. If you have a container that can hold a slice of bread along with the brownies, pop a slice in there too! This clever trick works wonders by absorbing excess moisture and preventing your brownies from drying out. Your delicious Biscoff brownies can stay at room temperature for about 2-3 days—trust me when I say they’ll taste just as divine as when they were freshly baked. When it comes to serving leftovers, simply warm them slightly in the microwave for about 10-15 seconds; this little heat wave will bring back that gooey richness we all adore!
Freezing Biscoff Brownies for Later
Now, if you find yourself with an abundance of these delightful treats (or you want to save some for a rainy day), freezing them is an excellent option! To freeze properly, allow the brownies to cool completely before cutting them into squares. Wrap each piece individually in plastic wrap or aluminum foil; then place them into a freezer-safe bag or container. They can be happily stored in your freezer for up to one month without losing their enchanting flavor. When you’re ready to indulge again, simply thaw them in the fridge overnight or let them sit at room temperature for a little while before enjoying. The convenience of having these heavenly bites ready at a moment’s notice is truly extraordinary—imagine pulling out a frozen brownie on a busy weeknight or when friends drop by unexpectedly!
Now that we’ve covered storage tips, it’s time to dive into pure joy whenever you’re ready!
PrintBiscoff Brownies
Indulge in the delightful world of Biscoff brownies, where a rich chocolate brownie base meets a luscious layer of gooey cookie butter, all topped with crunchy Biscoff cookies. Each bite offers a perfect blend of sweet and spiced flavors that will leave your taste buds craving more. These brownies are not just a treat; they’re an experience that transports you from the ordinary to something truly special. Ideal for gatherings or cozy evenings at home, they promise to impress everyone who takes a bite. Ready to create something spectacular? Let’s dive into this easy-to-follow recipe!
- Prep Time: 20 minutes
- Cook Time: 35 minutes
- Total Time: 55 minutes
- Yield: Approximately 16 servings 1x
- Category: Dessert
- Method: Baking
- Cuisine: American
Ingredients
- 3/4 cup Biscoff cookie butter
- 1/2 cup light or dark brown sugar (packed)
- 1/2 cup granulated sugar
- 2 large eggs
- 1 large egg yolk
- 1 tablespoon vanilla extract
- 10 tablespoons unsalted butter
- 2/3 cup + 1/4 cup semi-sweet chocolate chips
- 1/4 cup unsweetened Dutch cocoa powder
- 2/3 cup + 1 tablespoon all-purpose flour
- 1 teaspoon espresso powder
- 1/2 teaspoon fine sea salt
- 4–5 Biscoff cookies (for topping)
- Extra cookie butter (for drizzling)
Instructions
- Preheat the oven to 350°F (180°C). Line an 8×8-inch baking pan with parchment paper.
- In a medium bowl, whisk together the sugars, eggs, and vanilla until combined.
- Melt the butter and chocolate chips together in a microwave or double boiler until smooth, then mix into the egg mixture.
- Gently fold in cocoa powder, flour, espresso powder, and salt until just combined.
- Pour half of the batter into the prepared pan, followed by a layer of chilled cookie butter, then top with the remaining batter.
- Crumble Biscoff cookies on top and drizzle with warmed cookie butter.
- Bake for 30-40 minutes or until moist crumbs cling to a toothpick inserted in the center.
- Allow cooling before slicing into squares.
Nutrition
- Serving Size: 1 brownie (45g)
- Calories: 210
- Sugar: 18g
- Sodium: 90mg
- Fat: 12g
- Saturated Fat: 7g
- Unsaturated Fat: 5g
- Trans Fat: 0g
- Carbohydrates: 26g
- Fiber: 1g
- Protein: 2g
- Cholesterol: 40mg