Butterbeer Cookies Recipe
There’s something truly enchanting about the aroma of freshly baked cookies wafting through your home—it’s like a warm hug for your senses, drawing you in and wrapping you in nostalgia. The Butterbeer Cookies Recipe is not just dessert; it’s a delightful experience that transports you to a world of magic and whimsy. Inspired by the beloved Harry Potter universe, these cookies are soft, chewy, and topped with a dreamy butterscotch frosting that dances on your palate. Imagine biting into one of these golden treasures, where the sweet notes of brown sugar mingle with rich butter and a hint of vanilla—each bite feels like pure joy. Trust me when I say this recipe will become a cherished staple in your baking repertoire, whether you’re celebrating a special occasion or simply indulging in some well-deserved comfort food.
Now, let’s dive into the heart of this recipe—the soul behind every buttery bite. These cookies embody the spirit of warmth and friendship, making them perfect for sharing with loved ones or as a treat during movie nights. Their slightly crisp edges give way to a soft and chewy center that beckons you to have just one more. The butterscotch frosting adds an utterly intoxicating sweetness that perfectly complements the cookie base. So gather your favorite people around, because baking should always be a shared experience filled with laughter and love.
Butterbeer Cookies Recipe: A Sweet Taste of Magic
Let’s embark on this delicious journey together! Baking these Butterbeer Cookies will fill your kitchen with delightful aromas and create memories that will linger long after the last crumb has been savored. With just a bit of patience and love, you’ll conjure up cookies that are not only visually stunning but also utterly delicious.
Ingredients:
Before we begin our magical adventure in baking, let’s take a moment to appreciate each ingredient that plays its part in this recipe. Each one is essential for crafting those perfect Butterbeer Cookies.
- 1/2 cup (1 stick or 113g) unsalted butter, softened. This ingredient is absolutely paramount in creating the rich flavor and tender texture we crave in our cookies. When butter is softened at room temperature, it allows for easier creaming with sugars, which helps trap air and contributes to that lovely lightness we’re aiming for. Opt for high-quality butter—it can make all the difference! If you’re ever short on butter, coconut oil can be an interesting substitute that brings its own unique flavor profile.
- 1/3 cup granulated sugar. Granulated sugar serves multiple purposes here—it sweetens our dough while also helping to create those delightful crispy edges as they bake. I always choose organic options when possible because their flavor is cleaner and more vibrant. Remember: sugar also affects browning during baking, so don’t skip this step!
- 3/4 cup brown sugar. Ahh, brown sugar—the secret weapon that adds moisture and chewiness to our cookies! It’s packed with molasses, lending a deeper flavor profile that pairs beautifully with the buttery richness of our dough. When measuring brown sugar, pack it firmly into your measuring cup to ensure you’re getting the right amount; this step is non-negotiable if you want those perfect chewy bites!
- 1 large egg, brought to room temperature. Eggs are crucial as they provide structure while adding richness to our cookie dough. Using room temperature eggs ensures they blend seamlessly into the mix rather than cooling down your batter unexpectedly—nobody wants cold cookie dough!
- 2 teaspoons pure vanilla extract. This ingredient is like liquid gold in baking; it enhances flavors and adds a beautiful aroma that makes everything feel more indulgent. Always opt for pure vanilla extract over artificial versions when possible—the taste difference is profound!
- 1 ½ cups all-purpose flour. Flour forms the backbone of our cookie structure; it gives shape and substance while controlling moisture levels within the dough. For an even lighter texture, consider using cake flour instead; it can yield especially tender results.
- 1/4 teaspoon salt. Don’t underestimate salt! Just like in cooking, it enhances all other flavors present in sweet treats—a tiny pinch can elevate your cookies from good to extraordinary by balancing sweetness.
- 1 teaspoon baking powder. This little powerhouse helps our cookies rise beautifully while providing lightness—a crucial element if we want those dreamy soft centers! Ensure your baking powder is fresh; old leavening agents can lead to disappointing results.
- 1/2 cup (1 stick or 113g) unsalted butter, again softened for frosting purposes! The same principles apply here as before—softened butter creates an airy base for our luscious frosting.
- 2 cups powdered sugar. This fine sugar dissolves easily into butter and creates that signature fluffy texture we adore in frostings! While it’s tempting to skimp on quality here due to its nature as “just sugar,” using organic powdered sugar makes every bite even better.
- 1/4 cup butterscotch syrup. Ahh, butterscotch syrup—the star ingredient that brings our cookies their namesake flavor! It adds sweetness and depth beyond what regular sugars could achieve alone—a must-have for any true Butterbeer enthusiast!
- 1/2 teaspoon vanilla extract, added again for its magical aroma and flavor enhancement—because who doesn’t want more vanilla goodness?
- 1-2 tablespoons heavy cream (or substitute with non-dairy cream if preferred). Heavy cream helps achieve that silky-smooth consistency we desire for our frosting; it allows us to adjust thickness without sacrificing richness.
- Harry Potter-inspired sprinkles are optional but highly encouraged! They transform these cookies from simple treats into something whimsical—perfect for parties or any celebration!
Equipment You’ll Need:
Having the right tools at hand makes all the difference when embarking on any culinary adventure! While not technically ingredients themselves, these essential pieces of equipment will help ensure your Butterbeer Cookies turn out perfectly every time.
- Baking sheet lined with parchment paper – This provides an easy release surface for our cookies during baking while ensuring they don’t stick or burn on the bottom—a baker’s best friend!
- Mixing bowls (various sizes) – A good set of mixing bowls allows you flexibility as you combine wet ingredients separately from dry ones before bringing them together—this technique ensures even distribution throughout your cookie dough.
- Hand or stand mixer – While mixing by hand can certainly be done (and sometimes preferred!), using an electric mixer saves time—and who doesn’t love watching their ingredients come together effortlessly?
- Cookie scoop(s) – A large cookie scoop helps maintain uniformity in size across all cookies while making portioning effortless—plus it keeps things neat!
- Piping bag fitted with Tip 10 or 12 – For decorating those heavenly cookies with frosting! Having this tool elevates your presentation game significantly without requiring advanced techniques—trust me; everyone will be impressed!
Preparing the Butterbeer Cookies Recipe
Step 1: Preheat Your Oven & Prepare Your Baking Sheet
First things first: preheat your oven to 350 degrees F (175 degrees C). This step is crucial because starting with a hot oven ensures even baking right from the get-go—it guarantees those edges crisp up nicely while keeping centers delightfully chewy! Next, grab your trusty baking sheet and line it with parchment paper; this prevents sticking while allowing easy cleanup later on—a win-win situation!
Step 2: Creaming Together Butter & Sugars
In a mixing bowl (preferably large enough to accommodate everything), combine half a cup of softened unsalted butter along with both granulated and brown sugars—this process is known as creaming! Beat them together until smooth, lightened in color (about two minutes). You want to develop air pockets within this mixture which leads us toward achieving fluffy cookie perfection later on! Remember: don’t rush this step; patience yields exquisite results!
Step 3: Incorporate Egg & Vanilla Extract
Once your buttery mixture looks airy and invitingly pale yellowish hue emerges—add one room-temperature egg plus two teaspoons pure vanilla extract into this sweet concoction! Mix until thoroughly combined; watch how everything melds together beautifully—the egg acts as both binder while enhancing flavor further still!
Step 4: Combine Dry Ingredients
Now comes time for dry elements: whisk together one-and-a-half cups all-purpose flour alongside quarter teaspoon salt plus teaspoon baking powder within another bowl before slowly adding them into wet ingredients gradually while mixing gently until just combined (overmixing here leads us toward tough cookies!). Pay attention here; find balance between ensuring no dry pockets remain yet avoiding overworking gluten strands present within flour too much either—it’s about finesse rather than forcefulness!
I hope you’re feeling excited about creating these beautiful Butterbeer Cookies—they’re worth every moment spent in preparation! Keep following along as we finish preparing each delightful component leading towards delectable completion ahead…
Step 5: Sculpting Your Cookies with Love
Now that you’ve combined the wet and dry ingredients, it’s time to transform this lovely dough into cookies that will make your heart sing! Grab a large cookie scoop—this is essential for ensuring each cookie is evenly sized, which helps them bake uniformly. Using the scoop, take about 7-8 generous portions of your dough and place them onto your lined baking sheet. Here’s a little tip: don’t just drop them down; gently roll each portion into a ball between your palms first. This small act of care helps create a beautiful surface on each cookie that will bake up golden and perfectly tender.
Once you’ve got those dough balls on the baking sheet, it’s time to flatten them slightly. You want to press down until they’re about ¾ inches thick. The reason for this step is vital: if you leave them as perfect little spheres, they may rise too much in the oven and turn out puffy rather than the soft, chewy cookies we crave. Flattening them ensures they spread nicely while baking, creating that delightful texture that you want in every bite. Trust me on this; it’s absolutely paramount for achieving that signature butterbeer vibe!
Step 6: The Magic of Baking
With your cookies prepped and ready, it’s time to let the oven work its magic! Preheat your oven to 350 degrees Fahrenheit—that’s the sweet spot for creating perfectly baked cookies. Once your oven reaches this temperature, carefully slide in the baking sheet with your cookie dough balls. Set a timer for 12-13 minutes, but don’t just walk away! This is where patience shines through because watching those cookies bake is part of the delight.
As they begin to bake, you’ll notice an intoxicating aroma wafting through your kitchen—a warm embrace of butterscotch and vanilla that’s simply irresistible. When you peek inside around the 10-minute mark, look for those edges to be lightly golden; this means they’re starting to set while their centers remain wonderfully soft. Remember, every oven behaves differently; if you find yours tends to run hot or cool, keep an eye on them! They should be just set in the center when they’re done so that when they cool down outside the oven, they’ll achieve that melt-in-your-mouth tenderness we all adore.
Step 7: Cooling Down – The Waiting Game
Ahh, here comes one of the hardest parts—the waiting! Once your cookies are baked to perfection at around 12-13 minutes, it’s crucial to let them rest on the baking sheet for at least ten full minutes before transferring them to a cooling rack. Why such a long wait? Well, during these precious moments off heat, they continue to cook slightly from residual heat and firm up just enough so they won’t crumble when you move them.
While you wait, feel free to revel in that heavenly scent lingering in your kitchen—it’s like being wrapped in a warm hug! After ten minutes have passed (yes, I know it feels like an eternity), gently use a spatula to transfer those golden beauties onto a cooling rack. Allow them to cool completely before we dive into decorating—this step is non-negotiable because frosting warm cookies can lead to melted puddles instead of fluffy clouds of butterscotch goodness!
Step 8: Whipping Up Butterscotch Frosting Bliss
Now comes one of my favorite parts: crafting that utterly indulgent butterscotch frosting! In a mixing bowl—whether using a hand mixer or stand mixer—start by creaming together another half cup of softened butter until it’s irresistibly smooth and silky; this process creates air pockets that will make our frosting light and fluffy later on. Then it’s time for sweetness—add in two cups of powdered sugar gradually while mixing at low speed; this prevents an explosive cloud of sugar from covering your kitchen (trust me on this one!).
Next up is our magical ingredient: butterscotch syrup! Pour in ¼ cup along with half a teaspoon of vanilla extract and one tablespoon of heavy cream—this is where things get serious because these additions will give our frosting that rich flavor profile reminiscent of cozy evenings spent indulging in sweet treats. Beat this mixture on high speed for about four minutes until it transforms into a light and airy buttercream—a true symphony of flavors! You want it fluffy enough to pipe beautifully but still spreadable. If it seems too thick or too thin after beating it well, adjust consistency with a splash more heavy cream or powdered sugar as needed.
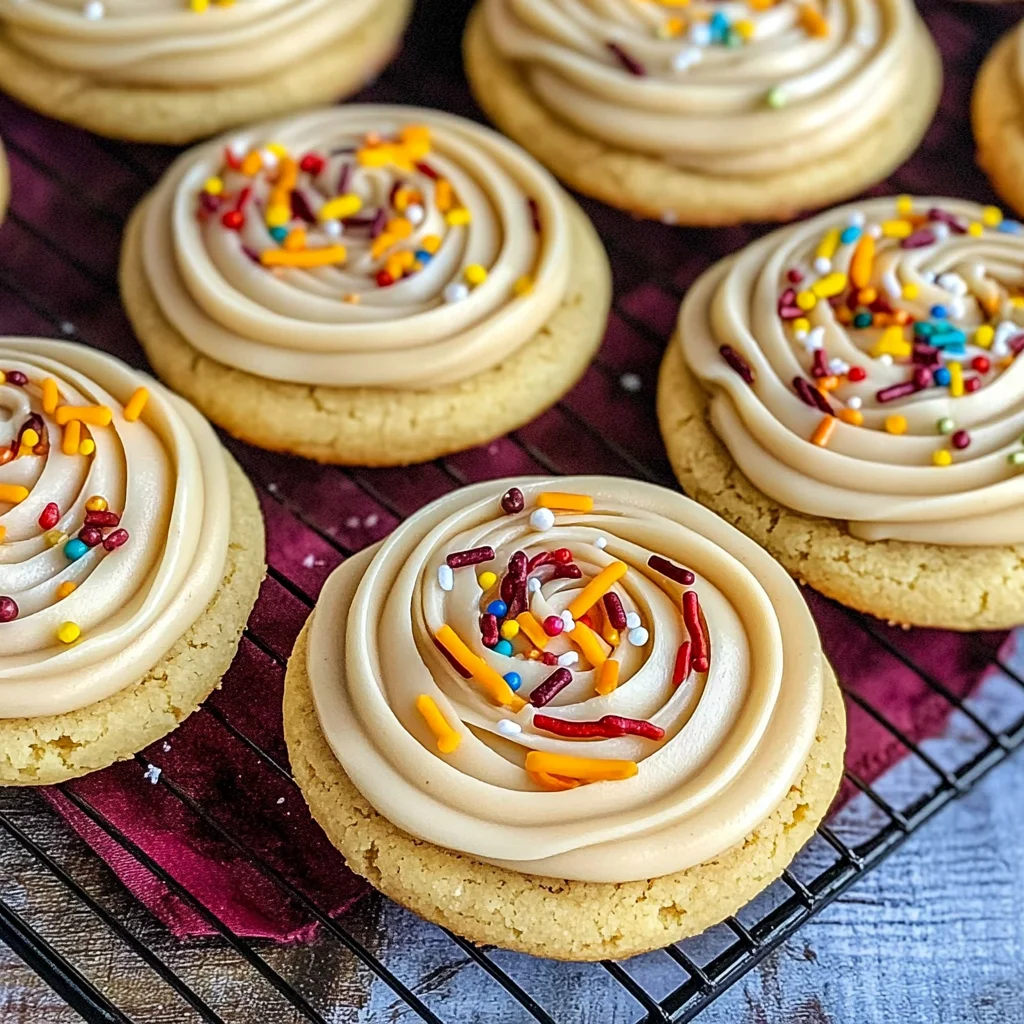
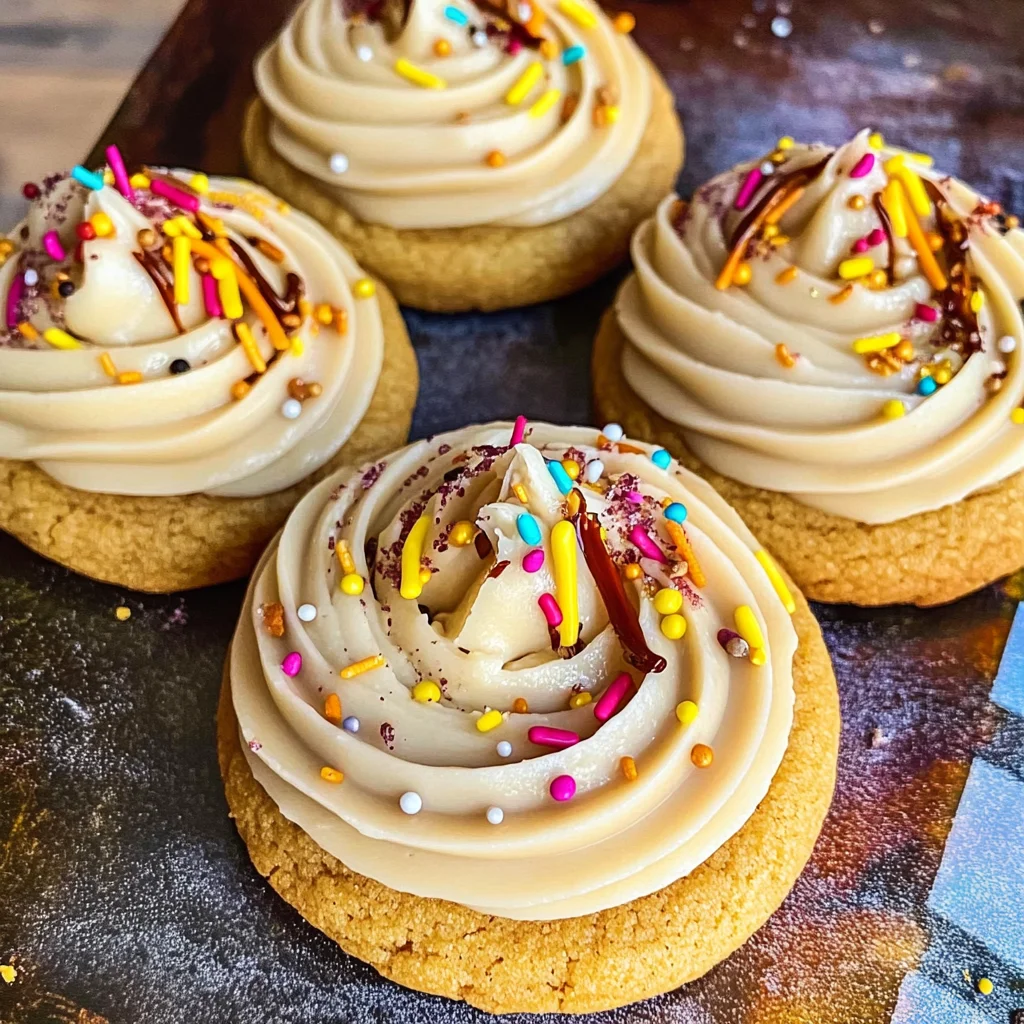
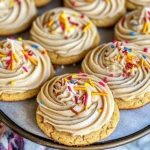
Final Touches: Decorating Your Cookies
Once your cookies have cooled completely and you’ve achieved that dream-like frosting consistency, it’s time for the fun part—decorating! Load up your piping bag fitted with either tip #10 or #12 (the choices are endless!), and let’s get creative! Begin by piping a dot right in the center of each cookie; think of this as planting the seed for what’s about to be a whimsical garden of flavor. From there, gently swirl around in tight circles until you’ve frosted the entire top with luscious layers of buttercream goodness.
Don’t forget about those delightful Harry Potter-inspired sprinkles—this is where you can truly let your imagination fly! Their colors and shapes add whimsy and joy with each sprinkle landing atop your frosted masterpiece like fairy dust on enchanted treats. I promise you; not only do they look fabulous but they also add an extra crunch against that creamy frosting which elevates every single bite into something truly extraordinary.
And there you have it—the complete Butterbeer Cookies Recipe! Each bite promises warmth and nostalgia while whisking you away into realms filled with magic and cheer. So gather your loved ones around these delicious creations—you’ll find both laughter and memories being made over these enchanting treats! Enjoy every crumb knowing you’ve crafted something spectacular from scratch!
Storage and Enjoyment Tips for Your Butterbeer Cookies Recipe
Now that you’ve baked up a batch of these enchanting Butterbeer Cookies, it’s time to revel in the delightful experience they bring! Picture yourself sitting in a cozy nook, perhaps with a cup of tea or coffee, savoring the sweet aroma wafting through your home. As you prepare to enjoy these treats, let’s talk about how you can keep the magic alive even after your first bite. Trust me, knowing how to store and preserve these cookies will ensure that you can indulge in their buttery goodness for days to come.
Storing Leftover Butterbeer Cookies Recipe
To keep your Butterbeer Cookies fresh and utterly irresistible, I recommend placing them in an airtight container. This is crucial because it locks in moisture and flavor while keeping them soft and chewy. You can store them at room temperature for about 5-7 days. If you’re anything like me, you’ll want to make sure they stay as delicious as the day they were made! A nifty trick I love is placing a slice of bread in the container alongside the cookies; this helps maintain their softness by absorbing excess moisture. After a few days, don’t be surprised if they still taste like freshly baked delights—this method works wonders! And when you’re ready for that blissful moment again, simply pull one out and let it come to room temperature; or if you’re feeling adventurous, pop it in the microwave for just a few seconds to warm it up. The chocolatey flavors will be even more pronounced, enveloping you in its comforting embrace.
Freezing Cookie Dough for Later
If you want to enjoy these charming Butterbeer Cookies at another time without all the mixing and measuring fuss, then freezing the cookie dough is an absolutely fantastic option! Simply scoop out your cookie dough balls onto a parchment-lined baking sheet and freeze them until solid—about 1-2 hours will do the trick. Once they’re frozen solid, transfer those little gems into a freezer-safe bag or container and label it with the date. They’ll keep beautifully for up to three months! When you’re ready to bake, there’s no need to thaw; just pop them into your preheated oven straight from the freezer! This convenience factor is one of my favorites: imagine being able to pull out fresh cookies whenever you please! It’s like having a secret stash of happiness waiting for you.
Butterbeer Cookies Recipe
Transport yourself to a whimsical world with these enchanting Butterbeer Cookies. Inspired by the beloved Harry Potter universe, these cookies are soft, chewy, and topped with a dreamy butterscotch frosting that will delight your taste buds. Each bite reveals the perfect blend of brown sugar, rich butter, and a hint of vanilla, creating an irresistible treat that’s perfect for sharing with family and friends. Whether you’re celebrating a special occasion or indulging in comfort food, this delightful cookie recipe is sure to become a cherished favorite.
- Prep Time: 20 minutes
- Cook Time: 13 minutes
- Total Time: 33 minutes
- Yield: Approximately 24 cookies 1x
- Category: Dessert
- Method: Baking
- Cuisine: American
Ingredients
- 1/2 cup unsalted butter (softened)
- 1/3 cup granulated sugar
- 3/4 cup brown sugar
- 1 large egg (room temperature)
- 2 teaspoons pure vanilla extract
- 1 ½ cups all-purpose flour
- 1/4 teaspoon salt
- 1 teaspoon baking powder
- 2 cups powdered sugar (for frosting)
- 1/4 cup butterscotch syrup
- Optional: Harry Potter-inspired sprinkles
Instructions
- Preheat your oven to 350°F (175°C) and line a baking sheet with parchment paper.
- In a mixing bowl, cream together softened butter, granulated sugar, and brown sugar until light and fluffy. Add the egg and vanilla extract; mix until well combined.
- In a separate bowl, whisk together flour, salt, and baking powder. Gradually add the dry ingredients to the wet mixture until just combined.
- Scoop dough onto the prepared baking sheet; flatten each cookie slightly before baking for about 12-13 minutes or until edges are lightly golden.
- Allow cookies to cool on the baking sheet for 10 minutes before transferring them to a cooling rack.
- For frosting, beat softened butter until smooth; gradually add powdered sugar and butterscotch syrup, mixing until fluffy. Pipe or spread frosting on cooled cookies and decorate with sprinkles if desired.
Nutrition
- Serving Size: 1 cookie (30g)
- Calories: 150
- Sugar: 12g
- Sodium: 45mg
- Fat: 6g
- Saturated Fat: 4g
- Unsaturated Fat: 2g
- Trans Fat: 0g
- Carbohydrates: 22g
- Fiber: <1g
- Protein: <1g
- Cholesterol: 15mg