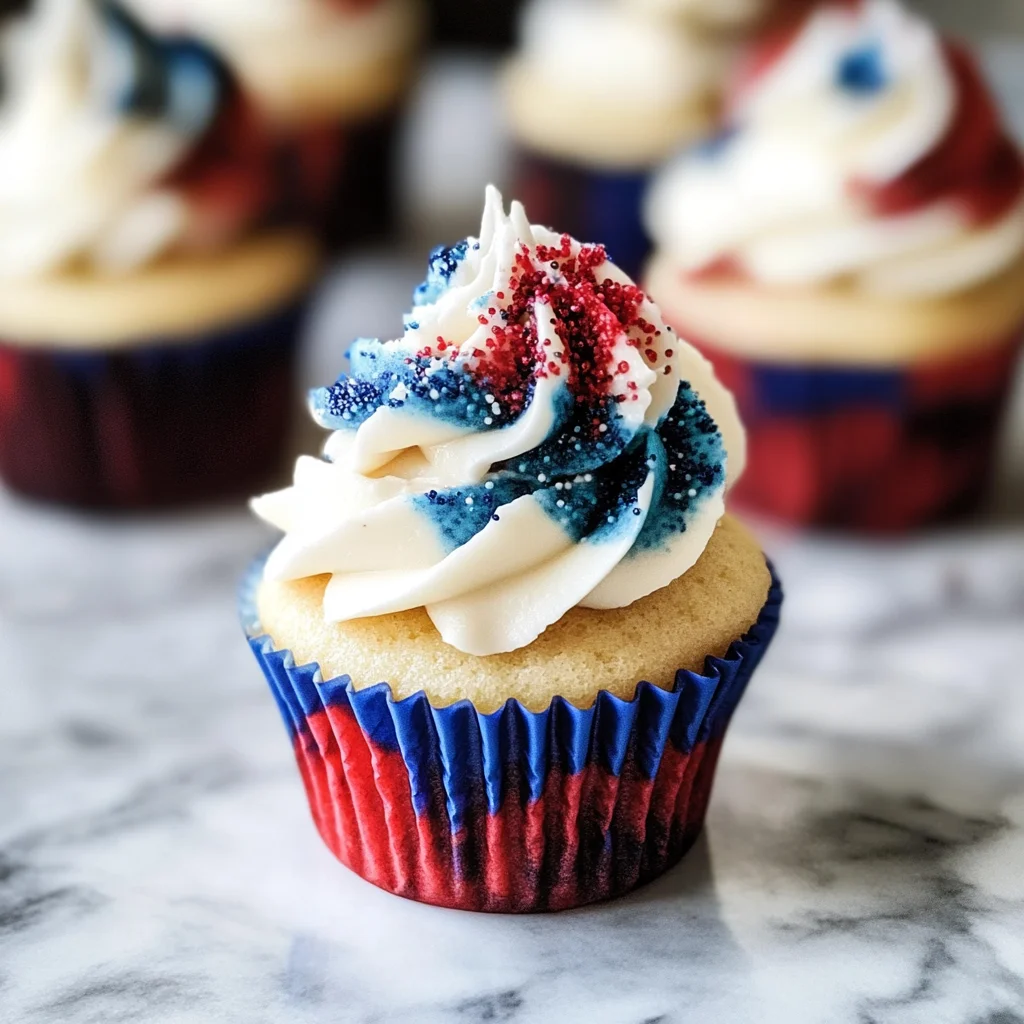
4th of July cupcakes
There’s something incredibly heartwarming about gathering friends and family to celebrate special occasions, isn’t there? The air is filled with laughter, the sound of fireworks in the distance, and a table adorned with vibrant treats that evoke the spirit of the day. That’s exactly what these 4th of July cupcakes bring to the table—an explosion of color and flavor, perfectly encapsulating the joy and unity of this special holiday. Each bite transports you to a summer day filled with sunshine, barbecues, and unforgettable memories. With their tender texture swirled in rich cocoa goodness and topped with luscious vanilla buttercream, these cupcakes are more than just dessert; they are a celebration of life itself.
I’ve always been captivated by how food can bridge generations, creating a tapestry of shared experiences. These gorgeous 4th of July cupcakes not only taste incredible but also serve as an opportunity to involve your loved ones in the kitchen. Imagine assembling together, mixing vibrant batters while sharing stories from your past Fourth of Julys or discussing dreams for future celebrations. The process is as delightful as the final result. Trust me when I say that every swirl of red velvet and blue velvet tells a story worth savoring!
4th of July Cupcakes: Celebrate with Color and Flavor!
These delightful cupcakes are perfect for your holiday festivities! With their stunning marbled appearance and rich flavors, they’re sure to be a hit at any gathering. Let’s dive into this culinary adventure together!
Ingredients:
As we embark on this culinary journey together, let’s take our time to appreciate each ingredient that will come together to create these extraordinary cupcakes. Every element plays a crucial role in building flavor and texture, so let’s explore what makes each one special.
- 1 1/2 cups all-purpose flour (spooned and leveled). This versatile flour forms the backbone of our cupcake batter, providing structure while keeping it tender. When measuring flour, spoon it into your measuring cup gently—it’s essential not to pack it down! Otherwise, you may end up with denser cupcakes instead of the light treats we’re aiming for.
- 1 tsp fine salt. Though it may seem small in quantity, salt is absolutely paramount in baking. It enhances sweetness while balancing flavors—think of it as a flavor amplifier! Opt for fine salt here so it dissolves easily into the batter without leaving any gritty texture behind.
- 1 tsp baking powder. This leavening agent is responsible for giving our cupcakes that delightful rise and fluffy texture we crave. Baking powder works by releasing carbon dioxide when mixed with wet ingredients, creating those lovely air pockets that make each bite light and airy.
- 1/4 tsp baking soda. Another key player in our leavening team! Baking soda reacts with acidic components in our recipe (like buttermilk) to produce lift as well. It’s crucial to use the right amount—too much can lead to an off-putting metallic taste!
- 8 tbsp unsalted butter, softened. Butter brings both flavor richness and moisture to our cupcakes. Make sure it’s softened to room temperature so that it creams beautifully with sugar—this process is where magic happens! If you want even richer results, consider using high-fat European-style butter.
- 3/4 cup sugar. Sugar doesn’t just sweeten; it also contributes to texture and moisture by trapping air during creaming with butter. This creates those airy structures within your cupcakes that we all love! Choose granulated sugar for classic sweetness.
- 2 large eggs, room temperature. Eggs are essential here—they add moisture while also providing structure through proteins that set during baking. Room temperature eggs blend more easily into batter than cold eggs straight from the fridge, so don’t skip this step!
- 2 tbsp sour cream, room temperature. Sour cream adds a delightful tanginess while also contributing fat for moistness—a non-negotiable aspect in achieving perfect cupcakes! Look for full-fat sour cream if possible; its richness makes all the difference.
- 2 tsp vanilla extract. You know how vanilla has the power to elevate almost any dessert? That’s because it adds depth and warmth! Always choose pure vanilla extract over imitation for the most authentic flavor experience—it truly makes these cupcakes shine.
- 2/3 cup buttermilk plus 2 tbsp, divided, at room temperature. Buttermilk not only adds moisture but also activates our baking soda for a perfect rise while lending a subtle tanginess that balances sweetness beautifully—absolutely crucial for depth in flavor!
- 3 tbsp cocoa powder. This ingredient is what gives us those beautiful chocolatey swirls! Look for unsweetened cocoa powder made from high-quality cacao beans; it will provide rich depth without overwhelming sweetness.
- 1 1/2 cups (350 g) salted butter, cubed and softened (for frosting). A generous amount of butter ensures our frosting is smooth and creamy—just like clouds on top of our cupcakes! Salted butter brings out sweetness even more beautifully; you’ll find yourself reaching back for seconds!
- 6 cups (700 g) powdered sugar, sifted. Powdered sugar provides sweetness while helping achieve that fluffy texture in our frosting—it’s what makes each bite utterly intoxicating! Sifting removes lumps ensuring smoothness throughout your frosting.
- 1 tsp vanilla extract (for frosting). Just like before, vanilla plays an important role here too; it enhances flavors throughout your frosting mixture making every bite memorable!
- 1 tsp boiling water. This might surprise you as an ingredient—but trust me on this one! Adding boiling water helps dissolve any remaining powdered sugar lumps ensuring silky-smooth frosting perfection.

Equipment You’ll Need:
Before we dive into mixing up those colorful batters and whipping up some delicious frosting, let’s ensure we have all our trusty tools at hand! While they’re not technically ingredients themselves, having the right equipment makes all the difference between success and frustration in baking.
- Mixing bowls – A selection of sizes will come in handy here! I recommend having at least one large bowl for mixing batters along with smaller bowls designated for combining dry ingredients separately—it helps maintain organization while preventing any accidental clumps!
- Electric mixer – An absolute game changer when it comes time to cream butter and sugar together until light and fluffy! While you can certainly do this by hand if you’re feeling ambitious (and have patience!), an electric mixer speeds things up significantly making your life easier.
- Muffin tin – Essential for holding those delightful cupcake liners as they bake away into perfection! I prefer using non-stick tins if possible; they help release baked goods effortlessly after cooling down—a true blessing when serving guests.
- Cupcake liners – These decorative paper cases not only make cleanup easier but also add visual appeal—who doesn’t love pretty desserts? Choose festive colors or designs reflecting Independence Day themes—the choice is yours!
Preparing the 4th of July Cupcakes
Step 1: Whisking Up Dry Ingredients
To start crafting these incredible 4th of July cupcakes, let’s begin by whisking together those dry ingredients: all-purpose flour, baking powder, baking soda, cocoa powder (for that stunning chocolate swirl), and fine salt in a mixing bowl until well combined—this ensures even distribution throughout our batter later on which leads us towards success! Don’t rush this step; whisking properly prevents lumps from forming within your mixture later down line—which would result in uneven textures throughout baked goods instead of uniformly soft delights!
Step 2: Creaming Butter & Sugar
Now comes perhaps my favorite part: creaming together softened unsalted butter with granulated sugar until lightened in color—this process takes about 3–5 minutes on medium speed using an electric mixer (or longer by hand!). What we’re doing here is incorporating air into our mixture creating tiny bubbles that expand during baking resulting in fluffy textures everyone adores so much about cakes/cupcakes alike! And remember: always scrape down sides of bowl halfway through mixing ensuring no ingredient is left behind—that’s crucial if we want every cupcake tasting equally delicious!
Step 3: Incorporating Eggs & Sour Cream
Once you’ve achieved that perfectly creamy consistency after creaming together butter/sugar combination beautifully—you’ll want now add room-temperature eggs one at a time allowing thorough incorporation before adding second egg followed closely by sour cream too—trust me when I say this addition works wonders elevating overall moistness factor tremendously without sacrificing richness either way whatsoever! Mix everything well until fully blended ensuring no visible streaks remain—what we seek here resembles smooth custard-like consistency which signifies successful integration among components thus far bringing us closer towards amazing results ahead!
Step 4: Alternating Adding Dry Ingredients & Buttermilk
Finally comes my favorite part—the grand finale where we alternate adding those dry ingredients alongside buttermilk mixture slowly into creamy batter base allowing gentle folding action between each addition rather than vigorous stirring motions which could lead tough results instead fluffy ones desired ultimately yielding perfectly airy bites later on down line once cooled off fully post-baking time frame completed satisfactorily thereafter finishing touches added shortly after needing only slight adjustments accordingly based upon personal preferences noticed along way too such wise choices made regarding flavors overall enhancing enjoyment further alongside providing necessary balance needed taste-wise throughout experience entirely making wow factor resonate deeply within hearts souls alike cherishing moments spent enjoying delicious creations birthed lovingly crafted hands-on efforts shown abundantly expressed joyfully shared amongst family friends alike celebrating cherished holidays like Independence Day celebrated annually nationwide across diverse communities everywhere standing united proudly waving flags high above heads basking sun shining brightly overhead illuminating skies beautifully whilst savoring sweet memories wrapped within colors flavors glittering joyously brightening days forevermore etched fondly hearts forever remembered warmly long after events concluded gracefully passed through fleeting times gone by swiftly leaving behind lingering echoes peace harmony hope dreams unite strengthen bonds build lasting legacies paved history journeys undertaken boldly move forward embracing futures filled possibilities endless…
Oh my goodness—I can hardly contain my excitement sharing these steps with you! We’re almost there; stay tuned as we whip up some dreamy frosting next…
Step 5: Whipping Up a Dreamy Batter
Now that you’ve got your dry ingredients all sorted, it’s time to bring the magic of flavor and texture into play. Start by grabbing a large mixing bowl and your softened butter—this step is crucial because soft butter will whip up beautifully with sugar, creating that airy structure we all adore in cupcakes. Add in the 3/4 cup of sugar and beat them together until the mixture turns into a pale, fluffy cloud. This process, known as creaming, is where you’re incorporating air into the batter, which will result in an incredibly tender cupcake. You want to continue this for about 3 to 5 minutes until you see tiny bubbles forming in the mixture; this is your indication that you’re on the right track.
Next, one at a time, crack in those two large eggs. Why do we add them one by one? It allows each egg to fully incorporate into the batter before adding the next. This ensures an even distribution of moisture and fat throughout your mixture, resulting in uniform cupcakes without any curdled surprises! Stir in your room-temperature sour cream and two teaspoons of vanilla extract; these are non-negotiable ingredients that will elevate your cupcakes with a delightful depth of flavor. The sour cream adds moisture and a subtle tang that balances the sweetness perfectly while enhancing that luxurious texture. And trust me, you’ll be grateful for this extra layer of deliciousness when you take that first passionate bite!
Step 6: The Buttermilk Magic
Now it’s time to introduce our buttermilk—2/3 cup plus an additional two tablespoons to be precise! Why buttermilk? Not only does it lend a rich creaminess to our batter, but its acidity also reacts with the baking powder, providing that wonderful lift we crave in our cupcakes. Pour it into your batter and mix gently until just combined; overmixing here can lead to dense cupcakes, which we absolutely want to avoid. Remember to scrape down the sides of your bowl frequently with a spatula—it’s so easy for ingredients to hide away from our whisking efforts!
At this point, I find it useful to divide my batter into two bowls for the fun marbling effect we’re after. Measure out half of your batter into another bowl and set it aside for later use. Now comes the moment where we infuse this lovely base with some color and rich cocoa flavor. In one of those equal portions of batter, sift in three tablespoons of cocoa powder and stir gently until just combined. Keep an eye on how smoothly everything blends together; you should end up with a beautiful chocolate hue that contrasts spectacularly against vibrant red and blue swirls later on.
Step 7: Creating Your Red Velvet Masterpiece
As we move forward with our recipe for these festive 4th of July cupcakes, it’s time to bring out that glorious red velvet aspect! In order to achieve this stunning color while keeping everything moist and flavorful, grab yourself some food coloring—a few drops go a long way! Add your desired amount (I usually recommend about 1 tablespoon diluted in water) into your reserved portion of plain batter. Mix gently until you achieve a beautiful crimson hue; don’t be afraid if it seems bright at first—it bakes down beautifully!
Now comes perhaps my favorite part: layering these colors in our cupcake liners! Using an ice cream scoop or two spoons (that’s what I usually do), spoon alternating dollops of red velvet and blue velvet batters into each cupcake liner—this is where creativity shines! Don’t worry if they don’t look perfect; remember we want those gorgeous marbled swirls peeking from every side when they bake up high and proud! Fill each liner only about two-thirds full; this allows room for rising without overflowing—nobody wants baked-on batter stuck to their oven walls!
Step 8: Baking Your Perfect 4th of July Cupcakes
With all those colorful layers nestled cozily in their cupcake liners, it’s finally time for them to head into the oven! Preheat your oven to 350°F (175°C), ensuring it’s fully heated before placing your tray inside—this step is absolutely paramount because putting cold batter in a warm oven can lead to uneven baking. Position your tray on the center rack for optimal airflow around each cupcake; they love being surrounded by warm air so they can rise evenly! Bake them for about 18-20 minutes, but let’s not rush this moment—the aroma filling your kitchen will be utterly intoxicating!
You’ll know they’re ready when their tops spring back gently when touched or when a toothpick inserted comes out clean or with just a few moist crumbs clinging on—it’s important not to pull them too early as they need time to set properly before cooling off completely. Once baked through, carefully remove them from the oven (watch out for those hot handles!) and allow them to cool in their pans for about five minutes before transferring them onto wire racks—this cooling process ensures that they’ll hold their shape beautifully while preventing sogginess at the bottom.
Conclusion:
As we wrap up this delightful journey through creating these stunning 4th of July cupcakes, I can’t help but feel excited about all the flavor possibilities that await you. From the tender cocoa-rich swirls to the striking red and blue velvety layers adorned with dreamy vanilla buttercream, this recipe isn’t just about making dessert—it’s about crafting memories filled with laughter and love during those special summer gatherings. The way these colors harmonize together not only provides a feast for the eyes but also creates a truly extraordinary taste experience that will leave everyone asking for seconds.
I wholeheartedly believe that this recipe is a must-try not only because of its mouthwatering flavors but also due to the sheer joy it brings throughout its creation! Imagine pulling these beauties from your oven while they cool on the counter; your kitchen will be enveloped in sweet aromas that whisper promises of celebration. These cupcakes shine brilliantly at any gathering—be it backyard barbecues or family picnics—and are perfect for sharing with loved ones as you gather around sparklers under starry skies.
Serving suggestions abound when it comes to enjoying your 4th of July cupcakes! Picture savoring one alongside a tall glass of freshly brewed iced tea on a warm afternoon or perhaps indulging in one while lounging by the pool with friends on a sun-drenched day. For an afternoon pick-me-up during those long summer evenings, pairing these treats with a scoop of creamy vanilla ice cream takes dessert to another level entirely. And let’s not forget how divine they would be served alongside some juicy watermelon slices—what an extraordinary way to celebrate summer!
Feeling adventurous? This recipe is wonderfully adaptable! You can effortlessly switch up flavors by incorporating lemon zest into your buttercream for a citrusy twist or even add some colorful sprinkles atop each cupcake before serving—they’ll bring an extra pop of joy! You could transform these into delightful mini cakes by adjusting baking times accordingly or experiment with different frosting flavors like chocolate ganache or strawberry whipped cream that will elevate each bite into new territories of flavor bliss. So go on—embrace your creativity, try out these variations, and share your experiences with me! I can’t wait to hear how your baking adventure unfolds!
4th of July Cupcakes
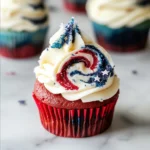
4th of July cupcakes are a vibrant and festive treat that perfectly encapsulate the spirit of Independence Day celebrations. With their stunning red and blue velvet layers swirled with rich cocoa, these cupcakes are not just visually appealing but also bursting with flavor. Topped with creamy vanilla buttercream, they offer a delightful combination of textures and tastes that will have your friends and family coming back for seconds. This easy-to-follow recipe invites everyone into the kitchen to create joyful memories while baking together.
- Prep Time: 25 minutes
- Cook Time: 20 minutes
- Total Time: 45 minutes
- Yield: Makes approximately 12 cupcakes 1x
- Category: Dessert
- Method: Baking
- Cuisine: American
Ingredients
- 1 1/2 cups all-purpose flour
- 1 tsp fine salt
- 1 tsp baking powder
- 1/4 tsp baking soda
- 8 tbsp unsalted butter, softened
- 3/4 cup sugar
- 2 large eggs, room temperature
- 2 tbsp sour cream, room temperature
- 2 tsp vanilla extract
- 2/3 cup buttermilk plus 2 tbsp, divided, at room temperature
- 3 tbsp cocoa powder
Instructions
- Preheat oven to 350°F (175°C). Line a muffin tin with cupcake liners.
- In a mixing bowl, whisk together flour, baking powder, baking soda, cocoa powder, and salt. Set aside.
- Cream softened butter and sugar until light and fluffy. Add eggs one at a time, mixing well after each addition. Stir in sour cream and vanilla extract.
- Alternate adding dry ingredients and buttermilk to the mixture until just combined.
- Divide batter into two bowls; mix cocoa powder into one for chocolate batter and color the other red with food coloring.
- Spoon alternating dollops of both batters into each cupcake liner.
- Bake for about 18–20 minutes or until a toothpick comes out clean.
- Allow cupcakes to cool before frosting with vanilla buttercream.
Nutrition
- Serving Size: 1 cupcake (60g)
- Calories: 210
- Sugar: 18g
- Sodium: 160mg
- Fat: 9g
- Saturated Fat: 5g
- Unsaturated Fat: 3g
- Trans Fat: 0g
- Carbohydrates: 30g
- Fiber: 1g
- Protein: 3g
- Cholesterol: 30mg