Teriyaki Chicken and Rice Casserole
It’s something magical, isn’t it? The way food can transport us to different places, evoke memories, and create a sense of belonging. This Teriyaki Chicken and Rice Casserole is more than just a meal; it’s a warm embrace on a chilly evening, a delightful blend of flavors that beckon you to the table with open arms. Imagine the aroma wafting through your kitchen as the sweet notes of teriyaki sauce mingle with tender chicken and vibrant vegetables. It’s not just comfort food; it’s an experience that encapsulates love, care, and culinary creativity. Each bite is a harmony of textures and tastes—a symphony that sings to the soul.
As I share this cherished recipe with you, I want you to feel the excitement I have whenever I pull this casserole from the oven. It’s a dish that brings family together, perfect for those weeknight dinners when you want something quick yet fulfilling. The luscious teriyaki sauce glistens like liquid gold, enveloping every morsel in its sweet embrace. Trust me when I say this is a dish that leaves everyone asking for seconds; it’s simple yet utterly extraordinary. So roll up your sleeves and let’s embark on this culinary adventure together!
Teriyaki Chicken and Rice Casserole: A Cozy One-Pan Delight
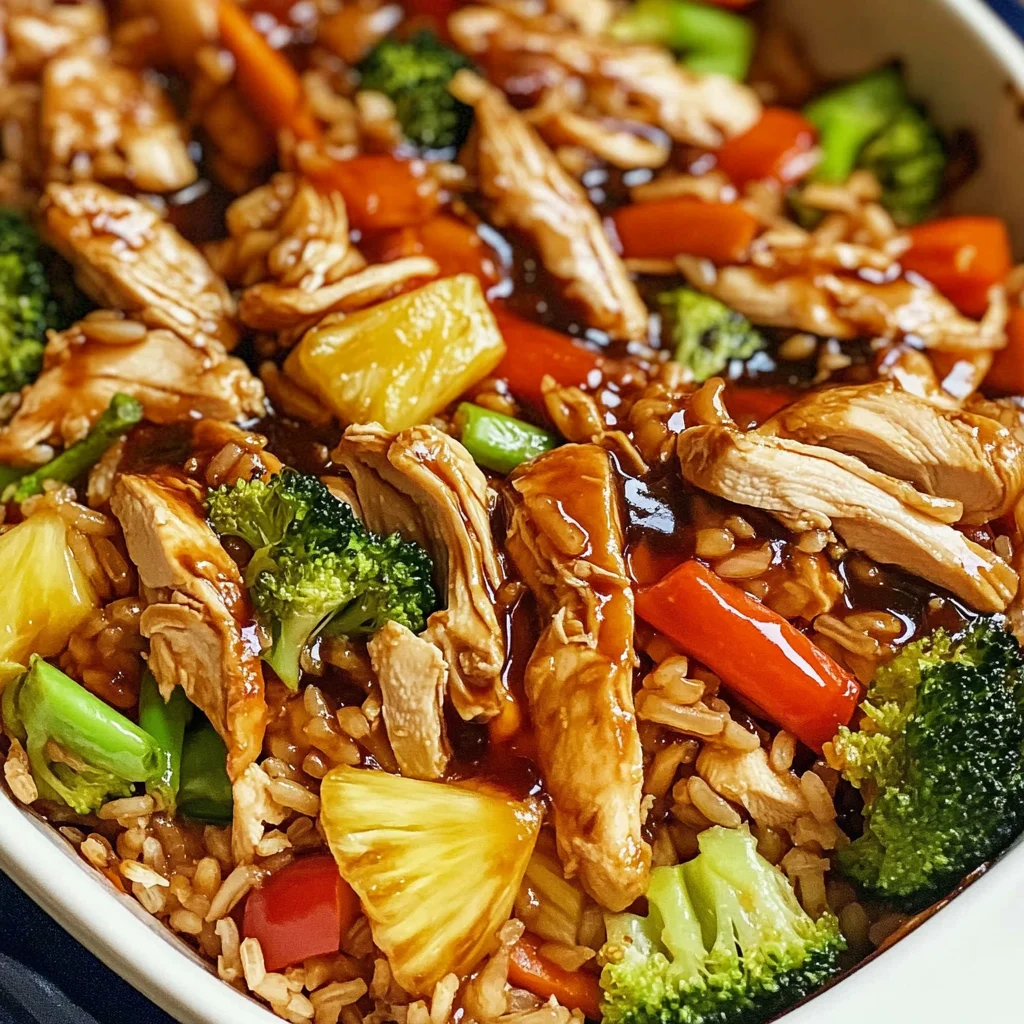
This Teriyaki Chicken and Rice Casserole is not just any casserole; it’s a celebration of flavors that come together beautifully in one pan! With juicy chicken, colorful vegetables, and sweet pineapple all mingling under a rich homemade teriyaki sauce, this dish is bound to become your go-to comfort meal.
Ingredients:
Let’s dive into the heart of our casserole—the ingredients! Each element plays a vital role in crafting this beautiful dish, working together to create something truly special.
- 3/4 cup low sodium soy sauce. This ingredient serves as the backbone of our homemade teriyaki sauce, contributing that classic umami flavor we all adore. Low sodium soy sauce allows us to control the saltiness without sacrificing taste—after all, we want all those delightful flavors to shine through! When choosing soy sauce, look for options made from whole soybeans rather than hydrolyzed vegetable proteins for a richer depth of flavor.
- 1/2 cup water. Water might seem like an afterthought here, but it plays an essential role in balancing the intensity of our sauce. It helps dilute the soy sauce slightly while allowing all other flavors—the sweetness from brown sugar and honey, along with pungent garlic—to harmonize beautifully without being overwhelming.
- 1/3 cup packed brown sugar. Ahh, brown sugar! It adds that unmistakable sweetness we crave in teriyaki dishes while also lending a hint of molasses-like richness that elevates our casserole’s flavor profile. Make sure to pack it tightly when measuring; that way, you get every bit of its caramel-like goodness into our dish.
- 1 tablespoon honey. Adding honey takes our sweetness game up another notch! Not only does it enhance the overall flavor complexity with its floral undertones but also contributes to that lovely glossy finish on our chicken as it bakes. Feel free to use raw honey for even more robust flavor—your taste buds will thank you!
- 3/4 teaspoon ground ginger. Ginger brings warmth and spiciness to our casserole—it’s like a gentle hug for your palate! Ground ginger works well here due to its convenience; however, fresh ginger could be used if you’re feeling adventurous! Just remember that fresh ginger has more potency than its dried counterpart—so adjust accordingly!
- 1 teaspoon olive oil. Olive oil not only helps sauté garlic but also promotes moisture retention within our dish during baking, ensuring tender chicken throughout. It adds richness without overpowering other flavors—always choose extra virgin olive oil for its superior quality!
- 1/2 teaspoon minced garlic. Garlic is non-negotiable in any Asian-inspired dish—it infuses everything with its unmistakable aroma and flavor profile! Freshly minced garlic will provide stronger flavor than pre-minced varieties found in jars; plus, there’s something therapeutic about chopping garlic by hand!
- 2 tablespoons cornstarch (for slurry) & 2 tablespoons water (for slurry). This dynamic duo transforms our teriyaki sauce into a glossy glaze rather than just liquid gold! Mixing cornstarch with water forms a slurry which thickens when added to boiling liquid—this step is crucial for achieving that restaurant-quality texture we love.
- 1.5 pounds boneless skinless chicken breasts. The star of our show! Chicken breasts are lean yet succulent when cooked correctly; they absorb flavors exceptionally well while remaining juicy throughout baking—a must-have in any casserole!
- 32 oz frozen mixed vegetables (unsauced Asian varieties). These vibrant veggies add both color and nutrition to our dish—plus they save time since they’re already prepped! Look for blends featuring broccoli florets or snap peas—they hold their shape well during cooking and add delightful crunch.
- 1 cup pineapple tidbits (drained, packed in juice). Pineapple introduces an unexpected burst of sweetness along with acidity which cuts through savory elements beautifully! Be sure to drain them thoroughly so excess juice doesn’t dilute your wonderful teriyaki sauce.
- 3 cups cooked brown rice. Brown rice serves as the bedrock upon which everything else rests—it absorbs flavors while providing hearty sustenance! Using brown rice instead of white adds nutty depth plus additional fiber—a win-win situation!

Equipment You’ll Need:
Having the right tools can make all the difference when creating anything delicious in your kitchen—it transforms chaos into seamless joy! While these items may not be ingredients themselves, they play crucial roles as partners in bringing this Teriyaki Chicken and Rice Casserole to life.
- 9×13-inch casserole dish: This spacious vessel is ideal for layering all your ingredients effortlessly without crowding them together too tightly—allowing even cooking throughout! Look for glass or ceramic options if you prefer seeing those beautiful layers before serving.
- Small saucepan: A sturdy saucepan will be essential for making your homemade teriyaki sauce from scratch—its size enables precise heating while allowing easy stirring until everything melds perfectly together into that irresistible glaze we crave!
- Mixing bowl: You’ll need one handy when preparing your cornstarch slurry—a bowl allows thorough mixing without splattering everywhere; consider using one with measurement markings if you’re feeling fancy!
- Meat thermometer: This tool is paramount when baking chicken—you want precise internal temperature readings (165°F or 74°C) ensuring safety while achieving moistness at once! Trust me; investing in one pays off big time over guesswork alone.
Preparing the Teriyaki Chicken and Rice Casserole
Step 1: Creating Your Sauce
We start by whisking together all those flavorful ingredients into what will be our luscious teriyaki sauce! In a small saucepan over medium heat, combine low sodium soy sauce with half a cup of water alongside packed brown sugar, honey, ground ginger powder (don’t skimp here), olive oil—and minced garlic because we can’t forget about it either! Stir gently until everything dissolves completely—you’ll know you’re ready once you see tiny bubbles begin rising around edges indicating it’s getting close to boiling point (but don’t rush!). Covering helps trap steam which assists further dissolving sugars faster too—so keep an eye out during this process!
Step 2: Thickening Your Sauce
Once boiling happens (which should take about 5 minutes), grab yourself another small bowl where you’ve already mixed two tablespoons worth each of cornstarch & water together into slurry consistency—you know what I mean? Gradually add this mixture back into bubbling sauces whilst continuously stirring until thickened appropriately—it should resemble syrupy texture after another minute or two max! This step creates velvety goodness coating every bite later on—we’re building layers here folks!
Step 3: Baking Your Chicken
Preheat oven now while waiting on sauces cooling down—set it at 350°F (175°C). Grab yourself those lovely boneless skinless chicken breasts then place them directly inside your chosen casserole dish—they’ll soak up all those delicious flavors beautifully during cooking time ahead! Pour approximately one cup worth earlier made teriyaki sauce evenly over top making sure each piece gets coated nicely—we want every morsel bursting forth come dinner time right?
Step 4: Cooking Time
Now slide everything carefully onto center rack within preheated oven allowing magic happen within approximately thirty-five minutes maximum until internal temperature reaches safe mark around 165°F (74°C). Resist urge checking too frequently though since oven door opening lets precious heat escape causing longer cooking durations overall—trust me here folks patience pays off greatly especially concerning poultry dishes like these where timing matters significantly as well ensuring moistness stays intact throughout process!! Once done remove from heat but leave covered until ready shred each piece apart using forks taking care not burn yourself meanwhile enjoying aromas floating around kitchen enticing appetites further along…
Stay tuned as we continue layering those wonderful components next!
Step 5: The Art of Shredding Chicken
Now that your chicken has been baking for about 30 to 35 minutes, it’s time for one of the most satisfying steps: shredding the chicken. You’ll know it’s ready when the internal temperature reaches a safe 165°F (74°C). Trust me, this is absolutely paramount because it ensures that your chicken is both safe to eat and juicy enough to absorb all those amazing teriyaki flavors. When you remove the casserole from the oven, let it sit for a couple of minutes; this short rest allows the juices to redistribute within the meat, making it tender and flavorful.
Using two forks, gently pull apart the chicken breasts right in the casserole dish. This technique is known as shredding and not only does it create bite-sized pieces that blend beautifully with your other ingredients, but it also allows every shred to become enveloped in that rich, homemade teriyaki sauce you’ve crafted with so much love. As you shred, take a moment to inhale the intoxicating aroma wafting through your kitchen; I promise you, it’s a preview of the deliciousness that awaits! Make sure you don’t leave any large chunks—every bite should be an explosion of flavor, so be diligent in breaking down those pieces!
Step 6: Preparing Your Vegetables
While your chicken is cooling slightly post-baking, let’s turn our attention to those vibrant frozen mixed vegetables. Whether they’re peas, carrots, broccoli, or snap peas—the colors and textures are going to add not just nutrition but also a delightful crunch to your casserole. Go ahead and steam or cook them according to package instructions. Steaming is particularly beneficial here because it preserves their bright colors and nutrients—a beautiful contrast against the rich teriyaki sauce.
As you prepare these veggies, keep an eye on timing; overcooking them can result in mushy textures and diminished flavors. Aim for just tender but still crisp—this balance will provide a lovely textural complement to both the shredded chicken and the fluffy brown rice we’ll add later. Remember, we want each component of our Teriyaki Chicken and Rice Casserole to sing together in perfect harmony! Once cooked, drain any excess water and set these aside. Trust me on this step; those bright bites will elevate your dish from ordinary to extraordinary.
Step 7: Bringing It All Together
With our chicken shredded and vegetables ready, now comes one of my favorite parts: combining all these incredible elements into one glorious casserole! In that same casserole dish where all that good chicken flavor has been marinating, gently fold in your cooked frozen vegetables along with the pineapple tidbits. Oh yes! The sweetness from the pineapple mixed with savory notes creates an utterly intoxicating experience that dances on your taste buds.
Next up is incorporating our cooked brown rice—this adds heartiness to our casserole while also soaking up all those mouthwatering flavors. Use a spatula or wooden spoon to carefully mix everything until well combined; you want each ingredient evenly distributed so that every bite delivers a symphony of flavors! Don’t rush this step; take a moment to admire how colorful and inviting your dish looks before pouring most of that luscious teriyaki sauce over everything. Reserve just a little for drizzling later—it’ll be like adding a cherry on top of an already fabulous sundae!
Step 8: The Final Bake
Now we’re almost there! Preheat your oven once again if necessary—set it at 350°F (175°C)—and prepare for what I like to call “the final bake.” This step is crucial because it melds everything together beautifully; think of it as letting all those individual flavors get cozy with one another. Transfer your assembled casserole back into the oven for about 15 minutes. Keep an eye on it during this time; you want everything heated through thoroughly without drying out.
You’ll know it’s done when you see some bubbling around the edges—that’s liquid gold indicating flavor convergence happening right before your eyes! The aroma filling your kitchen will be nothing short of heavenly; I can hardly contain my excitement thinking about how delicious this will be once served! Remember not to skip this important phase because allowing all components time together truly transforms them into something profoundly satisfying—a meal meant for sharing and savoring.
Conclusion:
As we wrap up our culinary journey with this Teriyaki Chicken and Rice Casserole, I hope you’re as excited as I am about bringing this dish into your home. It isn’t just about combining chicken, rice, and vegetables; it’s about creating memories around a table filled with warmth and laughter. The key flavor combinations—from the sweet notes of pineapple mingling with the savory teriyaki sauce to the tender crispness of mixed veggies—elevate this casserole beyond ordinary comfort food. Each bite resonates with love and care, making every meal feel profoundly satisfying.
This recipe is truly a must-try because not only does it deliver on taste, but it invites joy into your cooking experience. Whether you’re preparing for a family dinner or hosting friends for game night, imagine pulling this glorious casserole from your oven—golden-brown chicken glistening under layers of rich sauce, filling your kitchen with intoxicating aromas that make mouths water instantly. It’s perfect for any occasion where comfort food is needed—weeknight dinners, potlucks, or even lazy Sundays.
When serving this delightful creation, envision savoring each bite alongside fluffy coconut rice or crispy spring rolls for an authentic vibe that transports you straight to Asia. For an afternoon pick-me-up on those busy days ahead, consider pairing it with a refreshing cucumber salad drizzled with sesame dressing—the crunch complements every creamy morsel perfectly! And if you’re feeling fancy on date night? How about enjoying a glass of sparkling water infused with lime alongside? The possibilities are endless!
Feeling adventurous? This recipe is wonderfully adaptable! You could easily swap out chicken for tofu or chickpeas if you’re craving something plant-based; stir in some roasted cashews or sesame seeds for added texture; or even add a splash of sriracha if you’re looking to turn up the heat! Each variation enhances the dish in unique ways while keeping its essence intact. I invite you wholeheartedly to dive into this culinary adventure—try it out, share your experiences with others close to you, and let’s connect over our love for good food!
Teriyaki Chicken and Rice Casserole

Indulge in the warmth of Teriyaki Chicken and Rice Casserole, a delightful one-pan dish that brings together tender chicken, vibrant mixed vegetables, and sweet pineapple all enveloped in a rich homemade teriyaki sauce. This comforting casserole is not just quick to prepare but also a crowd-pleaser perfect for weeknight dinners or family gatherings. With every bite, you’ll experience a delicious harmony of flavors and textures that makes this dish an instant favorite. Serve it alongside fluffy brown rice for a wholesome meal that warms the heart and soul.
- Prep Time: 20 minutes
- Cook Time: 50 minutes
- Total Time: 1 hour 10 minutes
- Yield: Serves approximately 6
- Category: Main
- Method: Baking
- Cuisine: Asian
Ingredients
- 3/4 cup low sodium soy sauce
- 1/2 cup water
- 1/3 cup packed brown sugar
- 1 tablespoon honey
- 3/4 teaspoon ground ginger
- 1 teaspoon olive oil
- 1/2 teaspoon minced garlic
- 2 tablespoons cornstarch (for slurry)
- 2 tablespoons water (for slurry)
- 1.5 pounds boneless skinless chicken breasts
- 32 oz frozen mixed vegetables (unsauced Asian varieties)
- 1 cup pineapple tidbits (drained)
- 3 cups cooked brown rice
Instructions
- Preheat the oven to 350°F (175°C).
- In a small saucepan over medium heat, whisk together low sodium soy sauce, water, brown sugar, honey, ground ginger, olive oil, and minced garlic until dissolved.
- In another bowl, mix cornstarch with water to create a slurry; gradually add it to the boiling sauce until thickened.
- Place chicken breasts in a casserole dish and pour half of the teriyaki sauce over them.
- Bake for about 30–35 minutes until chicken reaches an internal temperature of 165°F (74°C).
- Shred the chicken in the dish and add mixed vegetables and pineapple tidbits; stir to combine.
- Fold in cooked brown rice and drizzle remaining teriyaki sauce on top.
- Return to the oven for an additional 15 minutes until heated through.
Nutrition
- Serving Size: 1 cup (240g)
- Calories: 392
- Sugar: 14g
- Sodium: 675mg
- Fat: 8g
- Saturated Fat: 1g
- Unsaturated Fat: 6g
- Trans Fat: 0g
- Carbohydrates: 58g
- Fiber: 5g
- Protein: 26g
- Cholesterol: 64mg