Crispy Goat Cheese Poppers with Honey
It’s hard to express just how much joy a simple bite of crispy goat cheese can bring. Recently, I found myself reminiscing about those unforgettable gatherings with friends where laughter filled the air, and the food was the centerpiece of it all. Among the array of dishes, there was always one that seemed to disappear faster than the others—Crispy Goat Cheese Poppers with Honey. This isn’t just a recipe; it’s a symphony of flavors that masterfully dances between creamy, tangy goat cheese and the sweet allure of honey. The crispy exterior gives way to a warm, luscious center that’s simply irresistible. Each bite is a delightful experience—a celebration of textures and tastes that connects us through shared moments and warmth.
What makes these little poppers truly special is their versatility. They’re not only a fantastic appetizer for fancy dinner parties or holiday gatherings, but they also make for an excellent snack while enjoying a cozy movie night at home. Imagine the crunch as you take your first bite, followed by the silky softness of the goat cheese melting on your tongue, all complemented by a drizzle of honey that adds just the right touch of sweetness. You might even find yourself wanting to make them more often than you initially planned—trust me, I’ve been there! So let’s embark on this culinary journey together as we whip up these Crispy Goat Cheese Poppers with Honey.
Crispy Goat Cheese Poppers with Honey: A Delightful Snack That Wows
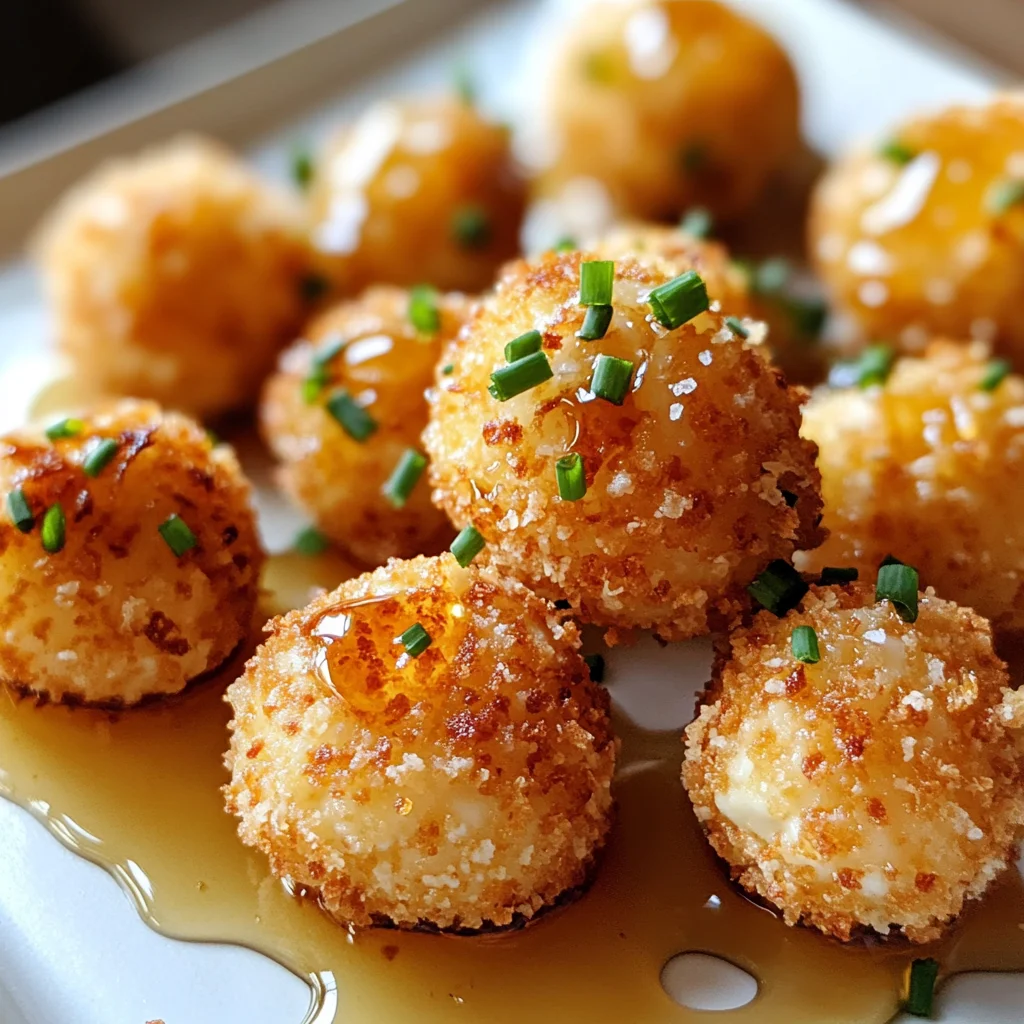
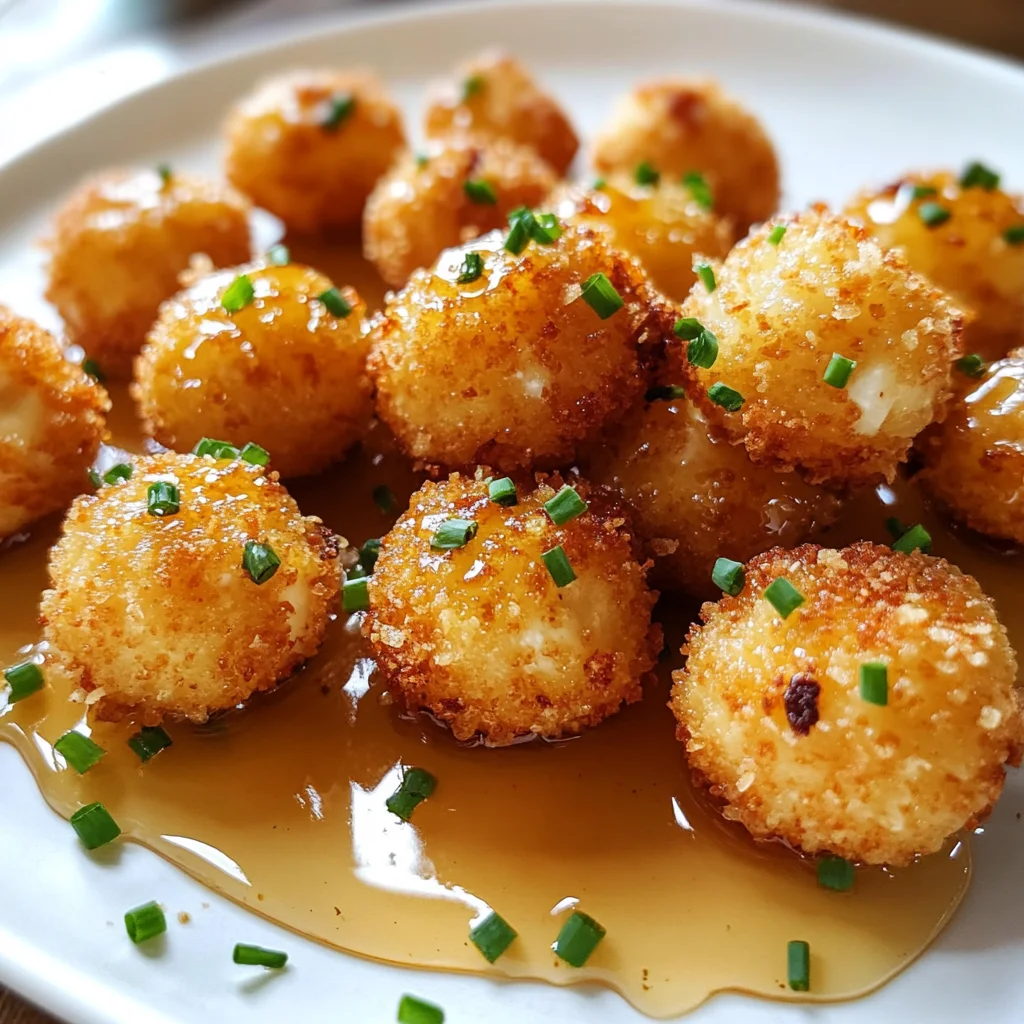
These Crispy Goat Cheese Poppers are sure to impress anyone who takes a bite. With just a few simple ingredients and some easy-to-follow steps, you’ll create an appetizer that’s not only delicious but also visually stunning when drizzled with honey and sprinkled with fresh chives. Are you ready? Let’s dive into this delicious adventure!
Ingredients:
Before we start cooking, let’s gather our ingredients. Each one plays an essential role in crafting these delightful poppers, so take a moment to appreciate what they bring to our table.
- 1/3 cup all-purpose flour. This humble ingredient serves as the initial coating for our poppers, providing that crucial barrier between the creamy goat cheese and the hot oil during frying. It helps achieve that golden-brown crust that is absolutely paramount for texture and flavor. When choosing flour, opt for a finely milled variety—this will ensure even coverage without any clumps or lumps that could disrupt your frying process.
- 1/2 tsp black pepper. This seasoning adds depth to our dish without overwhelming it. Black pepper enhances the flavors within the goat cheese while imparting its own subtle heat—think of it as an undercover agent working tirelessly in the background to elevate each bite! Freshly cracked black pepper is always my go-to because it brings out so much more aroma and flavor compared to pre-ground varieties.
- 1 large egg. Eggs act as our binding agent here; they help everything stick together nicely while also contributing moisture to keep our poppers from drying out during cooking. Make sure your eggs are at room temperature before you start—this makes them easier to whisk and ensures they emulsify better with other ingredients.
- 1/2 tsp kosher salt. Salt is essential in any dish as it amplifies flavors remarkably well; think of it as an enhancer rather than just seasoning! Kosher salt has larger grains than table salt and dissolves more slowly, which makes it perfect for this recipe since we want an even distribution without any overpowering bursts of salinity.
- 2/3 cup panko breadcrumbs. These Japanese-style breadcrumbs are lighter and crispier than traditional breadcrumbs, making them perfect for achieving that satisfying crunch we all love in fried foods. Their unique texture allows for maximum crispiness without becoming greasy—a true miracle worker in this recipe! If you can’t find panko, feel free to use regular breadcrumbs but know they might not deliver quite the same level of crunch.
- 1 11 oz log soft goat cheese. Here lies the star ingredient—the creamy goat cheese! Its tangy flavor contrasts beautifully with sweetness from honey later on; plus, its smooth texture becomes wonderfully creamy when fried, offering such a delightful experience on your palate. When selecting goat cheese, look for one that’s fresh and soft but firm enough to hold its shape when rolled into balls.
- 2 cups oil (grapeseed, canola or vegetable oil). The choice of oil matters greatly here because we want something that can handle high heat without smoking or imparting additional flavors that might compete with our delicate poppers. Grapeseed oil is particularly great for frying due to its high smoke point and neutral taste—it lets those beautiful flavors shine through!
- 1 Tbsp honey. Oh, liquid gold! Honey adds an enchanting sweetness that contrasts perfectly against the savory notes of goat cheese and chives; it transforms each bite into something special and utterly intoxicating! Choose high-quality honey—local if possible—for richer flavor notes; trust me—it makes all the difference!
- 2 Tbsp minced fresh chives. These lovely green herbs brighten up our dish both visually and flavor-wise with their mild onion-like taste! Chives add freshness right at the end when sprinkled over our finished poppers—and they truly make every bite feel like springtime on your plate!
Equipment You’ll Need:
Now that we’ve gathered our ingredients, let’s talk about the tools you’ll need to create these delicious Crispy Goat Cheese Poppers with Honey successfully! Having the right equipment will not only make your cooking experience smoother but also ensure you achieve phenomenal results every time.
- Medium mixing bowls – You’ll need several medium mixing bowls for combining your dry ingredients (like flour) vs wet ingredients (like egg), so having them handy will streamline your workflow.
- Slotted spoon – This tool is essential for safely removing your golden poppers from hot oil without excess grease clinging onto them! It allows any residual oil to drip off while transferring them directly onto paper towels.
- Deep saucepan or Dutch oven – A sturdy vessel for frying is non-negotiable here! It should be deep enough so there’s minimal risk of splatter while allowing enough space for popping those little balls around freely.
- Thermometer (optional but recommended) – If you’re serious about getting your oil temperature just right (which we absolutely are!), using a thermometer can give you precise control over achieving that ideal 350 degrees Fahrenheit—this means perfectly fried goodness!
With everything prepared—the ingredients lined up like eager participants waiting for their moment—and essential tools ready at hand—we’re almost set to embark on this culinary adventure together!
Preparing the Crispy Goat Cheese Poppers with Honey
Step 1: Mix Your Coatings
In a medium bowl, combine your all-purpose flour along with black pepper until thoroughly mixed—the combination creates an inviting base layer that will offer stability once we coat those luscious goat cheese balls later on! In another bowl, whisk together one large egg with kosher salt and two tablespoons water until lightened in color; this mixture acts like glue keeping everything intact during cooking time! Finally—in yet another separate bowl—pour in those glorious panko breadcrumbs which will bring us unparalleled crunch when fried up beautifully!
Step 2: Shape Those Little Balls
Now comes perhaps one of my favorite parts: rolling out our goat cheese into perfect little balls! Take your log of soft goat cheese (it should be softened nicely at room temperature) and weigh out approximately one tablespoon per ball; roll gently using clean hands until smooth—you want them uniform so they’ll cook evenly throughout! Once shaped into 24 adorable bites (yes—you’ll have enough poppers for everyone!), carefully roll each ball first in flour mixture then dip into egg wash before finally rolling into panko crumbs ensuring full coverage—that crispiness awaits!
Step 3: Chill Out
After coating each ball thoroughly (and perhaps sneaking one taste along the way), it’s crucial now—to freeze these beauties briefly for around twenty minutes until firmed up slightly before frying begins; don’t rush this step because chilling prevents them from falling apart while cooking—a common mishap if skipped altogether!
Step 4: Heat Up That Oil
When ready—and patience pays off here—you’ll want set a deep saucepan over medium-high heat allowing ample time for oils (grapeseed/canola/vegetable) heating up towards 350 degrees Fahrenheit which means sizzling action awaits soon enough! Use thermometer if available—it assures accurate readings preventing burnt surfaces ruining everything else inside pan!
Each step brings us closer toward creating something magnificent—a celebration worth sharing among friends gathered around tables laden with delectable treats awaiting discovery… Just imagine their faces lighting up once they taste these magical morsels drizzled lovingly atop honey glaze finishing touch…
Stay tuned—I can’t wait to guide you through frying perfection next time we meet here in kitchen paradise where culinary dreams come true together…
Step 5: Time to Get Cooking – Frying Your Popper Perfection
Now that we’ve prepared our little nuggets of joy, it’s time for the most exhilarating part: frying! This step is where the magic truly happens. You’ll want to heat your oil in a deep saucepan over medium-high heat until it reaches a glorious temperature of 350 degrees Fahrenheit. Trust me, this precise temperature is absolutely paramount because it ensures that those goat cheese poppers will crisp up beautifully without getting greasy. The science behind frying is fascinating; as the oil heats, it creates a barrier around the food, sealing in moisture while developing that golden-brown crust we all adore.
Once your oil has reached that magical temperature, gently lower in your frozen goat cheese balls in batches—don’t overcrowd the pan! I recommend frying just 4 or 5 at a time to give them plenty of space to float comfortably. You’ll want to keep an eye on them; after about 1 to 2 minutes, they should be transforming into little golden orbs of joy. Use a slotted spoon to remove them from the hot oil when they reach that perfect shade of crispy brown, letting any excess oil drip off before placing them on a paper towel-lined plate. This step is essential because it helps absorb any extra oil, ensuring your poppers are perfectly crisp rather than soggy.
Step 6: Plating with Love – Arranging Your Crispy Goat Cheese Poppers
With your poppers fried to perfection, let’s make them shine by arranging them beautifully on a platter! This might sound simple, but presentation can elevate your dish from ordinary to extraordinary. As you place each crispy goat cheese popper on the platter, think about creating visual balance and an inviting atmosphere for your guests or family. The vibrant contrast between the golden brown of the poppers and the bright green of fresh chives will not only catch the eye but also hint at the delightful flavors waiting within.
Now comes the fun part: drizzling that luscious honey over your poppers! I like to use about one tablespoon of honey for this batch; however, you can always adjust based on your personal sweetness preference. This liquid gold adds an utterly intoxicating sweetness that beautifully complements the tanginess of goat cheese and crunchiness of panko. Once you’ve artfully drizzled honey across all those crispy delights, don’t forget to sprinkle some minced fresh chives over top. Their mild onion flavor and vibrant green color provide a lovely finishing touch that makes these poppers not just delicious but also visually stunning.
Step 7: The Moment of Truth – Serving Up Your Appetizer
You’ve successfully created these delightful Crispy Goat Cheese Poppers with Honey, and now it’s time for everyone to indulge! Serve these beauties immediately for maximum enjoyment; they are best enjoyed while still warm and crisp. As they sit out even for a few moments, they might lose some of their charming crunchiness—so gather your friends and family around and dig in right away!
As you take that first bite, pay attention to how everything comes together: the creamy richness of goat cheese bursting with flavor inside meets the crunchy exterior, all harmoniously united with that sweet drizzle of honey and fragrant chives on top. It’s truly an experience that dances across your taste buds—a symphony of flavors indeed! If you’re hosting a gathering or simply enjoying a cozy night in, I promise these poppers will be an absolute hit. Don’t forget to share stories or memories around this dish as you savor each bite; after all, food is meant to bring us together.
Step 8: Final Touches – Making Every Bite Extraordinary
As you take in the harmony of flavors from your Crispy Goat Cheese Poppers with Honey, consider adding an extra twist for those who crave adventure—perhaps a sprinkle of crushed red pepper flakes for a hint of heat? This simple addition can elevate each bite further and create layers upon layers of delightful sensations that will keep everyone coming back for more.
Each element plays its part—crunchy panko provides texture while gooey melted goat cheese brings creaminess; honey ties everything together with its sweet brilliance. Remember, cooking is not just about following recipes; it’s about personal expression and making dishes uniquely yours! So don’t hesitate to experiment with garnishes or dips based on what excites you most—the world is your oyster!
And there you have it! Not only have we created something remarkably delicious together, but we’ve also built memories filled with warmth and laughter along the way. So as you gather around sharing these crispy gems with loved ones, remember that each bite encapsulates not just flavor but also love and passion poured into every step—from preparation through plating. Enjoy every moment!
Storage and Enjoyment Tips for Your Crispy Goat Cheese Poppers with Honey
Now that your kitchen is filled with the intoxicating aroma of freshly fried crispy goat cheese poppers, it’s time to dig in! But let’s not overlook the fact that you might have some leftovers. Trust me when I say that these delightful morsels are just as enjoyable the next day as they are fresh out of the pan, if stored correctly. This recipe is not just about immediate gratification; it’s about savoring every last bite, even after the gathering has ended.
Storing Leftover Crispy Goat Cheese Poppers with Honey
To keep your crispy goat cheese poppers at their best, place them in an airtight container. A glass or plastic container works beautifully; just make sure it seals tightly to lock in all that deliciousness. You can keep them in the fridge for up to three days, but I recommend consuming them sooner to enjoy their peak crunchiness and flavor. To maintain their crisp exterior, consider placing a paper towel at the bottom of the container—this little trick absorbs excess moisture from fried foods and keeps them fresher longer. While they may lose a bit of their initial crunch after being stored, reheating them in an oven or air fryer brings back some of that glorious texture. Just 5-7 minutes at 350°F will do wonders! So don’t hesitate to indulge again; you’ll be amazed at how they retain their rich, creamy interior and satisfying crunch.
Freezing for Later
If you’re like me and love meal prepping or simply want to have these heavenly bites on standby, freezing is a fantastic option! To freeze your crispy goat cheese poppers, lay them out in a single layer on a baking sheet lined with parchment paper and pop them into the freezer until they’re completely solid—this usually takes about an hour. Once frozen, transfer them into a zip-top bag or an airtight container, where they can stay fresh for up to three months. This method not only preserves their delightful flavors but also allows you to whip up a quick appetizer whenever cravings strike! When you’re ready to enjoy some from frozen, there’s no need to thaw; you can fry them straight from the freezer for about 3-4 minutes until golden brown. The convenience factor here is absolutely paramount—you’ll find yourself reaching for these poppers more often than you can imagine!
Crispy Goat Cheese Poppers with Honey

Experience irresistible Crispy Goat Cheese Poppers with Honey—a delightfully crunchy appetizer that’s easy to make and perfect for any occasion!
- Prep Time: 30 minutes
- Cook Time: 10 minutes
- Total Time: 40 minutes
- Yield: Approximately 24 servings 1x
- Category: Appetizer
- Method: Frying
- Cuisine: American
Ingredients
- 1/3 cup all-purpose flour
- 1/2 tsp black pepper
- 1 large egg
- 1/2 tsp kosher salt
- 2/3 cup panko breadcrumbs
- 11 oz log soft goat cheese
- 2 cups oil (grapeseed, canola, or vegetable)
- 1 Tbsp honey
- 2 Tbsp minced fresh chives
Instructions
- In one bowl, mix flour and black pepper. In another bowl, whisk together egg and kosher salt until lightened in color. Place panko breadcrumbs in a third bowl.
- Roll the goat cheese into approximately 24 uniform balls (about one tablespoon each). Coat each ball in the flour mixture, then dip in the egg wash, and finally roll in panko breadcrumbs.
- Chill the coated balls in the freezer for about 20 minutes to firm up.
- Heat oil in a deep saucepan until it reaches 350°F. Fry the chilled goat cheese balls in batches until golden brown (about 1-2 minutes).
- Use a slotted spoon to remove them from the oil and drain on paper towels.
- Drizzle with honey and sprinkle with fresh chives before serving.
Nutrition
- Serving Size: 1 serving
- Calories: 130
- Sugar: 1g
- Sodium: 160mg
- Fat: 8g
- Saturated Fat: 2g
- Unsaturated Fat: 6g
- Trans Fat: 0g
- Carbohydrates: 10g
- Fiber: 0g
- Protein: 4g
- Cholesterol: 25mg