Korean Popcorn Chicken
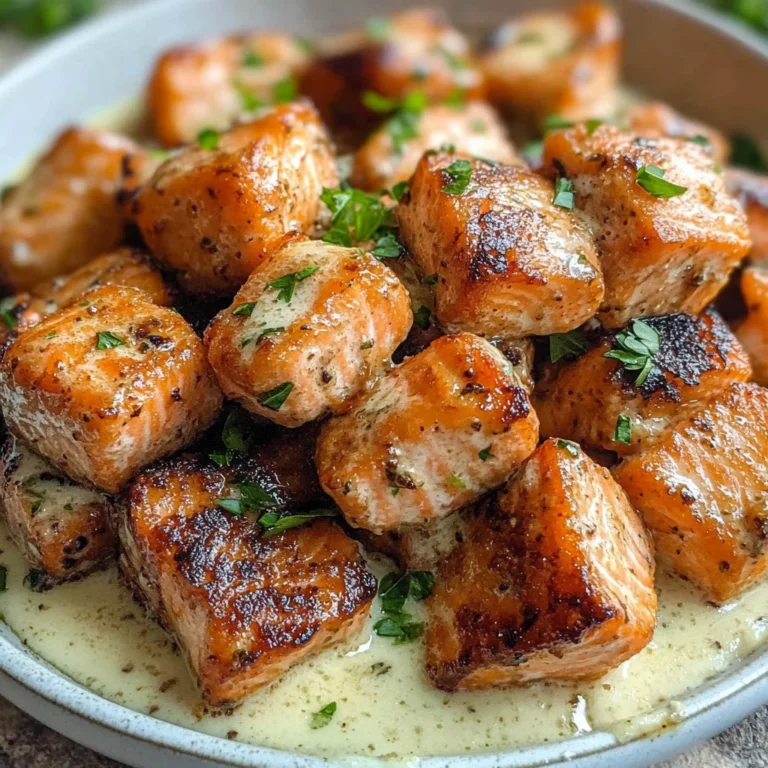
Cooking is a beautiful dance, a symphony of flavors and aromas that transport us to distant lands, even when we’re just in our kitchens. Korean Popcorn Chicken is not just a dish; it’s an experience that embodies the essence of Korean cuisine. Imagine crispy pieces of chicken, perfectly seasoned and coated in a sticky, sweet-spicy sauce that envelops each bite in warmth and excitement. As the aroma wafts through your home, it creates an inviting atmosphere—one that beckons family and friends to gather around the table and share stories over this delightful treat. I promise you, every crunch will echo with delight, making this dish a true celebration of flavor.
This recipe is particularly close to my heart because it blends tradition with modern comfort food innovation. The first time I tasted Korean Popcorn Chicken was during a vibrant street festival in Seoul, where vendors would serve these golden morsels fresh from the fryer. That moment, filled with laughter and the buzz of life around me, ignited my passion for recreating this dish at home. It’s perfect for game nights, movie marathons, or simply as a snack to indulge in after a long day. So roll up your sleeves and get ready to embark on this culinary journey!
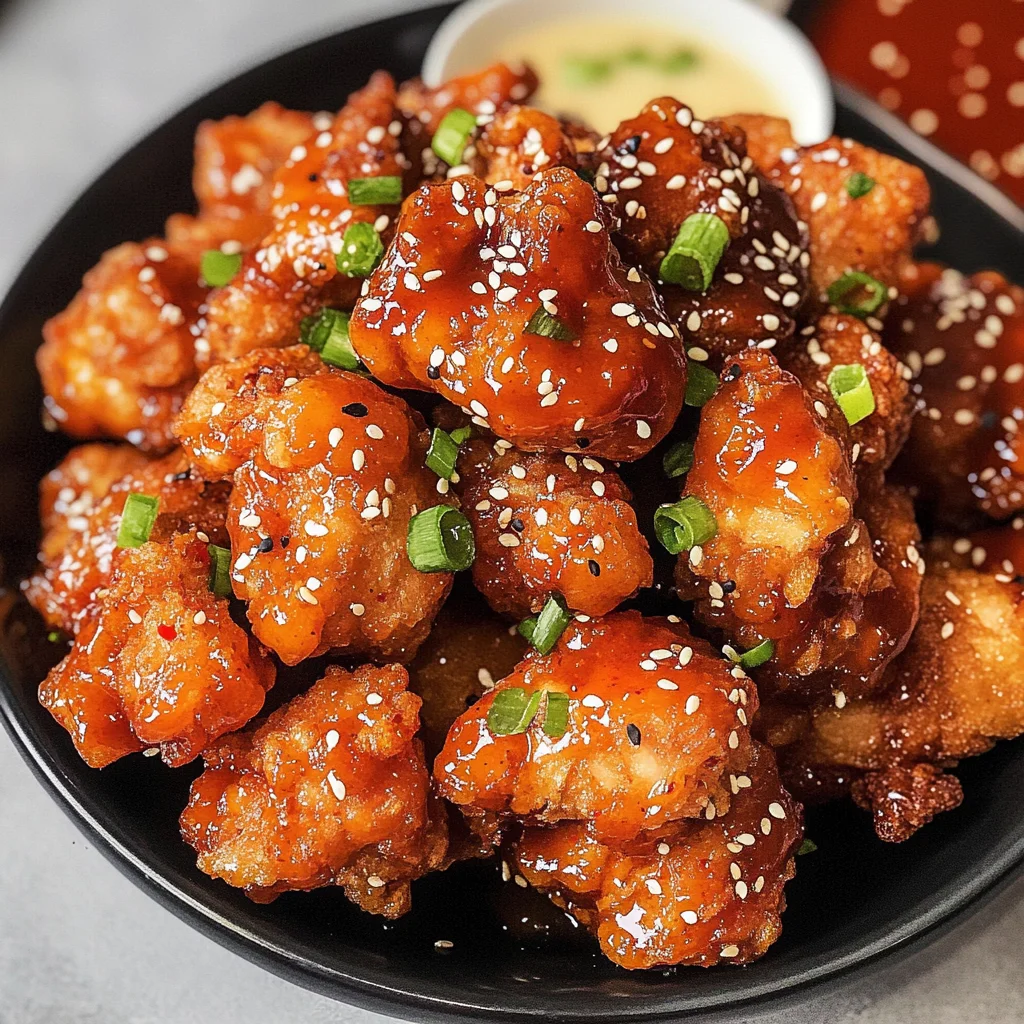
Korean Popcorn Chicken: A Crunchy Delight That Will Make You Swoon
Let’s dive into this recipe together! Making Korean Popcorn Chicken is a delightful process that not only fills your kitchen with irresistible aromas but also sets the stage for an unforgettable meal.
Ingredients:
Gathering quality ingredients is essential to achieving the best results in your cooking adventures. Here’s what you’ll need for this tantalizing dish:
- 1 lb Chicken Breast: The star of our show! Choose chicken breasts that are fresh and plump; they should have a nice sheen without any discoloration or unpleasant smell. This lean meat provides a wonderful canvas for our flavors while remaining juicy when cooked correctly. If you’re looking for alternatives due to dietary preferences, you can easily swap chicken breast for boneless thighs or even tofu for a vegetarian option.
- 1 cup All-purpose Flour: This flour serves as the backbone of our batter, creating that lovely crunch we all crave. When selecting flour, look for high-quality brands with fine texture; this ensures an even coating on your chicken. If you’re aiming for gluten-free options, almond flour or rice flour can be great substitutes.
- ¼ cup Cornstarch: Cornstarch is crucial here; it helps create an ultra-crispy exterior by absorbing moisture during frying and forming an exceptional crunch. This ingredient is non-negotiable if you want that delightful texture! If unavailable, potato starch works similarly well.
- 1 tsp Garlic Powder: This adds depth to our chicken’s flavor profile without overpowering it. Garlic powder offers convenience while delivering that iconic garlicky aroma we love—make sure it’s fresh for optimal taste! You might also consider using garlic granules if it’s what you have on hand.
- ½ tsp White Pepper: Often overlooked, white pepper provides subtle heat without altering the color of your batter—it’s like seasoning magic! Its slightly earthy notes elevate the overall taste beautifully.
- 1½ tsp Salt: Essential for enhancing all the flavors in this dish. While kosher salt works well due to its flakiness and ease of use, feel free to adjust according to taste or dietary needs.
- 1 tsp Chicken Stock Powder: This ingredient infuses rich umami into our chicken coating—think of it as liquid gold seasoning! It brings everything together beautifully; however, if you’re avoiding animal products altogether, vegetable stock powder makes an excellent substitute.
- 2 tbsp Water: Just enough to bring our dry ingredients together into a smooth batter without making it too runny. Always add gradually; you want a consistency thick enough to cling to the chicken but fluid enough to coat evenly.
- Cooking Oil: For frying—choose oil with a high smoke point like vegetable or canola oil so you can achieve that perfect golden crisp without burning!
- ¼ cup Gochujang Paste: This spicy-sweet fermented chili paste is nothing short of magical! It introduces complexity along with heat; its deep red hue promises vibrancy in both color and flavor.
- ½ cup Ketchup: Yes, ketchup plays a crucial role here! It balances out the heat from gochujang with sweetness while creating that luscious saucy finish we’re after. Opt for organic varieties if possible—they tend to have better flavor profiles!
- 1 tbsp Sesame Oil: A little goes a long way; sesame oil adds nutty richness that rounds out our sauce beautifully. Using toasted sesame oil intensifies those nutty notes even further!
- Sesame Seeds (for garnish): These tiny seeds add both crunch and visual appeal—a sprinkle transforms our dish from simple to spectacular! Toast them lightly before garnishing for an extra layer of flavor.
Now that we’ve gathered everything we need let’s get cooking!
Equipment You’ll Need:
Before diving into preparation, having the right tools at your disposal will make your cooking experience smoother and more enjoyable. Each piece plays its part in crafting something delicious!
- Large Mixing Bowl: Essential for combining ingredients smoothly without splattering everywhere—this bowl must be large enough to accommodate all your dry ingredients plus some room for mixing!
- Whisk: A good whisk will help incorporate air into your batter while breaking up clumps effectively—this ensures we achieve that light texture we’re aiming for in the coating.
- Deep Fryer or Heavy-bottomed Pot: You’ll want something sturdy that holds heat well; maintaining temperature is key not only for perfectly fried chicken but also safety reasons—avoid splatters by using deep vessels!
- Slotted Spoon or Spider Strainer: Ideal for lifting chicken out of hot oil safely while allowing excess oil to drain away—crucial if you want crispy results without sogginess!
- Baking Sheet lined with Paper Towels: Having this prepared ahead means you can place your fried chicken directly after cooking—this step absorbs any lingering grease while keeping everything crispy outside yet tender inside!
Now we’re all set up! Let’s begin preparing our delicious Korean Popcorn Chicken.
Step 1: Preparing Your Chicken
Start by cutting your chicken breast into bite-sized pieces—aim for uniformity so they cook evenly throughout! Once you’ve got those lovely chunks ready, season them generously with salt and pepper before tossing them into your mixing bowl filled with dry ingredients (flour, cornstarch, garlic powder). Why coat? This acts as an adhesive layer so all those flavors meld perfectly together during frying while also providing crunch at every bite!
Step 2: Creating The Batter
Next comes adding water gradually until everything combines neatly into a thick paste-like consistency; don’t rush this step! Trust me—it’s crucial because if you skip adding water slowly or overdo it at once—you risk ending up with either lumpy batter (not ideal) or runny messes (definitely not what we want). The goal here is smooth coating readying us for frying perfection ahead!
Step 3: Heating Up The Oil
With everything mixed beautifully now—we turn our attention towards heating up oil in whichever frying method you’ve chosen (deep fryer/pot). Allow sufficient time—around 10 minutes—is needed until reaching approximately 350°F/175°C; use thermometer if possible—but don’t fret too much if lacking one—the bubbling sound upon dropping small bits test often does wonders too! Watching closely prevents overheating which can lead unwanted burnt flavors ruining entire batch…and nobody wants THAT.
Step 4: Frying To Perfection
Once oil’s hot enough—it’s showtime folks! Gently drop pieces coated in batter into bubbling goodness—don’t overcrowd pan/pot as doing so lowers temperature causing greasy results instead crispiness desired…so patience pays off here too! Fry until golden brown (about 5 minutes) then remove onto prepared baking sheet lined towels letting excess grease drain off completely before serving…your kitchen will smell divine & friends won’t believe their eyes when they see how beautiful these are plated up!
Stay tuned as we continue with more steps toward completing delicious Korean popcorn chicken masterpiece soon…
Cooking Your Irresistible Korean Popcorn Chicken
Step 5: Marinating the Chicken for Flavor Explosion
Now that we have our chicken breast prepped and ready, it’s time to infuse it with flavor through marination. Begin by cutting your chicken breast into bite-sized pieces—think about one-inch cubes. The size is crucial because they need to cook evenly and quickly, giving you that wonderfully crispy texture on the outside while remaining juicy and tender inside. Once cut, place them in a bowl and add 2 tablespoons of water. This step may seem simple, but it helps the marinade adhere better to the chicken without compromising its moisture content.
Next, sprinkle in 1 teaspoon of chicken stock powder and 1½ teaspoons of salt, ensuring each piece is well-coated. The salt not only seasons the meat but also helps break down proteins, making the chicken more tender. I always allow my chicken to marinate for at least 30 minutes—pushing this to an hour if I can manage! During this time, the flavors meld beautifully, creating a truly extraordinary balance that will resonate in every bite. As you wait, think about all the deliciousness that’s about to unfold; trust me, this waiting period transforms your dish from good to memorable.
Step 6: Crafting the Perfect Coating
With your chicken marinated and ready to go, let’s prepare our dry mix that will give us that signature crunch. In a large bowl, combine 1 cup of all-purpose flour with ¼ cup of cornstarch, 1 teaspoon of garlic powder, and ½ teaspoon of white pepper. This combination is absolutely paramount; the flour provides structure while cornstarch enhances crispiness—a non-negotiable factor for achieving that delightful crunch we crave from Korean popcorn chicken.
Once everything is mixed well, take each piece of marinated chicken and coat it generously in this dry mixture. I like to use one hand for wet ingredients (the chicken) and another for dry (the flour mix) to keep things neat and prevent clumping. Make sure each piece is fully coated; this is where you’re building layers of flavor and texture! After coating each piece, let them rest on a wire rack for about 10-15 minutes before frying. This resting period allows the coating to adhere firmly to the chicken instead of falling off during cooking—a little patience goes a long way here!
Step 7: Frying to Golden Perfection
Now comes the exciting part—frying! Heat enough cooking oil in a deep pan or wok over medium-high heat until it reaches about 350°F (175°C). To test if your oil is ready without a thermometer (because who wants extra dishes?), drop a small pinch of your flour mixture into the oil; if it sizzles immediately, you are good to go! Carefully add your coated chicken pieces into the hot oil in batches—don’t overcrowd; this can lead to steaming instead of frying!
Fry each batch for approximately 5-7 minutes or until golden brown and cooked through, flipping them halfway through for even browning. As they fry away, you’ll notice an utterly intoxicating aroma filling your kitchen—it’s impossible not to get excited! Make sure to keep an eye on them; they should be bubbling gently rather than aggressively splattering everywhere—that’s a sign you’re on track! Once they are beautifully golden and crispy, remove them with a slotted spoon and place them on a paper towel-lined plate to drain any excess oil.
Step 8: Preparing Your Sauce – The Heartbeat of Flavor
While your Korean popcorn chicken cools slightly after frying—nothing too long though because we want it warm when serving!—let’s whip up our sauce that will elevate these bites into something truly special. In a separate bowl, mix together ¼ cup gochujang paste (a fabulous Korean chili paste), ½ cup ketchup (for sweetness), and 1 tablespoon sesame oil (which adds depth). This combination creates a beautifully balanced sauce—a perfect harmony between sweet, spicy, and savory.
The reason behind using ketchup here may surprise you; it not only adds sweetness but also provides body to our sauce without making it too thick or overwhelming. After mixing vigorously until smooth—you’re looking for a luscious consistency—it’s time for tasting! Adjust seasonings if needed; don’t be afraid to play around with additional honey or more gochujang depending on your preference! Trust me on this part—you want every piece of chicken generously coated in this liquid gold!
Final Touches: Bringing It All Together
Step 9: Glazing Your Chicken – The Grand Finale
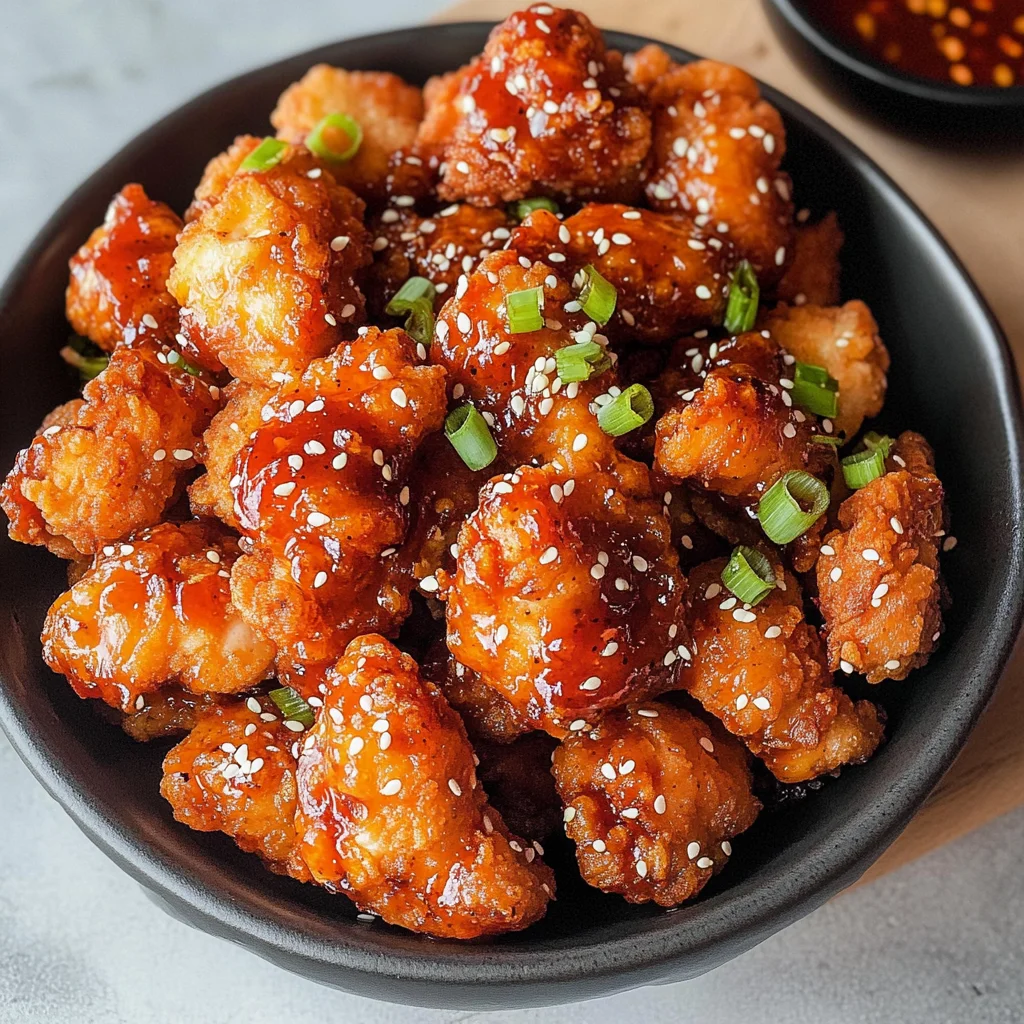
Finally! It’s time for the grand finale where all elements come together in one last flourish. Take those perfectly fried pieces of Korean popcorn chicken and toss them gently in your prepared sauce until they are completely coated—that shimmering glaze enveloping each piece is nothing short of mesmerizing! You’ll want every morsel dripping with that vibrant red sauce; it’s what makes this dish so unique!
As you do this step, pay attention to how beautifully glossy they become—the sauce clinging just right without being too runny or overly sticky. Remember not to rush this process; let each piece absorb some of that fabulous flavor as you gently stir everything together! Once coated thoroughly, transfer them onto a serving platter and garnish generously with sesame seeds—these little beauties not only add visual appeal but an extra nutty crunch that’s simply irresistible.
And there you have it—your very own homemade Korean popcorn chicken that would make anyone’s mouth water at first sight alone! Serve immediately while it’s warm alongside some freshly chopped green onions or perhaps even some pickled radish on the side for added contrast—a delightful touch! I promise you with every bite; you’ll be transported straight into culinary bliss! Enjoy your creation—you’ve earned every crispy morsel!
Storage and Enjoyment Tips for Your Korean Popcorn Chicken
Now that your kitchen is filled with the mouthwatering aroma of Korean Popcorn Chicken, it’s time to savor every delightful bite! Whether you plan to share this dish with friends or enjoy it all on your own, knowing how to store any leftovers properly ensures that you can relish this treat again and again. Let’s dive into some helpful storage tips so you can keep that crispy, flavorful goodness intact!
Storing Leftover Korean Popcorn Chicken
To keep your leftover Korean Popcorn Chicken as delicious as when it first came out of the oven, I recommend using an airtight container. This is absolutely crucial because it prevents moisture from seeping in, which can lead to soggy chicken—definitely not what we want after all that hard work! When stored properly in the fridge, your leftovers should maintain their quality for about 3-4 days. If you’re looking for a little extra tip, try placing a slice of bread in the container; it helps absorb excess moisture while adding a bit of freshness. Trust me, this small trick can make a world of difference! When you’re ready to enjoy your chicken again, simply pop it back in the oven at 350°F (175°C) for about 10-15 minutes until it’s heated through and that crispiness returns. Ahh, just imagining it makes me smile!
Freezing Korean Popcorn Chicken for Later
If you’ve made a larger batch or just want to be prepared for those busy weeknights, freezing is an excellent option! To freeze your Korean Popcorn Chicken, let it cool completely before transferring it into a freezer-safe bag or container—make sure to squeeze out as much air as possible. This dish freezes beautifully and can last up to 2 months in the freezer without losing its delightful flavor. When you’re ready to indulge, simply remove the chicken from the freezer and let it thaw in the fridge overnight before reheating. You’ll be amazed at how convenient it is to have such a tasty snack at your fingertips whenever those cravings hit! Plus, having homemade goodies ready to go makes me feel like a culinary superhero—who wouldn’t love that?
Korean Popcorn Chicken
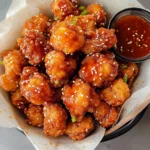
Experience irresistible Korean Popcorn Chicken that’s crispy, spicy, and utterly delightful. Try this easy recipe today for a delicious treat!
- Prep Time: 30 minutes
- Cook Time: 15 minutes
- Total Time: 45 minutes
- Yield: Approximately 6 servings 1x
- Category: Snack
- Method: Frying
- Cuisine: Korean
Ingredients
- 1 lb chicken breast
- 1 cup all-purpose flour (or gluten-free alternative)
- ¼ cup cornstarch (or potato starch)
- 1 tsp garlic powder
- ½ tsp white pepper
- 1½ tsp salt
- 1 tsp chicken stock powder (or vegetable stock powder)
- 2 tbsp water
- Cooking oil for frying
- ¼ cup gochujang paste
- ½ cup ketchup
- 1 tbsp sesame oil
- Sesame seeds for garnish
Instructions
- Cut the chicken breast into bite-sized pieces and season with salt and pepper.
- In a large bowl, mix together flour, cornstarch, garlic powder, white pepper, salt, and chicken stock powder.
- Gradually add water to the dry ingredients until you achieve a thick batter.
- Heat cooking oil in a deep pot or fryer to about 350°F (175°C).
- Coat each piece of marinated chicken in the batter and fry in batches until golden brown (about 5 minutes).
- In a separate bowl, combine gochujang paste, ketchup, and sesame oil to create the sauce.
- Toss the fried chicken pieces in the sauce until well-coated and garnish with sesame seeds.
Nutrition
- Serving Size: 1 serving
- Calories: 380
- Sugar: 10g
- Sodium: 780mg
- Fat: 18g
- Saturated Fat: 2g
- Unsaturated Fat: 14g
- Trans Fat: 0g
- Carbohydrates: 32g
- Fiber: 2g
- Protein: 25g
- Cholesterol: 80mg