Coleslaw Recipe (No Mayo)
There’s something undeniably magical about coleslaw, isn’t there? It’s not just a simple salad; it’s a vibrant celebration of fresh ingredients and flavors that come together to create an experience. When I think of summer gatherings, family picnics, or even cozy dinners with friends, I find myself yearning for that crisp, refreshing crunch of coleslaw. This particular Coleslaw Recipe (No Mayo) is an absolute gem—it’s light and tangy, providing a delightful contrast to the hearty dishes we often serve during those delicious occasions. With a clean vinegar-based dressing and no mayo in sight, this slaw stands as a testament to how simple ingredients can combine to evoke joy and satisfaction. Trust me, each bite feels like a symphony—a delightful balance of sweet and sour notes dancing on your palate.
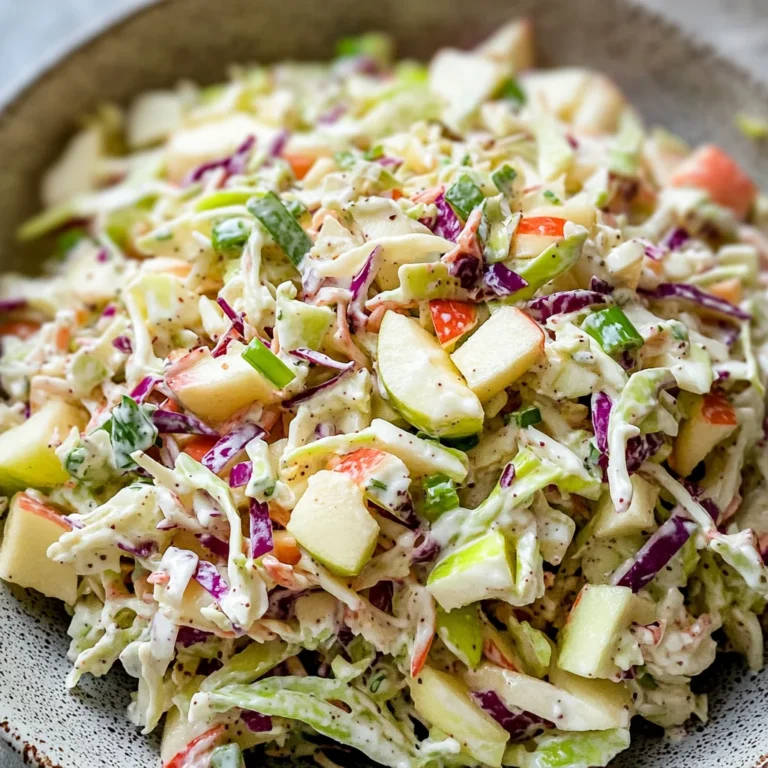
As we take this culinary journey together, let’s appreciate the beauty behind this classic dish. Traditionally laden with mayonnaise and sugar, coleslaw often misses the mark when it comes to refreshing summer fare. But here’s where my heart swells with excitement: this recipe transforms the ordinary into the extraordinary. The interplay of green and purple cabbage creates not only a feast for the taste buds but also a visual delight for the eyes. Imagine serving this vibrant bowl at your next barbecue or picnic—your friends will be lining up for seconds! Each time I make it, I’m reminded of family gatherings where laughter fills the air and the aroma of grilled delights wafts through the breeze. This coleslaw is more than just food; it’s a bridge connecting us to those moments full of joy and warmth.
Coleslaw Recipe (No Mayo): A Celebration of Freshness
This Coleslaw Recipe (No Mayo) is your ticket to creating a light, zesty side dish that complements any meal beautifully. You’ll find that its clean flavors are not only refreshing but also incredibly versatile! Perfect alongside pulled beef sandwiches or as a standout side at potluck summer picnics and BBQ cookouts, this slaw embodies everything we adore about fresh ingredients coming together harmoniously.
Ingredients:
Embarking on this culinary adventure starts with gathering your ingredients, each carefully selected to elevate our coleslaw to new heights. Let’s break down what we’ll need:
- 1/2 cup apple cider vinegar: This ingredient serves as the star of our dressing, bringing in a sharp yet welcoming tanginess that cuts through the sweetness of our honey and creates an invigorating flavor profile. Apple cider vinegar is beloved not just for its taste but also for its health benefits—rich in antioxidants and known for aiding digestion. When purchasing, look for raw or unfiltered varieties if you can; they tend to have more depth in flavor due to their natural fermentation process.
- 3/4 cup extra virgin olive oil: Think of olive oil as liquid gold in your kitchen—it adds richness and acts as the perfect medium to blend all our dressing components seamlessly. Extra virgin olive oil has a distinct flavor that enhances our slaw while providing healthy fats essential for nutrient absorption from our veggies. Always choose high-quality oil; you’ll notice how it elevates every dish you prepare!
- 2 tablespoons honey: Here’s where we add a touch of sweetness that perfectly complements the tangy vinegar! Honey not only balances out acidity but also contributes moisture without making our slaw heavy like traditional mayo would. If you’re looking for alternatives due to dietary preferences or availability, agave nectar works wonderfully as well.
- 2 teaspoons whole celery seeds: These tiny seeds pack an aromatic punch! They lend an earthy flavor that truly enhances our coleslaw’s complexity while harmonizing beautifully with the other ingredients. Whole celery seeds are preferable here because they release their essential oils when crushed during preparation—an important step that boosts their flavor impact!
- 1 teaspoon kosher salt: Salt is non-negotiable in any recipe; it’s what brings all flavors alive! Kosher salt has larger crystals compared to table salt, making it easier to sprinkle evenly throughout our dish without overwhelming it with sodium.
- 1 teaspoon black cracked pepper: Freshly cracked black pepper adds a warm kick that rounds out this medley beautifully. Its heat contrasts delightfully with the sweetness from honey and carrots while enhancing all those vivid flavors we’re crafting together!
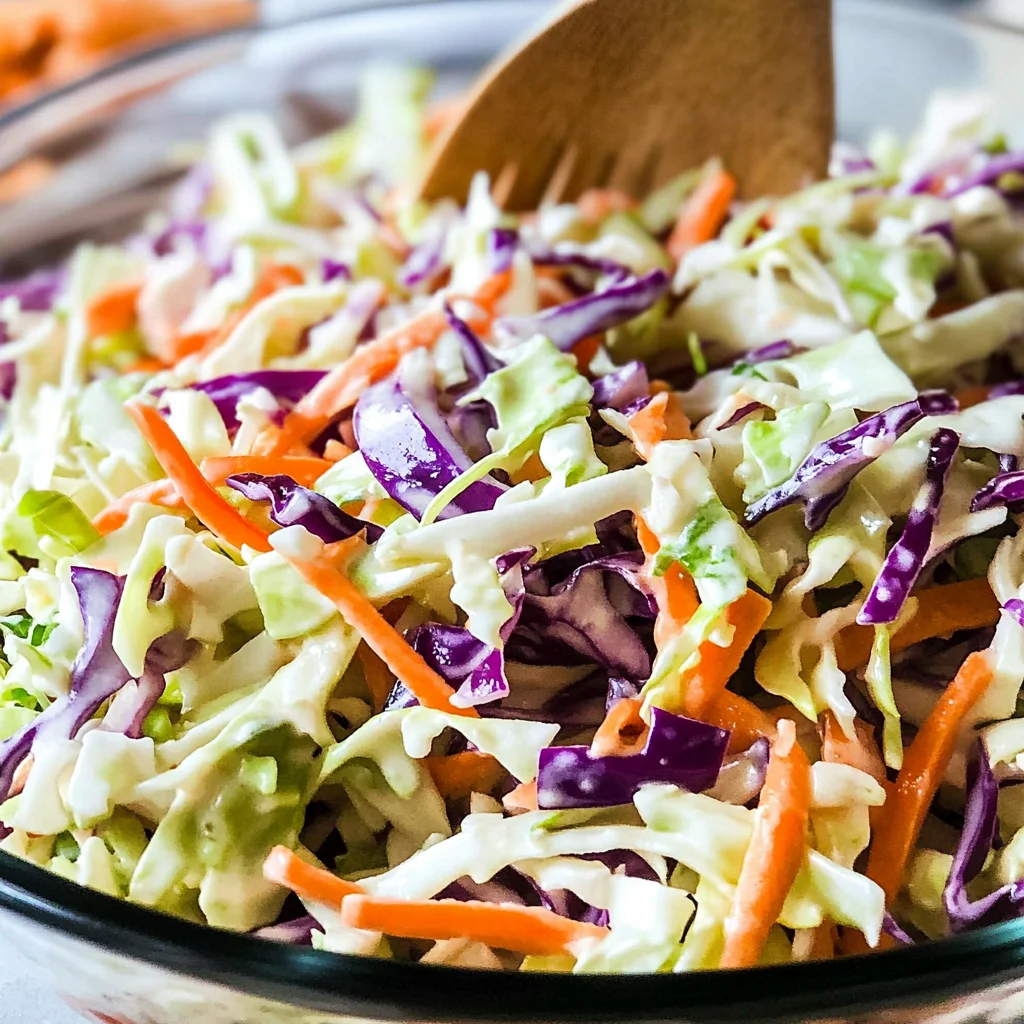
- 2 cups carrots (2 large carrots shredded): Carrots offer both color and crunch! Shredding them releases their natural sweetness while adding texture that complements our cabbage perfectly. When selecting carrots, opt for firm ones with vibrant color—they should feel crisp in your hands.
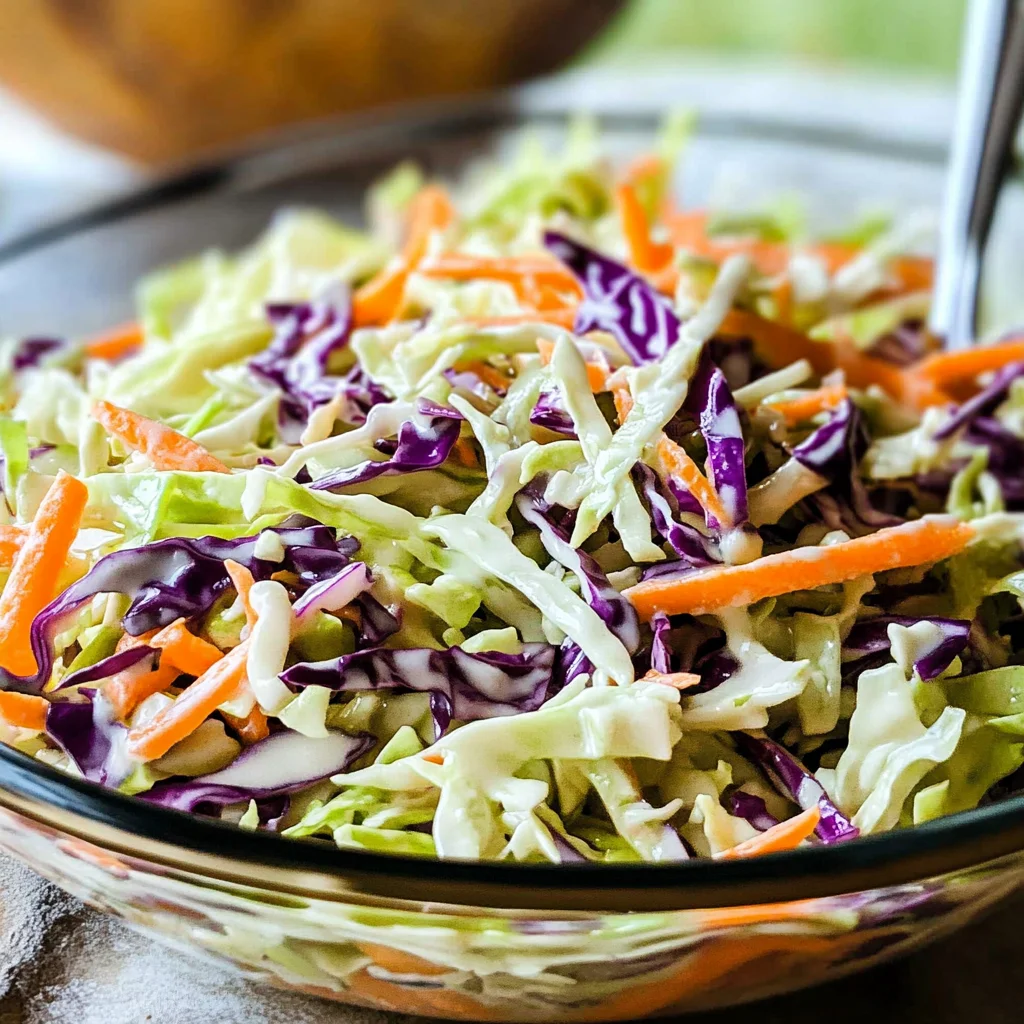
- 2 cups green cabbage (thinly sliced): Green cabbage provides that classic crunch we expect from coleslaw! It has a mild flavor that serves as an excellent backdrop against which all other ingredients shine through. Look for heads that feel heavy for their size and have tightly packed leaves; these will give you the best results.
- 2 cups purple cabbage (thinly sliced): Not only does purple cabbage add striking color contrast visually but its slightly sweeter flavor profile enhances the overall taste experience! Pairing it with green cabbage creates harmony between textures and colors in your bowl—it truly makes this dish pop!
Equipment You’ll Need:
Before we dive into preparing our wonderful coleslaw, let’s take a moment to appreciate the tools you’ll need—having these essentials makes everything run smoothly!
- Mason jar with fitted lid or small mixing bowl: Either option works well for whisking together your dressing ingredients! A Mason jar allows you easy storage if you choose to make it ahead of time while shaking ensures everything combines beautifully without any lumps.
- Sharp knife or mandoline slicer: A sharp knife is crucial when slicing both types of cabbage; it helps achieve those thin slices needed for maximum crunchiness without bruising your vegetables. If you’re feeling adventurous or want uniform slices quickly, consider using a mandoline slicer—it speeds up prep while maintaining consistency!
- Box grater: Grating carrots can be tedious if done by hand; however, using a box grater makes quick work of them! Choose one with varying sizes depending on how fine you’d like your shreds—either way will deliver delicious results.
- Large mixing bowl: A sizable bowl gives ample space when tossing everything together later on without making too much mess—trust me; nobody likes cleaning up splatters after enjoying good food!
Now that we’ve gathered our ingredients and equipment let’s move forward into preparing this delightful Coleslaw Recipe (No Mayo) that’s sure to become one of your favorite summer staples!
Step 1: Shake Things Up
Start by combining all your dressing ingredients in either your Mason jar or mixing bowl—apple cider vinegar, extra virgin olive oil, honey, whole celery seeds, kosher salt, and black cracked pepper go in seamlessly together here! If using a jar, simply seal it tightly before shaking vigorously until well combined—a minute should do nicely! If using a bowl instead, whisk until smooth; you’re aiming for emulsification so all those flavors meld perfectly together into one cohesive dressing.
Step 2: Get Slicing
Next comes one of my favorite parts—the slicing! Take your sharp knife (or mandoline if you’ve opted) and thinly slice both green cabbage heads along with purple cabbage heads into ribbons about 1/8 inch thick—the goal here is uniformity so they mix well later on but don’t stress too much if they aren’t perfect! As you slice away at those lovely greens (don’t forget about washing them first!), imagine how beautiful they’ll look when mixed with vibrant orange shreds from freshly grated carrots!
Step 3: Shred Your Carrots
Using either your box grater or pre-grated carrots if you’re short on time (we’ve all been there!), shred two large carrots until you have about two cups worth ready for action! Their sweet flavor combined with crunchy texture perfectly complements both kinds of cabbages—we’re creating layers upon layers of delightful contrasts through textures alone here!
Step 4: Toss It All Together
Once everything has been sliced and shredded beautifully into large mixing bowls ready-to-go mode—isn’t it satisfying? Now pour over all prepared dressing onto these colorful veggies before reaching eagerly toward tongs waiting nearby… toss gently yet thoroughly until every piece gets coated evenly—you want each bite bursting forth mouthwatering goodness when enjoyed later on!
And there you have it—the groundwork laid down perfectly towards achieving spectacular results from minimal effort involved throughout preparation stages leading up till now… stay tuned because there’s still plenty more delicious steps ahead once we finish wrapping up initial preparations within upcoming sections ahead…
Step 5: Tossing the Ingredients Together
Now that your dressing is beautifully combined, it’s time to bring all these vibrant ingredients together into a harmonious melody of flavors. First, if you haven’t already, grab yourself a large mixing bowl—this is where the magic truly happens! You’ll want to pour the freshly prepared dressing over the shredded cabbage and carrots, letting that fragrant liquid gold drizzle down over your colorful mixture. Using tongs, gently toss everything together. This part is crucial because you want every single strand of cabbage and every shavings of carrot to be coated in that tangy dressing. The goal here is not just to mix but to ensure each bite bursts with flavor, creating a symphony of taste with every mouthful.
As you toss, pay attention to the textures and colors. The green cabbage will contrast beautifully against the purple cabbage and bright orange carrots, creating a visually stunning dish that beckons you with its freshness. Don’t rush this step; take your time! This is your chance to infuse personality into your coleslaw recipe. A good toss will also help soften the cabbage slightly, making it easier to chew—trust me, this little detail makes a world of difference when serving!
Step 6: The Importance of Resting
Once you’ve tossed everything together, it’s essential to let your coleslaw rest for at least 15 minutes before serving—though I often recommend waiting longer if you can muster the patience! Allowing it to sit enables all those incredible flavors from the dressing to meld beautifully into the vegetables. Consider this resting period as a way for your coleslaw to marinate; it absorbs all that tangy goodness and softens just enough without losing its crunch. You’ll notice after about 30 minutes how much more flavorful your coleslaw becomes—it’s almost magical!
During this time, something fascinating happens: the salt in the dressing draws out moisture from the cabbage and carrots, creating a natural brine that further enhances flavor while keeping everything refreshing and crisp. Imagine taking that first bite after letting it rest—the contrasting textures dance on your palate while each ingredient sings its own song of flavor! It’s profoundly satisfying; trust me on this one.
Step 7: Taste Testing and Adjustments
After allowing your coleslaw some quality time to mingle, it’s time for one of my favorite moments—taste testing! Grab a small serving in a bowl and give it a gentle stir before diving in with a fork. This step is essential because it gives you an opportunity to assess whether any adjustments need to be made. Do you crave more sweetness? A touch more honey could elevate those flavors even higher! Is there just enough zing? If you think it could use more acidity, feel free to add an extra splash of apple cider vinegar.
Taste testing isn’t just about checking flavors; it’s also about ensuring balance among all components. Your coleslaw should be light yet flavorful with an invigorating crunch—if anything feels off, don’t hesitate to tweak it! Remember, cooking is as much about personal expression as it is about following recipes. My friends often say they love how customizable this dish can be; it’s truly yours, so make it sing!
Step 8: Serving Your Coleslaw Recipe (No Mayo)
Finally, let’s talk about how best to present this gorgeous coleslaw recipe (no mayo) at your next gathering or meal! When you’re ready to serve, transfer your beautifully mixed coleslaw into a stunning bowl or platter that showcases those vibrant colors—you want everyone who sees it to feel compelled to take a scoop! If you’re preparing for an outdoor picnic or BBQ cookout, consider adding some fresh herbs like parsley or cilantro on top as garnishes; not only does this add visual appeal but also an extra layer of freshness.
As for serving suggestions, this tangy coleslaw pairs perfectly alongside grilled meats or sandwiched between slices of bread with pulled beef sandwiches—it creates such a delightful contrast in flavors and temperatures! Remember that since this salad contains no mayonnaise, it’s safe sitting out for hours during outdoor events without fear of spoilage. If you’re not serving immediately, cover any leftovers tightly in an airtight container; they can last for up to two days in the fridge (though I promise they rarely last that long!).
Final Touches: Embracing Simplicity
With everything set up, just take a moment before diving in; appreciate what you’ve created! This coleslaw recipe (no mayo) encapsulates not just flavors but memories—the laughter shared over meals together and the joy found in simple food made with love. I hope each bite transports you back to summer picnics filled with sunshine or cozy dinners spent with family around the table.
So there you have it—a completely delightful coleslaw recipe that’s clean, refreshing, and utterly addicting without any mayo! I promise you’ll find it hard not to go back for seconds (or thirds!). Enjoy making this dish as much as I enjoyed sharing it with you today. Happy cooking!
Storage and Enjoyment Tips for Your Coleslaw Recipe (No Mayo)
Now that you’ve crafted this vibrant, tangy coleslaw, it’s time to relish the fruits of your labor! I can already picture the joy on everyone’s faces as they dig into this refreshing side dish. But what happens if there are leftovers? Don’t worry! I’ve got you covered with some handy storage tips that will keep your coleslaw tasting fresh and delicious for days to come.
Storing Leftover Coleslaw Recipe (No Mayo)
To preserve the crispness and invigorating flavors of your coleslaw, it’s best to store it in an airtight container—think glass or plastic with a snug lid. This helps lock in those delightful tastes while keeping unwanted air out, preventing any wilting or sogginess. Ideally, you want to tuck it away in the refrigerator where it should last for about two days, though I promise you, it’s so good that it might vanish much sooner! To maintain its crunchy texture, consider placing a slice of bread in the container; this little trick absorbs moisture and keeps your coleslaw feeling fresh. While the taste may mellow slightly after a day or two—becoming even more harmonious as those bold flavors meld together—it will still offer that irresistible crunch when served cold. Just remember, there’s no need to reheat this beauty; simply take it out of the fridge and enjoy!
Freezing Components for Later
If you find yourself overwhelmed with cabbage from your garden or simply want to prepare ahead for future gatherings, consider freezing your coleslaw components separately. To do this properly, chop the green and purple cabbage along with carrots as usual, but skip the dressing until you’re ready to enjoy them again. Place these veggies in a freezer-safe bag or container, pressing out as much air as possible before sealing. They’ll keep well for up to three months frozen! When you’re ready to use them, just thaw them in the refrigerator overnight before tossing them with your homemade dressing—it’s such a convenient option for busy days! Imagine pulling out those vibrant colors from your freezer during a sunny summer BBQ; it’s like having a little taste of sunshine at your fingertips.
Coleslaw Recipe (No Mayo)
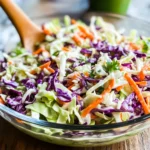
Coleslaw is a classic side dish that brings refreshing crunch and vibrant flavors to any meal. This Coleslaw Recipe (No Mayo) is a light and tangy twist on the traditional version, making it perfect for summer picnics, barbecues, or cozy dinners with friends. Featuring a delightful blend of green and purple cabbage, crunchy carrots, and a zesty vinegar-based dressing, this coleslaw is not only visually appealing but also bursting with flavor. The absence of mayonnaise allows the natural crispness of the vegetables to shine through while providing a healthy option that everyone can enjoy. Serve it alongside grilled meats or as part of a hearty sandwich filling for an irresistible combination. Enjoy the symphony of textures and tastes in every bite!
- Prep Time: 15 minutes
- Cook Time: None
- Total Time: 0 hours
- Yield: Serves approximately 6 people 1x
- Category: Salad
- Method: Mixing
- Cuisine: American
Ingredients
- 1/2 cup apple cider vinegar
- 3/4 cup extra virgin olive oil
- 2 tablespoons honey
- 2 teaspoons whole celery seeds
- 1 teaspoon kosher salt
- 1 teaspoon black cracked pepper
- 2 cups shredded carrots
- 2 cups thinly sliced green cabbage
- 2 cups thinly sliced purple cabbage
Instructions
- In a mason jar or mixing bowl, combine apple cider vinegar, olive oil, honey, celery seeds, kosher salt, and black pepper. Shake or whisk until well combined.
- Using a sharp knife or mandoline slicer, thinly slice both green and purple cabbage into ribbons.
- Shred the carrots using a box grater until you have about two cups.
- In a large mixing bowl, pour the dressing over the shredded cabbage and carrots. Toss gently with tongs until all ingredients are evenly coated.
- Let the coleslaw rest for at least 15 minutes before serving to allow flavors to meld.
Nutrition
- Serving Size: 1 cup (150g)
- Calories: 150
- Sugar: 6g
- Sodium: 120mg
- Fat: 13g
- Saturated Fat: 2g
- Unsaturated Fat: 10g
- Trans Fat: 0g
- Carbohydrates: 9g
- Fiber: 3g
- Protein: 1g
- Cholesterol: 0mg