Homemade Irish Stew with Cheddar Dumplings
There’s something about a bowl of stew that just fixes everything. It’s like a warm hug in a dish, bringing comfort and solace on the coldest of days. When I think back to my childhood, I can almost smell the aroma wafting through my grandmother’s kitchen—a heady mix of savory meats, earthy vegetables, and fragrant herbs that would dance around as they simmered away. The magic of Homemade Irish Stew with Cheddar Dumplings is not just in its delightful flavors but also in how it brings people together. This dish is a celebration of tradition and love, and let me tell you, when you take your first spoonful, you’ll understand why it’s become a timeless favorite in so many households.
What makes this recipe particularly special is its ability to adapt while remaining true to its roots. While many might lean on traditional ingredients like stout for depth, we’ve crafted an equally satisfying version that maintains all the heartiness and warmth without any pork or alcohol. Imagine biting into tender chuck roast that melts in your mouth, surrounded by vibrant vegetables and finished off with fluffy cheddar dumplings that are simply irresistible. Trust me when I say that this isn’t just dinner; it’s an experience—an invitation to slow down, gather loved ones around the table, and savor every delicious moment together.
Homemade Irish Stew with Cheddar Dumplings: A Cozy Comfort Food Delight
Today, I’m thrilled to share my take on this classic dish! The Homemade Irish Stew with Cheddar Dumplings combines hearty ingredients with a touch of indulgence that makes it utterly extraordinary. Whether you’re looking for a comforting weeknight meal or something special for a gathering, this stew will surely warm both hearts and bellies alike.
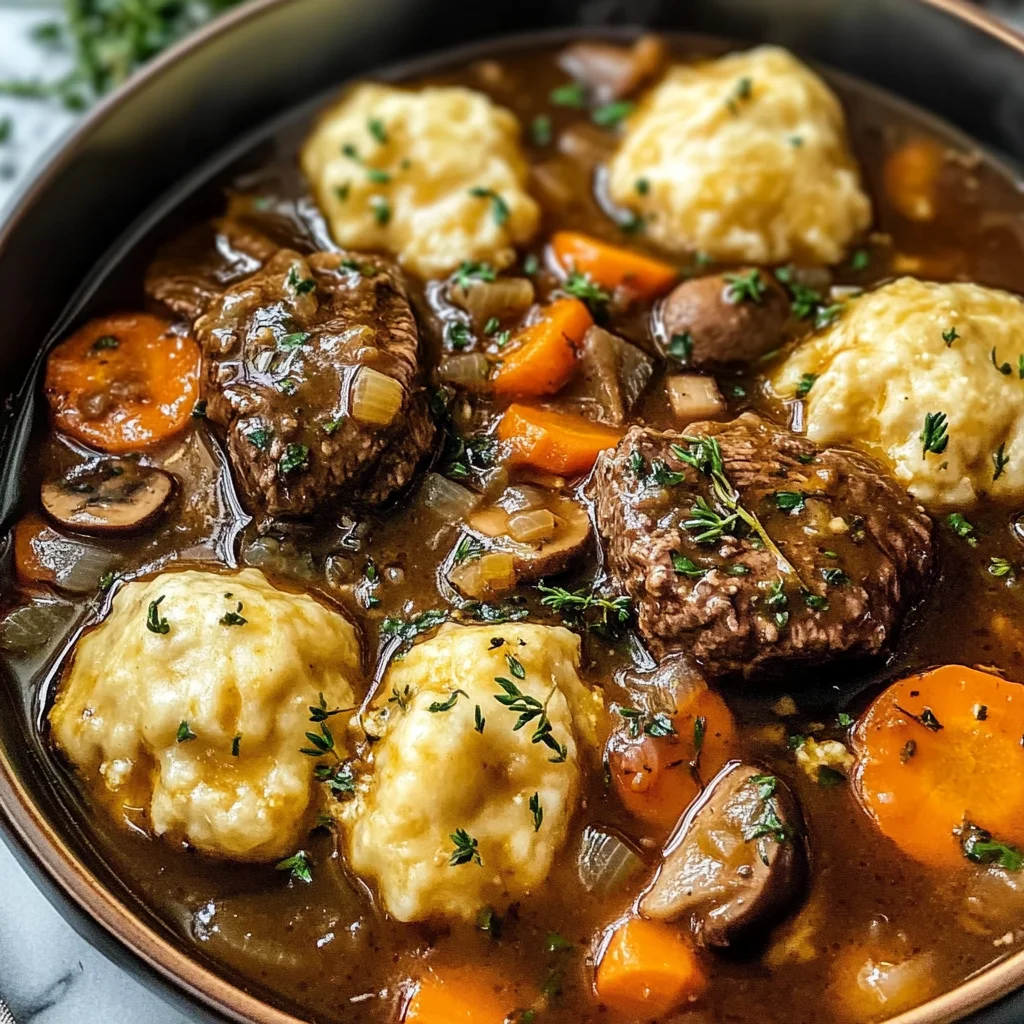
Ingredients:
As we embark on this culinary journey together, let’s take a moment to appreciate each ingredient that plays a vital role in our stew. Each one contributes uniquely to the final dish—making it rich, comforting, and utterly satisfying.
- 3 lb chuck roast (cut into 1 1/2-inch cubes for even cooking). The chuck roast is the star of our show! This cut comes from the shoulder area of the cow and is known for its rich marbling and tenderness when cooked low and slow. By cutting it into uniform cubes, you ensure even cooking throughout—no one wants unevenly cooked meat ruining their stew! It holds up beautifully against long cooking times while becoming incredibly flavorful as it simmers in its own juices along with other ingredients.
- 1/3 cup olive oil. Think of olive oil as our golden elixir—it not only helps in browning our meat but also infuses flavor into our stew right from the start. When choosing olive oil, opt for extra virgin if possible; its robust flavor elevates every ingredient it touches. You’ll want this oil to be hot enough before adding your chuck roast so that it sears beautifully—creating a crust that locks in those precious juices.
- 2 onions (diced into 1/2-inch pieces). Onions are the foundation of flavor in many cuisines, including stews! They add sweetness as they caramelize during cooking while also providing depth to our broth. Dicing them evenly ensures they cook at the same rate—nobody wants raw bits of onion amongst their tender meat and veggies! When sautéed until translucent, they become sweet little nuggets of flavor that make your taste buds sing.
- 1 tbsp thyme. Fresh thyme brings an aromatic quality that’s simply irresistible! Its subtle earthiness complements the richness of beef while adding layers of complexity to our stew’s flavor profile. If you can find fresh thyme at your local market or garden center, use it! That said, dried thyme will work too; just remember that dried herbs are more concentrated—so use about one-third less than you would fresh.
- 1 tbsp rosemary. Rosemary has such a unique pine-like fragrance that adds warmth to dishes like no other herb can! It pairs perfectly with beef and adds an aromatic bouquet that enhances every bite. When using fresh rosemary, chop it finely so its oils release fully into the dish; if using dried rosemary instead, remember again to reduce the quantity since dried herbs pack more punch!
- 6 garlic cloves. Garlic is another essential layer here—it adds depth and richness that’s hard to replicate with anything else! When minced or smashed (my favorite technique), garlic releases all its natural oils which infuse our stew with bold flavors as they cook down slowly over time. Don’t shy away from using good quality garlic; it makes all the difference!
- 3 tbsp tomato paste (I prefer Hunt’s for its deep color). Tomato paste is where we begin layering flavors beyond just savory; it adds acidity which balances out rich meats beautifully! The brand you choose matters too—Hunt’s offers a rich color that’s perfect for creating stunning depth in your broth. Make sure you sauté it alongside onions so those sugars caramelize nicely—you’ll know it’s ready when you see vibrant rust-colored hues!
- 6 cups beef stock. Stock serves as our base here—the liquid gold that transforms simple ingredients into something truly magical! Using homemade stock gives unparalleled flavor; however store-bought works well too if you’re short on time—just look for low-sodium varieties so you can control salt levels better as everything cooks together.
- 2 bay leaves. Bay leaves might seem unassuming but trust me—they’re crucial! These leaves slowly release their aromatic oils during cooking which infuse every bite with subtle herbal notes without overpowering other ingredients’ flavors. Just remember: remove them before serving since they’re not meant to be eaten!
- 6 carrots (sliced into 1-inch thick rounds). Carrots bring sweetness and texture into our stew; plus their bright orange hue makes for visual appeal too! Cutting them into thicker rounds ensures they hold their shape throughout long simmering times while still becoming tender enough to enjoy alongside other veggies.
- 3 potatoes (peeled and diced). Potatoes provide bulk while absorbing all those delicious flavors from surrounding ingredients—they’re like sponges soaking up goodness! Opt for waxy varieties such as Yukon Gold or red potatoes because they hold up well under pressure compared to starchy types which may turn mushy too quickly.
- 3 celery stalks (diced). Celery adds crunchiness along with earthy undertones—it’s essential for balancing out sweetness from carrots/potatoes nicely! The key here lies within dicing them evenly so each piece melds seamlessly into the broth rather than standing alone among larger chunks elsewhere!
- 2 cups mushrooms (sliced). Mushrooms introduce umami richness unlike anything else—they lend depth without overpowering other elements present within your bowlfuls! Choose baby bellas or cremini varieties if possible; they have great textures along with robust flavors perfect pairing alongside meats & veggies alike!
- 1/2 tsp black pepper. Black pepper enhances everything by bringing out hidden flavors present within each ingredient while adding just enough zing—not too much though since we’re aiming for harmony rather than heat here!
- 2 cups Bisquick (I always use Original variety for better lift). This beloved baking mix takes care of dumpling preparation without any fuss whatsoever—it blends seamlessly together creating tender pillows atop bubbling stews below which soak all juices up beautifully once served hot straight from pot itself!
- 1 tsp garlic powder. While fresh garlic shines bright throughout cooking process itself—we use garlic powder here mainly enhance overall flavor experience further still without needing additional chopping prep involved!
- 2 cups cheddar cheese (freshly shredded melts much smoother than bagged). Cheese isn’t just an indulgent topping—it plays pivotal role enhancing dumpling texture making them extra creamy inside once melted through baking process ensuring everyone enjoys bites filled soft cheesiness paired perfectly alongside savory stew beneath!
- 1/4 cup chives (chopped finely). Chives offer subtle onion-y flavor note complimenting richness already present while also adding color contrast visually appealing each bowl served steaming hot—plus their freshness brightens overall presentation quite nicely too!
- 3/4 cup milk (whole preferred). Finally we finish off dumpling mixture adding milk helps bind everything together creating fluffy light dough holding sauce well upon steaming resulting final product being not only delicious but also beautiful too!
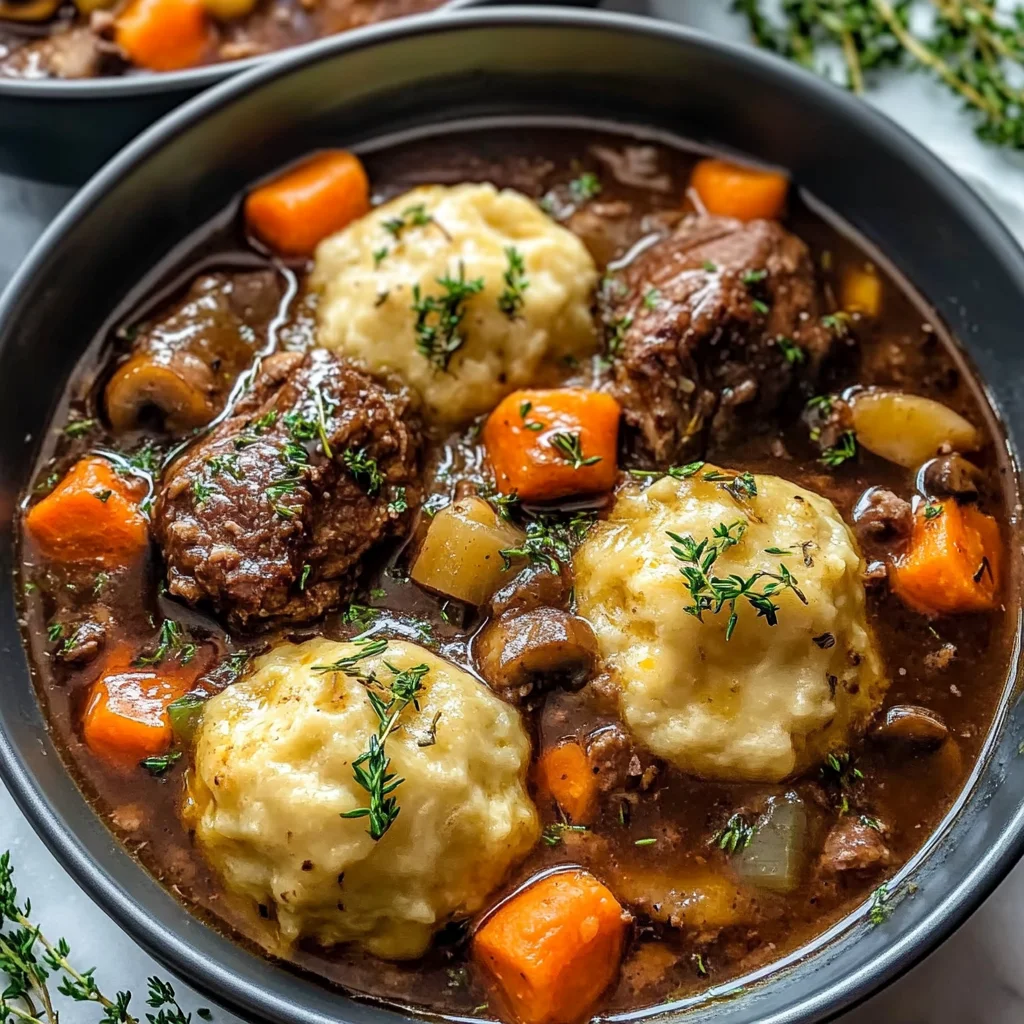
Equipment You’ll Need:
Before diving into making this delightful Homemade Irish Stew with Cheddar Dumplings, let’s talk about some essential tools that’ll help ensure your cooking experience goes smoothly—that way you can focus solely on enjoying every step of this process rather than scrambling around looking for what you need mid-recipe!
- Large Dutch oven or heavy-bottomed pot: A sturdy pot is non-negotiable here because it distributes heat evenly while retaining warmth over long periods required during simmering stages—which allows flavors meld beautifully together without burning anything along edges unexpectedly either!
- Wooden spoon: You’ll want something reliable when stirring ingredients throughout cooking process so nothing sticks unexpectedly—plus wooden spoons don’t scratch surfaces like metal counterparts potentially could either making them perfect choice overall when preparing dishes such as these where gentleness required often times necessary throughout stages involved here specifically focused upon building those layers carefully ensuring no steps skipped whatsoever!
- Cutting board & sharp knife: A good cutting board provides ample workspace necessary chopping veggies/meat safely without risk slipping occurring plus having sharp knife allows quick clean cuts through tougher items like carrots/potatoes allowing effortless prep work done swiftly ensuring everything ready timely manner possible throughout entire cooking journey taken today together instead feeling rushed through things unnecessarily!
Preparing the Homemade Irish Stew with Cheddar Dumplings
Step 1: Searing Your Chuck Roast
Start by heating your Dutch oven over medium-high heat until it’s nice and hot—this is where we create those gorgeous brown bits on our chuck roast that’ll form the backbone of flavor in our stew later on! Add about one-third of your olive oil to coat the bottom generously before placing half of your cubed chuck roast gently into the pot without overcrowding it; overcrowding can lead to steaming instead of searing—which defeats our purpose entirely here! Allow each piece ample room around them so they get nice golden crusts formed naturally after about 5 minutes per side depending thickness desired doneness achieved previously mentioned earlier should stay intact during flipping process easily done watching closely avoiding burning outside edges accidentally occurring during these initial stages crucial considering outcome ultimately produced following steps taken thereafter based upon decisions made initially up front at beginning itself leading us towards glorious end result awaiting patiently ahead awaiting discovery soon enough once all preparations complete thoroughly beforehand first time ever experiencing magic unfold right before eyes themselves revealing secrets hidden beneath surface waiting patiently behind walls constructed previously built firmly aligning dreams envisioned coming alive finally once again…
Step 2: Building Flavor
Once you’ve removed those beautifully browned chunks from heat onto plate temporarily set aside while repeating same process remaining batches until finished completely browning properly achieved across board then return all pieces back inside Dutch oven alongside onions garlic thyme rosemary stirring occasionally allow soften slightly roughly about 5 minutes total mixing well combined letting aromatic fragrances fill air surrounding kitchen enticing nearby guests eagerly awaiting opportunity indulge soon after followed closely behind next stage featuring addition tomato paste incorporated directly involving stirring frequently allowing caramelization occur seamlessly developing deeper hues flavors emerge richer than ever before witnessed firsthand feels almost intoxicating sense satisfaction knowing efforts paying dividends shortly thereafter inviting folks gather round hearth shared experiences enjoyed collectively amidst laughter warmth shared hearts filled joy anticipation fulfilled moments spent dining together cherished forevermore close friends family alike gathered close sharing stories exchanging smiles connecting bonds formed stronger through shared meals alike…
Step 3: Adding Liquid Gold
Next comes liquid gold—the beef stock—and yes please don’t forget those bay leaves tucked away somewhere safe earlier otherwise would miss chance enhancing rich essence permeating entire pot now bubbling away merrily combining harmoniously alongside previous elements added thus far leading towards ultimate destination awaits eagerly ahead beckoning forth come join feast laid bare invite everyone partake revelry unfolding graciously unfolding promises kept alive long ago brought forth fruition reality becoming tangible sensation filling senses embraced fully enveloped warmly wrapped snugly within comforting embrace seasoned richly prepared thoughtfully crafted lovingly assembled step after step taken carefully relishing joys small victories achieved along way culminating triumphantly culminating fine results obtained worthy celebration indeed worthy reward long sought after finally reached after lengthy endeavors undertaken diligently painstakingly rewarded handsomely pleasing tastes discovered indulged lovingly savored moments forged forever engraved memory everlasting etched deeply within minds hearts reminding us why love remains central theme guiding life travels taken onward forevermore side by side walking journey hand in hand sharing laughter joy discovering magic found midst ordinary surroundings transformed extraordinary experiences lived fully realized connection forming lasting impressions left indelibly marked souls intertwined forevermore…
Step 4: Incorporating Vegetables
Now let’s add those vibrant vegetables—the carrots potatoes celery mushrooms—to enrich stew further deepen complexity presenting brightly colored palette inviting appreciation visually inspiring appetites awaken desires untamed yearning partake delightful creations placed forth within reach ensuring everyone gets chance savor bounty nature bestowed freely available plentiful abundance surrounding us if only willing open eyes hearts explore mysteries lies waiting discover hidden treasures abundant everywhere seeking nourishment feed souls not merely bodies alone nourished spirits uplifted rejuvenated remind us beauty exists amongst chaos mundane lives lived daily far removed realities often forgotten remind us simplicity pleasures derived pleasure derived nurturing relationships nurtured cared tended lovingly yet tenderly amidst life storms encountered bravely faced challenges overcome gracefully celebrated triumphantly spreading kindness gratitude wherever traveled paths lead offering encouragement uplifting others reminding everyone deserving joy smile warmth embraces shared spread freely given exchanged reciprocated openly boundless…
Step 5: Searing the Meat to Perfection
Now, let’s talk about one of the most crucial steps in creating that rich, deep flavor profile for your Homemade Irish Stew with Cheddar Dumplings: searing the meat. You want to take those beautifully cubed pieces of chuck roast—ensuring they’re nice and dry by patting them down with a paper towel first—and heat your olive oil in a large, heavy-bottomed pot over medium-high heat. The oil should shimmer like liquid gold before you add the meat; this is your cue that it’s time to get cooking! Adding too many pieces at once can lower the temperature of the pan, leading to steaming instead of searing, which is a big no-no. Instead, work in batches if necessary, giving each piece enough space to caramelize beautifully on all sides.
Searing not only creates a beautiful brown crust but also enhances the stew’s flavor through the Maillard reaction—a fancy term for that magical transformation that happens when proteins and sugars react under heat. This step is absolutely paramount; without proper searing, your stew will lack those complex layers of flavor we all crave. Once your meat is browned on all sides (about 3-4 minutes per side), remove it and place it on a plate, allowing it to rest while we build our aromatics.
Step 6: Building Layers of Flavor
With your chuck roast resting comfortably, it’s time to turn your attention to those delicious aromatics that will elevate your stew into something truly extraordinary. In the same pot that you just used to sear the meat, toss in those diced onions and sauté them until they become translucent—this usually takes about 5-7 minutes. As they cook down, you’ll start to notice that wonderfully sweet aroma filling your kitchen; trust me when I say it’s utterly intoxicating! Next up, add in the minced garlic cloves, thyme, and rosemary—everything needs about another minute or so just to release their essential oils. Don’t rush this step; it’s during these moments that flavors meld together harmoniously.
Once you’ve coaxed out all those delightful scents, stir in the tomato paste. This ingredient may seem simple, but it’s one of my secret weapons for adding depth and richness. Letting it cook for a couple of minutes will deepen its color and flavor even more. After this aromatic symphony has played out beautifully in your pot, return the seared beef back into this mixture. It’s time to introduce some liquid gold into the mix! Pour in your beef stock gently; you’ll want to scrape up all those lovely brown bits stuck at the bottom of the pot—these are packed with flavor and are non-negotiable for an exceptional stew.
Step 7: Simmering with Love
Now comes one of my favorite parts: simmering! Add in your bay leaves along with those gorgeous carrots, potatoes cut into hearty chunks, celery stalks (don’t forget to chop them!), and mushrooms that have been sliced just right. The vibrant colors will make you feel as though you’re crafting a masterpiece rather than simply making dinner. Bring everything to a gentle boil over high heat before reducing it down to low so that it simmers softly—think bubbling cauldron rather than roaring volcano here!
Covering the pot is essential during this stage—it helps trap steam and keeps everything moist while allowing flavors to develop beautifully over time. You’ll want this simmering away for around 2-3 hours; yes, I know patience isn’t always easy! But I promise you it’s worth every minute as those ingredients meld together into something profoundly satisfying and comforting. Keep an eye on it occasionally; give it a gentle stir every now and then just to ensure nothing sticks or burns at the bottom—like I always say, care leads to great taste!
Step 8: Crafting Cheddar Dumplings That Steal The Show
While our stew is doing its thing on the stove—the aromas wrapping around you like an old friend—it’s time to focus on those glorious cheddar dumplings that will crown this dish with perfection! In a mixing bowl, combine 2 cups of Bisquick mix with 1 teaspoon of garlic powder—you know how much I love garlic—and then fold in that freshly shredded cheddar cheese along with chopped chives for an extra punch of flavor. This combination is key because not only does cheese bring richness but also helps create that delightful gooeyness we all crave in dumplings.
Next up comes adding milk gradually until you achieve a doughy consistency; think soft but not sticky—this is where some intuition comes into play! Trust me on this: if it’s too wet or too dry, you’ll either end up with flat dumplings or dense hockey pucks instead of fluffy clouds atop your stew! Once combined well (don’t overmix), let this dough rest for about 10 minutes—this brief pause allows gluten strands to relax so you can enjoy perfectly tender dumplings later on.
Baking Your Perfect Homemade Irish Stew with Cheddar Dumplings
With everything prepped and smelling divine around you, it’s finally time for the grand finale! Carefully drop spoonfuls of that luscious cheddar dumpling batter onto the surface of your bubbling Irish stew—the gentle sizzle as they touch down is music to my ears! They’re going to rise beautifully while cooking away. Ensure they’re evenly spaced out; they need room to expand and fluff up as they steam under that comforting lid.
Cover again and allow everything to simmer together for an additional 15-20 minutes without peeking—this part can be tough since you’ll want nothing more than to dive right in! But remember: lifting the lid lets out precious steam needed for cooking those dumplings properly; trust me when I say waiting will be rewarded tenfold when you finally unveil what lies beneath! You’ll know they’re done when they puff up adorably and pass the toothpick test—a clean insert means you’re golden!
Letting them rest briefly before serving allows flavors within each component time for harmony too—it’s truly magical how patience transforms dishes from good into unforgettable ones! As you ladle spoonfuls into bowls (and don’t forget generous amounts of broth), prepare yourself for not just a meal but an experience filled with warmth and comfort reminiscent of home-cooked love at its finest.
So there you have it—a heartfelt journey toward creating your very own Homemade Irish Stew with Cheddar Dumplings! Each step crafted with care ensures every bite holds stories waiting to be shared around tables filled with laughter and joy. Enjoy every moment spent making this dish as much as savoring each bite afterward—it truly embodies what comfort food should be all about!
Storage and Enjoyment Tips for Your Homemade Irish Stew with Cheddar Dumplings
Now that you’ve crafted this delightful pot of comfort, it’s time to dig in and savor every spoonful of your Homemade Irish Stew with Cheddar Dumplings! As the steam rises and the rich aroma fills your kitchen, you might find it hard to resist diving straight into your creation. But if you happen to have leftovers—a scenario I encourage you to embrace—you’ll want to know the best way to store that liquid gold for future enjoyment. This stew is not just a meal; it’s a warm hug in a bowl, and preserving it properly ensures you can relive those cozy moments even days later.
Storing Leftover Homemade Irish Stew with Cheddar Dumplings
When it comes to storing your luscious stew, using airtight containers is absolutely paramount. Glass containers are my go-to choice because they don’t retain odors like plastic might, ensuring that each time you open your fridge, you’re greeted by the same inviting scent. Make sure to let your stew cool completely before sealing it up tight; this helps prevent condensation from turning your dumplings soggy. In the refrigerator, your stew will remain deliciously vibrant for about 3-4 days—though I promise you it’ll be gone long before then! Pro tip: If you’re worried about the texture of the dumplings after storage, consider placing a slice of bread on top of them before sealing—this little trick absorbs excess moisture and keeps everything beautifully intact. When reheating, do so gently over low heat on the stovetop or in the microwave until it’s warmed through; this method ensures even heating and helps maintain that deeply satisfying flavor.
Freezing Your Homemade Irish Stew with Cheddar Dumplings for Later
Should you wish to extend that cozy feeling even further into the future, freezing is an excellent option! To freeze your stew perfectly, allow it to cool completely (trust me, patience is key here) before transferring it into freezer-safe bags or containers. Make sure to leave some space at the top of the container as liquids expand when frozen; this will prevent any messy explosions in your freezer! Your Homemade Irish Stew with Cheddar Dumplings will keep well in the freezer for about 3 months—though I doubt it’ll last that long once you discover how easy it is to pull out a hearty meal on busy weeknights. The convenience factor here is extraordinary; simply thaw overnight in the fridge and reheat when you’re ready for another comforting bowlful. Imagine coming home after a long day and knowing that a warm, hearty stew awaits you—it’s like having a little piece of home waiting for you!
Homemade Irish Stew with Cheddar Dumplings
Homemade Irish Stew with Cheddar Dumplings is a heartwarming dish that evokes nostalgia and comfort. Perfect for chilly days, this stew features tender chunks of chuck roast simmered in a rich beef stock, alongside vibrant vegetables like carrots, potatoes, and celery. The crowning glory is the fluffy cheddar dumplings that soak up the savory broth, making every bite a delightful experience. This recipe honors tradition while offering a unique twist—no pork or alcohol required! Gather your loved ones around the table for this cozy meal that promises to warm both hearts and bellies.
- Prep Time: 20 minutes
- Cook Time: 3 hours
- Total Time: 3 hours 20 minutes
- Yield: Serves approximately 8 people 1x
- Category: Main
- Method: Cooking
- Cuisine: Irish
Ingredients
- 3 lb chuck roast (cut into 1 1/2-inch cubes)
- 1/3 cup olive oil
- 2 onions (diced)
- 6 garlic cloves (minced)
- 3 tbsp tomato paste
- 6 cups beef stock
- 6 carrots (sliced)
- 3 potatoes (peeled and diced)
- 2 cups mushrooms (sliced)
- 2 cups Bisquick mix
- 2 cups cheddar cheese (shredded)
Instructions
- In a large Dutch oven, heat olive oil over medium-high heat. Sear half of the chuck roast until browned on all sides, then remove and set aside.
- In the same pot, add onions and cook until translucent. Stir in garlic, thyme, and rosemary; cook for another minute.
- Add tomato paste and stir for a few minutes until it darkens in color.
- Return the meat to the pot, pour in beef stock, and add bay leaves, carrots, potatoes, celery, and mushrooms. Bring to a boil and then reduce to a simmer for 2-3 hours.
- For the dumplings: In a bowl, mix Bisquick with shredded cheddar cheese and milk until just combined. Drop spoonfuls onto the stew during the last 20 minutes of cooking.
- Cover and allow dumplings to steam until puffed up.
Nutrition
- Serving Size: 1 serving
- Calories: 450
- Sugar: 6g
- Sodium: 920mg
- Fat: 22g
- Saturated Fat: 9g
- Unsaturated Fat: 10g
- Trans Fat: 0g
- Carbohydrates: 37g
- Fiber: 4g
- Protein: 30g
- Cholesterol: 90mg