Middle Eastern Pickled Turnips Recipe
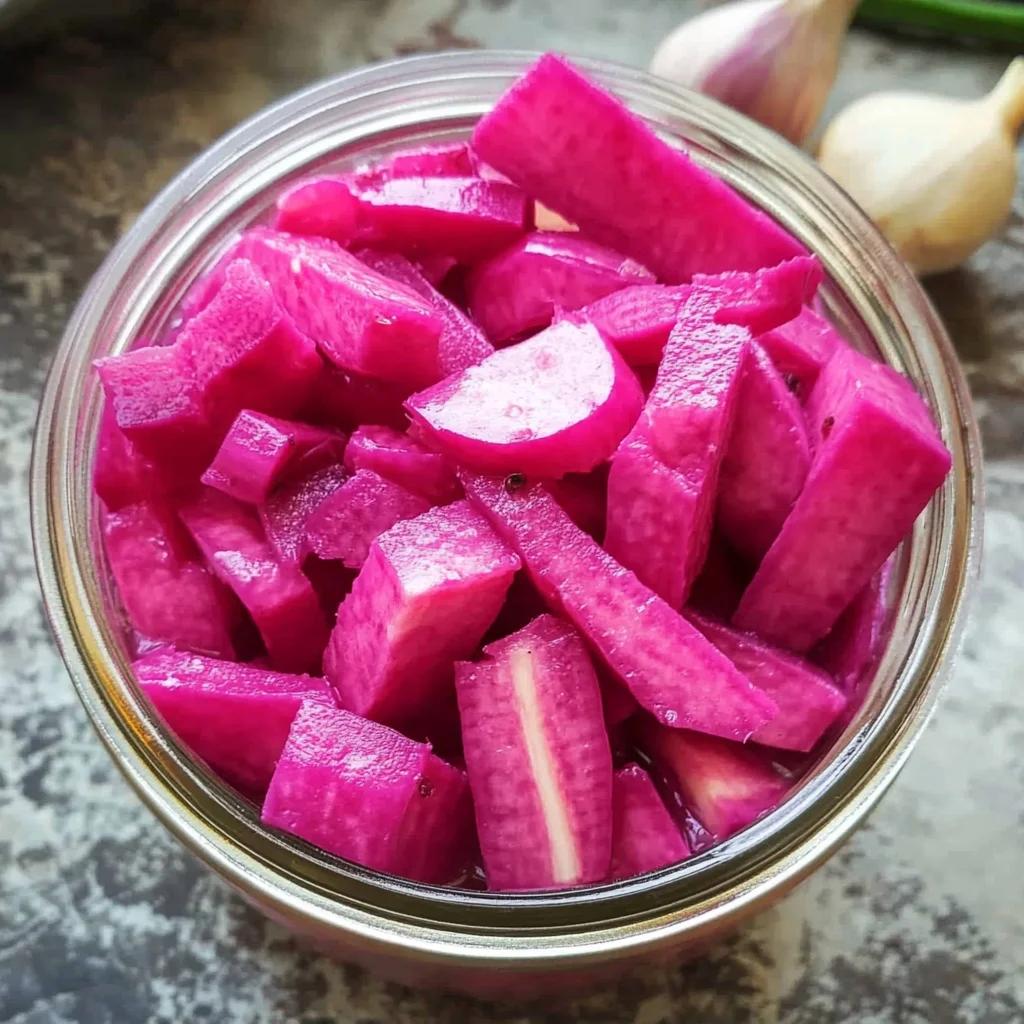
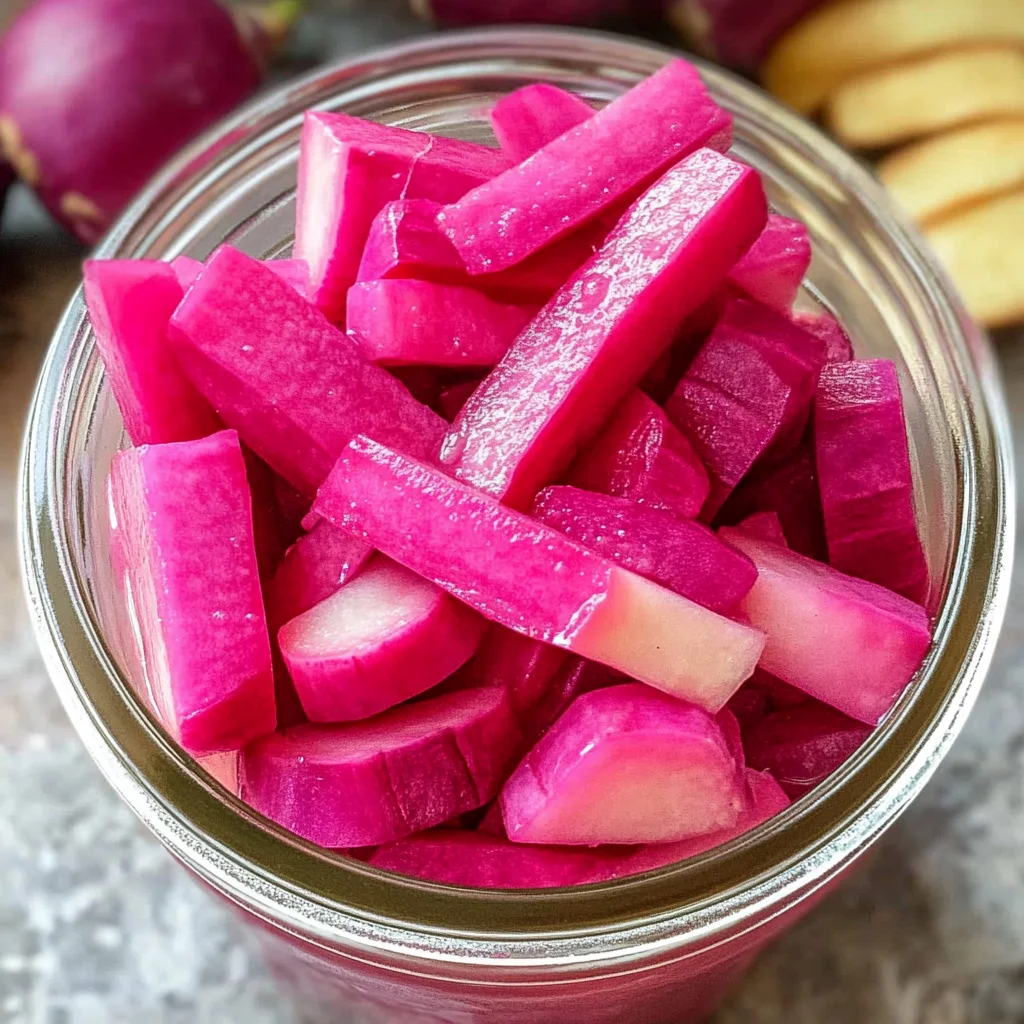
There’s something profoundly satisfying about creating a dish that not only tantalizes the taste buds but also tells a story—one that connects us to cultures, traditions, and memories. The Middle Eastern Pickled Turnips Recipe is one such dish that encapsulates this experience perfectly. Imagine taking your first bite of these vibrant pink beauties; their crisp texture combined with the subtle kick of garlic and peppercorn dances on your palate like a joyous celebration. The first crunch gives way to a symphony of flavors, with the earthiness of turnips being beautifully complemented by the tangy brine, all elevated by the burst of color from the beets. You can almost feel the warmth of a bustling market or a family gathering as you relish each bite.
What’s truly remarkable about these pickled turnips is how they bring together simplicity and sophistication in one jar. They are incredibly versatile—whether you’re layering them in a falafel wrap, tossing them into a salad for an unexpected zing, or simply enjoying them as a crunchy snack on their own. They’re not just food; they’re an invitation to explore Middle Eastern cuisine, enhancing any meal with their vibrant flavor and captivating color. Trust me when I say that once you make these pickled turnips, they will become a staple in your kitchen—a beautiful addition to your culinary repertoire.
Middle Eastern Pickled Turnips Recipe: A Crunchy Delight Awaits
Are you ready to dive into the delightful world of pickling? This Middle Eastern Pickled Turnips Recipe is not only quick and easy but also incredibly rewarding. In just 15 minutes of prep time, you’ll create something utterly extraordinary that will elevate your meals for days to come. The best part? You can enjoy these tangy, colorful treats after just six days in the fridge—although I doubt you’ll be able to resist sneaking bites before then!
Ingredients:
Let’s embark on this culinary journey together! Each ingredient plays a vital role in crafting those irresistible pickled turnips we’re all dreaming about.
- 2 cups water. Water is the foundation of our brine, acting as the solvent that dissolves salt and sugar while carrying all those wonderful flavors into our turnips. When selecting water for pickling, always opt for filtered or distilled if possible; chlorine from tap water can interfere with fermentation processes and alter the final taste.
- 1 tbsp Kosher salt. Salt is absolutely paramount in this recipe—not just for flavor but also as a preservative. Kosher salt is preferred due to its larger grains, which dissolve easily and evenly distribute throughout the brine. If you’re in a pinch and have table salt instead, remember that it’s more concentrated than kosher salt; use about half as much to avoid overwhelming our delicate turnips.
- 1/2 tbsp granulated sugar. Sugar adds balance to our brine by cutting through acidity and enhancing flavors in unexpected ways. It’s essential for achieving that perfect harmony between sweet and sour—trust me when I say it transforms your pickles from good to unforgettable! If you’re looking for alternatives, consider honey or agave syrup; just remember they may add different notes to your brine.
- 1 cup white vinegar. The star player here is undoubtedly vinegar! It brings tanginess that livens up every bite while also acting as a preservative—keeping our turnips crisp and fresh throughout their shelf life. Look for high-quality distilled white vinegar with at least 5% acidity; this will ensure an effective pickle while giving you that sharp flavor we crave.
- 2 large turnips (peeled and cut into 1/2-inch batons). Turnips are what we’re pickling! Their crunchy texture is ideal for absorbing all those delicious flavors from our brine without becoming mushy over time—making them perfect for pickling! Choose firm turnips with smooth skin; any blemishes could affect their taste and texture during storage.
- 1 small beet (peeled and cut into 1-inch chunks). Beets are not only responsible for imparting those stunning pink hues but also contribute earthy sweetness that beautifully complements the turnips’ mild flavor profile. When selecting beets, look for smaller ones since they tend to be more tender; however, don’t hesitate to use larger ones if that’s what you have on hand!
- 4 cloves garlic (peeled and sliced). Garlic adds an aromatic depth that elevates our pickles beyond mere condiments into culinary treasures! Its pungent aroma mellows out during pickling while still providing comforting warmth—perfectly balancing out the sharpness of vinegar. Fresh garlic works best here; avoid pre-minced varieties if you want that authentic punch!
- 1 tsp peppercorn. Whole peppercorns lend a subtle heat that dances delightfully on your tongue without overwhelming other flavors at play. They infuse warmth gradually during the pickling process, making every bite excitingly complex! For added spice, consider incorporating red pepper flakes or mustard seeds alongside them.
Equipment You’ll Need:
Having the right tools makes cooking so much smoother—and trust me when I say it elevates your experience dramatically! While they may not be ingredients themselves, these essential partners will help create something truly wonderful.
- Mason jars (with tight-fitting lids) – These are non-negotiable when it comes to preserving our gorgeous pickles! Mason jars provide an airtight seal crucial for keeping our brine intact while preventing spoilage during refrigeration. You can use one large jar or several smaller ones depending on how you prefer storing them.
- Saucepan – A heavy-bottomed saucepan is ideal here because it distributes heat evenly while allowing us to dissolve salt and sugar efficiently without burning anything—a crucial step in ensuring our brine achieves perfection!
- Cutting board & knife – A sturdy cutting board paired with a sharp knife ensures safe slicing of both turnips and beets while maintaining precision—important factors contributing toward uniformity within each jar!
With all these ingredients and equipment at hand, let’s prepare ourselves for some delightful kitchen magic!
Preparing the Middle Eastern Pickled Turnips Recipe
Step 1: Creating Your Flavorful Brine
First things first: let’s get started on creating our magical brine! Begin by pouring 2 cups of water into your saucepan over medium-high heat—this process allows us to warm up our liquid gently without boiling away its beneficial properties too quickly (we want everything dissolved nicely!). As soon as you notice gentle bubbles forming at its surface signaling simmering has begun, add 1 tablespoon kosher salt along with ½ tablespoon granulated sugar—I promise you’ll love how they dissolve effortlessly into this warm bath! Stir lightly until both are fully integrated before introducing 1 cup of white vinegar into this mixture; keep simmering at medium-low heat for about two minutes more just long enough for everything meld together harmoniously before turning off heat completely so we can let it cool down naturally.
Step 2: Packing Your Jars
While waiting patiently for our flavorful brine to cool down completely—the anticipation builds! Grab those lovely mason jars now (remember: tight-fitting lids are key!), then begin placing all prepared turnip batons inside one by one until they fill up nicely—but leave some space at top because we’ll need room later when pouring in that glorious liquid gold brining solution too! Once you’ve nestled those beautiful pieces snugly within their new homes (or jars), layer in chunks of beet followed by sliced garlic cloves—the combination creates such an inviting aroma at this stage already!
Step 3: Pouring on That Liquid Gold
Now comes perhaps my favorite part—pouring that fragrant brining solution over everything packed tightly inside jars! Carefully ladle cooled-down liquid over veggies ensuring it covers each piece completely without leaving any exposed bits behind—these need equal attention during picking too after all! Use additional jars if necessary rather than cramming everything tightly together—you want proper air circulation around each piece over time while they pickle away safely tucked away outta sight until ready.
Step 4: Sealing & Storing
Once everything’s swimming happily beneath layers upon layers of tangy goodness securely sealed under lids—it’s time now store them safely away within refrigerator where magic happens next few days ahead as flavors meld together beautifully waiting patiently till reaching peak perfection after six full days pass (mark calendars!) Remember though patience pays off immensely here—don’t rush this step; trust me—it’s well worth waiting couple extra days longer than expected since quality improves dramatically overtime resulting utter deliciousness beyond imagination!
And there you have it—the start of something incredible awaits within those jars bubbling with potential flavors waiting just beyond reach! Keep checking back every couple days peeking into see progress unfold inside each jar filled vibrant colors reflecting warmth sunshine glowing against backdrop cold refrigerator reminding us brighter days ahead soon come back around again…
Step 5: The Art of Brining
Now that you’ve prepared the brine, it’s time to let this fragrant concoction work its magic! Once you’ve turned off the heat, allow the brine to cool completely before pouring it over your turnips and beets. This resting period is absolutely crucial because hot brine can cook the vegetables, which we definitely want to avoid. Instead, we want the brine to gently infuse its flavors while maintaining the crispness of those lovely turnip batons. As you wait, take a moment to inhale the tantalizing aroma wafting from your saucepan; I promise you, that scent is just a hint of the flavor explosion waiting in your fridge!
While you’re letting the brine cool, prepare your jars. If you’re using mason jars (which I highly recommend for their airtight seal), make sure they are clean and dry. This step is not just about aesthetics; it’s a matter of food safety! Any residue or moisture left in the jar could compromise your pickles. Trust me on this—taking a few extra moments to ensure everything is spotless will pay off in flavor and freshness when you bite into those vibrant pink pickled turnips later on.
Step 6: Layering Flavors Like an Artist
With your brine cooled, it’s time to layer those beautiful ingredients into your jar! Start with placing the freshly cut turnip batons at the bottom of your jar; they should fill about half of it. Don’t rush this step—arranging them neatly not only makes for a pretty presentation but also ensures that every bite is packed with flavor. Next, add in the beet chunks, which will release their stunning color and earthy sweetness into the brining mixture as they sit together in harmony.
Now sprinkle in those aromatic slices of garlic and whole peppercorns. Each element plays a vital role: garlic adds an intoxicating warmth while peppercorns introduce a subtle hint of spice that will elevate each mouthful to new heights. As you layer these ingredients, imagine how they’ll interact during fermentation; it’s like setting up a symphony of flavors waiting to burst forth! Make sure everything fits snugly in the jar but don’t pack it too tightly—this isn’t a wrestling match; we want space for magic to happen!
Step 7: The Pouring Ritual
Once you’ve layered everything beautifully in your jar(s), it’s time for what I like to call “the pouring ritual.” Carefully pour your cooled brine over the turnips and beets until they are completely submerged—this is absolutely non-negotiable! The brine needs to envelop each piece so they can absorb all those delightful flavors during their time in the refrigerator. Take a moment here to appreciate the transformation—the vivid pink liquid cascading over those white and purple veggies is nothing short of mesmerizing.
If you notice any stubborn air bubbles trapped among your veggies, gently tap the jar against your countertop or use a clean utensil to help release them. This may seem like a small detail, but trust me—it can significantly improve flavor infusion and prevent unwanted spoilage due to trapped air. Once everything is submerged and looking vibrant, seal those jars tightly with their lids! This simple act locks in all that goodness and sets you up for success.
Step 8: Patience is Key – The Waiting Game
Now comes perhaps one of the hardest parts—waiting patiently as those pickled turnips transform into something utterly extraordinary! While it may feel like an eternity (I get it!), allowing them to sit in your refrigerator for at least six days is vital for developing that truly iconic pickled flavor profile we all adore. During this time, the acid from vinegar works its way into each turnip baton and beet chunk, softening them ever so slightly while imparting an irresistible tanginess.
As days pass by, I encourage you to sneak a taste around day three or four—you’ll notice how every passing hour enhances their flavor complexity! Just remember: great things take time. Keep them sealed tight during this process; opening them too frequently could let out precious flavor and introduce unwanted bacteria. So mark your calendar or set reminders on your phone if need be; trust me on this one—the anticipation will make that first bite even more rewarding!
Conclusion:
As we wrap up this delightful culinary adventure of crafting your own Middle Eastern pickled turnips recipe, I hope you feel as excited as I am about bringing this vibrant dish into your kitchen! The journey from raw turnips and garlic to these beautifully brightened bites is not just about following steps; it’s about embracing flavors that dance around each other harmoniously while transforming simple ingredients into something truly extraordinary. Each bite captures a moment—a memory—and transports us straight into bustling markets filled with spices and laughter.
But beyond just taste lies the true joy of creating these pickles yourself—the satisfaction of pouring love into every step makes this recipe a must-try for anyone looking to elevate their meal game! Perfect alongside grilled meats or tucked into sandwiches, these turnips shine on any occasion—from casual weeknight dinners to festive gatherings where they become the star of your spread. Picture pulling open that jar at a summer picnic; friends gather around with curious eyes and eager smiles as they take their first crunch—what could be more rewarding than sharing something you’ve created?
When it comes to serving suggestions, imagine savoring one with warm pita bread slathered in hummus for an afternoon pick-me-up; or serve them alongside creamy tahini-dressed salads for an explosion of color and flavor on your plate! For a truly decadent experience, pair them with roasted vegetables drizzled in olive oil—the earthy notes complementing the tangy crunch will have everyone asking for seconds.
And let’s not forget about all those fun variations waiting for your exploration! Feeling adventurous? Why not toss in some sliced jalapeños or experiment with different herbs like dill or coriander? This recipe is wonderfully adaptable—each tweak will introduce new layers of flavor while still celebrating that signature taste we all adore. So gather your ingredients, put on some music, and dive into this project; I promise you an enriching experience awaits! Share your creations with me—I can’t wait to hear how yours turned out!
Middle Eastern Pickled Turnips Recipe
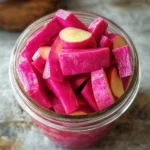
Experience the vibrant flavors of Middle Eastern cuisine with this easy-to-make pickled turnips recipe. These strikingly pink, crunchy delights are infused with garlic and peppercorns, offering a perfect balance of tanginess and sweetness. Whether you enjoy them as a snack, add them to salads, or incorporate them into wraps, these pickled turnips will invigorate your meals. With only 15 minutes of preparation and a week in the fridge to develop their flavors, they are a must-have staple in any kitchen. Get ready to elevate your dishes with this colorful condiment!
- Prep Time: 15 minutes
- Cook Time: None
- Total Time: 0 hours
- Yield: Approximately 8 servings 1x
- Category: Side Dish
- Method: Pickling
- Cuisine: Middle Eastern
Ingredients
- 2 cups water
- 1 tbsp Kosher salt
- 1/2 tbsp granulated sugar
- 1 cup white vinegar
- 2 large turnips (peeled and cut into 1/2-inch batons)
- 1 small beet (peeled and cut into 1-inch chunks)
- 4 cloves garlic (peeled and sliced)
- 1 tsp peppercorn
Instructions
- In a saucepan over medium-high heat, combine water, kosher salt, and sugar. Stir until dissolved.
- Add white vinegar and simmer on medium-low heat for 2 minutes before removing from heat to cool.
- Pack turnip batons in mason jars along with beet chunks and garlic slices.
- Pour cooled brine over the vegetables until fully submerged.
- Seal jars tightly and refrigerate for at least six days before enjoying.
Nutrition
- Serving Size: 1/4 cup (60g)
- Calories: 25
- Sugar: 2g
- Sodium: 460mg
- Fat: 0g
- Saturated Fat: 0g
- Unsaturated Fat: 0g
- Trans Fat: 0g
- Carbohydrates: 6g
- Fiber: 2g
- Protein: 0g
- Cholesterol: 0mg