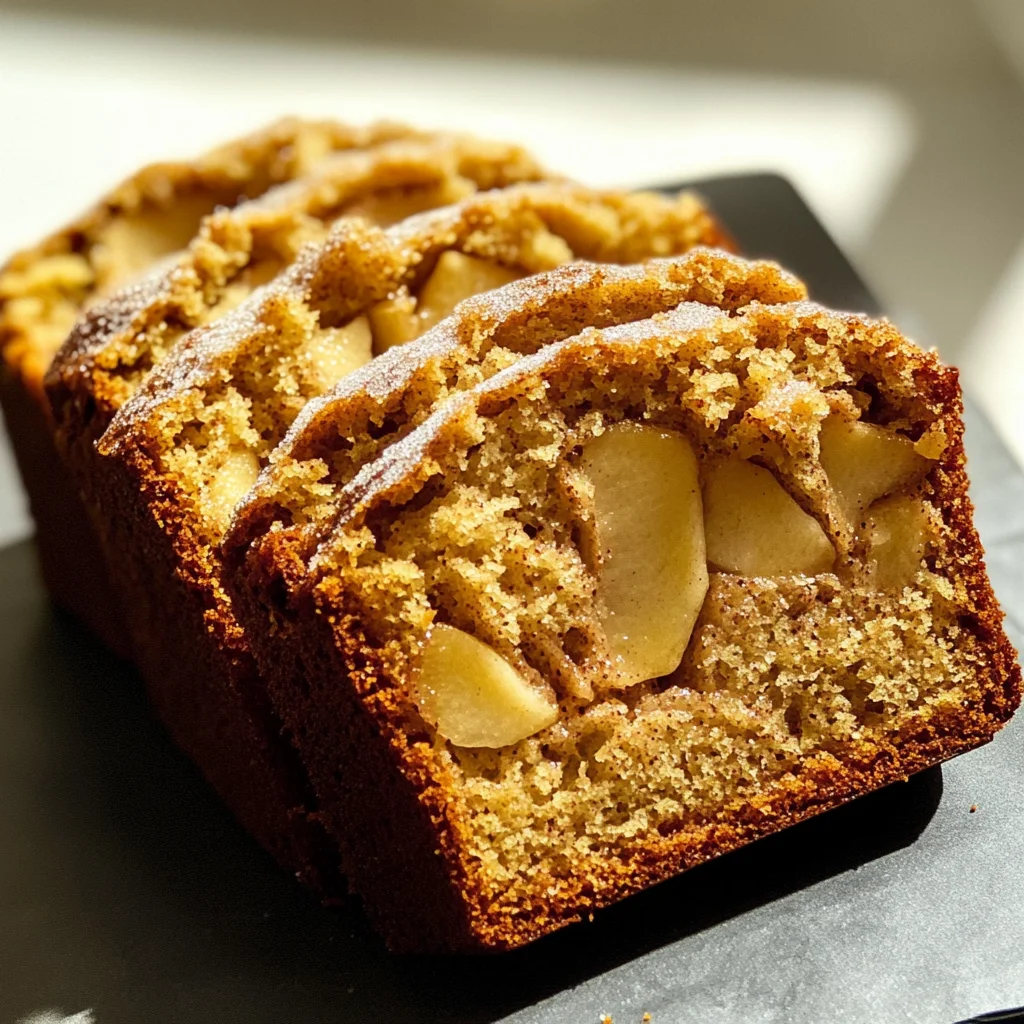
Apple Bread
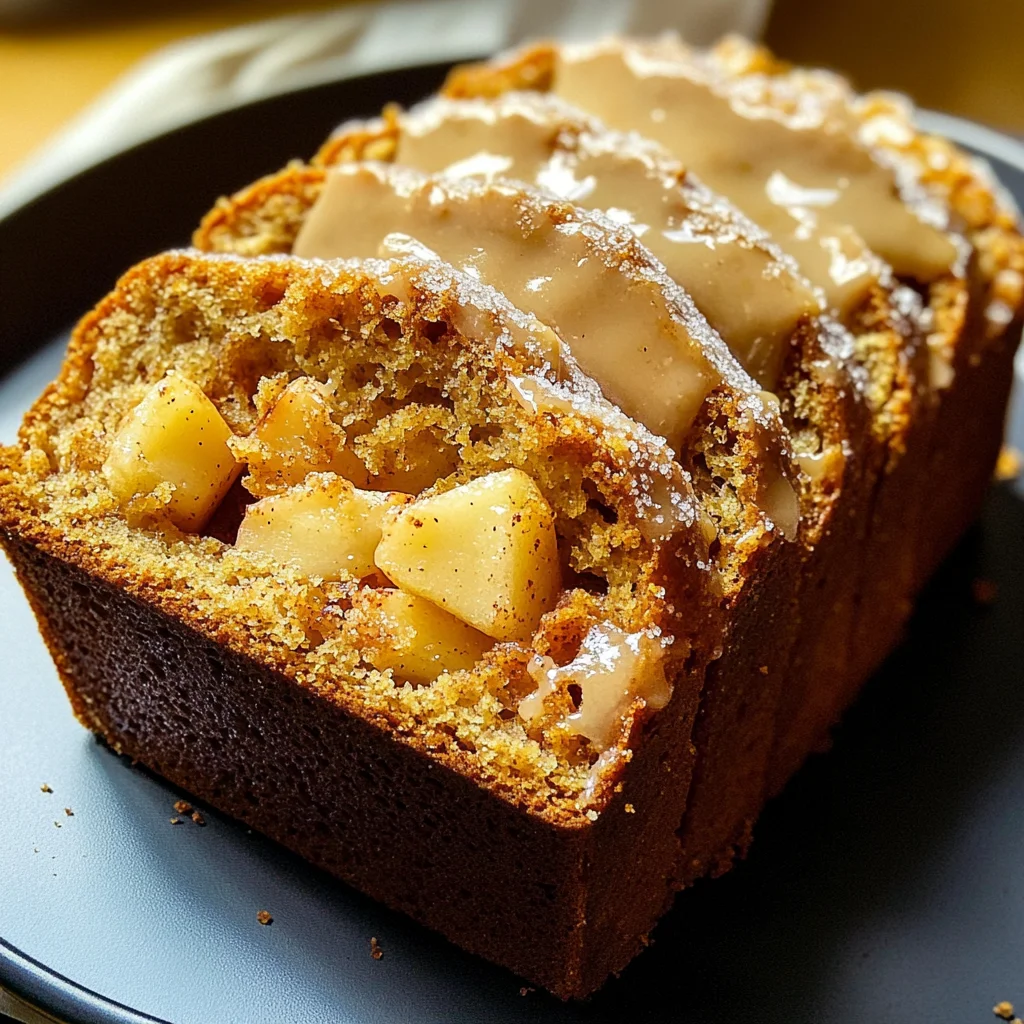
There’s something profoundly enchanting about the smell of baking bread wafting through the house, isn’t there? It’s like a warm hug from the universe, wrapping you in comfort and nostalgia. Today, I want to share with you a recipe that has become a cherished part of my own kitchen repertoire: Apple Bread. This isn’t just any quick bread; it’s a delightful experience that melds the sweetness of ripe apples with the aromatic embrace of cinnamon. Picture this: golden-brown loaves emerging from the oven, their tops slightly crackled and dusted with sugar and spice. You can almost hear them whispering “slice me!” as you wait impatiently for them to cool, eager to taste that first bite. I promise you, it’s an experience that transcends mere sustenance; it celebrates the simple joys of life.
Apple Bread holds a special place in my heart because it’s not only delicious but also incredibly easy to make. With no yeast involved, this quick bread is perfect for those busy mornings or spontaneous baking cravings. The best part? It yields six mini loaves—perfect for sharing with friends or gifting to loved ones. Imagine wrapping a loaf in cheerful paper and delivering it to someone special; it’s like giving them a slice of your affection! This recipe is truly versatile, fitting seamlessly into breakfasts, brunches, or even as a delightful dessert after dinner. So gather your ingredients, roll up your sleeves, and let’s dive into this culinary journey together!
Apple Bread: A Cozy Slice of Fall
This Apple Bread recipe is an irresistible blend of sweet and spice that will have everyone coming back for seconds. Trust me when I say that each slice is bursting with tender apples and just the right hint of cinnamon—a combination that feels like autumn on your palate. Whether you’re baking for yourself or planning a cozy gathering with friends, this recipe will elevate your experience and fill your home with warmth and cheer.
Ingredients:
As we embark on this culinary adventure together, let’s take a moment to appreciate the star players—our ingredients! Each component contributes something unique to our Apple Bread, ensuring it turns out perfectly every time.
- 2 cups white granulated sugar. This sugar serves as the backbone of our recipe, providing sweetness that beautifully balances the tartness of the apples. When choosing sugar, opt for fine granulated sugar which dissolves easily into our batter. If you’re feeling adventurous or trying to cut down on refined sugars, you could substitute half with coconut sugar for a hint of caramel flavor.
- 4 cups all-purpose flour. The foundation of our bread! All-purpose flour gives structure and stability while ensuring our loaves rise beautifully without being too dense. When measuring flour, scoop it gently into your measuring cup and level it off; packing it down can lead to heavy bread—definitely not what we want here!
- 2 tablespoons baking powder. This ingredient is absolutely paramount for achieving that lovely rise in our quick bread. It acts as a leavening agent that creates tiny bubbles in the batter during baking, making each loaf light and airy rather than heavy like a brick! Be sure to check your baking powder’s expiration date; an old batch won’t give you the lift we need.
- 1 teaspoon salt. While seemingly insignificant at first glance, salt plays an essential role in enhancing flavors within our bread. It brings out the sweetness of the sugar and rounds out the overall taste profile beautifully. Don’t skip this step; it’s non-negotiable!
- 2 large eggs. Eggs are crucial not just for binding our ingredients but also for adding moisture and richness to our bread. They help create that tender crumb we all adore! When cracking eggs into your bowl, do so carefully—nobody wants bits of shell in their delicious bread!
- 2 cups milk. Milk acts as both a liquid base for our batter and adds moisture—ensuring our apple bread isn’t dry but instead incredibly moist and flavorful! If you prefer non-dairy options due to dietary needs or preferences, almond milk or oat milk work beautifully here as substitutes without sacrificing flavor.
- ⅔ cup vegetable oil. This liquid gold keeps our bread moist and tender by adding fat without any additional flavor interference—allowing those delicious apple notes to shine through! You can use other neutral oils if you prefer; sunflower oil or canola oil work well too.
- 1 cup apples (diced and peeled). Apples are undoubtedly the stars of our show! They add natural sweetness and texture while infusing each bite with juicy goodness—think about how they soften while baking but retain just enough bite so they don’t turn mushy! For best results, try using firm varieties like Granny Smith or Honeycrisp—they hold up beautifully during baking.
- 1 tablespoon ground cinnamon. Cinnamon is like a warm hug in spice form! Its aromatic qualities elevate this apple bread beyond basic levels—it’s what makes every slice feel comforting and familiar yet still exciting at the same time.
- ⅔ cup white granulated sugar (for topping) & 1 teaspoon ground cinnamon (for topping): This final sprinkling creates an utterly intoxicating crust on top of each loaf—a crunchy surface contrasting perfectly with soft interior bites!
Now that we’ve gathered all these wonderful ingredients let’s move on to what you’ll need to bring this Apple Bread masterpiece to life!
Equipment You’ll Need:
Having the right tools at hand truly makes all the difference when embarking on any cooking adventure! While these items aren’t ingredients per se, they are essential partners in creating something wonderful.
- Mixing bowls – A few good mixing bowls in various sizes will help keep things organized while allowing you space to whisk together dry ingredients separately from wet ones before combining them later on.
- Stand mixer (or hand mixer) – While you can mix everything by hand if you’d like some arm exercise (and I totally believe in doing things manually sometimes!), using a stand mixer simplifies blending those wet ingredients until perfectly combined—and saves time too!
- Loaf pans – Since we’re making mini loaves today (which I find just adorable), ensure your pans are greased well beforehand so nothing sticks! You could also use silicone molds if that’s more accessible.
- Whisk & spatula – A whisk helps combine dry ingredients quickly while ensuring no lumps remain—this step is crucial for achieving even texture throughout your batter! A spatula assists with folding those luscious diced apples into everything smoothly without overmixing.
With all these essentials ready at hand let’s dive into crafting this delicious Apple Bread!
Step 1: Preheat Your Oven & Prepare Your Pans
First things first: preheating your oven is critical because we want everything ready once we’ve mixed up our batter—the last thing we want is warm batter sitting around while waiting for an oven to catch up! Set it at 350°F (175°C) so it’ll be nice and hot when we’re ready for those beautiful loaves later on! Don’t forget also about greasing those loaf pans thoroughly; using either vegetable oil spray or butter ensures nothing sticks later—which would be such a tragedy after all this hard work!
Step 2: Combine Dry Ingredients
In a medium mixing bowl (or one that’s large enough), whisk together two cups of white granulated sugar along with four cups of all-purpose flour along with two tablespoons of baking powder plus one teaspoon salt until evenly mixed throughout—this helps prevent clumping during mixing later on! Why do we separate these dry elements initially? Because doing so guarantees every ingredient gets properly distributed throughout before taking center stage once combined with wet components later down below—we’re aiming for perfection here folks!
Step 3: Mix Wet Ingredients
Now let’s shift gears toward whipping together some lovely wet elements inside another bowl using either stand mixer fitted with paddle attachment (my personal favorite!) Or handheld beaters if that’s what you’ve got handy instead—no judgment here at all! Crack open two large eggs then pour in two cups milk along with two-thirds cup vegetable oil before beating gently until they’re just combined—this process helps emulsify everything smoothly which means better texture down line when folding everything together afterward!
Step 4: Unite Dry & Wet Mixtures
Once those wet components are ready go ahead slowly add dry mixture straight into wet bowl gradually—it should come together quite nicely without overdoing things since overmixing leads us towards tough loaves instead fluffy ones beloved by everyone else around table who’ll inevitably gravitate towards them once cooled off slightly afterward cooling period finishes shortly thereafter… We want fluffy goodness here people—not dense bricks masquerading under guise “quickbread”! After mixed gently fold diced apples coated lightly cinnamon until evenly incorporated throughout batter lovingly made from scratch ourselves today…
Let’s keep going—you’re doing fantastic so far! We’ll continue mixing up this heartwarming recipe next…
Step 5: Pouring the Mixture – The Art of Combining Flavors
Now that you have your beautifully mixed batter, it’s time for one of my favorite parts—pouring this delightful mixture into your prepared loaf pans. This is where the magic truly begins! Take a moment to admire the thick, luscious batter; it should be just combined without any dry flour remaining. The key here is to fill each loaf pan to about two-thirds full. Why do we leave space at the top? As this apple bread bakes, it will rise beautifully, and you want to ensure there’s enough room for that delightful dome to form without spilling over. So grab a trusty spatula and gently scoop the batter into the pans.
As you pour, watch for those inviting chunks of diced apples peeking through the mixture. This visual cue not only signals their presence but also hints at the juicy bites awaiting you in every slice. I promise you; this step is crucial because those apples will bring moisture and sweetness that elevate your apple bread to extraordinary levels. Once you’ve filled all your pans, give them a gentle tap against the counter—this helps to release any air bubbles trapped within the batter, ensuring a lovely, even texture throughout your loaves.
Step 6: Swirling Sweetness – The Cinnamon-Sugar Topping
Now comes an utterly intoxicating step that elevates your apple bread from delicious to divine—the cinnamon-sugar topping! In a small bowl or measuring cup, combine two-thirds of a cup of granulated sugar with one teaspoon of ground cinnamon. This simple yet transformative mix adds warmth and depth, creating that classic fall aroma we all crave as soon as the leaves start turning golden.
Once combined, take a spoonful and sprinkle it generously over each filled loaf pan. But don’t just toss it on haphazardly; use a knife or skewer to gently swirl this sweet mixture into the batter. Why swirl? This technique allows those aromatic spices to infuse into the bread as it bakes, creating an irresistible crust that contrasts beautifully with the soft interior. Trust me on this—when you pull these loaves out of the oven, they’ll have that picturesque cinnamon swirl peeking through, beckoning everyone around to indulge in a slice (or two!).
Step 7: Baking Your Perfect Apple Bread – The Anticipation Builds
Now that everything is prepped and looking oh-so-tempting, it’s time to send these mini loaves into the oven! Preheat your oven to 350°F (175°C) if you haven’t done so already—this temperature is absolutely paramount for achieving that perfect golden-brown crust while keeping the inside moist and fluffy. Place your loaf pans on the middle rack of your preheated oven; this is where they’ll get just enough heat circulation for even baking.
You’ll want to bake them for approximately 40 minutes; however, every oven can vary slightly in temperature—so keep an eye on them! A good rule of thumb is to check for doneness by inserting a toothpick or a knife into the center of one loaf; if it comes out clean or with just a few moist crumbs clinging to it, you’re right on track! If there’s wet batter adhering to it, let them bake for another five minutes before checking again. It’s essential not to rush this step—patience is key when baking because you want those flavors fully developed and harmonized.
Step 8: Cooling & Savoring – The Final Touches
Once your kitchen is filled with that heavenly aroma of fresh-baked apple bread—a scent that’s almost like a warm hug—you’ll want to resist diving in immediately (though I know how tempting it can be!). Allow your loaves to cool in their pans for about 10-15 minutes before transferring them onto a wire rack or cutting board. This resting period is crucial because it lets steam escape from beneath your bread while preventing sogginess at the bottom.
After they have cooled slightly but are still warm enough to embrace their beautiful aroma, it’s time for slicing! When cutting into these loaves, you’ll notice how perfectly tender and moist they are inside; those little pieces of apple will melt in your mouth with each bite. You might even find yourself lost in memories shared over slices of homemade bread with loved ones—after all, food has an incredible way of connecting us all!
Next Major Phase – Gifting & Enjoying Your Apple Bread
What makes this recipe truly special is its versatility—it’s perfect for breakfast gatherings, cozy evenings by the fire, or even as thoughtful gifts wrapped in parchment paper and tied with twine. Whether you’re treating yourself or sharing with friends and family, I guarantee this apple bread will bring smiles all around.
So go ahead! Slice up those mini loaves and serve them warm or at room temperature alongside some fresh butter or whipped coconut cream if you’re feeling indulgent. Each bite will remind you why baking brings such joy—not just in creation but also in sharing goodness with others. Enjoy every moment spent savoring this deeply satisfying treat!
Storage and Enjoyment Tips for Your Apple Bread
Now that your kitchen is filled with the cozy aroma of freshly baked apple cinnamon bread, it’s time to savor every bite! This recipe not only delights the senses but also lends itself beautifully to sharing – whether you’re gifting a loaf to a friend or enjoying it yourself over a leisurely breakfast. But what about those delightful leftovers? Let’s dive into how to make sure your apple bread stays as scrumptious as the moment it came out of the oven.
Storing Leftover Apple Bread
To keep your beloved apple bread fresh and moist, I recommend storing it in an airtight container at room temperature. If you’re like me and want to stretch out that deliciousness, it can last for about 3 to 4 days, though I promise you, it’s often devoured long before then! A little trick I’ve learned over the years is to place a slice of bread inside the container; this helps maintain moisture levels and keeps everything wonderfully tender. And let me tell you, the taste after a day or two is still incredibly satisfying—those flavors meld together beautifully, creating that comforting essence we all crave. When you’re ready to enjoy a slice (or three!), simply pop it in the microwave for about 10-15 seconds or lightly toast it. The result? A warm, inviting treat that feels just like the first time you pulled it from the oven!
Freezing Apple Bread for Later
If you’re thinking ahead and want to save some of that apple goodness for another day, freezing is an excellent option! Start by letting your loaves cool completely before wrapping them tightly in plastic wrap or aluminum foil. Then, place them in a freezer-safe bag or container. This way, they’ll keep well for about 2 to 3 months without losing their charm! When you’re ready to indulge again, simply remove a loaf from the freezer and let it thaw overnight in the refrigerator or on your countertop for a few hours. Trust me on this: having homemade apple bread stashed away feeds not just your hunger but also your soul on those chilly days when nothing else will do. It’s truly convenient and ensures that you always have something special on hand!
Apple Bread
Apple Bread is a delightful, no-yeast quick bread that captures the essence of fall with every bite. Bursting with tender apples and warm cinnamon, this recipe is not only easy to make but also perfect for sharing. Imagine golden-brown mini loaves emerging from your oven, their sweet aroma wrapping around you like a cozy blanket. Whether served as a breakfast treat or a thoughtful gift, this apple bread promises to bring warmth and joy to any occasion. With just the right balance of sweetness and spice, it’s an invitation to indulge in life’s simple pleasures. Gather your ingredients and let’s embark on this delicious baking adventure!
- Prep Time: 20 minutes
- Cook Time: 40 minutes
- Total Time: 1 hour
- Yield: Approximately 36 slices from six mini loaves 1x
- Category: Dessert
- Method: Baking
- Cuisine: American
Ingredients
- 2 cups white granulated sugar
- 4 cups all-purpose flour
- 2 tablespoons baking powder
- 1 teaspoon salt
- 2 large eggs
- 2 cups milk (dairy or non-dairy)
- ⅔ cup vegetable oil
- 1 cup diced and peeled apples (e.g., Granny Smith or Honeycrisp)
- 1 tablespoon ground cinnamon
Instructions
- Preheat your oven to 350°F (175°C) and grease mini loaf pans.
- In a medium bowl, whisk together sugar, flour, baking powder, and salt.
- In another bowl, mix eggs, milk, and vegetable oil until well combined.
- Gradually add the dry ingredients to the wet mixture until just combined; fold in the diced apples coated with cinnamon.
- Pour batter into prepared pans filling them two-thirds full.
- Combine additional sugar and cinnamon; sprinkle over the top and swirl gently with a knife.
- Bake for about 40 minutes or until a toothpick comes out clean.
Nutrition
- Serving Size: 1 slice (50g)
- Calories: 180
- Sugar: 14g
- Sodium: 120mg
- Fat: 7g
- Saturated Fat: 1g
- Unsaturated Fat: 6g
- Trans Fat: 0g
- Carbohydrates: 27g
- Fiber: 1g
- Protein: 3g
- Cholesterol: 25mg