Apricot White Chocolate Cookies
There’s something truly magical about baking, isn’t there? The way the aroma of warm cookies wafts through the house, drawing everyone closer like a moth to a flame. In my kitchen, Apricot White Chocolate Cookies have become a cherished tradition, a delightful bridge between the sweet and slightly tangy notes of dried apricots and the creamy decadence of white chocolate. Every time I bake these cookies, I’m reminded that food is not just sustenance; it’s an experience, a celebration of flavors and memories. Imagine biting into these golden delights, where each chew reveals bursts of sweetness mingled with rich chocolate—it’s a revelation that dances on your taste buds. This recipe has been passed down through generations in my family, and I promise you, it will bring joy to your holiday gatherings or cozy evenings at home.
The beauty of these cookies lies not only in their deliciousness but also in their versatility. They’re perfect for cookie exchanges during the festive season; they bring warmth to holiday parties and are even splendid as an afternoon treat with tea or coffee. The combination of chewy apricots and luscious white chocolate makes them utterly intoxicating—I’ve seen friends devour them within minutes! What I love most is how simple yet extraordinary they are; this recipe encapsulates both comfort and indulgence. So grab your apron, because we’re about to embark on a culinary journey that will fill your home with love and delicious scents.
Apricot White Chocolate Cookies: A Sweet Symphony of Flavor
Let’s dive into this delightful recipe together! Baking these Apricot White Chocolate Cookies is not merely about following steps; it’s about creating something beautiful that you can share with loved ones. As we embark on this culinary adventure, remember to savor each moment—the chopping of apricots, the creaming of butter and sugars—it all matters in crafting the perfect cookie.

Ingredients:
Embarking on this baking journey requires quality ingredients that sing together in perfect harmony. Each one plays an essential role in bringing our Apricot White Chocolate Cookies to life.
- 1 cup (2 sticks or 226g) unsalted butter, softened to room temperature. This is crucial for achieving that light and airy texture we’re aiming for in our cookies. If your butter is too cold, it simply won’t cream properly with the sugars, leaving you with dense cookies instead of the fluffy delights we desire. Conversely, if it’s melted, you’ll end up with cookies that spread too much during baking—a real bummer! Opt for high-quality unsalted butter for richer flavor; European-style butter can elevate your cookies even further thanks to its higher fat content.
- 1/2 cup granulated sugar. This ingredient adds sweetness while also contributing to the overall texture of the cookie. Granulated sugar helps create a crisp edge while keeping the center chewy—just what we want! When selecting sugar, aim for finer granules as they dissolve more readily into the batter during mixing, enhancing that smooth mouthfeel we crave.
- 1 1/2 cups brown sugar (packed). Brown sugar brings moisture and depth to our cookies due to its molasses content. It creates those irresistible chewy centers while giving our cookies a beautiful caramel-like flavor profile. Be sure to pack it firmly into your measuring cup; this ensures you get every bit of sweetness needed for balance with the other ingredients.
- 2 large eggs. Eggs are the binding agents here—they hold everything together while providing richness and moisture. Make sure your eggs are at room temperature before adding them into the mix; this step allows for better emulsification when combined with butter and sugars.
- 2 1/2 tsp real vanilla extract (no imitation vanilla flavoring). The quality of vanilla extract can make or break your baked goods! Real vanilla adds warmth and complexity that’s simply irreplaceable by imitation varieties. Look for pure vanilla extract labeled pure rather than imitation—it may be pricier but trust me, it’s worth every penny for those magic moments when you take your first bite!
- 3 1/2 to 4 cups UNBLEACHED all-purpose flour. Unbleached flour not only contributes structural integrity but also maintains a delicate texture without toughening our cookies like bleached flour would. Start with 3 1/2 cups; depending on humidity levels or how packed your measuring cup is, you might need a little extra flour to achieve that perfect dough consistency!
- 3/4 tsp sea salt. Salt enhances all flavors within our cookies—it’s an absolute game-changer! It balances sweetness while elevating other flavors at play like the buttery notes from our fat source and richness from chocolate.
- 1 tsp baking soda & 1 tsp baking powder. These two leavening agents work synergistically to provide lift while ensuring our cookies don’t turn out flat as pancakes! Baking powder acts quickly when wet ingredients are introduced while baking soda neutralizes acidity (hello brown sugar!)—this combination guarantees perfectly risen treats!
- 2 cups dried apricots (chopped). Dried apricots add wonderful sweetness along with chewy bites throughout each cookie—truly a match made in heaven! Soak them briefly in hot water before use; this process rehydrates them enough so they don’t dry out during baking but remain juicy within those golden edges.
- 2 cups white chocolate chips (not vanilla chips or premiere white baking chips). The creamy richness of quality white chocolate adds an indulgent touch that pairs beautifully with tangy apricots—we can’t skip this step! Choose high-quality chocolate chips here as they melt beautifully without seizing up during mixing or baking.
- 1 cup almonds (slivered or sliced). Almonds lend nutty crunchiness which contrasts wonderfully against soft textures from both fruit and chocolate pieces alike! Plus they add depth without overpowering existing flavors—what’s not to love? If you’re not keen on nuts or have allergies present in your circle of family/friends feel free to leave them out completely!
Equipment You’ll Need:
Now that we’re set on ingredients let’s talk tools—the unsung heroes behind any successful baking endeavor! Having reliable equipment makes such a difference in ensuring everything runs smoothly while avoiding last-minute scrambles when you’re knee-deep into mixing dough!
- **Mixing bowl – An essential tool where all our magic happens! Opt for larger bowls made from glass or stainless steel which help retain warmth while allowing easy mixing without splattering everywhere—as someone who learned this lesson the hard way multiple times, trust me on this!
- **Electric mixer – A trusty companion when it comes time to cream butter & sugars together smoothly! Whether handheld or stand mixer works fine here; just ensure whatever option used has sufficient power so no lumps remain after incorporating eggs & vanilla into mixture effortlessly!
- **Measuring cups & spoons – Precision matters immensely in baking! Invest in good-quality measuring tools since accuracy directly affects outcomes; avoid guessing measurements wherever possible—it pays off big time later down line when biting into perfectly baked cookies!
- **Baking sheets – A sturdy surface meant specifically for holding uncooked batches ready for oven action awaits us soon enough! Non-stick options work wonders preventing any sticky situations from arising post-baking while allowing easy transfer onto cooling racks once done too!
With our ingredients prepped alongside reliable equipment at hand let’s roll up those sleeves—we’re about ready now!
Preparing the Apricot White Chocolate Cookies
Step 1: Preheat Your Oven
Before diving headfirst into mixing up this heavenly dough, let’s start by preheating our oven to 350°F (175°C)—this step may seem minor but trust me when I say it’s absolutely paramount! Preheating ensures even cooking across all batches once placed inside—if you skip this crucial step expect unevenly baked results ranging from gooey middles paired alongside burnt edges—not exactly what we’re aiming for here! While waiting patiently for oven warmth enveloping us I recommend preparing dried apricots next since soaking them helps yield juicier bites later—so grab those scissors/chopping board ready!
Step 2: Plump Up Those Apricots
Now onto those dried apricots waiting ever-so-patiently nearby—let’s chop them up into small bits first then place into bowl filled with hot water ideally around room temp so they can plump back up nicely over next ten minutes soaking away blissfully until rehydrated fully before draining thoroughly afterward (be sure not skipping either part here!). This process breathes new life into previously dried-out fruits making each nibble burst forth vibrantly when bitten down upon amidst soft textures found within cookie itself later instead leaving us disappointed once tasted due lack thereof freshness present otherwise—a true win-win situation here folks!
Step 3: Cream Butter & Sugars Together
Now comes one of my favorite parts—the enchanting creaming process where we’ll transform softened butter along granulated & brown sugars into luscious fluffy goodness using electric mixer until smooth consistency appears right before eyes usually lasting around three minutes total depending upon chosen device speed setting utilized here carefully monitoring progress throughout ensuring no lumps remain intact along way either—it should look pale yellowish hue almost resembling cloud-like texture eventually formed amidst swirling blades whirring away cheerfully nearby!
Step 4: Incorporate Remaining Wet Ingredients
Next introduce those lovely eggs alongside aromatic vanilla extract bringing forth additional depth flavors harmonizing beautifully amongst buttery notes already present inside bowl now as well stirring gently yet thoroughly until fully combined before moving forward toward next phase ahead—don’t rush through this step folks please allow time necessary ensuring everything melds together seamlessly otherwise risk compromising final outcome achieved later down line once baked resulting instead disappointment rather than joyous triumph celebrating successful bake-off experience overall too!
And there we have it—a delightful start towards crafting these beloved Apricot White Chocolate Cookies full of love and care! Stay tuned as we continue through every step until perfection achieved awaiting delicious rewards ahead waiting eagerly just beyond horizon beckoning us onward still…
Step 5: The Creamy Union of Ingredients
Now that your apricots are plump and ready to join the party, it’s time to bring together the stars of the show: butter, sugars, eggs, and vanilla. In a large mixing bowl—preferably one that feels sturdy in your hands—combine 1 cup of softened unsalted butter with 1/2 cup of granulated sugar and 1 1/2 cups of packed brown sugar. This is where the magic begins! Using an electric mixer, beat these ingredients on medium speed until they transform into a fluffy mixture, which should take about 2-3 minutes. You want this blend to be light and airy because it will create a delightful texture in our cookies; think of it as giving them a warm hug before they even go into the oven.
Next, crack open 2 large eggs, one at a time, allowing each to fully incorporate before adding the next. This step is crucial because each egg adds moisture and richness, helping to bind our cookie dough together. Then, pour in 2 1/2 teaspoons of real vanilla extract, which you’ll want to make sure is genuine—trust me on this! The aroma alone will transport you to a cozy kitchen filled with warmth. Continue mixing until everything is perfectly combined and smooth. At this point, don’t rush; take your time to ensure every grain of sugar is dissolved into the buttery goodness. This stage sets the foundation for your cookies’ flavor profile—rich, sweet, and utterly irresistible.
Step 6: The Flour Power
Once you have that luscious mixture ready, it’s time to add our dry ingredients—this is where we start building structure in our cookies. Begin by measuring out 3 1/2 to 4 cups of unbleached all-purpose flour; I recommend starting with the lower amount. Why unbleached? Well, it retains more nutrients and contributes to a softer texture in baking! Sift the flour if you like (though not strictly necessary), then sprinkle in 3/4 teaspoon of sea salt, 1 teaspoon of baking soda, and 1 teaspoon of baking powder right into the bowl. These leavening agents are essential; they help our cookies rise beautifully while contributing to that perfect chewy texture we all crave.
Using a wooden spoon—my preferred tool for this kind of mixing—gently fold in the flour mixture until just combined. It’s important not to overmix here; otherwise, your cookies can turn out tough instead of tender! You want just enough stirring until you no longer see dry patches of flour but avoid breaking down any gluten too much. Trust me on this: patience pays off! When finished mixing, you should have a lovely dough that feels slightly sticky but holds together well.
Step 7: The Sweet Additions
Now comes my favorite part—the moment when we introduce those delightful chopped apricots, white chocolate chips, and almonds into our dough! First things first: remember those plumped-up apricots? Drain them thoroughly after their hot bath—they should feel soft yet firm enough to hold their shape when incorporated into the dough. Now measure out 2 cups of chopped dried apricots and toss them right into your mixing bowl along with 2 cups of white chocolate chips (not just any chips here; make sure they’re quality white chocolate) and finally 1 cup of slivered or sliced almonds for that extra crunch.
With your wooden spoon still in hand, gently fold these ingredients into the dough until evenly distributed. This step adds layers upon layers of flavor and texture—not only do you get that sweet burst from the apricots with every bite but also creamy notes from the melted white chocolate chips paired with a delightful crunch from those gorgeous almonds! You might find it helpful to take a moment here and truly embrace the beautiful colors—the golden yellow from the apricots against the creamy white chocolate is simply stunning! As you mix, keep an eye out for any dry spots or clumps; ensuring an even distribution will lead to cookies that are beautifully balanced in flavor.
Step 8: Shaping Your Future Cookies
Once everything is thoroughly mixed (and believe me when I say this may take some elbow grease!), it’s time for shaping those delicious dough balls that will soon become heavenly cookies. Take a generous scoop of dough—about golf ball-sized would be perfect—and roll it gently between your palms until it’s smooth. This creates surface tension which helps keep your cookies chewy on the inside while forming those lovely crispy edges as they bake.
Place each dough ball about two inches apart on greased cookie sheets—don’t crowd them! These little gems need their space to spread out while baking. If you’re feeling particularly creative or festive today, consider using an ice cream scoop for uniformity; this ensures even baking among all your cookies! As you shape them up, try not to press them flat—keeping them rounded allows for that delightful domed top once baked. It’s important not just for aesthetics but also for maintaining that perfect chewy interior we all dream about when biting into a cookie!
Next Major Phase – Baking Your Perfect Apricot White Chocolate Cookies
Step 9: Baking Time Bliss
With all your cookie dough shaped and waiting patiently on the cookie sheets, we’re almost at that blissful moment where fragrance fills your home as these beauties bake away! Preheat your oven to 350°F (175°C) if you haven’t already done so—this temperature is absolutely paramount for achieving that golden edge while keeping centers delightfully soft.
Pop those trays into the oven and set your timer for 13-15 minutes. About halfway through baking—at around six minutes—you’ll want to rotate your cookie sheets between racks in the oven. This ensures even cooking since most ovens can have hot spots where some cookies might bake faster than others. Keep an eye on their edges; they should start turning light brown while remaining pale in color at their centers—that’s when you know they’re nearing perfection!
When they’re done baking (the edges should be lightly browned), remove them from the oven but don’t rush this step either—allow them to cool on the sheets for about five minutes before transferring them onto wire racks or platters. Cooling is crucial because it allows residual heat to finish cooking those centers without overbaking them during transfer! Plus, nothing beats indulging in warm cookies fresh from the oven with gooey white chocolate melting against tangy apricots—it’s pure bliss!
So there you have it—the delightful journey toward creating mouthwatering Apricot White Chocolate Cookies that are destined to become one of your favorites! I promise you won’t regret sharing these at holiday parties or enjoying them during cozy nights at home with family or friends. Enjoy every bite—it’s an experience worth savoring!
Storage and Enjoyment Tips for Your Apricot White Chocolate Cookies
Now that your kitchen is filled with the intoxicating aroma of freshly baked Apricot White Chocolate Cookies, I can’t help but feel an overwhelming excitement for you to dive right in! But before you do, let’s talk about how you can savor these delightful treats long after they come out of the oven. The beauty of these cookies is not just in their immediate enjoyment but also in how well they store. Trust me, knowing how to preserve their deliciousness will make your heart sing as you relish them over the next few days or even weeks!
Storing Leftover Apricot White Chocolate Cookies
To keep your cookies fresh and utterly scrumptious, I recommend placing them in an airtight container. This is crucial because it locks in moisture while keeping unwanted air at bay, allowing each bite to remain soft and chewy. If you’re like me and love a little extra texture, consider tossing a slice of bread into the container; it works wonders by absorbing excess moisture without sacrificing your cookies’ delightful chewiness! When stored this way, your Apricot White Chocolate Cookies will maintain their deliciousness for up to a week at room temperature. However, I must warn you—their divine flavor tends to make them disappear faster than you might expect! If by some miracle there are leftovers after a few days, you’ll find that they still taste fantastic, with the flavors gently melding together into an even more profound symphony of sweetness. If you’re looking for a warm treat later on, pop one in the microwave for just a few seconds; you’ll be rewarded with a gooey center that makes every moment feel like a cozy hug.
Freezing Apricot White Chocolate Cookies for Later
If you’re preparing for a future craving or holiday festivities, freezing these cookies is an excellent option! Begin by allowing your cookies to cool completely—this step is non-negotiable as it prevents ice crystals from forming during freezing. Once cooled, simply place them in a single layer in a freezer-safe bag or container, ensuring they’re sealed tightly to prevent freezer burn. I promise you they can stay frozen for up to three months without losing any of their decadent flavor! When that sweet tooth strikes or when unexpected guests arrive, just take out as many cookies as you’d like and allow them to thaw at room temperature or pop them directly into the oven for a quick reheating session. This convenience factor is absolutely paramount during busy times—it means you can enjoy homemade treats anytime without the fuss of baking from scratch!
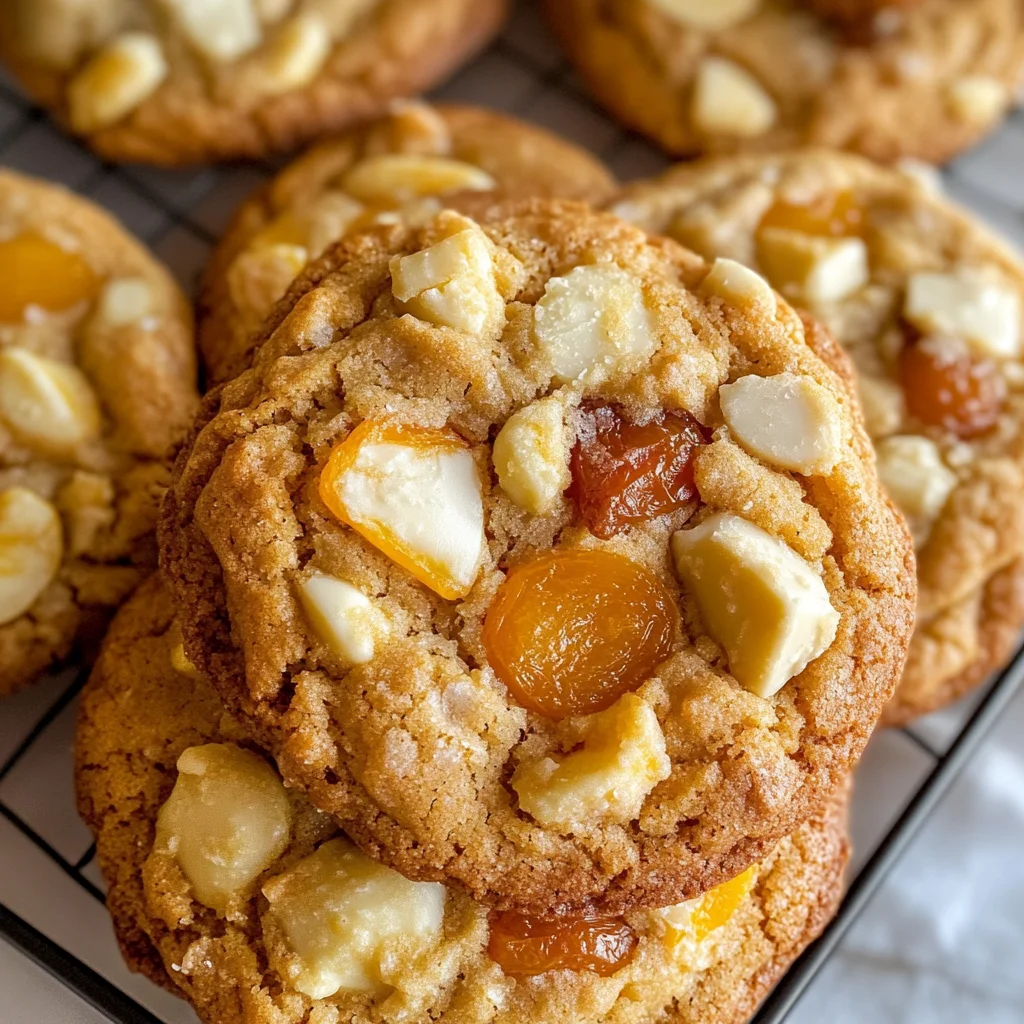
Apricot White Chocolate Cookies

Indulge in the delightful world of Apricot White Chocolate Cookies, where chewy, tangy dried apricots meet creamy white chocolate for an unforgettable treat. These cookies are not only a festive favorite but also perfect for cozy evenings at home. Their warm aroma will fill your kitchen with comfort and joy, making them an ideal companion for coffee or tea. Easy to prepare and sure to impress, this recipe is perfect for cookie exchanges or family gatherings. With a combination of soft textures and vibrant flavors, these cookies are destined to become a beloved tradition in your home.
- Prep Time: 20 minutes
- Cook Time: 15 minutes
- Total Time: 35 minutes
- Yield: Approximately 24 cookies 1x
- Category: Dessert
- Method: Baking
- Cuisine: American
Ingredients
- 1 cup unsalted butter (softened)
- 1/2 cup granulated sugar
- 1 1/2 cups brown sugar (packed)
- 2 large eggs
- 2 1/2 tsp vanilla extract
- 3 1/2 to 4 cups unbleached all-purpose flour
- 3/4 tsp sea salt
- 1 tsp baking soda
- 1 tsp baking powder
- 2 cups dried apricots (chopped)
- 2 cups white chocolate chips
- 1 cup slivered almonds
Instructions
- Preheat your oven to 350°F (175°C).
- Soak chopped dried apricots in hot water for about 10 minutes; then drain.
- In a large mixing bowl, cream together softened butter, granulated sugar, and brown sugar until fluffy.
- Add eggs one at a time, followed by vanilla extract; mix until smooth.
- In a separate bowl, whisk together flour, salt, baking soda, and baking powder.
- Gradually incorporate the dry ingredients into the wet mixture until just combined.
- Fold in soaked apricots, white chocolate chips, and slivered almonds.
- Scoop dough onto lined baking sheets about two inches apart.
- Bake for 13-15 minutes or until edges are lightly browned; let cool on sheets for five minutes before transferring to wire racks.
Nutrition
- Serving Size: 1 cookie
- Calories: 180
- Sugar: 12g
- Sodium: 85mg
- Fat: 8g
- Saturated Fat: 4g
- Unsaturated Fat: 3g
- Trans Fat: 0g
- Carbohydrates: 25g
- Fiber: 1g
- Protein: 2g
- Cholesterol: 20mg