Authentic Thai Yellow Curry with Chicken
Craving some authentic Thai yellow curry? Don’t have the time to take an island vacation? Well, this simple, spicy, and delicious recipe will take your tastebuds on a journey to Thailand, and you don’t even have to leave your own kitchen. Imagine walking into your home, where the warm aroma of coconut milk and spices wafts through the air, wrapping you in a comforting embrace. This isn’t just a meal; it’s an experience that transports you to bustling markets filled with vibrant colors and scents that dance together in perfect harmony. Each spoonful of this Authentic Thai Yellow Curry with Chicken is like a little hug for your soul, filled with flavors that sing and spice that delights.
As I share this recipe with you, my dear friend, I want you to know that cooking is not just about following instructions; it’s about embracing creativity and finding joy in each step. The beauty of this dish lies in its ability to evoke memories—perhaps of sun-soaked afternoons in Thailand or cozy nights spent around the dinner table with loved ones. It’s a symphony of flavors, with tender chicken enveloped in a luscious sauce that balances sweetness and spice effortlessly. Trust me when I say that once you master this dish, it will become a cherished staple in your culinary repertoire.
Authentic Thai Yellow Curry with Chicken: A Flavorful Journey to Thailand
Let’s embark on this culinary adventure together! This Authentic Thai Yellow Curry with Chicken combines fragrant spices, creamy coconut milk, and succulent chicken for a dish that is wonderfully satisfying yet surprisingly easy to prepare. Whether you’re hosting friends or enjoying a quiet night in, this vibrant curry promises to impress and satisfy all at once.
Ingredients:
As we dive into creating this vibrant yellow curry, let’s gather our ingredients! Each component plays a vital role in crafting a dish that’s not only delicious but also deeply nourishing.
- 1 tbsp virgin coconut oil. This ingredient is like liquid gold in the world of Thai cooking! Virgin coconut oil imparts a subtle sweetness and rich flavor while being incredibly healthy. It has a high smoke point, which means it can withstand the heat without breaking down and losing its beneficial properties. When heated properly, it creates an aromatic base for our curry paste to bloom beautifully.
- 4 tbsp yellow curry paste. Ahhh, the star of our show! Yellow curry paste is a blend of spices such as turmeric, coriander, cumin, lemongrass, and galangal. It brings warmth and depth to the dish while offering just the right amount of heat without overwhelming your palate. When selecting your curry paste, look for high-quality brands or fresh versions if available—they make all the difference!
- 2 15-ounce cans of coconut milk (high quality). Here’s where we find our creamy richness! Coconut milk adds an indulgent texture and balances out the spices beautifully. Look for full-fat versions for maximum creaminess; light coconut milk can be used if you’re watching calories but may not lend the same luxurious mouthfeel. The first can’s solid cream layer is particularly important—don’t skip it!
- 1 or 2 cups chicken stock. This liquid gold serves as our comforting broth base. The amount depends on how thick you prefer your curry; less stock yields a richer texture while more stock gives you a soupier consistency that’s perfect for swooping up with jasmine rice later on.
- 4 carrots, peeled and sliced into 1/8″ rounds. Carrots add vibrant color along with natural sweetness that balances out the spices beautifully. Their slight crunch holds up well during cooking but will soften enough to meld seamlessly into every bite.
- 4 medium-size potatoes, peeled and cut into bite-size pieces. Potatoes act as little sponges—absorbing all those delicious flavors while providing heartiness to the dish. Opt for yellow or Yukon Gold potatoes for their buttery texture; they hold their shape well without turning mushy during cooking.
- 1 yellow onion, sliced into wedges then halved. Onions bring essential aromatics that form the backbone of many dishes—including our curry! They caramelize gently during cooking to release their natural sugars which contribute sweetness and complexity that enhances every bite.
- 2 chicken breasts, very thinly sliced. Chicken breast is lean yet provides protein-rich substance for our dish without overpowering it with heaviness. Slicing them thin ensures rapid cooking—keeping them tender rather than dry—a crucial factor in achieving curry perfection.
- 1.5 tsp fish sauce, plus more to taste. Fish sauce may sound intimidating at first glance—but don’t be put off! It adds umami depth that elevates flavors from good to extraordinary—the secret ingredient you didn’t know you needed! Adjust according to your taste preferences; trust me—it’s worth experimenting!
- 3/4 tsp salt, plus more to taste. Salt might seem simple but it’s absolutely paramount! It enhances all those lovely flavors we’ve incorporated so far; however be mindful not too oversalt until you’ve had time to adjust after cooking!
- 1.5 tsp sugar, plus more to taste. Sugar balances out acidity from other ingredients while enhancing overall flavor profiles across dishes like ours here today—use sparingly but mindfully!
- Cilantro, for garnish—fresh cilantro adds brightness both visually & flavor-wise at serving time!
- Lime wedges, for garnish—these zesty jewels elevate each bite by adding refreshing acidity!
- Serve with jasmine rice—this fragrant rice absorbs savory sauces beautifully while its soft texture complements each spoonful perfectly!
Equipment You’ll Need:
Having the right tools makes creating any dish smoother—and trust me when I say they are essential partners in bringing your culinary masterpiece alive! While they may not be ingredients per se—each piece contributes significantly towards success!
- Large pot – A sturdy pot is crucial for simmering our curry evenly without scorching it onto surfaces as things bubble away joyfully inside! Choose one that holds sufficient volume since we’ll have lots going on here!
- Wooden spoon or spatula – A trusty wooden spoon allows gentle stirring without scratching up nonstick surfaces while providing control over temperature regulation throughout various steps involved here today!
- Sharp knife – Having sharp knives helps slice through chicken & veggies smoothly—it makes prep much easier—and reduces risk injury from dull blades slipping around unexpectedly!
With these tools at hand—you’re ready embark on this delightful adventure together; let’s get started on preparing our Authentic Thai Yellow Curry with Chicken!
Step 1: Heating Up Your Flavor Base
In a large pot over medium-high heat—let’s add that luscious tablespoon of virgin coconut oil! As it melts down gracefully into shimmering liquid gold—you’ll notice how fragrant aromas fill your kitchen instantly when combined with yellow curry paste shortly thereafter too! Stir-fry this mixture carefully until fragrant (about two minutes), taking care not allow anything stick stubbornly onto bottom surfaces—scrape gently along edges using wooden spoon as needed—it’s important because those bits carry immense flavor we want incorporated fully throughout dish later on too!
Step 2: Bringing In The Creamy Goodness
Now comes one of my favorite parts: gently spooning out solid cream layer from top our coconut milk cans first before mixing rest below into pot alongside prepared broth too! Letting these rich fats fry alongside spices creates divine aromas while melding flavors harmoniously thereby setting stage perfection further ahead down line—I promise you won’t regret giving this step ample attention either—as everything begins bubbling away blissfully together next step onward…
Step 3: Introducing Our Veggies
Next up—we’re stirring in those beautiful potato pieces right away making sure they get coated nicely within flavorful sauce formed thus far already too; patience pays dividends here friends so take care allowing them cook halfway through before adding sliced carrots & onion wedges afterward too—they’ll add color crunch delightfully contrasting textures amidst otherwise creamy backdrop surrounding them—that balance keeps things exciting all around dinner table everyone loves gathering ’round eventually…
Step 4: Perfecting Our Protein
Once carrots are almost fork-tender—a mere minute or two left remaining—we’ll now introduce thinly sliced chicken breast pieces straightaway directly atop veggies simmering inside pot currently… Pay attention closely at timing here because overcooking leads dryness ruining tenderness level achieved thus far already—not long until cooked perfectly tender either so stay vigilant watching closely serve soon after done ensuring results remain optimum throughout entire process rather than rushing ahead skipping key moments along way…
Now tell me…isn’t this making your mouth water? Can’t wait till we reach final steps soon allowing everyone indulge themselves fully enjoying delightful feast created lovingly together today!!!
Step 5: Adding the Chicken – The Heart of Your Curry
As you find yourself in the mesmerizing rhythm of cooking, it’s time to introduce your thinly sliced chicken to the pot. With the vegetables almost fork-tender, your kitchen should already be filled with intoxicating aromas that dance in the air. The key here is to add the chicken at just the right moment—this ensures it cooks through without losing its juiciness and tenderness. Gently stir the chicken into the simmering curry, allowing it to mingle with those vibrant flavors for about two to three minutes. You want to keep a close eye on it; overcooking can lead to dry, rubbery pieces, which we definitely want to avoid. Instead, look for that beautiful transformation where the chicken turns from pink to opaque, signaling it’s ready for enjoyment.
Trust me on this: timing is crucial when it comes to cooking chicken. It’s not just about making sure it’s safe to eat; it’s about achieving that ideal texture that will leave you and your loved ones craving more. When done right, each bite of chicken should be succulent and infused with all those incredible flavors swirling around in your pot. As you stir gently, take a moment to appreciate how everything is coming together—the colors, the scents—and envision how this will taste when served over fluffy jasmine rice.
Step 6: Seasoning for Perfection – Balancing Flavors
Now that you’ve cooked your chicken to perfection, it’s time for one of my favorite parts of the recipe: adding depth through seasoning! Carefully remove the pot from heat before introducing your fish sauce, salt, and sugar into this fragrant symphony. Each ingredient plays a vital role in balancing the flavors; fish sauce adds a rich umami element that elevates every other flavor profile while enhancing that authentic Thai experience. You’ll want to start with 1.5 teaspoons of fish sauce and adjust according to your taste preference—remember that it’s easier to add than it is to take away!
Next comes salt; I suggest starting with three-quarters of a teaspoon. Salt amplifies flavors and can truly make or break a dish—it’s essential for coaxing out the natural sweetness of those carrots and potatoes while also enhancing the savory notes from the chicken and coconut milk. And let’s not forget about sugar! A touch of sweetness rounds out those bold flavors beautifully; as you sprinkle in 1.5 teaspoons, know that you’re creating a harmonious balance that transforms your curry into something truly extraordinary. After stirring everything together, take a moment for a taste test—this is where you get to play chef! Don’t hesitate to adjust any of these seasonings until it’s just right; trust me, this last step can elevate your Authentic Thai Yellow Curry with Chicken from good to unforgettable.
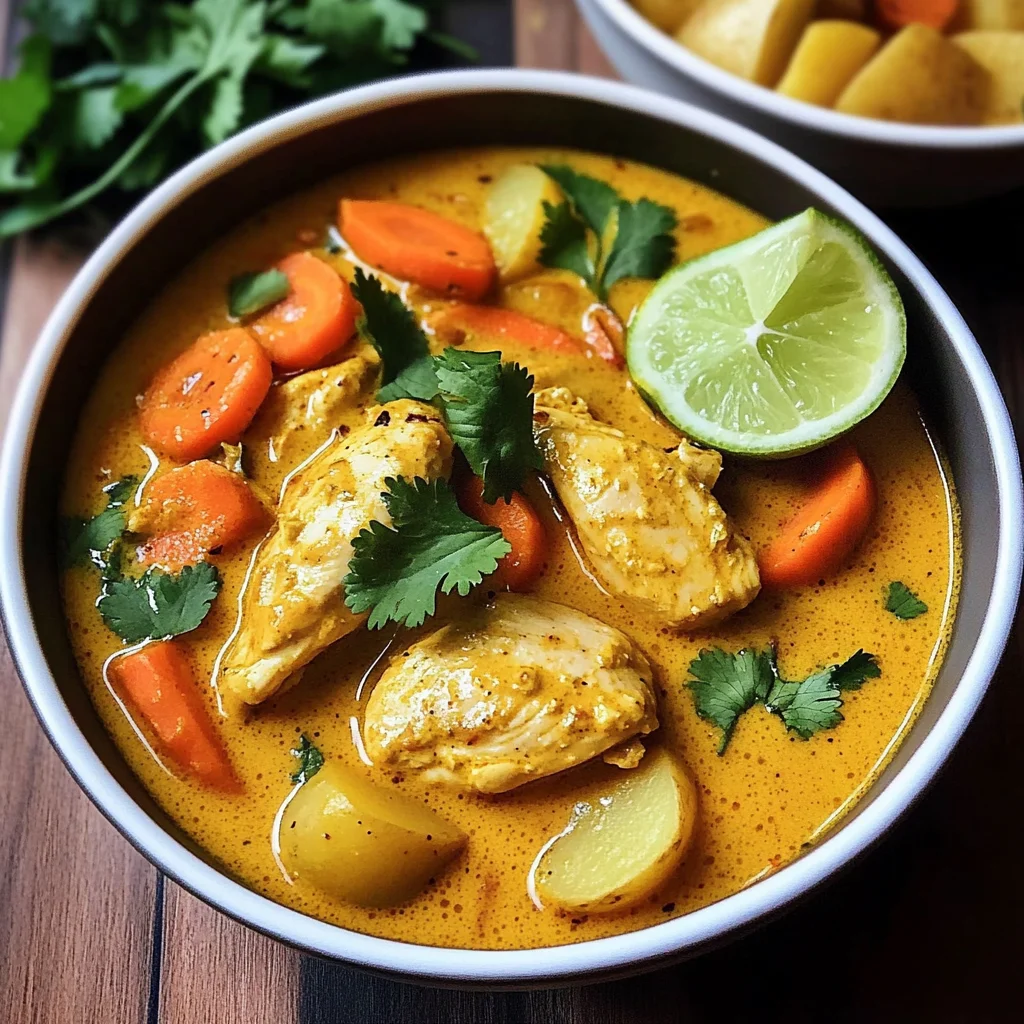
Step 7: Serving Up Joy – Presenting Your Culinary Masterpiece
Now comes one of my absolute favorite moments—the grand reveal! Picture this: bowls filled with steaming jasmine rice topped generously with your vibrant yellow curry, garnished with fresh cilantro and zesty lime wedges that beckon you closer. As you ladle out servings into bowls, allow yourself a moment of pride—this dish has transformed from simple ingredients into an inviting meal bursting with flavor and color. I always like to place my bowls on a large platter for family-style serving; there’s something so delightful about sharing food straight from communal dishes!
When garnishing with cilantro, don’t skimp! This herb adds not only freshness but also an aromatic lift that brightens every bite while visually enhancing your dish. And those lime wedges? They’re not just for decoration—they’re an essential part of enjoying this culinary delight! When squeezed over each bowl just before taking that first bite, they introduce a tangy vibrance that cuts through the richness of coconut milk beautifully.
Step 8: The Last Touch – Enjoying Every Bite
You’ve crafted something magnificent—now it’s time to revel in your creation! As you take your first spoonful of Authentic Thai Yellow Curry with Chicken atop fluffy jasmine rice, allow yourself to fully embrace this moment. Close your eyes and savor how each element contributes to an utterly intoxicating experience—a creamy base enriched by coconut milk carries tender pieces of chicken alongside sweet carrots and potatoes in an explosion of flavor.
But remember—this isn’t just about eating; it’s about connecting with those around you. Share stories as you dig into this comforting bowl together, creating memories over delicious bites filled with warmth and joy. Don’t rush through it either; relish every mouthful as if you’re back in Thailand itself! You might even find yourself inspired by the flavors and techniques you’ve explored today—perhaps dreaming up new variations or side dishes for future meals!
Final Thoughts – Embracing Your Culinary Adventure
As we conclude this culinary journey together, I hope you feel empowered by creating your own Authentic Thai Yellow Curry with Chicken at home! Cooking is not merely following steps; it’s an adventure where love meets creativity in every chop, stir, and taste test along the way. Remember that every meal has its own story—yours just happens to be bursting with flavor and passion.
The next time you’re looking for quick dinner ideas or healthy weeknight meals full of comfort and satisfaction, you’ll have this gem tucked away in your recipe box! So gather your loved ones around the table often because life is too short not to share delicious food made straight from the heart. Happy cooking!
Storage and Enjoyment Tips for Your Authentic Thai Yellow Curry with Chicken
And just like that, your kitchen is filled with the intoxicating aroma of an authentic Thai yellow curry that’s ready to take center stage at your dinner table! The vibrant colors and rich scents promise a truly delightful experience, but let’s talk about how to preserve this magic so you can enjoy it even longer. Whether you’re savoring this dish immediately or saving some for later, I promise you’ll find joy in every bite.
Storing Leftover Authentic Thai Yellow Curry with Chicken
To keep your leftover authentic Thai yellow curry with chicken fresh and delicious, it’s essential to store it properly. I recommend using airtight containers, which are non-negotiable when it comes to maintaining flavor and preventing any unwanted odors from sneaking in. Simply transfer the cooled curry into these containers and pop them in the fridge, where they will keep for about 3-4 days. If you’re worried about the quality dipping after a couple of days, here’s a pro tip: placing a slice of bread in the container can help absorb excess moisture and maintain creaminess. Trust me on this; it works wonders! When you’re ready to enjoy your leftovers, the flavors meld beautifully after sitting for a day or two, becoming even more profound and satisfying. Just reheat gently on the stove over low heat or in the microwave until steaming hot, adding a splash of coconut milk if it seems too thick.
Freezing Authentic Thai Yellow Curry with Chicken for Later
If you’re looking to stock up on meals or simply want a convenient option for busy nights, freezing your authentic Thai yellow curry is an excellent choice! To do this properly, allow the curry to cool completely before ladling it into freezer-safe containers or heavy-duty freezer bags—just make sure to leave some space at the top since liquids expand when frozen. This delicious dish can last up to three months in the freezer without losing its incredible flavors. When you’re ready to enjoy it again, simply thaw overnight in the fridge and reheat gently as mentioned above. The convenience of having homemade comfort food waiting for you is nothing short of extraordinary! Imagine pulling out a container after a long day and being greeted by those warm, inviting aromas once more—it’s like bringing a little piece of Thailand back home whenever you need it.
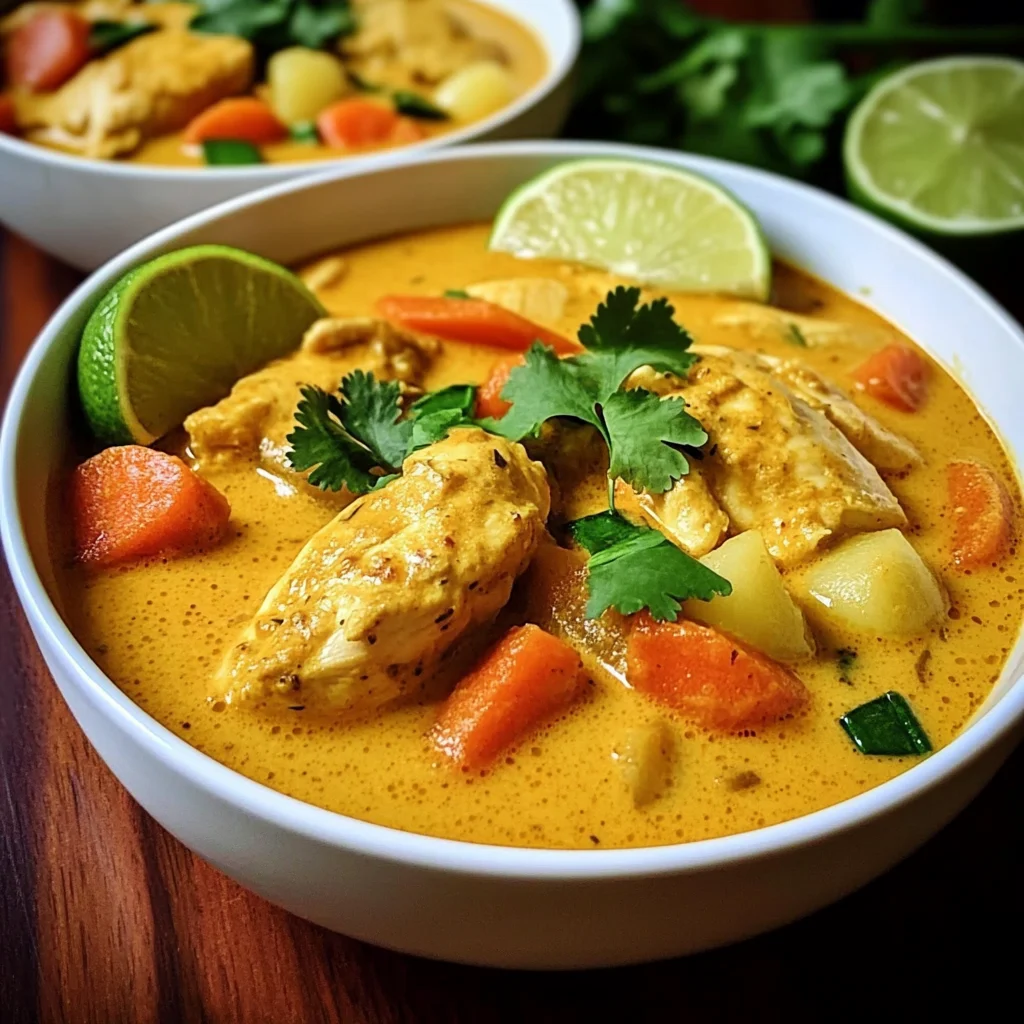
Authentic Thai Yellow Curry with Chicken
Experience the warm embrace of Thailand right in your kitchen with this Authentic Thai Yellow Curry with Chicken. This vibrant dish combines tender chicken, creamy coconut milk, and a blend of aromatic spices that create a symphony of flavors. Picture yourself savoring each spoonful, as the rich curry envelops crispy carrots and hearty potatoes, while fresh cilantro and zesty lime uplift every bite. Perfect for sharing with family or enjoying on a cozy night in, this easy-to-make recipe promises to transport you to a bustling Thai market filled with enticing aromas. Get ready for a culinary adventure that’s both comforting and unforgettable!
- Prep Time: 15 minutes
- Cook Time: 30 minutes
- Total Time: 45 minutes
- Yield: 4 servings 1x
- Category: Main
- Method: Simmering
- Cuisine: Thai
Ingredients
- 1 tbsp virgin coconut oil
- 4 tbsp yellow curry paste
- 2 15-ounce cans of coconut milk
- 1 or 2 cups chicken stock
- 4 carrots, peeled and sliced into 1/8" rounds
- 4 medium-size potatoes, peeled and cut into bite-size pieces
- 1 yellow onion, sliced into wedges then halved
- 2 chicken breasts, very thinly sliced
- 1.5 tsp fish sauce
- 3/4 tsp salt
- 1.5 tsp sugar
- Cilantro, for garnish
- Lime wedges, for garnish
- Serve with jasmine rice
Instructions
- Heat coconut oil in a large pot over medium-high heat until shimmering. Stir in yellow curry paste and sauté for about 2 minutes until fragrant.
- Add the solid cream layer from the top of the coconut milk can along with the remaining coconut milk and chicken stock. Bring to a gentle simmer.
- Stir in diced potatoes and cook halfway through before adding carrots and onion wedges. Cook until tender.
- Add thinly sliced chicken to the pot and simmer until cooked through.
- Season with fish sauce, salt, and sugar to taste; adjust flavors as needed.
- Serve over jasmine rice, garnished with fresh cilantro and lime wedges.
Nutrition
- Serving Size: 1 serving
- Calories: 380
- Sugar: 5g
- Sodium: 780mg
- Fat: 18g
- Saturated Fat: 14g
- Unsaturated Fat: 3g
- Trans Fat: 0g
- Carbohydrates: 40g
- Fiber: 5g
- Protein: 20g
- Cholesterol: 55mg