Banana Cream Cheesecake
There’s something truly magical about desserts that not only please the palate but also stir up fond memories and warm feelings. When I think of my cherished culinary adventures, I can’t help but smile at the thought of this Banana Cream Cheesecake. The way it melds creamy goodness with the delightful essence of fresh bananas creates an experience that transcends mere sustenance. Each bite is a luscious journey, where the velvety texture of cream cheese meets the sweetness of ripe bananas, all lovingly enveloped in a buttery crust. It’s more than just a dessert; it’s a celebration of flavors and comfort, a bridge between tradition and innovation that has graced many family gatherings and special occasions. I promise you, once you dive into this ethereal Banana Cream Cheesecake, you’ll understand why it has earned its place in hearts (and stomachs) everywhere.
As you prepare to embark on this culinary journey, let the scent of vanilla and banana fill your kitchen as a comforting reminder of home and warmth. This recipe isn’t just about combining ingredients; it’s about crafting something extraordinary from simple elements. It invites creativity while honoring classic techniques and flavors. Imagine bringing this stunning cheesecake to your next gathering, where friends and family will gather around, eager to savor each slice. Trust me when I say that this Banana Cream Cheesecake will soon be part of your treasured recipes—one you’ll share with loved ones for generations to come.
Banana Cream Cheesecake: A Slice of Heaven
Get ready to indulge in one of life’s sweetest pleasures! This Banana Cream Cheesecake combines everything we adore about desserts: rich creaminess, luscious banana flavor, and a satisfying crunch from the crust. Each component plays an essential role in creating a dessert that’s not only beautiful but utterly intoxicating to eat. Let’s get those aprons on and start this delightful adventure together!
Ingredients:
Every great recipe begins with quality ingredients that come together in harmony to create something truly special. For our Banana Cream Cheesecake, each item plays its part like musicians in a symphony—together, they create an unforgettable experience.
- 2 1/4 cups (302g) vanilla wafer crumbs: These little beauties serve as the foundation for our cheesecake crust. Their sweet flavor and crunchy texture create a delightful contrast to the smooth filling. Look for high-quality vanilla wafers that are crisp yet not overly sweet; they should enhance rather than overpower the cheesecake’s flavors.
- 10 tbsp (140g) salted butter, melted: Butter is essential here—not just for flavor but also for binding our crumb mixture together into a cohesive crust that holds its shape during baking. Using salted butter adds depth and balances out the sweetness of both the crust and filling beautifully.
- 3 tbsp (39g) sugar: While our vanilla wafer crumbs already provide some sweetness, this added sugar ensures that every layer harmonizes perfectly without being cloying or overwhelming. It also helps with browning during baking!
- 24 ounces (678g) cream cheese, room temperature: This is where we find that beloved rich creaminess! Room temperature cream cheese blends smoothly into our batter without lumps, creating that luxurious texture we crave in cheesecakes. Be sure to use full-fat cream cheese for optimal flavor and texture.
- 1 cup (207g) sugar: Sweetness is crucial in balancing out the tanginess of the cream cheese. This sugar dissolves seamlessly during mixing, ensuring an even sweetness throughout—the last thing we want is pockets of sugar sitting uneasily within our creamy filling!
- 3 tbsp (24g) all-purpose flour: Flour acts as a stabilizer here; it helps give structure so our cheesecake doesn’t collapse when cooling down after baking. Just remember—be gentle when incorporating it into the batter!
- 1/4 cup (58g) sour cream, room temperature: Sour cream adds richness along with a slight tang that brightens up all those flavors lurking within our cheesecake. Plus, it contributes to an incredibly creamy mouthfeel—who doesn’t love that?
- 4 tsp banana extract: Now we’re diving deep into banana territory! The banana extract amplifies that beloved flavor so each bite bursts with fruity goodness. If you’re looking for substitutes or feel adventurous, try using pure banana puree instead for an even more natural taste.
- 1 cup (240ml) pureed banana (2 medium-sized bananas): Fresh bananas are key here! They add moisture and natural sweetness while giving us those lovely specks of fruit throughout our cheesecake which not only looks beautiful but tastes divine too.
- 3 large eggs, room temperature: Eggs play multiple roles; they act as binders while contributing to the creamy texture we’re striving for in our cheesecake filling. Room temperature eggs mix more easily with other ingredients—trust me on this one!
- 1 tsp powdered vegan gelatin: This ingredient serves as our secret weapon for achieving that signature Bavarian cream layer on top! It helps stabilize mixtures without any animal-derived products involved—an ideal solution for creating that silky-smooth finish we desire.
- 2 tbsp (30ml) milk: A splash of milk enhances consistency while integrating those other ingredients seamlessly—think of it as liquid gold helping us achieve perfection!
- 2 egg yolks: Richness alert! These yolks add depth to our Bavarian cream layer while providing extra thickness which makes it luxuriously creamy.
- 1/2 cup (120ml) heavy whipping cream: This is where decadence comes into play—the heavy whipping cream transforms our Bavarian layer into dreaminess itself! The higher fat content gives us volume when whipped while adding unmatched richness.
- 2 tbsp (26g) sugar: Just like earlier—a touch more sugar elevates sweetness levels without being overwhelming—it balances beautifully against all those lovely buttery notes from before.
- 3/4 tsp vanilla extract: Vanilla enhances every flavor present; it’s like waving a magic wand over these ingredients making them shine brighter together!
- 1/4 tsp banana extract: A second dose of banana love helps ensure every bite screams “banana!” Trust me—it’s non-negotiable if you want true flavor impact!
- 2/3 cup (160ml) heavy whipping cream, cold: Chilled heavy whipping cream whips up beautifully into soft peaks—it’s essential here for adding fluffiness to layers atop our cheesecake!
- 5 tbsp (36g) powdered sugar: The powdered version dissolves easily into whipped creams creating perfect sweetness without any gritty bits left behind—a must-have component here!
- 1/2 cup heavy whipping cream, cold: Another helping hand towards getting luscious whipped textures incorporated throughout layers on top—we can never have too much whipped goodness!
- 1/4 cup powdered sugar: Again—the magic word here is “smooth.” We need this extra bit added delicately so everything blends effortlessly together without any unpleasant surprises lurking around corners!
- Fresh sliced bananas: Finally—I always recommend topping off each serving with fresh slices right before serving! They add visual appeal alongside additional fruit flavor while acting as decorative touches elevating presentation standards significantly—everyone deserves beautiful food!
Equipment You’ll Need:
Before diving headfirst into mixing bowls and measuring cups, let’s talk about some essential tools that will make your baking journey smoother and infinitely more enjoyable! Having the right equipment can turn what could be a daunting task into an exciting adventure filled with creativity and joy.
- Springform pan: This tool is absolutely paramount for cheesecakes! Its removable sides allow easy access once your masterpiece has baked perfectly without risking damage during removal—a thoughtful design feature indeed since cheesecakes can be delicate affairs post-baking.
- Mixing bowls: You’ll want at least two good-sized mixing bowls—one for your filling components and another perhaps reserved strictly for whipping creams later on down the line! Opting for glass or stainless steel makes cleanup easier too—and who doesn’t love less mess?
- Electric mixer or whisk: Whether you’re pulling out an electric mixer or opting for some old-fashioned elbow grease with manual whisking—you need something capable enough to thoroughly combine ingredients until everything’s smooth sailing ahead!
- Rubber spatula: A trusty companion while folding whipped creams or scraping down sides during mixing sessions—this tool ensures no precious batter gets left behind stuck against bowl walls—a baker’s best friend indeed!
- Measuring cups & spoons: Precision matters greatly when baking—it ensures consistency across batches so having reliable measuring tools handy means success becomes almost guaranteed every time you step into your kitchen arena!
Preparing the Banana Cream Cheesecake
Step 1: Crafting Your Heavenly Crust
Let’s kick things off by preparing our crust because every great cheesecake starts from solid ground—or should I say crispy? In a medium-sized mixing bowl, combine those 2 1/4 cups of vanilla wafer crumbs with 10 tablespoons of melted salted butter and 3 tablespoons of sugar until everything resembles wet sand—that’s exactly how we want it! Make sure every crumb is coated well because this ensures you achieve maximum flavor when baked later on—there’s nothing worse than dry patches ruining what should be blissful bites! Next comes pressing this crumb mixture firmly into your springform pan; don’t rush through this process! Take your time spreading evenly across bottom first then working up slightly along sides until you create an even barrier all around—this will help hold everything inside securely once filled later on down line…
Step 2: Baking That Base
Now it’s time to bake what we’ve just crafted—it’ll take about 10 minutes at 350°F (175°C). You’ll know it’s ready when edges appear lightly golden brown—that’s when those delicious aromas begin wafting through your kitchen like whispers beckoning everyone closer! Once done baking allow it cool completely before moving onto next steps because hot bases lead to soupy fillings—not ideal circumstances if we’re aiming high here…
Step 3: Mixing Up That Dreamy Filling
With cooled crust ready waiting expectantly let’s jump straight into making creamy filling magic happen! Grab another large bowl now housing those softened blocks(24 ounces total!)of room-temperature cream cheese first—we’re talking luxurious textures mixed perfectly smooth here folks…using electric mixer beat until fluffy before gradually blending in remaining sugars(1 cup), flour(3 tablespoons), sour cream(1/4 cup), along with those fabulous extracts(4 teaspoons banana + dash vanilla)—I promise these elements combined create sheer bliss—you’ll notice how lightening brightens overall composition too thanks entirely due diligence taken thus far…Next introduce pureed bananas slowly allowing them fully integrate prior adding eggs one by one ensuring thorough incorporation each time—you don’t want any lumps messing things up now do ya?
Step 4: The Artful Bake
Now comes perhaps one most crucial moments—the actual bake itself! Pour prepared batter over cooled crust gently smoothing top using rubber spatula ensuring no air bubbles trapped underneath want anything ruining final product trust me…Transfer carefully onto preheated oven rack allowing bake roughly hour & forty minutes keeping watchful eye towards end—you’re looking for just set center edges slightly puffed up around perimeter while still jiggly middle area remains intact sounds odd yet perfect sign indicating success ahead awaits… Once finished remove from oven let cool entirely at room temp before transferring refrigerator overnight ideally resting gently within chilled confines allowing flavors meld beautifully resting overnight provides best results possible leading towards decadent enjoyment next day…
There you have it dear friend—the beginnings toward crafting Banana Cream Cheesecake destined become favorite dessert worthy celebrating life joyous occasions alike…stay tuned as we’ll wrap everything together finishing touches tomorrow including luscious Bavarian topping transforming ordinary slices extraordinary experiences…
The Joy of Crafting Your Banana Cream Cheesecake
Step 5: Bringing the Banana Bliss to Life
Now that your crust is baked and has cooled to perfection, let’s dive into creating the luscious banana cheesecake filling that will be the heart of this Banana Cream Cheesecake. Start by grabbing your room-temperature cream cheese—this is crucial because it ensures a smooth and creamy texture without any lumps. In a large mixing bowl, combine the cream cheese with one cup of sugar and three tablespoons of all-purpose flour. The flour acts as a stabilizer in this mixture, giving your cheesecake structure while still allowing it to remain delightfully creamy. Using an electric mixer on medium speed, blend these ingredients until they are utterly smooth and free from lumps; this should take about two to three minutes. Trust me on this step—taking the time to thoroughly mix at this stage will pay off later when you sink your fork into that velvety slice.
Next, gently fold in the sour cream, four teaspoons of banana extract, and one cup of pureed bananas (which you can easily achieve by blending two ripe bananas until silky). This combination not only enhances the banana flavor but also contributes to the creaminess that everyone loves in a cheesecake. After incorporating these ingredients, add in your three large eggs one at a time, mixing just until combined after each addition. Remember to scrape down the sides of your bowl throughout this process; it’s an essential step that ensures even mixing without leaving behind any forgotten bits. Once everything is well-combined, take a moment to appreciate how aromatic and inviting this mixture is—it smells like pure sunshine in a bowl!
Step 6: Creating the Cheesecake Layers
With your filling perfected, it’s time to pour this heavenly mixture into your prepared crust. Ensure that the crust is completely cool; if it’s warm, it could melt some of that precious filling or create unwanted steam during baking. Carefully pour the cheesecake batter over your crust, using a spatula to spread it evenly. This step is important because an even layer prevents uneven baking and helps avoid cracks on the surface once it’s done baking. You want to achieve a smooth top for aesthetic appeal—who doesn’t want their dessert to look as beautiful as it tastes?
Before placing it in the oven, I highly recommend gently tapping the pan against your counter a few times. This technique eliminates air bubbles trapped within your batter; those pesky bubbles can form unsightly holes in your finished cheesecake or cause cracks during baking. Now comes an essential part: baking! Preheat your oven to 325°F (160°C) and bake for about 70-80 minutes. Keep an eye on it during this time—you’re looking for the edges to be set while the center remains slightly jiggly, akin to a perfectly wobbly jelly, which indicates that it’s still creamy inside.
Step 7: The Patience Game – Cooling Down
Once you’ve baked your cheesecake to perfection, resist the urge to dig right in! It’s vital now more than ever to allow this beauty some cooling time. Turn off your oven but leave the door ajar with the cheesecake inside for about an hour—this gradual cooling method helps prevent sudden temperature changes that could lead to cracks forming on top of your cheesecake later on. Think of this as letting it rest after a long workout; just like we need recovery time after exertion, so does our cheesecake!
After an hour has passed, carefully remove it from the oven and let it cool completely at room temperature for another hour or so before transferring it to the refrigerator. Cooling is paramount because chilling further allows flavors to meld beautifully while firming up that silky texture we crave when we think “cheesecake.” You’ll want to chill it for at least four hours or overnight if possible—the longer you give it in that fridge, the more profound its flavors will become! Just imagine slicing into that chilled dessert tomorrow and finding not just rich banana flavor but also a wonderful harmony between all components.
Step 8: Finishing Touches with Bavarian Magic
Now comes my favorite part: preparing our luxurious banana bavarian cream topping! In a small saucepan over low heat, combine two tablespoons of milk with half a teaspoon of powdered vegan gelatin just until dissolved; keep stirring gently so that nothing burns or clumps together—this is where patience becomes key again! The gelatin will add body and stability without compromising that delightful creaminess we’ve worked hard on achieving throughout this recipe.
Once dissolved completely (you’ll know it’s ready when it’s clear), remove from heat and allow it to cool slightly while you whip up half a cup of heavy whipping cream with two tablespoons of sugar until soft peaks form. This step brings air into our cream making it light yet stable enough for layering onto our cheesecake later. Gently fold in both vanilla extract and quarter teaspoon of banana extract into this whipped cream before slowly drizzling in your cooled gelatin mixture while continuing to fold gently; you want everything incorporated without losing too much volume here! This bavarian layer will sit atop our chilled cheesecake like fluffy clouds—a truly extraordinary finish.
Final Phase: Assembling Your Masterpiece
Step 9: Layering Up – A Celebration of Flavors
With everything prepped and ready (I can almost smell those bananas!), let’s assemble our masterpiece! Remove your cooled cheesecake from its springform pan carefully—using a warm knife dipped in hot water can help ease its release from any sticking points along edges without damaging its beautiful surface. Place it onto a serving platter where all can admire its glory before topping with that luscious bavarian cream you’ve just created! Spread it evenly across the top with care; envision each dollop being lovingly placed as if you’re tucking in a delicate baby blanket around something precious.
To elevate this already stunning dessert even further—and trust me when I say you won’t regret this—decorate with fresh sliced bananas arranged artfully around its perimeter or sprinkled sporadically atop for visual interest and added flavor bursts as you dig into each slice later on! Don’t skip this garnish—the vibrant yellow will pop against that creamy backdrop creating not just visual appeal but also enhancing each bite’s sensory experience.
Finally, cover lightly with plastic wrap (to avoid any fridge odors seeping into our beloved creation) before returning it back into refrigeration for another hour at least; however long you can hold out! What makes waiting so worthwhile is knowing how every minute spent enhances flavor melding—a truly satisfying reward awaits those who practice patience here.
So there you have it—a gloriously decadent Banana Cream Cheesecake that’s not only visually stunning but bursting with layers upon layers of flavor and textures! I promise you’ll feel immense joy serving slices to friends or family—they’re sure to be utterly enchanted by every bite!
Storage and Enjoyment Tips for Your Banana Cream Cheesecake
Now that you’ve crafted this luscious Banana Cream Cheesecake, it’s time to revel in the joy of sharing it with family and friends—or perhaps indulging in a slice all by yourself! The creamy layers of cheesecake and banana bavarian cream are just waiting to be enjoyed, but if you find yourself with leftovers (which is a rare feat, I promise), there are ways to preserve that delightful taste. Storing your cheesecake properly ensures that every bite remains as blissful as the first, allowing you to enjoy its heavenly flavors for days to come.
Storing Leftover Banana Cream Cheesecake
When it comes to storing your precious Banana Cream Cheesecake, using an airtight container is absolutely crucial. This not only protects the delicate textures of your cheesecake but also keeps unwanted odors from infiltrating its sweetness. If you don’t have an airtight container, simply cover the cheesecake tightly with plastic wrap. Ideally, it should be kept in the refrigerator where it can stay fresh for about 3 to 5 days. To maintain that creamy quality, consider placing a slice of bread in the container—it’s a neat trick that helps keep moisture levels balanced and prevents your dessert from drying out. After refrigeration, you’ll discover that the flavors actually deepen; the banana flavor becomes even more pronounced while the creamy texture remains luxuriously smooth. When you’re ready to indulge again, simply serve it chilled straight from the fridge or allow it to soften slightly at room temperature for an even creamier experience.
Freezing Banana Cream Cheesecake for Later
If you’re looking to extend the life of your Banana Cream Cheesecake beyond a few days, freezing is a fantastic option! To freeze properly, slice your cheesecake into individual portions—this makes it easy to thaw just what you need later on. Wrap each piece tightly in plastic wrap before placing them in a freezer-safe container or a heavy-duty zip-top bag. This method can keep your cheesecake delicious for up to 2 months! When you’re ready to enjoy a slice from the freezer, simply transfer it to the refrigerator overnight to thaw gently. The convenience factor here is remarkable; imagine having this delightful treat at your fingertips whenever a craving strikes! Plus, pulling out a piece of homemade cheesecake from your freezer feels like uncovering a treasure; it’s bound to bring smiles all around.
Banana Cream Cheesecake
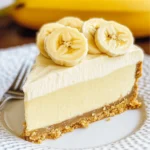
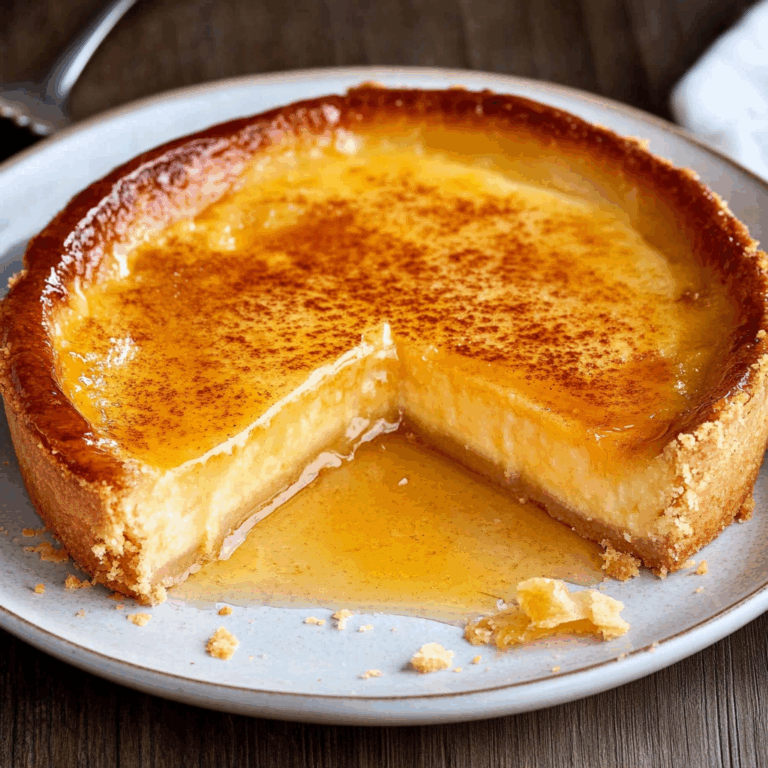
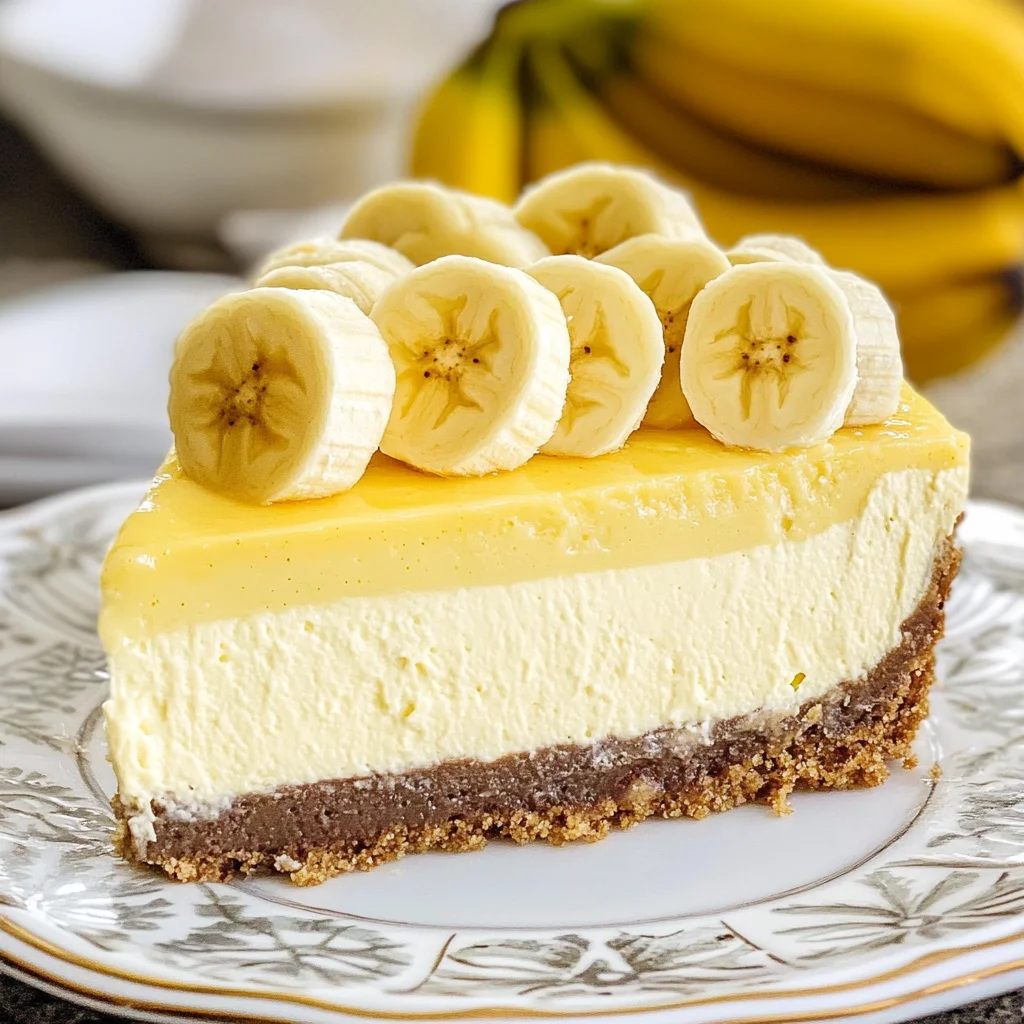
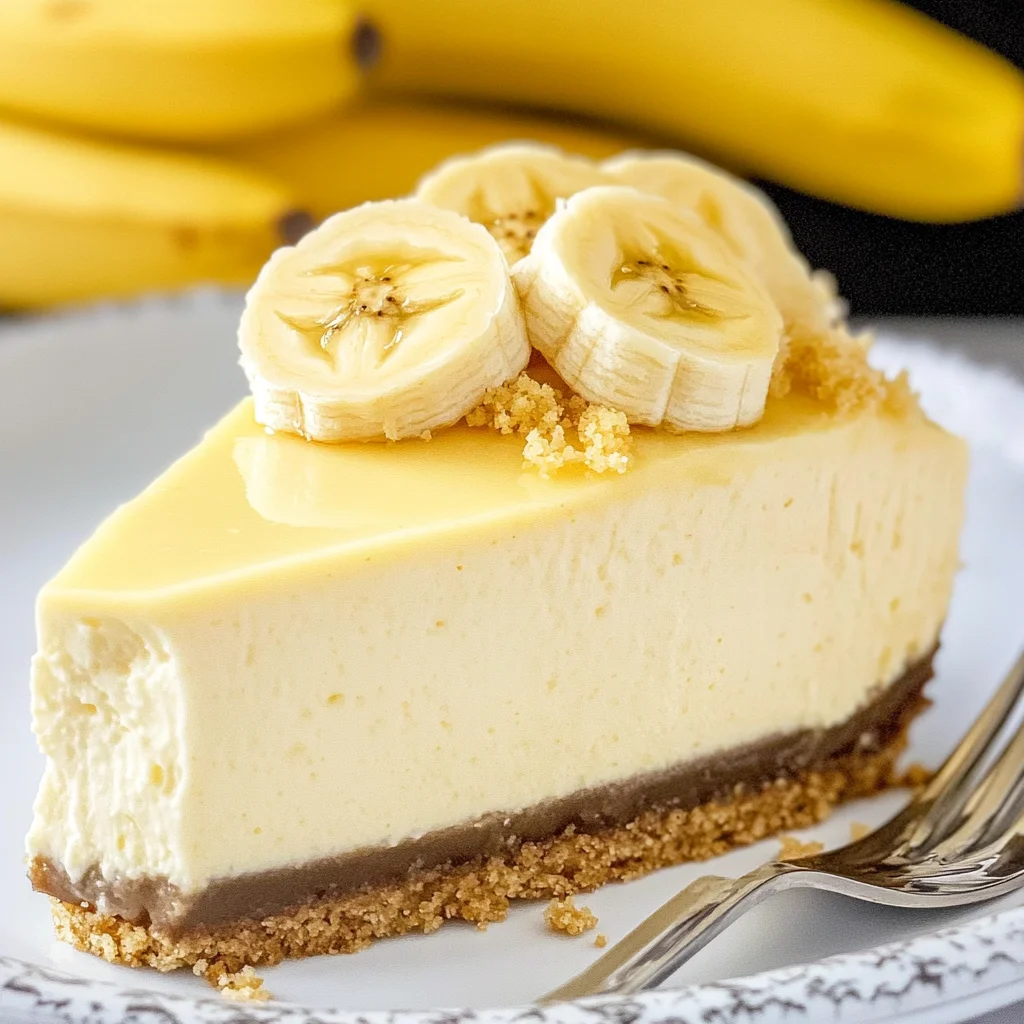
Indulge in the creamy delight of Banana Cream Cheesecake, a dessert that perfectly balances rich flavors and textural contrasts. This luscious cheesecake features a buttery vanilla wafer crust, a smooth cream cheese filling infused with ripe bananas, and a heavenly banana bavarian cream topping. With each bite, you’ll experience the velvety texture of the cheesecake complemented by the sweetness of fresh bananas. Ideal for gatherings or cozy family dinners, this dessert is sure to become a beloved favorite. Prepare to impress your guests with this extraordinary treat that captures the essence of comfort and celebration in every slice.
- Prep Time: 30 minutes
- Cook Time: 80 minutes
- Total Time: 1 hour 50 minutes
- Yield: Approximately 11 servings 1x
- Category: Dessert
- Method: Baking
- Cuisine: American
Ingredients
- 2 1/4 cups vanilla wafer crumbs
- 10 tbsp salted butter, melted
- 24 ounces cream cheese, room temperature
- 1 cup sugar
- 3 tbsp all-purpose flour
- 1/4 cup sour cream, room temperature
- 4 tsp banana extract
- 1 cup pureed banana (about 2 medium-sized bananas)
- 3 large eggs, room temperature
- 2 tbsp milk
- 1/2 cup heavy whipping cream
- 2 tbsp sugar (for topping)
- 3/4 tsp vanilla extract
- 2/3 cup heavy whipping cream, cold
- 5 tbsp powdered sugar
- Fresh sliced bananas for garnish
Instructions
- Preheat oven to 325°F (160°C). In a mixing bowl, combine vanilla wafer crumbs, melted butter, and sugar until crumbly. Press into the bottom of a springform pan.
- Bake for about 10 minutes until lightly golden. Allow to cool completely.
- In a large bowl, blend cream cheese until smooth. Gradually add sugar and flour; mix well.
- Add sour cream, banana extract, and pureed bananas; mix until combined. Add eggs one at a time until just blended.
- Pour filling over cooled crust; bake for 70-80 minutes until edges are set but center jiggles slightly.
- Cool in oven with door ajar for an hour then transfer to refrigerator to chill for at least four hours or overnight.
- For the bavarian topping: Whip heavy cream with sugar until soft peaks form; fold in banana extract. Spread over chilled cheesecake and garnish with fresh banana slices.
Nutrition
- Serving Size: 1 slice (120g)
- Calories: 360
- Sugar: 30g
- Sodium: 250mg
- Fat: 25g
- Saturated Fat: 15g
- Unsaturated Fat: 8g
- Trans Fat: 0g
- Carbohydrates: 30g
- Fiber: 1g
- Protein: 5g
- Cholesterol: 95mg