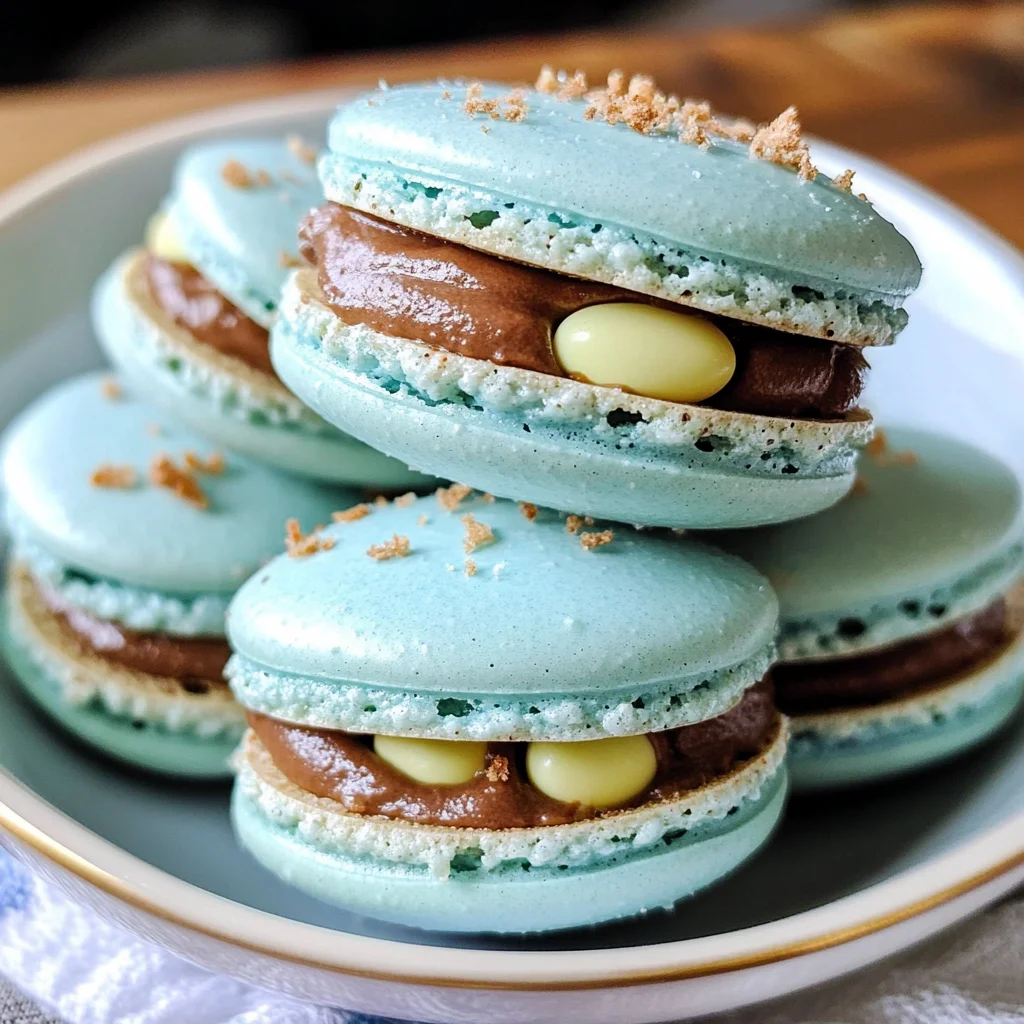
Cadbury Egg Macarons
There’s something profoundly special about baking, don’t you think? It’s more than just mixing flour and sugar; it’s an alchemy that transforms simple ingredients into something magical. Today, I want to take you on a journey through the enchanting world of French pastry with my Cadbury Egg Macarons. These delicate confections are not just treats; they’re little bites of joy that evoke the excitement of springtime and all the warmth it brings. As the light blue shells mimic the delicate hue of robin’s eggs, each bite reveals a luscious ganache filled with finely pulsed Cadbury mini eggs, creating a symphony of flavors that will have you smiling from ear to ear.
I promise you, making macarons is not just about following a recipe; it’s about embracing the process. Each step allows you to connect with your inner baker and create something beautiful. The smooth, glossy shells paired with the rich chocolatey filling make these Cadbury Egg Macarons a delightful centerpiece for any Easter celebration or spring gathering. So grab your apron, and let’s dive into this captivating culinary adventure together!
Cadbury Egg Macarons: A Springtime Delight
These macarons are more than just a dessert; they’re an experience that brings joy to every gathering. Perfectly sweet yet balanced by the richness of chocolate, they embody everything we love about spring—the renewal, the color, and yes, those charming little surprises like Cadbury mini eggs! Whether you’re entertaining guests or indulging in a cozy afternoon treat at home, these macarons will elevate your dessert game to new heights. Plus, there’s something so rewarding about mastering this classic French pastry technique—it’s like earning your badge as a true baking aficionado!
Ingredients:
As we embark on this delightful baking journey together, let’s gather our ingredients—a crucial step that sets the stage for our success. Each element plays its own vital role in crafting these exquisite macarons.
- 112 grams egg whites. Fresh egg whites are essential for achieving that perfect meringue texture—light and airy yet stable enough to hold its shape during baking. Make sure to separate them from their yolks carefully; even a tiny bit of fat can prevent your meringue from rising beautifully. Room temperature egg whites whip up better because they expand more easily—so let them sit out for about 30 minutes before use.
- 140 grams super fine almond flour. This finely ground almond flour is what gives our macarons their signature chewy texture and nutty flavor. If you can’t find super fine almond flour at your local store, feel free to pulse regular almond flour in a food processor until it reaches a finer consistency—this extra step can make all the difference in how smooth your macaron shells turn out.
- 140 grams confectioners’ sugar. This ingredient is crucial for sweetness and helps create a silky-smooth batter when mixed with our almond flour. It dissolves easily into the meringue without leaving any graininess behind—ensuring our macarons achieve that pristine finish we all admire.
- 1/2 teaspoon cream of tartar. A key player when it comes to stabilizing our meringue! This ingredient helps keep the air bubbles intact while we whip our egg whites into soft peaks, leading us to perfectly risen macaron shells. Don’t skip this step; it’s absolutely paramount for achieving success.
- 126 grams granulated sugar. This will be added gradually to our meringue and contributes sweetness while also helping stabilize it further as we whip it up to glossy perfection. Using granulated sugar will give us that ideal structure needed for our delicate cookies.
- 2 drops light blue gel food coloring. While completely optional, this gel coloring adds an enchanting touch that captures the essence of spring! Gel colors are preferable because they won’t alter the consistency of our batter as liquid colors might—just a couple drops will do!
- 1/2 teaspoon cool water (for garnish – optional) & 1 drop brown gel food coloring (for garnish – optional). These garnishes are completely optional but can help create those adorable speckled patterns reminiscent of real robin’s eggs! If you choose this route, ensure your water is cool so it doesn’t affect your decorating process.
- 1/2 cup semi-sweet chocolate morsels. Rich and indulgent chocolate morsels melt beautifully into our ganache filling, providing depth and richness that complements the sweetness of our macaron shells perfectly.
- 2 tablespoons unsalted butter (softened to room temperature). The creamy texture of softened butter adds richness to our ganache filling while ensuring it melds seamlessly with our melted chocolate morsels—creating decadence in every bite.
- 6 tablespoons heavy cream. This luxurious ingredient provides that silky mouthfeel we crave in a ganache filling while also allowing us to adjust its consistency depending on how thick or thin we prefer it.
- 1 cup Cadbury milk chocolate mini eggs (finely pulsed in a food processor). The star of our show! These delightful little eggs not only bring nostalgia but also infuse incredible flavor into our ganache filling—a magical marriage between classic chocolate and playful whimsy!
- 1 teaspoon vanilla extract. Vanilla acts as an aromatic enhancer, bringing warmth and depth to both the macaron shells and ganache filling—never underestimate its power!
- 1/4 teaspoon fine sea salt. Adding just a pinch of salt can elevate sweetness by balancing flavors beautifully—it’s true what they say: salt is sweet’s best friend!
Equipment You’ll Need:
Before diving into creating these gorgeous macarons, let me emphasize how having the right tools can truly elevate your baking experience! Think of them as essential partners in crafting something wonderful together.
- Food processor – An absolute necessity for achieving finely pulsed almond flour and those delightful Cadbury mini eggs! It ensures everything is uniformly ground for smoothness—plus it saves time compared to manually sifting or chopping.
- Mixing bowls – Opt for glass or metal bowls because these materials allow for better temperature control while whipping egg whites—they help maintain stability during mixing.
- Electric mixer (stand or hand) – A reliable mixer helps achieve stiff peaks when whipping egg whites efficiently—you’ll want one with good speed settings so you can control exactly how quickly you’re incorporating air!
- Silicone spatula – An essential tool for folding gently without deflating your precious meringue—this step requires finesse!
- Piping bag fitted with round tip (size 10 or 12) – Piping bags allow for precision when shaping those beautiful macaron rounds without making too much mess—it’s all about practice!
Now that we’ve gathered all our ingredients and tools together let’s dive into preparing these divine Cadbury Egg Macarons!
Step 1: Whip Up Your Meringue
First things first! We need to whip those egg whites until they’re fluffy clouds of delight! Start by placing your room temperature egg whites in your mixing bowl along with cream of tartar—a crucial step for stabilization—as well as half of the granulated sugar (63 grams). Begin whisking on medium speed until soft peaks form; you’ll know you’re there when you see gentle waves forming in your meringue but it still droops slightly when lifted with a spatula. This might take about 4 minutes or so depending on your mixer—don’t rush this step! Patience here means perfect texture later on.
Once you’ve reached soft peaks status, gradually add in the remaining granulated sugar while continuing to beat on medium-high speed until we achieve stiff peaks—a state where our mixture stands tall like little mountains! At this point, we’re looking for glossy surfaces—a sign that air has been incorporated effectively—and don’t forget those lovely bubbles too; they should be small rather than large which indicates overbeating might happen if pushed too far past this point!
Step 2: Sift Together Dry Ingredients
Now let’s shift gears towards incorporating those dry ingredients—we’re going to sift together almond flour and confectioners’ sugar directly onto our whipped meringue mixture using either a sifter or mesh strainer! Trust me when I say sifting is non-negotiable here; it’s crucial because it removes lumps while ensuring even distribution throughout—the last thing we want is uneven textures once baked!
After sifting over half at first gently fold these dry ingredients into your meringue using that trusty silicone spatula—we want just enough movement so everything begins blending nicely but be cautious not too overmix either… remember we’re aiming for lightness here instead of deflation! Once incorporated fully add remaining sifted mix then continue folding until fully combined—we’re looking at somewhat thickened batter resembling flowing lava—not too runny nor too dry…you’ve got this!
Step 3: Add Color
Now comes one of my favorite parts—the color transformation! Carefully add two drops of light blue gel food coloring directly onto your mixture before gently folding again until evenly distributed throughout—that vibrant hue will become even more pronounced during baking so don’t hold back here if you love bold shades! Take care not to deflate any air we’ve worked hard creating while doing this…stay gentle my friend!
Step 4: Pipe Those Shells
It’s finally time for some piping fun—grab that piping bag fitted with round tip—and fill it generously with batter before twisting top securely closed like gift wrapping—it keeps things neat without spills happening along way trust me on this one! Position yourself over parchment-lined baking sheets making sure there’s ample room between each shell since they’ll spread out ever-so-slightly during baking…aiming roughly for circles around 3cm wide should do nicely.
Hold bag upright above surface then apply consistent pressure as you squeeze gently downward whilst simultaneously lifting away upwards once desired size appears… voilà—you’ve created beautiful rounds ready for oven magic ahead! Don’t worry if they look imperfect at first—we all start somewhere—but practice makes progress every single time…even if there are occasional quirky shapes encountered along way too!
Let them rest at room temperature approximately 30 minutes until slightly dry surface forms—it’ll help develop those signature “feet” characteristic found underneath perfect macarons once baked giving them additional height & stability upon cooling later down line after exiting hot oven doors…
And there we have it—a lovely introduction into crafting stunning Cadbury Egg Macarons! Stay tuned as we continue exploring further steps towards assembling delicious ganache fillings next…
Step 5: Whipping Up the Perfect Meringue
Now that your dry ingredients are all set, it’s time to focus on an absolutely critical step in making our Cadbury Egg Macarons—the meringue. Start by placing your egg whites into a clean mixing bowl (make sure there’s no grease or water lingering from previous tasks; even the smallest residue can be a game changer). Begin whipping those egg whites on medium speed until they become frothy, which should take about a minute. This initial stage is crucial because it sets the foundation for the volume and stability of our meringue. Once you see those bubbles forming, sprinkle in the cream of tartar; this ingredient plays a vital role as it helps stabilize the egg whites and increases their volume, ensuring your macarons come out perfectly airy and light.
After adding the cream of tartar, increase your mixer speed to high and start gradually adding in the granulated sugar, about one tablespoon at a time. This slow addition allows each bit of sugar to dissolve into the egg whites fully before incorporating more. As you continue to whip, keep an eye out for soft peaks forming—this is when you know you’re on the right track! You want to achieve stiff peaks, where the meringue holds its shape firmly when you lift the whisk out. This process usually takes around 5-7 minutes. But here’s where patience truly pays off: if you under-whip, your macarons won’t have that beautiful structure we desire; if over-whipped, they’ll become grainy. So, trust me on this—take your time and watch your mixture transform into a glossy cloud of perfection!
Step 6: Folding It All Together
Once your meringue is fluffy and stiffened to perfection, it’s time for the delightful process of folding in your dry ingredients. This step requires a gentle hand because we want to maintain that lovely airiness while integrating everything harmoniously. Start by adding about one-third of your almond flour and confectioners’ sugar mixture into the whipped egg whites. Using a silicone spatula, gently fold from the bottom up and around, combining them with careful strokes that avoid deflating your precious meringue. It’s almost like giving it a warm hug—slowly but surely coaxing everything together.
As you continue folding in the remaining dry ingredients, pay close attention to how the batter transforms. You’re looking for what’s called macaronage, which refers to reaching that perfect consistency where the batter flows smoothly but isn’t too runny—it should resemble lava cascading down a mountain! To test if you’ve achieved this coveted texture, let some batter fall from your spatula; if it forms ribbons that hold their shape for just a moment before smoothing back into itself, congratulations—you’ve nailed it! Now is also when you’ll add those two drops of light blue gel food coloring; mix gently until evenly distributed. This gorgeous hue will make our macarons visually stunning and reminiscent of robin’s eggs—a perfect little nod to springtime!
Step 7: Piping Those Beautiful Shells
With your batter ready and beautifully colored, it’s time to pipe those fabulous macaron shells! Grab a piping bag fitted with a round tip (I recommend using Wilton tip #12 or something similar) and fill it with your macaron batter. Before you begin piping onto baking sheets lined with parchment paper or silicone mats (which I adore for their non-stick properties), remember to tap each filled sheet several times against your counter after piping each circle. This action releases any trapped air bubbles within each shell—a step that is absolutely paramount for achieving those signature smooth tops without cracks.
When piping, aim for uniform circles about 1.5 inches wide—use templates (like printed circles under your parchment) if needed for guidance! Trust me when I say that consistency is key here; uneven sizes can lead to unpredictable results during baking. Once piped, let them sit at room temperature for about 30-60 minutes until they develop a skin—a slightly dry outer layer that doesn’t stick when touched lightly with a finger. This resting period is essential as it helps form that delicate “foot” characteristic of macarons as they bake; without it, you might end up with flat cookies instead of those gorgeous puffy delights we’re after!
Step 8: Baking Your Perfect Cadbury Egg Macarons
Finally! It’s time to bring our creations into the oven where they will undergo their magical transformation! Preheat your oven to 300°F (about 150°C)—a lower temperature ensures even cooking throughout each macaron shell without burning them too quickly. Carefully slide one tray into your preheated oven at a time (this helps maintain consistent heat). Bake for about 15-19 minutes—this timing can vary depending on your specific oven’s quirks so keep an eye on them once they hit that 15-minute mark.
What should you be watching for? Look closely at those lovely little feet forming at the base; they’re often what indicates successful baking! You want them to puff up beautifully while still retaining their shape without browning too much on top—this visual cue is absolutely crucial because overbaked shells can lead to dryness inside while underbaked ones will collapse upon cooling. Once baked, let them cool on their trays for about five minutes before transferring them onto wire racks; this slight cooling period allows them enough stability without risking breakage as you move them around. Take in that intoxicating aroma wafting through your kitchen—it’s utterly delightful and makes all this effort feel so worth it!
Conclusion:
As we wrap up our delightful journey through crafting these stunning Cadbury Egg Macarons, I can’t help but feel a sense of joy bubbling inside me! Each step we took together was not just about following a recipe but rather creating something truly special that embodies warmth, sweetness, and celebration. The combination of that delicate almond meringue infused with the rich chocolate ganache creates an extraordinary symphony of flavors that dance harmoniously on your palate — making each bite profoundly satisfying. It’s not just dessert; it’s an experience filled with nostalgic sweetness that will transport you back to cherished moments spent around loved ones.
I wholeheartedly believe that this recipe is an absolute must-try! It invites you into the wonderful world of French pastry-making while being accessible enough for bakers at all levels. Imagine pulling these colorful delights from your oven—those light blue shells glistening like precious jewels—and witnessing the faces of everyone around you light up with joy! Whether it’s Easter gatherings, springtime celebrations, or simply those cozy afternoons at home, these macarons shine brightly in any occasion.
For serving suggestions that elevate your dessert experience even more: imagine savoring one alongside a cup of freshly brewed coffee or aromatic tea; the contrast between hot beverages and cool ganache is nothing short of heavenly! Or perhaps pair them with fresh berries—think strawberries or raspberries—that add a tart burst complementing the sweetness perfectly. And let’s not forget about drizzling some melted dark chocolate over them for an extra touch of indulgence; I promise you won’t regret it!
Feeling adventurous? This recipe is wonderfully adaptable! You could swap out the filling for different flavored ganaches—maybe try matcha or raspberry purée—to create variations that surprise your palate anew every time. Or how about infusing some zesty lemon into your batter for a refreshing twist? The possibilities are endless! I encourage you to explore and make this recipe truly yours; share your experiences with friends and family—it brings us all closer together through food! So roll up your sleeves and dive into this culinary adventure; I can’t wait to hear all about your marvelous creations!
Cadbury Egg Macarons

Indulge in the enchanting world of Cadbury Egg Macarons, a delightful treat perfect for springtime celebrations. These exquisite French pastries feature delicate light blue shells that evoke the charm of robin’s eggs. Each macaron is filled with a luscious chocolate ganache infused with finely pulsed mini Cadbury eggs, creating a whimsical and rich flavor experience. Perfect for festive gatherings or cozy afternoons, these macarons not only showcase your baking skills but also bring joy to every occasion. Join me on this culinary adventure and create these sweet bites of happiness that will surely impress friends and family!
- Prep Time: 30 minutes
- Cook Time: 19 minutes
- Total Time: 49 minutes
- Yield: Approximately 24 macarons 1x
- Category: Dessert
- Method: Baking
- Cuisine: French
Ingredients
- 112 grams egg whites
- 140 grams super fine almond flour
- 140 grams confectioners' sugar
- 1/2 teaspoon cream of tartar
- 126 grams granulated sugar
- 2 drops light blue gel food coloring
- 1/2 cup semi-sweet chocolate morsels
- 2 tablespoons unsalted butter (softened)
- 6 tablespoons heavy cream
- 1 cup Cadbury milk chocolate mini eggs (finely pulsed)
- 1 teaspoon vanilla extract
- 1/4 teaspoon fine sea salt
Instructions
- Preheat oven to 300°F (150°C). Line baking sheets with parchment paper.
- In a clean mixing bowl, whip room temperature egg whites with cream of tartar until frothy. Gradually add granulated sugar, beating until stiff peaks form.
- Sift together almond flour and confectioners' sugar; gently fold into the meringue until smooth and flowing.
- Add light blue gel food coloring and fold until evenly mixed.
- Transfer batter to a piping bag fitted with a round tip, pipe rounds onto prepared baking sheets, allowing space between each shell.
- Let piped shells rest at room temperature for 30-60 minutes until dry to touch.
- Bake for 15-19 minutes, then cool on wire racks.
- For ganache, melt chocolate morsels; mix in softened butter and heavy cream until smooth; fold in finely pulsed mini eggs and vanilla extract.
- Pipe ganache onto half the macaron shells, topping with remaining shells.
Nutrition
- Serving Size: 1 macaron (about 25g)
- Calories: 120
- Sugar: 12g
- Sodium: 20mg
- Fat: 5g
- Saturated Fat: 3g
- Unsaturated Fat: 2g
- Trans Fat: 0g
- Carbohydrates: 15g
- Fiber: <1g
- Protein: 2g
- Cholesterol: <10mg