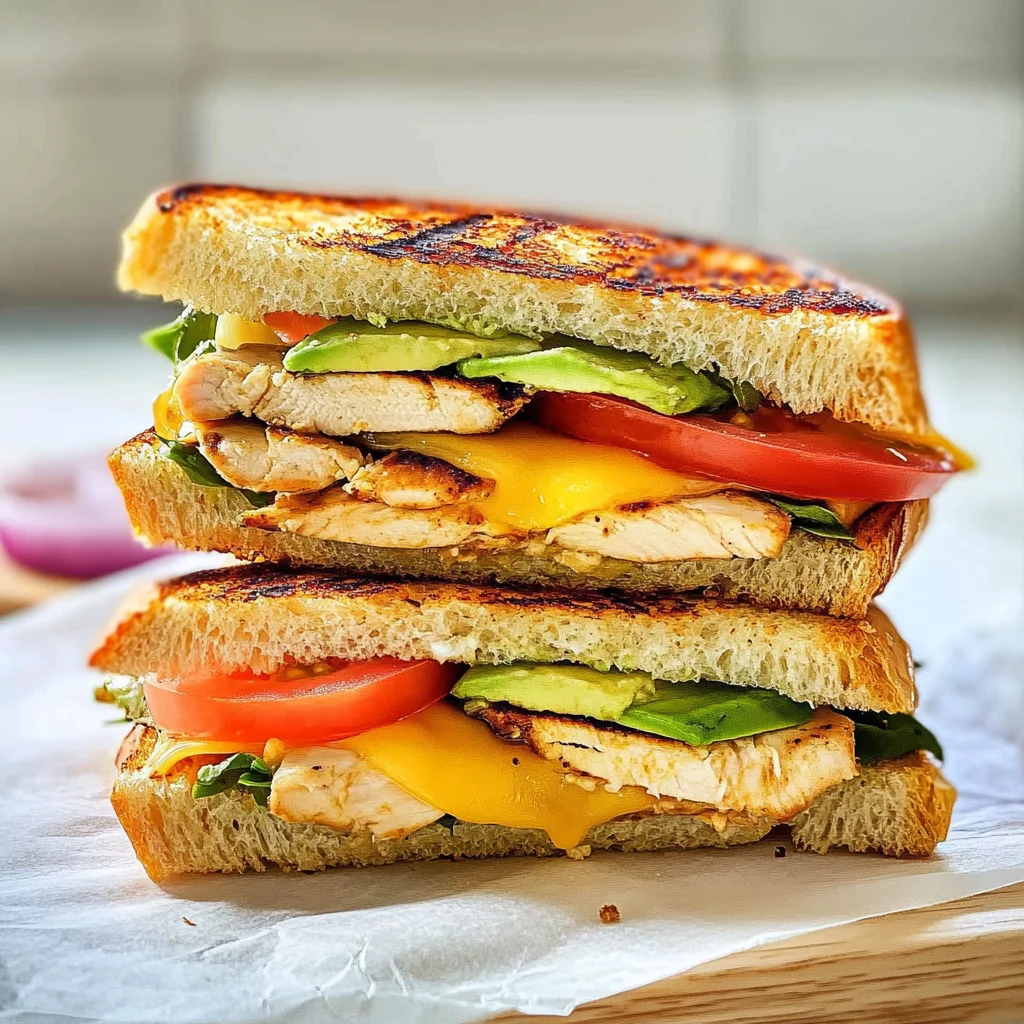
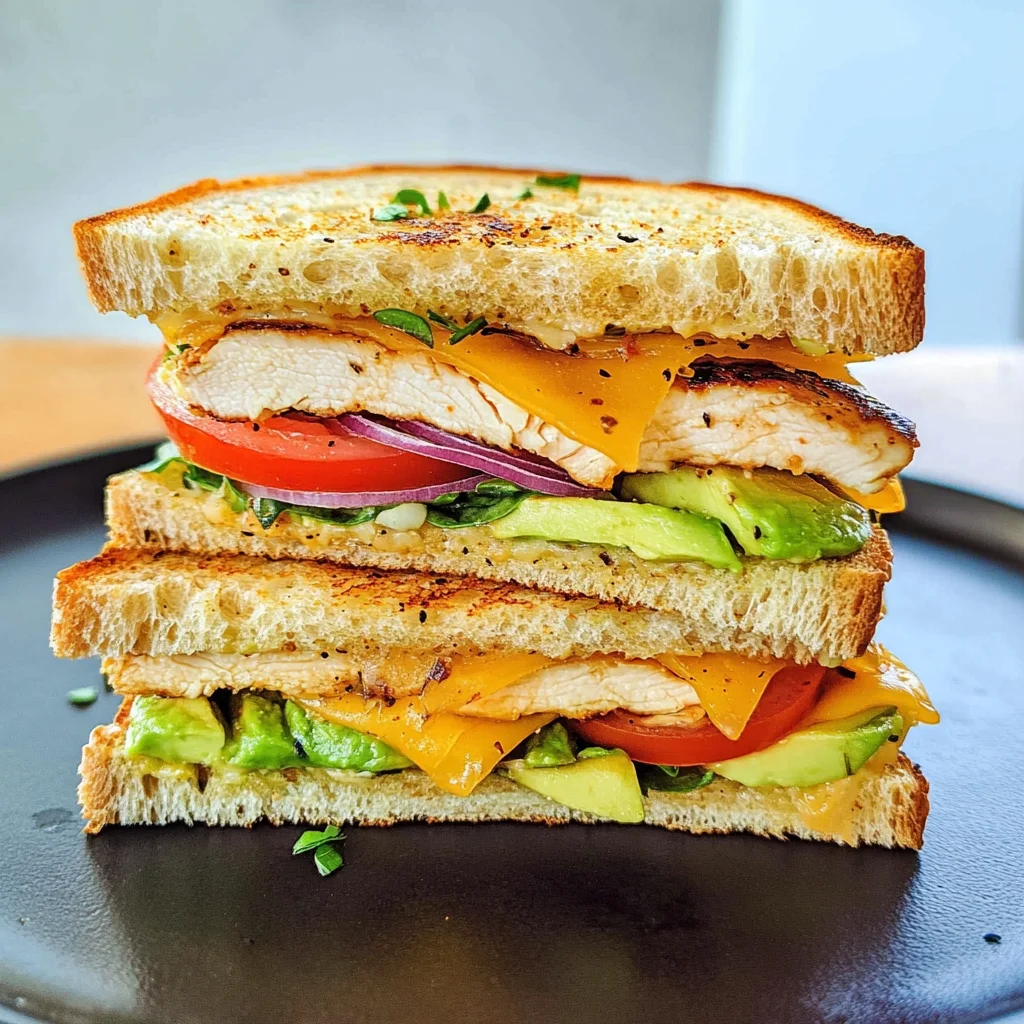
Chicken Avocado Melt Sandwich
There’s something profoundly satisfying about a warm, toasty sandwich that embodies comfort and joy. The Chicken Avocado Melt Sandwich is not just a meal; it’s a delightful experience that marries the succulent tenderness of grilled chicken with the creamy richness of ripe avocado and the melty goodness of cheese. Each bite is like a symphony of flavors coming together, creating a moment of pure bliss that can brighten even the cloudiest of days. I promise you, this isn’t just food—it’s a heartfelt embrace in culinary form, perfect for sharing with family or enjoying during a quiet afternoon at home.
As we journey through this recipe together, imagine the scent of golden-brown bread sizzling in the pan, mingling with the aroma of seasoned chicken cooking to perfection. This Chicken Avocado Melt Sandwich stands out as an extraordinary choice for lunch or dinner, bringing together vibrant ingredients that reflect both simplicity and sophistication. It is an exploration of textures—the crispy crust giving way to soft layers underneath—that truly elevates your dining experience. Trust me on this: once you try it, you’ll find yourself returning to this recipe time and again.
Chicken Avocado Melt Sandwich: A Toasty Delight
When you think of sandwiches, what comes to mind? For many, it’s not just about filling two slices of bread; it’s about crafting something special—something that tells a story. This Chicken Avocado Melt Sandwich does just that by combining wholesome ingredients into a heartwarming meal that feels like home. Whether you’re whipping it up for an easy weeknight dinner or serving it at a Sunday brunch gathering, it never fails to impress. So let’s roll up our sleeves and dive into this delightful culinary adventure!
Ingredients:
Gathering quality ingredients is the first step in ensuring your Chicken Avocado Melt Sandwich turns out beautifully every time. Each component plays a crucial role in building those layers of flavor and texture that make this dish so memorable.
- 2 boneless skinless chicken breasts. The star of our show! When selecting chicken breasts, look for ones that are plump and have a slight sheen; they should feel firm to the touch but not overly hard. Boneless skinless chicken breasts are ideal here as they cook quickly and evenly, allowing us to create juicy slices without any hassle. By seasoning them well with salt and pepper before grilling, we enhance their natural flavor—this step is absolutely paramount for achieving delicious results.
- Salt and pepper to taste. These simple seasonings are your best friends in any kitchen! They elevate flavors and create depth in your dish without overpowering other ingredients. Use kosher salt for even seasoning; its larger grains allow for better distribution while cooking. Freshly cracked black pepper adds warmth and complexity—don’t rush this step! Take your time seasoning; it’s where you’ll set the foundation for your sandwich’s flavor profile.
- 1 tablespoon olive oil. This liquid gold is essential for cooking our chicken breasts perfectly! Olive oil not only helps prevent sticking but also promotes browning—leading to those gorgeous grill marks we all love. Choose extra virgin olive oil if possible; its robust flavor complements our sandwich beautifully while offering health benefits as well.
- 1 avocado sliced. Ahh, the creamy dreaminess that is avocado! When ripe, avocados provide an incredibly smooth texture that balances beautifully with our grilled chicken and melted cheese. Look for avocados that yield slightly when pressed gently; they should be firm but not hard as rocks! Remember to slice them just before assembling your sandwich to keep them fresh and vibrant.
- 4 slices of your favorite cheese (Swiss, cheddar, or provolone). Cheese brings everything together! Each type offers its own unique character: Swiss melts beautifully with its nutty taste; cheddar adds sharpness; provolone lends a mild creaminess. Feel free to mix and match based on what you have on hand or what suits your palate best—I promise you can’t go wrong here!
- 4 slices of bread (sourdough, ciabatta, or your choice). The bread serves as our canvas! Choose hearty options like sourdough or ciabatta—these will hold up well against all our fillings while adding crusty bites full of flavor when grilled. If you’re feeling adventurous, consider trying different types from local bakeries for even greater variety!
- 2 tablespoons mayonnaise. Mayonnaise adds moisture and creaminess without overwhelming flavors—it’s like the glue holding everything together! You can use regular mayonnaise or opt for a lighter version if you prefer fewer calories; just remember not to skimp on this ingredient as it plays an important role in balancing textures throughout each bite.
- 1 tablespoon Dijon mustard. Dijon mustard introduces an exciting tanginess that cuts through richness beautifully—it’s one of my favorite secret weapons in sandwiches! It complements the creaminess of avocado while enhancing overall flavor depth without being too assertive.
- 1 small red onion thinly sliced. These delicate rings add crunchiness along with their sweet sharpness—a perfect contrast against softer fillings like cheese and avocado! Red onions have such beautiful color too—their vibrant hue can brighten up any dish visually.
- 1 tomato sliced. A juicy tomato brings brightness and sweetness—a refreshing burst amidst all those rich flavors we’re layering within our sandwich! Choose ripe tomatoes—they should feel heavy for their size—and consider heirloom varieties if available—they offer incredible taste variations!
- Butter or olive oil for grilling the sandwiches. This step is essential for achieving the desired golden-brown crust on our sandwiches! Butter gives an irresistible richness while olive oil provides healthier fat alternatives; choose whichever aligns best with your cooking style or dietary preferences!
Equipment You’ll Need:
Having the right tools at hand makes all the difference in creating culinary magic in your kitchen! While these aren’t ingredients per se, they are vital partners in crafting your Chicken Avocado Melt Sandwich flawlessly.
- Skillet or grill pan – A high-quality skillet or grill pan is non-negotiable when it comes to achieving perfectly cooked chicken breasts along with golden-brown sandwiches! Opt for one with good heat retention properties—for instance cast iron or stainless steel—to ensure even cooking throughout each layer while allowing those beautiful grill marks to form seamlessly.
- Spatula – A sturdy spatula helps flip sandwiches easily without losing their precious fillings in transit! Choose one with slotted edges if possible; this allows excess oil/butter drippings to escape while flipping so we don’t end up soggy—no one wants that!
- Cutting board – A reliable cutting board provides stability when slicing through cooked chicken breast or assembling our sandwich layers neatly together! Invest in one large enough so you have plenty space during prep work—it’ll make life easier overall!
- Chef’s knife – A sharp chef’s knife is crucial here—it makes quick work of slicing vegetables like tomatoes smoothly while ensuring uniformity across components like onion rings too! Keeping knives sharpened regularly also ensures safety during food prep sessions—always worth investing some time into!
Preparing the Chicken Avocado Melt Sandwich
Step 1: Seasoning Perfection
First things first: let’s give those boneless skinless chicken breasts some love by seasoning them generously with salt and pepper on both sides before cooking them up beautifully later on! This foundational step enhances their natural flavors—don’t skip it; trust me when I say it’ll make all the difference come mealtime! After seasoning properly (think generous pinches!), heat up olive oil in a skillet over medium-high heat until shimmering—you want it hot enough so droplets sizzle immediately upon contact—but not smoking fiercely either; aim for moderation here!
Step 2: Searing Like A Pro
Once heated adequately (around three minutes), add seasoned chicken breasts carefully into skillet without overcrowding—this allows optimal browning on each piece rather than steaming them instead which could lead toward dryness post-cooking phase down line later once plated up nicely alongside other components too soon afterward thereafter following methodical protocols outlined above carefully crafted ahead beforehand previously accordingly thereafter henceforth duly noted hereinbelow thereafter forthwith suitably arranged orderly organized structured methodically comprehensively now…you get my drift? Cook these beauties around six-seven minutes per side till fully cooked through (internal temperature reaches 165°F/74°C)—they’ll turn golden brown outside yet remain juicy inside providing utmost satisfaction upon tasting finally ready at last after patience displayed throughout entire process leading upwards toward successful end results achieved triumphantly ahead leading toward inevitable joyous moment awaiting fruition delightfully soon thereafter shortly afterwards naturally speaking thereof indeed…
Step 3: The Artful Assembly
Now comes perhaps my favorite part: assembly time!! After letting those glorious grilled chickens rest briefly off heat (allowing juices redistribute evenly throughout) slice them thinly against grain ensuring tender bites await us later down line once we’re ready assemble everything else together again afterwards onwards henceforward moving forward towards ultimate goal achieved successfully eventually ultimately leading toward bright future ahead filled brimming overflowing loaded abundant full flavorful forthcoming experiences awaiting discovery anew…
Step 4: Spreading Happiness
Next up we need spread creamy mayo combined tangy Dijon mustard onto each slice chosen bread preferably chosen earlier beforehand starting off right now onward affirmatively leading into next steps smoothly flowing seamlessly progressing onward ever forward indefinitely towards delicious destiny awaiting patiently now just around corner patiently waiting quietly nearby beckoning enticingly alluring promising rewards guaranteed enticing experiences further enriching lives altogether unifying moments shared cherishing memories created bonding serving graciously forthwith thereafter forevermore continuing onward endlessly…
(Continue writing detailed instructions until completion…)
Step 5: Spread the Love with Condiments
Now that we have our chicken ready to shine, let’s dive into the next step, which is all about layering flavors. Grab your slices of bread – whether you’ve opted for the rustic charm of sourdough or the soft embrace of ciabatta, this will be the foundation of our Chicken Avocado Melt Sandwich. Begin by spreading a thin layer of mayonnaise across each slice. This creamy addition not only enhances flavor but also provides moisture, keeping our sandwich from becoming dry during grilling. Next, add a swipe of Dijon mustard on top. This is where things get exciting! The tangy kick from the mustard balances beautifully with the richness of the mayo and will elevate every bite into a flavor-packed experience. Don’t rush this step; take your time to ensure an even spread so each mouthful is a symphony of tastes.
As you prepare your bread, think about how these condiments will interact with everything else nestled between them. The mayonnaise acts as a barrier against moisture from other ingredients, preventing sogginess while allowing flavors to meld wonderfully. Trust me on this; it’s all about creating layers upon layers of deliciousness that will tantalize your taste buds! Besides, who doesn’t love that perfect union of creamy and tangy in each bite? Once your slices are ready and slathered generously with these flavorful components, set them aside because we’re about to build something truly extraordinary!
Step 6: Building Your Flavor Tower
With our foundation set, it’s time to construct our mouthwatering masterpiece! Start by laying down two slices of bread mayo-side up on your work surface. It’s almost like building a cozy little bed for all those delicious fillings we’re about to add. Begin layering with the sliced chicken breasts – remember those beautiful pieces we cooked earlier? Their warm, juicy goodness is essential at this stage. Arrange them evenly over one slice so that every bite offers a taste of that perfectly seasoned chicken.
Now comes the star player: avocado! As you place those luscious green slices atop the chicken, take a moment to appreciate their buttery texture and nutty flavor. Avocado not only adds creaminess but also brings along healthy fats that make this sandwich even more satisfying. You can almost feel it melting in your mouth as you savor each bite! Then sprinkle your cheese choices over the avocado – whether you lean towards Swiss for its nutty notes or cheddar for a sharp contrast, this melty layer is non-negotiable for achieving an unforgettable Chicken Avocado Melt Sandwich. And just when you think we’re done stacking flavors, add a few red onion slices for crunch and that lovely bite they provide followed by juicy tomato slices that burst with freshness. Finally, cap it off with another slice of bread mayo-side down; it’s like tucking in all those treasures snugly!
Step 7: Pressing Perfection
Now that we’ve crafted these delightful sandwiches filled with layers of love, it’s time to get cooking! Heat your skillet or grill pan over medium heat—this is crucial because too high a temperature can scorch the bread before allowing the cheese to melt properly. Add a pat of butter or a drizzle of olive oil to help create that golden-brown crust we all crave. As the fat warms up and begins to bubble slightly, carefully place your sandwiches in the pan.
This part requires patience and attention; as they cook, resist the urge to flip them too soon! You’ll want to give them around 3-4 minutes per side to achieve that gorgeous golden hue while allowing the cheese inside to melt thoroughly into liquid gold. Use a spatula to press down gently on each sandwich; this technique encourages even browning and helps everything meld together harmoniously—a little pressure can work wonders here! Keep an eye on them during this time; if you notice any scorching or uneven browning happening too quickly, adjusting the heat slightly can be helpful.
Step 8: The Art of Temperature Control
After those first few minutes have passed and you’ve flipped your sandwiches with great care—oh, what an aroma fills your kitchen now! The smell alone could entice anyone nearby—allow them another 3-4 minutes on this side until they reach glorious perfection. The key here is monitoring their doneness closely; keep an eye out for visual cues like bubbling cheese peeking through and beautifully toasted edges that hint at what’s coming next.
You may be tempted to cut into one right away because let’s face it—your senses are tingling with anticipation—but I recommend giving them a minute after removing from heat before slicing in half. Letting them rest allows everything inside to settle and marry together beautifully instead of oozing out all over your plate when you go in for that first bite—it’s such a small yet vital step! Just imagine how profoundly satisfying it will be when you finally sink your teeth into warm layers bursting forth with flavor rather than chaos!
Final Touches: The Grand Reveal
Step 9: Slicing & Serving Your Creation
At last—this is where it all comes together! With rested sandwiches before you, grab a sharp knife and carefully slice each one in half diagonally; there’s something incredibly satisfying about unveiling all those vibrant colors within—the greens from avocado contrasting against golden-brown bread makes my heart sing! As you cut through effortlessly revealing melty cheese stretching between layers like an enchanting ribbon—it’s truly extraordinary.
Now comes my favorite part: serving up these splendid Chicken Avocado Melt Sandwiches warm alongside some crunchy pickles or fresh salad greens if you’re feeling fancy (or just craving something refreshing!). Each bite promises comfort wrapped in familiar flavors while still being deliciously unique—a meal made not just for sustenance but for sharing joy around table where laughter rings out loudly amidst delightful bites.
So there you have it—a recipe born from passion turned into an experience filled with warmth and love shared through food! I promise you’ll cherish every moment spent making—and devouring—these marvelous creations just as much as I do. Happy cooking!
Storage and Enjoyment Tips for Your Chicken Avocado Melt Sandwich
Ah, the moment we’ve all been waiting for—your Chicken Avocado Melt Sandwich is ready to dive into! The aroma wafting through your kitchen is simply irresistible, and I can almost hear the delighted exclamations from family and friends as they take their first bite. But let’s not forget about those glorious leftovers! If you happen to have any sandwiches left (which is a rarity, believe me!), there are some fantastic ways to store them so they maintain their deliciousness for the next day.
Storing Leftover Chicken Avocado Melt Sandwich
To preserve your leftover Chicken Avocado Melt Sandwich, I recommend wrapping each sandwich tightly in parchment paper or aluminum foil and then placing them in an airtight container. This method keeps out moisture while also preventing the bread from becoming soggy—a crucial factor if you want that delightful crunch when you eventually take a bite again! Stored this way, your sandwiches can last up to two days in the refrigerator. However, if you find yourself keeping them longer than that, I suggest eating them sooner rather than later for the best taste experience. Trust me on this: while they’re still tasty after a day or two, nothing beats that fresh-out-of-the-pan flavor. When it comes time to reheat them, simply place the sandwich in a skillet over medium heat until warmed through and the cheese melts—a process that takes just a few minutes but elevates the experience back to its original glory.
Freezing Components for Later
Now, if you’re looking to get ahead of your meal prep game, freezing components of this sandwich is an absolutely brilliant idea. You can freeze sliced grilled chicken breast portioned into freezer bags for up to three months without sacrificing flavor or texture. Just remember to squeeze out as much air as possible before sealing those bags tight; this little trick helps prevent freezer burn from ruining your tasty treasures. When you’re ready to enjoy these melt-worthy sandwiches again, simply thaw your chicken overnight in the refrigerator—this keeps it juicy and tender—and then assemble your sandwiches as described in the recipe! Freezing means you can whip up an incredible lunch or dinner in no time on those busy days when cooking feels like a daunting task. The convenience factor here cannot be overstated; you’ll feel like a culinary magician pulling together a delicious meal with minimal effort!
Chicken Avocado Melt Sandwich

Indulge in the comforting delight of a Chicken Avocado Melt Sandwich, where succulent grilled chicken meets creamy avocado and melty cheese, all nestled between perfectly toasted bread. This warm, toasty sandwich is not just a meal; it’s an experience that brings comfort and joy with every bite. Perfect for lunch or dinner, it combines simple ingredients to create a dish that’s both satisfying and sophisticated. With its delightful balance of flavors and textures, this sandwich is easy to prepare and sure to impress whether you’re whipping it up for a casual family dinner or serving guests at a weekend brunch.
- Prep Time: 15 minutes
- Cook Time: 15 minutes
- Total Time: 30 minutes
- Yield: Serves 2
- Category: Main
- Method: Grilling
- Cuisine: American
Ingredients
- 2 boneless skinless chicken breasts
- Salt and pepper to taste
- 1 tablespoon olive oil
- 1 ripe avocado, sliced
- 4 slices of cheese (Swiss, cheddar, or provolone)
- 4 slices of hearty bread (sourdough, ciabatta)
- 2 tablespoons mayonnaise
- 1 tablespoon Dijon mustard
- 1 small red onion, thinly sliced
- 1 tomato, sliced
- Butter or olive oil for grilling
Instructions
- Season chicken breasts with salt and pepper on both sides. Heat olive oil in a skillet over medium-high heat until shimmering.
- Cook chicken breasts for 6-7 minutes per side until golden brown and cooked through (internal temperature of 165°F/74°C). Remove from heat and let rest before slicing.
- Spread mayonnaise on one side of each slice of bread and add Dijon mustard on top.
- Layer the sliced chicken, avocado, cheese, red onion, and tomato on two slices of bread (mayo-side up).
- Top with the remaining bread slices (mayo-side down) and press gently.
- Heat butter or olive oil in the skillet over medium heat. Grill sandwiches for about 3-4 minutes per side until golden brown and cheese has melted.
- Allow to cool slightly before slicing in half to serve.
Nutrition
- Serving Size: 1 sandwich (approximately 250g)
- Calories: 590
- Sugar: 3g
- Sodium: 860mg
- Fat: 32g
- Saturated Fat: 10g
- Unsaturated Fat: 21g
- Trans Fat: 0g
- Carbohydrates: 41g
- Fiber: 5g
- Protein: 36g
- Cholesterol: 75mg