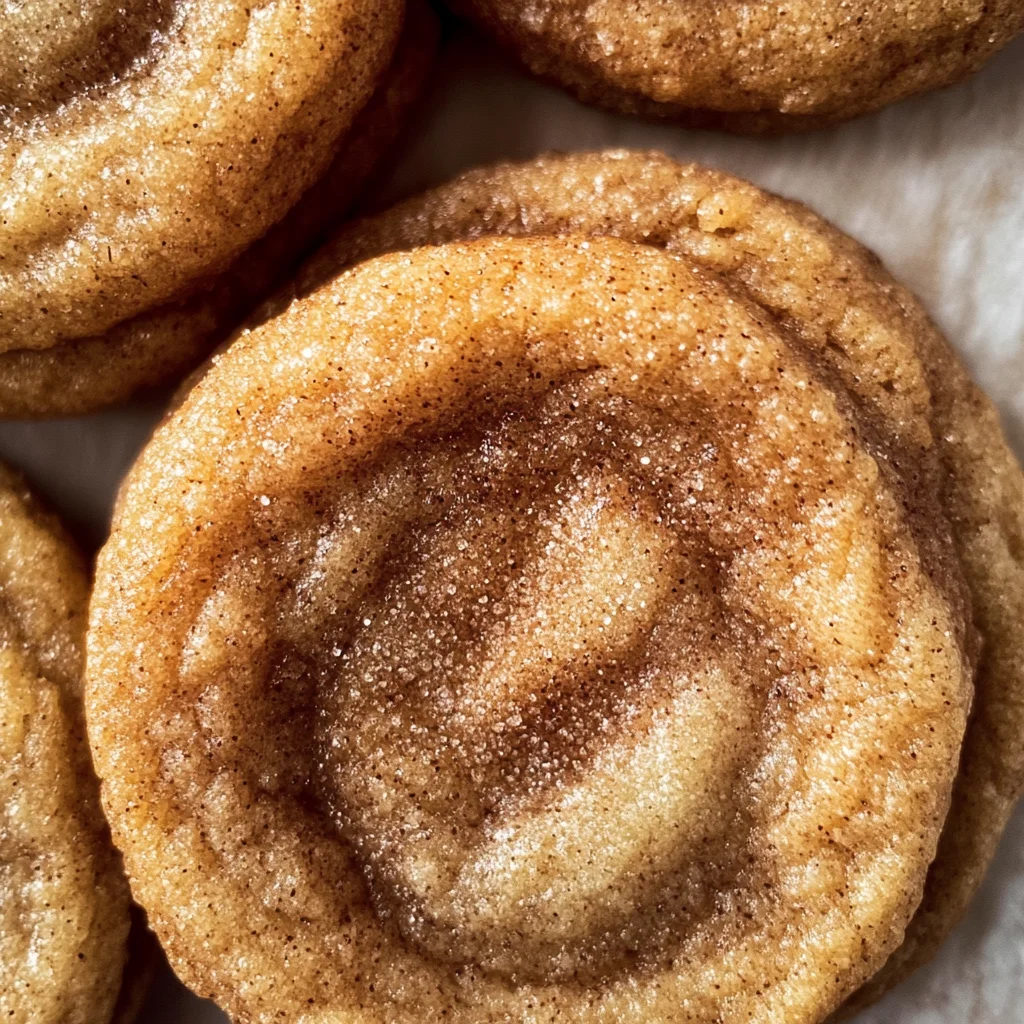
Cinnamon Brown Butter Cookies
Cinnamon Brown Butter Cookies are not just a treat; they are an experience, a journey through time and flavor that invokes warm memories of laughter-filled kitchens and the sweet aroma of baking wafting through the air. As the rich, nutty scent of browned butter mingles with the comforting warmth of cinnamon, you’ll find yourself transported to those cozy moments spent with family and friends. Each bite of these cookies reveals a delightful contrast between a crisp edge and a chewy center, creating a symphony of textures that dance upon your palate. Trust me, once you taste these Cinnamon Brown Butter Cookies, you’ll understand why they hold a special place in my heart—and why I can’t wait to share this recipe with you.
What makes these cookies so extraordinary is not only their flavor but also the nostalgia they evoke. This recipe has been lovingly passed down through generations, transformed along the way into something uniquely comforting yet refreshingly modern. With every batch baked, I can almost hear Grandma’s laughter as we would sneak bites from the cooling rack, our faces dusted with flour and sugar—a reminder that cooking is about connection and joy as much as it is about the food itself. So, whether you’re hosting a gathering or simply indulging in some me time, these cookies are perfect for any occasion. They’re easy to whip up but create an unforgettable experience that fills your home with love and warmth.
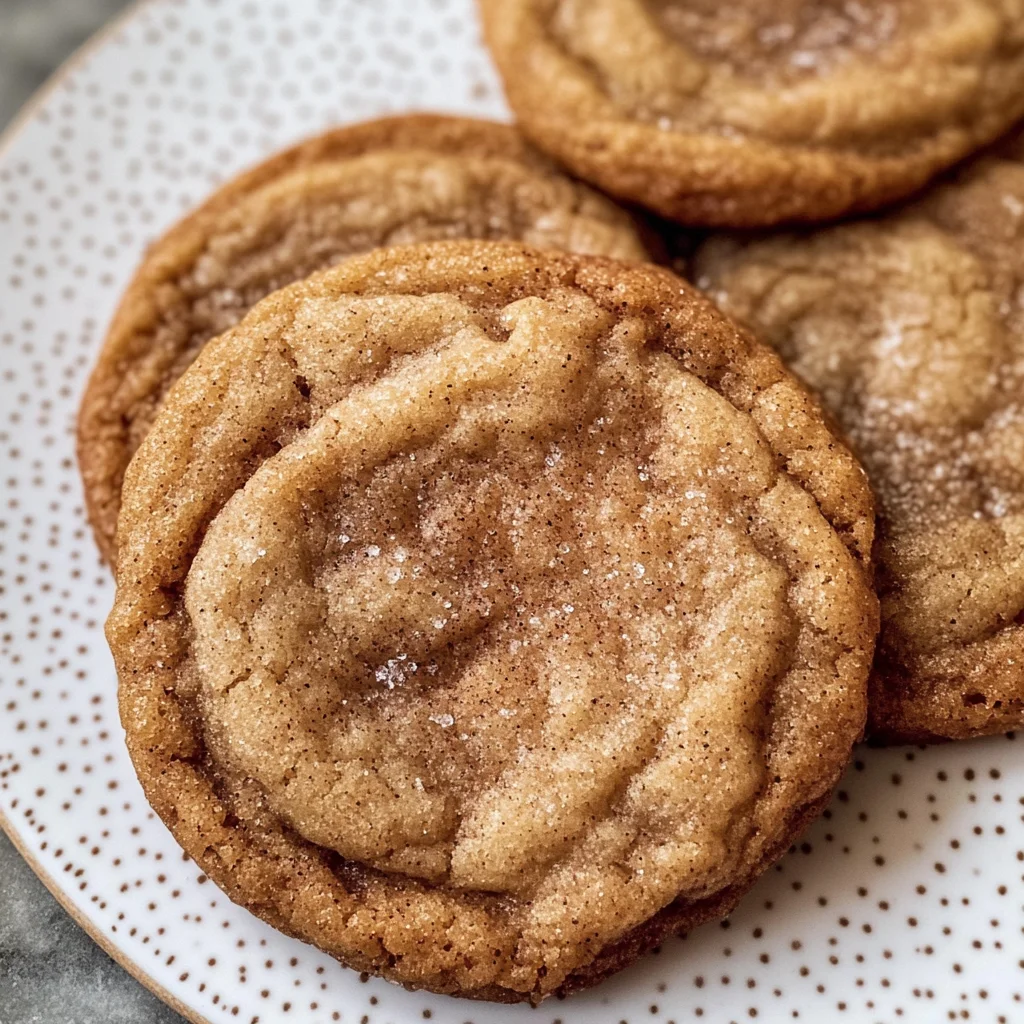
Cinnamon Brown Butter Cookies: A Cozy Treat for All Occasions
These Cinnamon Brown Butter Cookies are sure to become a cherished favorite in your kitchen! With their wonderful marriage of flavors—from the nutty depth of browned butter to the warm embrace of cinnamon—every bite is like receiving a hug from an old friend. Plus, they’re incredibly versatile! Enjoy them on their own or jazz them up by adding chocolate chips or nuts for extra indulgence. Let’s embark on this delicious adventure together!
Ingredients:
Before we dive into baking bliss, let’s gather our ingredients! Each component plays a crucial role in creating these mouthwatering cookies that will leave everyone asking for seconds.
- 1 cup (2 sticks or 226g) unsalted butter: The star of our show! Browning unsalted butter elevates its natural flavor profile to new heights, transforming it into liquid gold with nutty undertones that perfectly complement the sweetness of our cookies. Make sure to use unsalted butter so you can control the saltiness of your dough—a crucial aspect in achieving that balanced taste we’re after.
- 1 cup packed light brown sugar: This sugar is key for adding moisture and chewiness to our cookies. The molasses present in brown sugar not only provides deeper flavor but also helps create that delightful chewy texture we all crave. When measuring, be sure to pack it tightly in your measuring cup; this ensures you get enough sweetness without overwhelming the other flavors.
- 1/2 cup granulated sugar: This sugar contributes structure and crispness to our cookie edges while balancing out the richness from the brown sugar. The combination creates an ideal sweetness level—just right without being overly saccharine.
- 2 large eggs: Eggs play two vital roles here: binding our ingredients together while also helping to create lift and structure as they cook. Be sure your eggs are at room temperature so they incorporate more seamlessly into your batter.
- 2 cups all-purpose flour: Flour is essential for providing stability and structure to our cookies. It absorbs moisture during baking, allowing us to achieve that perfect chewy texture contrasted with crispy edges. If you’re feeling adventurous and wish to add a healthy twist, consider substituting half of it with whole wheat flour for added nutrients!
- 1 tsp baking soda: This ingredient acts as our leavening agent, helping our cookies rise beautifully while creating a light texture that melts in your mouth. It’s important not to skip this step; without it, your cookies may turn out flat instead of fluffy.
- 1 tbsp ground cinnamon: Cinnamon infuses our dough with warmth and spice—it’s what makes these cookies feel so cozy! Ground cinnamon blends beautifully with both sugars in this recipe, enhancing each bite’s aromatic qualities.
- 1/4 tsp salt: Don’t underestimate salt’s role—it balances sweetness beautifully! It accentuates flavors throughout our dough while ensuring each bite is extraordinarily satisfying.
Now that we have all our ingredients gathered and ready, it’s time to roll up those sleeves!
Equipment You’ll Need:
Before we dive into mixing and baking, let’s talk about some essentials you’ll want on hand! Having the right tools makes everything smoother and more enjoyable, transforming cooking from just another task into pure joy.
- Medium saucepan: We’ll need this for browning our butter—a process that requires gentle heat and close attention. Choose one with a light-colored interior so you can easily monitor the butter as it transforms from yellow to golden brown without burning.
- Mixing bowls (large and medium): These versatile companions will help keep your workspace organized as you mix dry ingredients separately before combining them with wet ones. Opt for glass or stainless steel bowls—they’re durable and easy to clean!
- Whisk: A trusty whisk will ensure we incorporate air into our eggs when blending them in with sugars; this step is crucial for achieving that glossy batter consistency we’re aiming for when making our Cinnamon Brown Butter Cookies.
- Rubber spatula: Perfect for scraping down sides while mixing—it ensures every last bit of goodness is integrated into your cookie dough! Plus, using silicone means less sticking compared to traditional plastic spatulas.
- Baking sheets lined with parchment paper: These sheets create non-stick surfaces for cookie placement; they allow even baking while preventing burnt bottoms—making clean-up effortless too!
Now that we’ve gathered everything needed for success let’s jump straight into preparing those delightful Cinnamon Brown Butter Cookies—your kitchen will soon be filled with intoxicating aromas!
Step 1: Browning the Butter – Unlocking Flavor
To begin this magical process of creating Cinnamon Brown Butter Cookies, start by placing one cup of unsalted butter into a medium saucepan over medium heat. As it slowly melts away, watch closely—it won’t be long before you start smelling its heavenly aroma filling your kitchen! You’ll notice it bubbling gently at first; don’t rush this step or turn up the heat too high—that will cause burning rather than browning. Instead, allow patience here because what happens next is truly transformative! As the moisture evaporates from within each cube of butter, it’ll transition into golden liquid gold flecked with small brown bits—this stage signifies what we call ‘browning’.
Once you’ve achieved that beautiful amber color (which usually takes about 5 minutes), immediately remove it from heat; if left unattended even briefly at this stage could lead straight towards burnt bitterness instead—a non-negotiable setback in achieving perfection! Allowing it cool slightly before proceeding ensures we don’t scramble those precious eggs when mixed together later on either; trust me on this step!
Step 2: Mixing It All Together – The Magic Happens
Now comes my favorite part—the moment where all those glorious ingredients come together! Start by pouring your cooled browned butter into a large mixing bowl along with both sugars—the packed light brown sugar and granulated white sugar—and mix until smooth using either an electric mixer or whisking vigorously by hand if you’re feeling strong today! This process known as ‘creaming’ helps incorporate air into our mixture while dissolving those sugars completely creates an incredibly luxurious base full-flavored cookie dough ahead!
As you blend everything together until combined (about 2 minutes if using electric mixer), watch how smooth it becomes—this glossy texture indicates successful incorporation already forming right before us! Now it’s time for those two large eggs; add them one at a time while continuing mixing after each addition—you’ll notice how everything becomes even silkier after incorporating them fully into batter—we want no lumps left behind here folks!
Step 3: Combining Dry Ingredients – Building Structure
While creating magic within wet mixtures earlier was exciting enough already… now let’s prepare ourselves by combining dry elements next! In another bowl (yes—I promise there’s method behind madness), sift together two cups all-purpose flour along with one teaspoon baking soda alongside one tablespoon ground cinnamon plus quarter teaspoon salt until evenly dispersed throughout mixture—that’s crucial because such uniformity ensures consistent results across every single cookie baked later on!
Gradually add this dry blend directly onto wet components already prepared earlier—using rubber spatula gently fold flour mixture until fully incorporated without overmixing—we want soft dough rather than tough rock-like biscuits here after all which could ruin everything if rushed past proper technique now wouldn’t they?
Step 4: Chilling Out – Why Patience Is Key
Once everything has been mixed well together forming cohesive sticky dough ready-to-go… resist temptation folks!! Here lies another pivotal moment where chilling truly matters most—it’s recommended letting dough rest inside refrigerator covered tightly within plastic wrap or container ideally lasting around thirty minutes minimum (or longer!) depending upon available time slot during busy days ahead since colder temperatures help prevent spreading too much during baking stage later ahead yielding perfect end products instead!
Chilling also enhances flavors deeply allowing spices blended previously mingle nicely over time resulting therefore richer cookie experiences overall once baked once again later on—you’ll thank yourself later when bites taste divine versus bland rushed versions otherwise made fresh out oven prematurely without letting sit beforehand!!
With patience comes rewards beyond imagination… once chilled thoroughly next up would be preheating oven ready bake batches ahead toward perfection shortly thereafter!!
Stay tuned dear friend—we’re almost there!!
Step 5: The Chilling Process – A Crucial Step for Texture
Now, let’s pause for a moment and talk about chilling the dough—this step is absolutely paramount in achieving those wonderfully chewy Cinnamon Brown Butter Cookies we all crave. After you’ve combined your dry ingredients with the wet mixture, scoop the dough into a bowl and cover it with plastic wrap or a clean kitchen towel. You’ll want to chill the dough for at least 30 minutes, and trust me, this waiting period is not just a formality; it’s a game-changer! By allowing the dough to rest in the refrigerator, you’re giving the flour time to fully hydrate, which leads to an improved texture. This process also allows the flavors to meld beautifully; think of it as letting all those delightful spices mingle and celebrate their harmonious relationship.
During this time, the butter in your dough will firm up, resulting in cookies that hold their shape while baking. You might wonder why this matters so much—well, if you skip this step and bake right away, your cookies may spread too much and lose that desired balance of crisp edges and chewy centers. So don’t rush this step; pop on your favorite playlist or enjoy a cup of tea while you wait. I promise you, the end result is well worth it!
Step 6: Prepping Your Oven – The Perfect Baking Environment
While your dough chills, it’s time to prepare your oven for action! Preheat it to 350°F (175°C). This temperature is key for achieving that perfect golden-brown finish on your cookies. A properly preheated oven allows for even baking, ensuring that each cookie develops that lovely crisp edge while maintaining a soft center. If you’re like me and often forget this crucial step—don’t worry! Just set a timer for about 15 minutes before you plan to bake so that your oven has ample time to reach the desired temperature.
While waiting for the preheat signal, line two baking sheets with parchment paper. This simple yet effective technique prevents sticking and promotes even cooking. It’s like giving each cookie its own cozy little bed! If you want to elevate your baking game even further, consider using silicone baking mats—they provide an excellent non-stick surface and can be reused for countless batches of cookies. Trust me on this: these little details make all the difference when it comes to turning out perfectly baked Cinnamon Brown Butter Cookies.
Step 7: Scooping Perfection – Forming Your Cookies
Now comes one of my favorite parts—scooping out your cookie dough! Using a tablespoon-sized cookie scoop or simply two spoons, portion out the chilled dough onto your lined baking sheets. Aim for uniform scoops spaced about 2 inches apart; this spacing is crucial because cookies need room to spread as they bake. You should see them plump up beautifully without merging into one giant cookie—a delicious disaster waiting to happen! As you scoop, take a moment to appreciate the rich color of the brown butter-infused dough specked with cinnamon; it looks good enough to eat already!
At this stage, I like to gently press down on each scoop with my fingers or the back of a spoon just slightly—not too much! This helps them flatten ever so slightly while still retaining enough height for that irresistible chewiness we love. I promise you that taking these few extra seconds will result in a more visually appealing cookie with even texture throughout once baked.
Step 8: Baking Your Masterpieces – The Anticipation Builds
With our cookies ready for their grand entrance into the oven, it’s time for some serious magic! Place your baking sheets in the preheated oven and set a timer for about 12 minutes. Keep an eye on them as they bake—this part is where patience pays off! You’ll notice how they begin to puff up slightly; their edges should turn a beautiful golden brown while their centers remain soft and slightly undercooked—that’s exactly what we want! To test doneness without sacrificing any deliciousness, look closely; they should appear set around the edges but still have that enticing glossy sheen at their centers.
If you’re unsure whether they’re ready or if your oven tends to run hot (which can happen), feel free to check them at around 10 minutes; every oven is unique after all! Remember not to overbake; we want these beauties moist and chewy inside rather than dry. Once they come out of the oven looking like golden nuggets of joy, let them cool on the baking sheet for about five minutes before transferring them onto wire racks—this resting period allows them to firm up just enough without losing that divine softness we adore.
Conclusion:
As we wrap up this delicious journey through making Cinnamon Brown Butter Cookies, I hope you feel as excited as I do about this recipe! It has been such a joy sharing my passion for this treat with you. The combination of nutty brown butter and warm cinnamon creates a symphony of flavors that dances on your palate, elevating it from just another cookie recipe to something truly extraordinary. Each bite is not only a taste sensation but also an invitation to reminisce about cherished moments spent in kitchens filled with laughter and love.
This recipe is a must-try because it captures not just flavor but the sheer joy of baking! It’s accessible enough for even novice bakers while packing enough depth to impress anyone lucky enough to receive these cookies. Picture yourself pulling them from the oven—the golden edges glistening under soft light as you catch that intoxicating scent wafting through your home. It’s pure bliss! These cookies shine during festive gatherings or cozy afternoons alike; they invite shared moments around tables laden with laughter and stories.
Imagine savoring one with your afternoon tea or coffee—what a pairing! For an extra indulgent experience, try adding a drizzle of melted chocolate over these cookies right before serving; it creates an utterly divine contrast against the rich brown butter flavor. Or perhaps pair them with creamy vanilla ice cream for an easy dessert that feels fancy yet effortless. Feeling inspired? Think about serving them alongside spiced chai or hot cocoa during chilly evenings—it will transform your living room into a haven of warmth.
And let’s not forget about variations! Feeling adventurous? You could easily swap out some flour for oats for added texture or toss in nuts like pecans or walnuts for that crunchy element we all adore. If you’re craving something extra sweet, fold in chocolate chips or dried fruits like cranberries to enhance those cozy flavors even more. This recipe is wonderfully adaptable—so go ahead and make it yours! I can’t wait to hear how your journey goes; please share your experiences with me and connect over these delightful treats that bring us all together.
Cinnamon Brown Butter Cookies
Cinnamon Brown Butter Cookies are the embodiment of comfort, combining the rich, nutty flavor of browned butter with the warm spice of cinnamon. These cookies are not just a delicious treat but also a nostalgic experience that brings back memories of cozy kitchens filled with laughter and love. With a delightful contrast between crisp edges and chewy centers, each bite offers a perfect balance of flavors and textures. Whether you’re sharing them at a gathering or enjoying them during some well-deserved ‘me time,’ these cookies will surely become a cherished favorite in your home.
- Prep Time: 20 minutes
- Cook Time: 12 minutes
- Total Time: 32 minutes
- Yield: Approximately 24 servings 1x
- Category: Dessert
- Method: Baking
- Cuisine: American
Ingredients
- 1 cup (2 sticks) unsalted butter
- 1 cup packed light brown sugar
- 1/2 cup granulated sugar
- 2 large eggs
- 2 cups all-purpose flour
- 1 tsp baking soda
- 1 tbsp ground cinnamon
- 1/4 tsp salt
Instructions
- Preheat the oven to 350°F (175°C) and line two baking sheets with parchment paper.
- In a medium saucepan over medium heat, melt the unsalted butter until it turns golden brown; let it cool slightly.
- In a large bowl, mix the browned butter with both sugars until smooth. Add in eggs one at a time, mixing well after each addition.
- In another bowl, whisk together flour, baking soda, cinnamon, and salt. Gradually fold into the wet mixture until just combined.
- Chill the dough for at least 30 minutes in the refrigerator.
- Scoop tablespoon-sized portions onto prepared baking sheets, spaced about 2 inches apart.
- Bake for 10-12 minutes or until golden around the edges but soft in the center. Let cool on the sheets for five minutes before transferring to wire racks.
Nutrition
- Serving Size: 1 cookie (30g)
- Calories: 140
- Sugar: 8g
- Sodium: 85mg
- Fat: 7g
- Saturated Fat: 4g
- Unsaturated Fat: 3g
- Trans Fat: 0g
- Carbohydrates: 18g
- Fiber: 0g
- Protein: 2g
- Cholesterol: 30mg