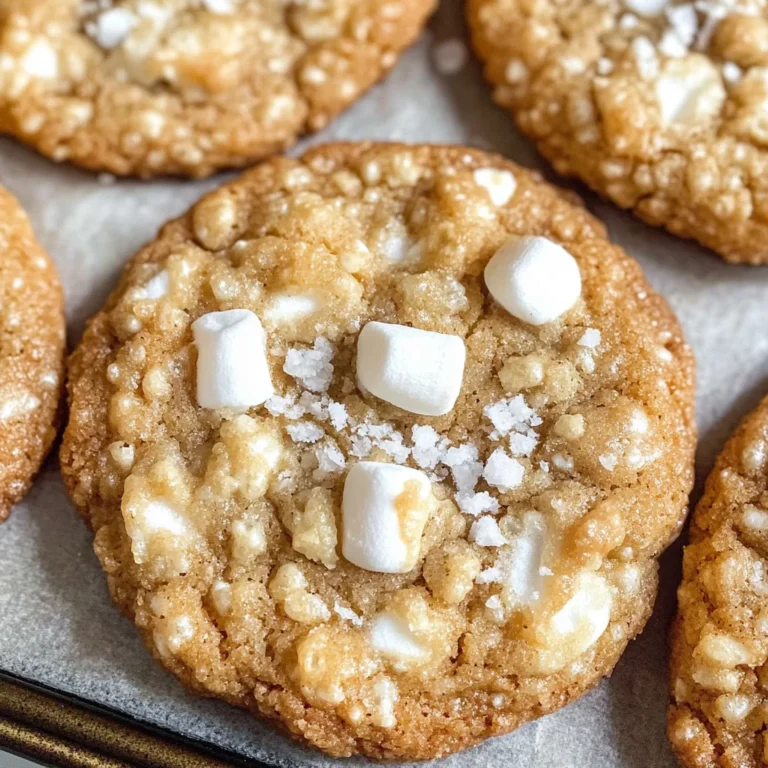
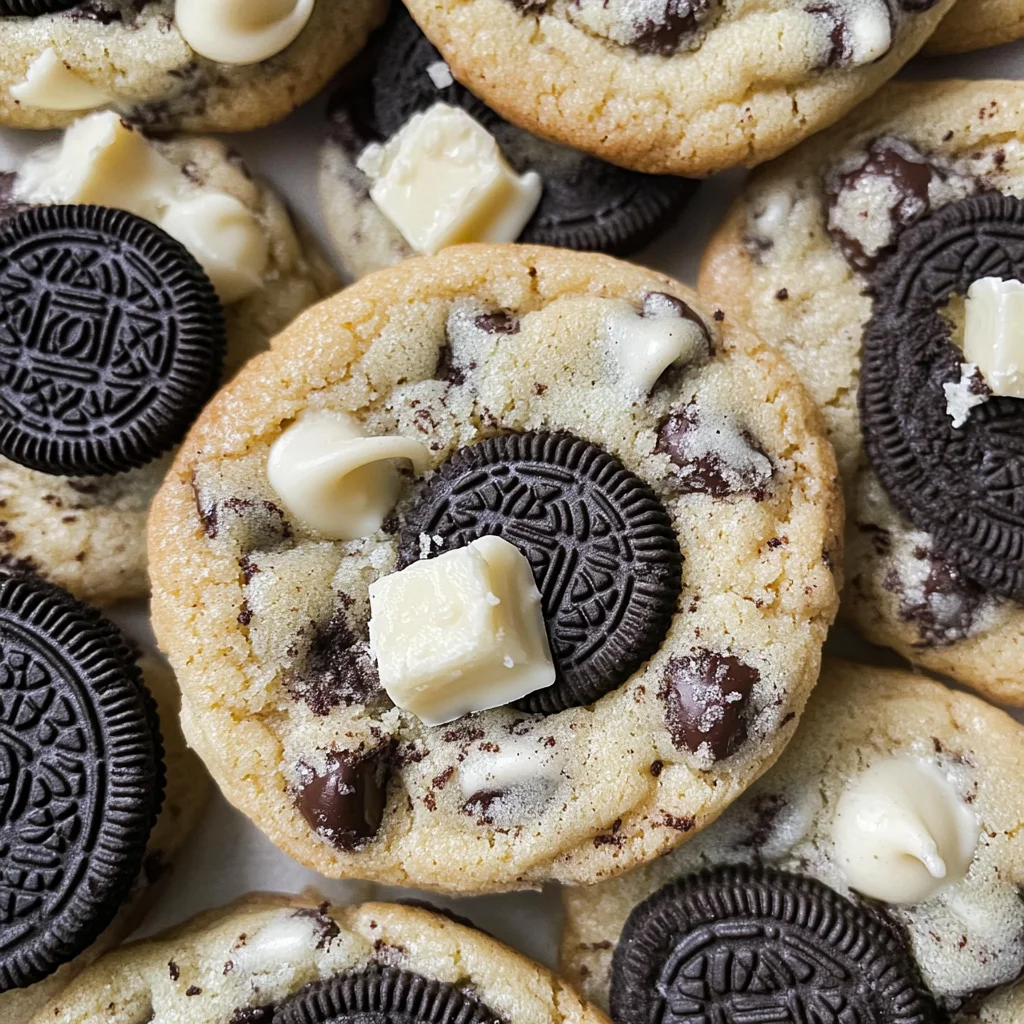
Cookies and Cream Cookie Recipe
From the moment you step into your kitchen, the air is filled with an intoxicating blend of sweetness and nostalgia that comes only from baking. It’s a dance of flavors and textures, a ritual that turns simple ingredients into something truly magical. This Cookies and Cream Cookie Recipe isn’t just about making cookies; it’s about crafting memories. Each bite transports me back to sun-drenched afternoons spent in the warmth of my grandmother’s kitchen, where the aroma of freshly baked treats intertwined with laughter and stories. I promise you, these cookies encapsulate that same joy—soft, chewy, and studded with delightful chunks of Oreo cookies and creamy white chocolate chips. It’s like enjoying cookies and cream ice cream but in a perfectly handheld form!
What makes this recipe so special? Well, it’s not just the combination of flavors; it’s the experience itself. The luscious creaminess from the white chocolate pairs beautifully with the rich cocoa notes from the Oreos, creating a symphony of flavors that are both familiar and exciting. Whether you’re baking for a gathering or just indulging yourself after a long day, these cookies are sure to bring smiles all around. Trust me on this: every step in this Cookies and Cream Cookie Recipe is infused with love and care, ensuring that each batch is as delightful as the last.
Cookies and Cream Cookie Recipe: A Sweet Indulgence
Welcome to your new favorite cookie adventure! This Cookies and Cream Cookie Recipe invites you to embrace your inner baker while creating something utterly delicious. You don’t need to be a pro in the kitchen; all you need is a little enthusiasm and maybe some music playing in the background to get you in the mood. Let’s dive into this delightful journey together!
Ingredients:
As we embark on this culinary journey together, let me guide you through each ingredient that will transform your everyday baking into something extraordinary. Each component plays its role in achieving those dreamy, chewy cookies we all crave.
- 1 cup + 2 tablespoons all-purpose flour: Flour is our foundation! It provides structure to our cookies while allowing them to rise gently. When measuring flour, make sure not to pack it down; instead, spoon it lightly into your measuring cup for accuracy. You might also consider using a high-quality brand for superior results since it’s crucial for achieving that perfect texture.
- 1 teaspoon cornstarch: Cornstarch is one of those secret weapons in baking that often goes unnoticed! It helps create softness in our cookies by preventing gluten formation—allowing them to remain tender instead of tough. Just think of it as a little magic dust that enhances chewiness!
- 3/4 teaspoon baking powder: This ingredient acts as a leavening agent that helps our cookies rise slightly during baking. It’s absolutely paramount for achieving those fluffy centers we adore while ensuring they don’t spread too much.
- 1/2 teaspoon baking soda: Baking soda serves to balance out acidity (like from our Oreos) and contributes to browning during baking—creating that lovely golden hue we all love! Be cautious with its quantity; too much can lead to overly salty cookies.
- 1/2 teaspoon salt: Salt is essential even in sweet recipes! It enhances flavor by bringing out the sweetness without being overpowering. Think of it as the unsung hero—it may seem small, but it makes a world of difference.
- 4 tablespoons unsalted butter (softened, at room temperature): Butter is where flavor begins! Using unsalted butter allows us more control over salt levels while providing richness and moisture. Make sure to soften it properly; if it’s too cold, it won’t mix well with sugar—and we want everything smooth for our cookie dough!
- 1/2 cup plus 2 tablespoons granulated sugar: Granulated sugar not only sweetens our cookies but also aids in achieving that crisp edge while keeping the centers soft. The ratio here is key; more sugar means more moisture retention which equals chewier goodness!
- 1 large egg: Eggs bind everything together while adding moisture—serving as a crucial building block in our cookie structure. Ensure your egg is at room temperature as well for easier incorporation into your batter.
- 1 teaspoon vanilla extract: Ahh, vanilla—the soul of any good dessert! It brings warmth and depth to our Cookies and Cream Cookie Recipe by balancing out sweetness beautifully. Always go for pure vanilla extract if possible; artificial versions simply can’t compete.
- 10 Oreo or chocolate sandwich cookies (coarsely chopped): These iconic cookies add delightful crunchiness along with bursts of chocolatey creaminess throughout each bite—making them an utterly irresistible addition! Feel free to chop them roughly for varied textures or finely if you prefer more uniformity throughout.
- 1/2 cup white chocolate chips: White chocolate adds richness without overshadowing other flavors—a creamy counterpart that takes these cookies over-the-top delicious! Look for high-quality chips since they melt better and provide smoother integration within your dough.
Equipment You’ll Need:
Before we dive into mixing up this delightful batter, let’s talk about some essential tools you’ll want on hand—think of them as trusty companions on this baking adventure! Having the right equipment makes all the difference between an enjoyable experience and one filled with frustration.
- Mixing bowls – A set of mixing bowls in various sizes will be invaluable here! They allow you to easily combine wet ingredients separately from dry ones before merging them into one glorious mixture—a technique that ensures even distribution.
- Electric mixer or stand mixer – While it’s certainly possible to mix by hand (and great for building arm strength!), an electric mixer saves time and energy when creaming butter with sugar until light and fluffy—a crucial step for texture!
- Rubber spatula – This versatile tool will become your best friend during this process! Use it to scrape down sides of mixing bowls or fold ingredients gently together—ensuring no bit goes unnoticed or wasted.
- Baking sheets – Choose sturdy baking sheets lined with parchment paper or silicone mats; they promote even cooking while preventing sticking—a vital step toward achieving perfectly baked cookies without any hassle!
- Cookie scoop – A cookie scoop (or disher) helps ensure uniform size across all your cookies—meaning they’ll bake evenly too! Plus, it makes portioning so much easier—no messy hands required!
Now that we’ve gathered everything we need let’s begin preparing these scrumptious Cookies and Cream Cookies…
Step 1: Preheat Your Oven & Prepare Your Baking Sheets
Begin by preheating your oven to 350 degrees Fahrenheit—this step allows proper heat distribution throughout cooking once you’re ready! While it’s heating up, take some time to line your baking sheets with parchment paper or silicone mats; doing so creates a non-stick surface ensuring easy release later on once baked perfection emerges from within those hot confines!
Step 2: Whisk Together Dry Ingredients
In a small bowl (or medium-sized one if you’re feeling ambitious), whisk together the all-purpose flour, cornstarch, baking powder, baking soda, and salt until well blended—this process ensures an even distribution across your dough later on! Don’t rush through this step because incorporating dry ingredients separately helps achieve consistent texture without any lumps sneaking their way into final creations!
Step 3: Cream Butter & Sugar
Now let’s grab our electric mixer (or stand mixer!) because it’s time to cream together softened unsalted butter along with granulated sugar until combined—this process known as creaming incorporates air bubbles creating lightness within baked goods which yield softness once cooled down after pulling them from oven’s warm embrace! Aim for about 2–3 minutes at medium speed until mixture appears light-colored—a beautiful sign everything is coming together nicely!
Step 4: Add Egg & Vanilla Extract
Once you’ve got lovely whipped butter-sugar combo ready-to-go next comes adding that large room-temperature egg followed closely behind by aromatic vanilla extract—it’ll elevate flavor levels immensely trust me here friends!! Mix thoroughly until everything looks smooth without any lumps interrupting flow…scrape down sides periodically using rubber spatula ensuring nothing gets left behind because every drop counts when crafting these divine treats!!
Stay tuned—we’ll keep rolling through these delectable steps shortly…
Step 5: Mixing It All Together – The Joy of Combining Flavors
Now, let’s take a moment to appreciate the magic that happens in this step. With your beautifully whipped butter and sugar mixture, it’s time to introduce the egg and that delightful splash of vanilla extract. This is where the true creaminess begins! As you add the egg, watch how it transforms the texture; it turns from a gritty mixture into a smooth, luscious batter that practically begs to be devoured. Trust me on this—mixing until everything is well incorporated is absolutely paramount. You don’t want any lumps lurking about because each bite should be a harmonious blend of sweet creaminess and crunchy surprises.
Once you’ve got that silky batter ready, it’s crucial to scrape down the sides of your mixing bowl with a rubber spatula. This simple act ensures that all those delicious ingredients are thoroughly combined, leaving no sweet morsel behind. After all, we want every cookie to sing with flavor! So go ahead and reduce your mixer speed to low as you start adding in your pre-measured dry ingredients. Gently combine them until just barely mixed together; over-mixing can lead to tough cookies, which is definitely not what we’re after here. The goal is a soft, chewy cookie dough that cradles chunks of Oreo cookies and white chocolate chips—incredible!
Step 6: The Cookie Dough Revelation – A Visual Feast
Now comes the fun part—you’ll get to see your cookie dough come alive! At this stage, I encourage you to pause for a moment and take in the aroma wafting from your mixing bowl; it’s intoxicating! As you add in those coarsely chopped Oreo cookies and white chocolate chips, you’re not just throwing in ingredients; you’re creating a masterpiece that will undoubtedly delight everyone who takes a bite. Use a spatula or wooden spoon to gently fold these goodies into the dough until they are evenly dispersed throughout. This careful folding technique helps maintain the integrity of those precious cookies while ensuring every single bite has that perfect balance of flavors.
Here’s where you might be tempted to taste the dough—go ahead! It’s like indulging in cookie dough ice cream without any guilt (though I promise you won’t feel guilty about these cookies when they’re done!). However, keep in mind that raw flour should always be treated cautiously due to potential bacteria. If you’re feeling adventurous and want an even deeper flavor profile, consider letting your dough rest for about 30 minutes before baking; this allows the flavors to meld beautifully and results in an even chewier cookie.
Step 7: Scooping Perfection – The Art of Portion Control
Now it’s time for one of my favorite tasks—scooping out those cookie portions! Using a small cookie scoop (which holds roughly two tablespoons), portion out your dough onto prepared baking sheets lined with parchment paper or silicone mats. Here’s a little tip: make sure there’s enough space between each scoop—at least 2 inches apart—because these cookies love to spread as they bake! Gently round each scoop with your hands before placing them on the sheet, giving them just a slight press downwards so they bake evenly.
It may seem trivial, but trust me when I say this step impacts texture too! By pressing them slightly, you’ll achieve those perfectly rounded edges while allowing the centers to remain delightfully soft and chewy. Remember, this isn’t just about aesthetics; it’s about ensuring every bite carries that signature Cookies and Cream vibe we’re aiming for. Once arranged on the baking sheet, take a moment to admire your handiwork—it’s like prepping little clouds of sweetness ready for their journey into the oven!
Step 8: Baking Your Cookies – A Symphony of Aroma
Preheating your oven to 350°F (175°C) was just the beginning—the real magic happens now as they transform from doughy mounds into golden brown delights! Slide those trays into your preheated oven and set your timer for 8-10 minutes. Keep an eye on them during this time; it’s incredibly important not to overbake these gems if you want that soft center we’ve been dreaming about! You’re looking for a golden hue around the edges but still slightly underbaked in the center—that’s when they’re at their most glorious.
While they bake, prepare yourself for one of life’s greatest pleasures—the heavenly scent filling your kitchen will be nothing short of extraordinary! It serves as an invitation for everyone nearby to gather round; you’ll have friends popping by out of sheer curiosity! When nearly done, use either your nose or a gentle poke test—the sides should feel set while the middle remains tender and slightly gooey. Remember though: once out of the oven, they’ll continue cooking for another minute or two from residual heat—a little patience goes a long way here!
Final Touches – Elevate Your Cookies
Step 9: Cooling Time – The Sweetest Anticipation
As soon as those cookies emerge from their baking adventure, let them cool on the baking sheets for about 5 minutes before transferring them onto cooling racks. This resting period is crucial—allowing them some time off the heat lets them firm up while still retaining that irresistible chewiness in every blissful bite. Don’t rush this step; patience will reward you with cookies that boast both structure and softness.
Once they’ve had their moment on the cooling rack (and believe me when I say you’ll want to try one warm!), you’ll find yourself surrounded by cookies so mouthwateringly good it feels like an embrace from an old friend. Each cookie carries whispers of creamy sweetness mingling with crunchy bits—a nostalgic flavor experience reminiscent of enjoying cookies and cream ice cream on hot summer days.
So there you have it—the ultimate Cookies and Cream Cookie Recipe which will utterly enchant anyone lucky enough to take part! As you share these delightful treats with family or friends—or perhaps savoring them all alone—you’ll realize just how special homemade cookies can be. They aren’t just snacks; they’re heartfelt bites infused with love and memories waiting to happen!
Storage and Enjoyment Tips for Your Cookies and Cream Cookie Recipe
With the delightful aroma of freshly baked cookies still lingering in the air, it’s time to talk about how to preserve this magic a little longer. These cookies are not just a treat for the moment; they’re meant to be savored over several days—if they last that long! Picture yourself reaching for a soft, chewy cookie whenever that sweet tooth strikes, and trust me, it’s an experience you won’t want to miss. So let’s dive into how to store these treasures properly so that every bite remains as delicious as the first.
Storing Leftover Cookies and Cream Cookie Recipe
To ensure your Cookies and Cream Cookie recipe stays fresh and irresistible, store them in an airtight container at room temperature. This simple step is absolutely paramount; it keeps the cookies from drying out while allowing them to retain their delightful chewiness. They’ll stay delectable for about 5 to 7 days, but I suspect you might find them gone long before then! If you want an extra tip from my kitchen to yours, try placing a slice of bread in the container with the cookies. This little trick helps maintain moisture, keeping your treats perfectly soft, as the bread will absorb any excess air. The flavors will meld beautifully over time, creating a profoundly satisfying cookie experience even after a few days. If you decide to warm them up before serving, pop them in the microwave for just 10-15 seconds for that fresh-out-of-the-oven bliss!
Freezing Cookies for Later
Now, if you find yourself with an abundance of these dreamy cookies—or if you simply want to treat yourself down the line—freezing is a fantastic option! To freeze your Cookies and Cream Cookie recipe perfectly, allow them to cool completely first (we don’t want any condensation ruining your masterpieces). Then, arrange them in a single layer on a baking sheet lined with parchment paper and freeze until solid. Once frozen, transfer them into a freezer-safe bag or container, where they can keep their charm for up to three months! When you’re ready for a cookie fix, just take out what you need and let them thaw at room temperature. You can also reheat them in the oven at 350°F (175°C) for about 5-7 minutes. Trust me when I say that having these cookies on hand is like having little pockets of joy waiting for you whenever you need a sweet escape.
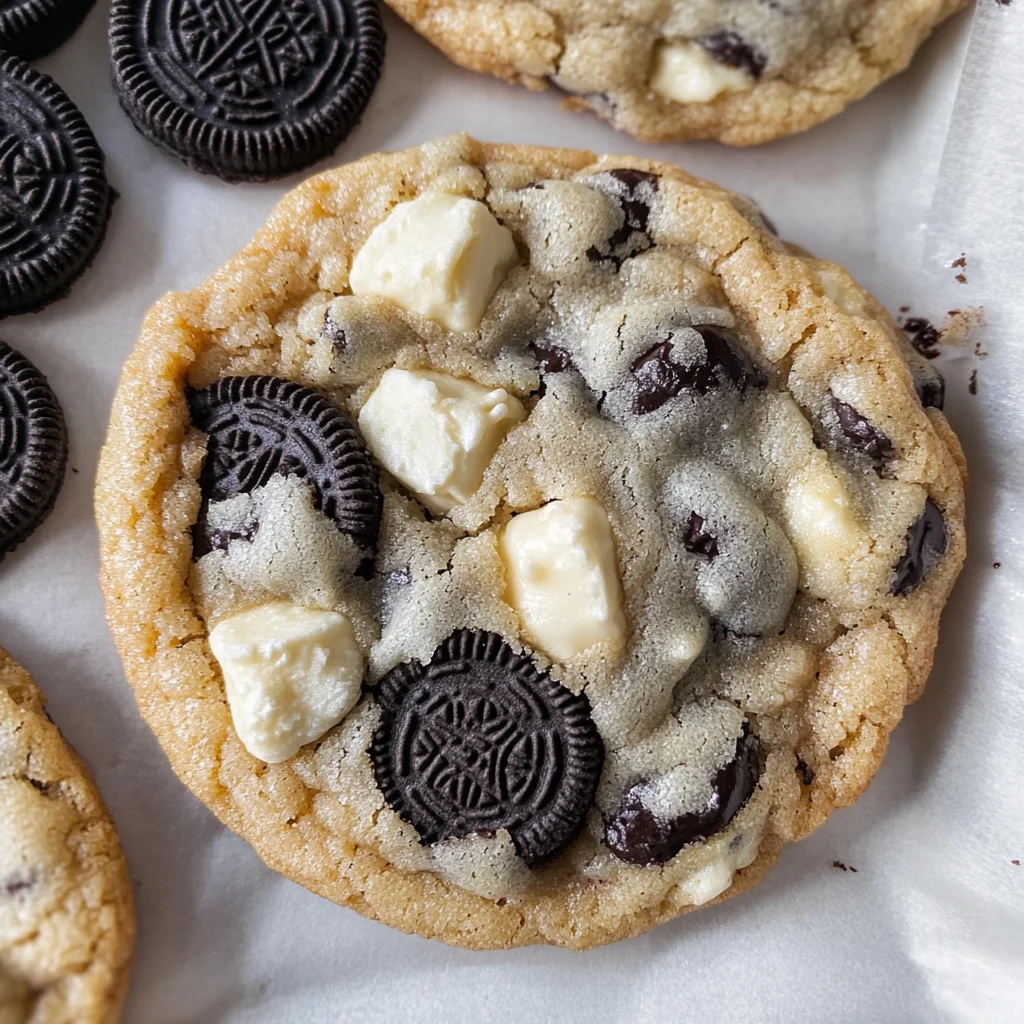
Cookies and Cream Cookie Recipe

Indulge in the nostalgic flavors of childhood with this delightful Cookies and Cream Cookie Recipe. Each bite brings together the creamy goodness of white chocolate and the rich crunch of Oreo cookies, creating a soft, chewy treat that’s perfect for any occasion. Whether you’re baking for a party, enjoying a cozy night in, or simply satisfying your sweet tooth, these cookies are sure to impress. The combination of textures and flavors makes them reminiscent of your favorite cookies and cream ice cream—now in cookie form! With simple ingredients and straightforward steps, you’ll have a batch of these delectable cookies ready to share (or keep all to yourself) in no time.
- Prep Time: 15 minutes
- Cook Time: 10 minutes
- Total Time: 25 minutes
- Yield: Approximately 18 cookies 1x
- Category: Dessert
- Method: Baking
- Cuisine: American
Ingredients
- 1 cup + 2 tablespoons all-purpose flour
- 1 teaspoon cornstarch
- 3/4 teaspoon baking powder
- 1/2 teaspoon baking soda
- 1/2 teaspoon salt
- 4 tablespoons unsalted butter (softened)
- 1/2 cup + 2 tablespoons granulated sugar
- 1 large egg (room temperature)
- 1 teaspoon vanilla extract
- 10 Oreo cookies (coarsely chopped)
- 1/2 cup white chocolate chips
Instructions
- Preheat your oven to 350°F (175°C) and line baking sheets with parchment paper.
- In a bowl, whisk together flour, cornstarch, baking powder, baking soda, and salt.
- In another bowl, cream softened butter and granulated sugar until light and fluffy. Add egg and vanilla; mix until smooth.
- Gradually add dry ingredients to the wet mixture until just combined.
- Fold in chopped Oreos and white chocolate chips gently.
- Scoop dough onto prepared sheets, spacing them at least two inches apart.
- Bake for 8–10 minutes until edges are golden but centers look slightly underbaked.
- Let cool on the baking sheets for about five minutes before transferring to a cooling rack.
Nutrition
- Serving Size: 1 cookie (30g)
- Calories: 150
- Sugar: 9g
- Sodium: 85mg
- Fat: 7g
- Saturated Fat: 4g
- Unsaturated Fat: 3g
- Trans Fat: 0g
- Carbohydrates: 21g
- Fiber: <1g
- Protein: 2g
- Cholesterol: 15mg