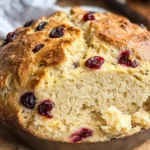
Cranberry Orange Irish Soda Bread
There’s something truly magical about baking bread, isn’t there? The way it fills your kitchen with an intoxicating aroma, the warmth that envelops you as you slice into a freshly baked loaf, and the sense of accomplishment when you share it with loved ones—each moment is a celebration of connection and love. I can’t help but feel this deep appreciation for the art of making bread, especially when it comes to my favorite twist on a classic: Cranberry Orange Irish Soda Bread. This isn’t just any soda bread; it’s a delightful concoction that marries the tartness of cranberries with the zesty brightness of oranges, creating an experience that transcends mere sustenance. Trust me on this one—this recipe is more than a dish; it’s a heartfelt embrace shared over warm slices and sweet conversations.
Now, I know what you might be thinking—Irish soda bread is traditionally quite simple, relying on basic ingredients like flour, baking soda, and buttermilk. And while I absolutely adore the traditional recipes that have stood the test of time, this particular version invites innovation into the mix. The addition of sweet dried cranberries and fragrant orange zest transforms this humble loaf into something remarkably special. As your knife glides through its crusty exterior and reveals that soft, buttery interior studded with vibrant fruit, you’ll understand why this Cranberry Orange Irish Soda Bread has become a cherished favorite in my home. It’s perfect for breakfast alongside your morning coffee or as an afternoon snack slathered with butter—and let’s not forget how delightful it is served at gatherings during festive occasions!
Cranberry Orange Irish Soda Bread: A Sweet Twist on Tradition
Ready to embark on a culinary adventure? Let’s roll up our sleeves and dive into making this delectable Cranberry Orange Irish Soda Bread together. You may be surprised at how straightforward it is to create such a delicious masterpiece! I promise you that once you try this recipe, it will hold a special place in your heart (and your recipe book) for years to come.
Ingredients:
Before we begin our journey into baking bliss, let’s take a moment to gather our ingredients. Each one plays a pivotal role in crafting this extraordinary soda bread.
- 4 3/4 cups all-purpose flour (DIVIDED) – Flour is the backbone of any bread recipe; it provides structure and texture. For our soda bread, we’ll need to divide this flour to help manage the dough’s stickiness later on. Look for high-quality all-purpose flour with good protein content to ensure your bread rises beautifully without becoming dense.
- 1/4 cup granulated sugar – This might seem like just a small amount, but sugar does more than sweeten—it enhances flavor and helps create that lovely golden crust we all adore. Plus, when paired with tart cranberries and zesty oranges, it strikes an exquisite balance that makes every bite sublime.
- 1 teaspoon baking soda – This key ingredient is what gives our soda bread its name! Baking soda acts as a leavening agent by producing carbon dioxide when combined with acidic ingredients like buttermilk. This reaction creates those delightful air pockets in your bread that give it that airy texture. It’s absolutely crucial for achieving that irresistible rise!
- 1 1/2 teaspoons salt – Salt is essential for flavor—it brings out the natural goodness in our ingredients while also balancing sweetness. It’s often said that salt enhances everything in cooking; well, in baking too! Choose fine sea salt or kosher salt for even distribution throughout your dough.
- 1/2 cup cold unsalted butter (cut into squares, 1 stick) – Butter adds richness and moisture to our bread. Using cold butter helps create those signature flaky layers—we’re aiming for pieces roughly the size of peas here! Unsalted butter allows us to control the salt content more accurately while still bringing that creamy goodness to each bite.
- 1 3/4 cups buttermilk – Buttermilk introduces acidity into our dough which reacts beautifully with baking soda to help our bread rise while contributing tenderness and flavor. If you don’t have any on hand, don’t fret! You can easily make a substitute by adding 1 tablespoon of lemon juice or vinegar to regular milk—let it sit for about five minutes before using.
- 1 large egg – Eggs provide moisture while also enriching our dough with protein and fat; they help bind everything together nicely as we mix. Make sure your egg is at room temperature before adding it—increasing its temperature promotes emulsification, leading to better texture!
- 1 tablespoon freshly grated orange zest (from 1 medium orange) – This ingredient is where we really bring in those bright flavors! Freshly grated orange zest awakens the senses with its vibrant aroma and adds an unmistakable citrus note that complements the tartness of cranberries perfectly.
- 1 cup dried cranberries – These little gems are not only visually appealing but also pack a punch of flavor! Their sweetness contrasts beautifully with the savory elements of our bread while adding chewy texture throughout each slice.
Each ingredient contributes uniquely to our Cranberry Orange Irish Soda Bread, transforming simple components into something truly extraordinary.
Equipment You’ll Need:
Before diving headfirst into mixing dough, let’s talk about having the right tools at hand—they’re essential partners in creating something wonderful! While they may not be “ingredients,” these kitchen staples streamline your experience and elevate your results.
- Mixing bowls – Having multiple mixing bowls handy allows you to keep dry ingredients separate from wet ones until they’re ready to unite in glorious harmony! Opt for sturdy glass or stainless steel bowls—they’re easy to clean and won’t retain odors from previous uses.
- Pastry blender or fork – This tool is vital for cutting cold butter into flour until we achieve those pea-sized bits necessary for creating flaky layers in our bread. If you don’t have one handy, don’t worry—a fork can do just as well!
- Wooden spoon – A wooden spoon is ideal for mixing thick batters like ours because it stands up well against resistance without bending or breaking apart under pressure—the perfect companion as we stir together wet and dry ingredients!
- Silicone mat or parchment paper – Lining your baking sheet will prevent sticking while ensuring easy cleanup afterward; both options allow heat circulation around your loaf so it bakes evenly all around—absolutely paramount!
- Sharp knife – You’ll need this trusty tool for cutting an X into the top of your loaf before baking; this allows steam to escape efficiently so your bread rises beautifully instead of puffing up awkwardly!
With these tools ready at hand, you’ll find each step flows smoothly as we create delectable Cranberry Orange Irish Soda Bread together!
Preparing the Cranberry Orange Irish Soda Bread
Step 1: Preheating & Preparing Your Baking Sheet
First things first—let’s get that oven preheated! Set it to 375 degrees Fahrenheit because consistency is key when baking anything from scratch; even slight deviations can lead us astray from achieving optimal results! While waiting patiently for it warm up (which gives us just enough time), let’s prepare our baking sheet by lining it with either silicone mat or parchment paper—or if you’re feeling adventurous (and don’t mind some extra cleanup), lightly coating it with non-stick spray works wonders too! The choice is yours—but remember: proper preparation sets us up for success right from the start!
Step 2: Mixing Dry Ingredients
Next up: grab yourself a large mixing bowl and let’s combine four cups of all-purpose flour along with granulated sugar, baking soda, and salt. Here’s where things start getting exciting—the combination of dry ingredients forms the foundation upon which we’ll build our amazing Cranberry Orange Irish Soda Bread recipe! Use a whisk or spatula here because incorporating air helps ensure an even distribution throughout all mixtures later down the line—this step truly cannot be rushed if we want everything melded seamlessly together!
Step 3: Cutting In Butter
Now comes one of my favorite steps—adding cold unsalted butter cut into small squares right into our flour mixture! Using either a pastry blender or simply your fingers (if you’re feeling brave!), work swiftly to blend until those buttery bits resemble peas scattered throughout—a process known as cutting in. Why do we do this? Well friends…it’s crucial if we’re after those tender layers everyone loves so much! The cold butter creates pockets within dough which translates beautifully onto finished product texture-wise once baked off—that light flakiness we’re all yearning after!
Step 4: Combining Wet Ingredients
While we’re letting those delicious butter bits mingle happily amongst their dry counterparts…let’s turn attention toward another bowl where we’ll whisk together buttermilk along with egg plus freshly grated orange zest until fully combined—I promise you’ll fall head over heels just smelling those bright citrus notes wafting through air around us right now! Once thoroughly mixed through…make sure there are no rogue lumps hiding out anywhere…we want smooth sailing ahead! Afterward…create yourself cozy little well right smack dab center within dry ingredients’ mixture so we can pour wet ones directly inside later on—it makes combining easier when ready since everything fits snugly together like puzzle pieces coming together perfectly!
As we move forward from here…just know every single step matters deeply towards building flavorful character behind each slice ultimately resulting from laborious efforts put forth today—you’ll thank yourself later when sharing warm loaves amongst friends during cozy gatherings filled laughter joyfully ringing across dining tables alike…how inspiring nothing quite compares homemade delights bringing people closer together over shared meals made lovingly by hand themselves…
Stay tuned as I guide you through more steps toward completing this heavenly creation that’s sure become staple addition family gatherings upcoming holidays alike soon enough!
Step 5: Create the Perfect Dough Harmony
Now it’s time to bring together those dry ingredients with our glorious wet mixture. In a medium bowl, you’ll want to whisk together the buttermilk, egg, and freshly grated orange zest. The zest is particularly magical here; it infuses a bright, citrusy aroma that will make your taste buds sing! When you have a smooth, cohesive mixture, make a well in the center of your flour blend. This is crucial because it allows the wet ingredients to envelop the dry ones without creating too much gluten prematurely—trust me, you want that soft crumb in your final loaf! Pour that luscious buttermilk mixture into the well and grab a sturdy wooden spoon. Gently stir until the dough begins to come together; it’s okay if it looks a little shaggy—that’s just part of its charm. As you fold in the dried cranberries, take a moment to appreciate their deep ruby color and chewy texture. These little gems not only add sweetness but also a delightful burst of tartness that perfectly balances the richness of the butter.
This step is all about tenderness; we want to treat our dough as gently as possible. You might notice that it’s quite sticky at this stage, which is entirely normal! Avoid the urge to overmix because developing too much gluten can lead to a dense bread instead of the airy delight we’re aiming for. Instead, just mix until everything is barely combined—think of it as coaxing rather than forcing. Once you see those lovely cranberries scattered throughout, you’re ready for the next stage!
Step 6: Kneading with Care
Now comes one of my favorite parts: kneading! Don’t be intimidated by this technique—it’s all about giving your dough a little love while keeping things light and fluffy. Turn your sticky dough out onto a clean, floured surface. Here’s where you’ll sprinkle some additional flour over the top—this helps prevent sticking and allows you to handle it more easily. Gently fold the dough over itself while incorporating more flour little by little; this process should be tender rather than aggressive. The goal here is to transform that sticky mass into something smooth and cohesive without working it too much.
As you knead, pay attention to how the texture changes; after just a few folds, you’ll notice how the dough starts coming together beautifully. Ideally, after about 5 minutes of gentle kneading, your dough should no longer be tacky when touched. If it still clings stubbornly to your fingers or the surface beneath it, sprinkle on more flour—but remember not to go overboard! It’s all about achieving that perfect balance between moistness and structure; patience here will lead to an utterly intoxicating final product.
Step 7: Shaping Your Masterpiece
Once you’ve worked your magic on that dough and it feels just right—smooth yet slightly tacky—you can shape it into a round loaf. Picture yourself cradling that beautiful creation in your hands; it’s essential to maintain its round form as this will ensure even baking later on. Gently press down on the top while tucking in any rough edges from underneath—that way, it holds its shape beautifully during baking.
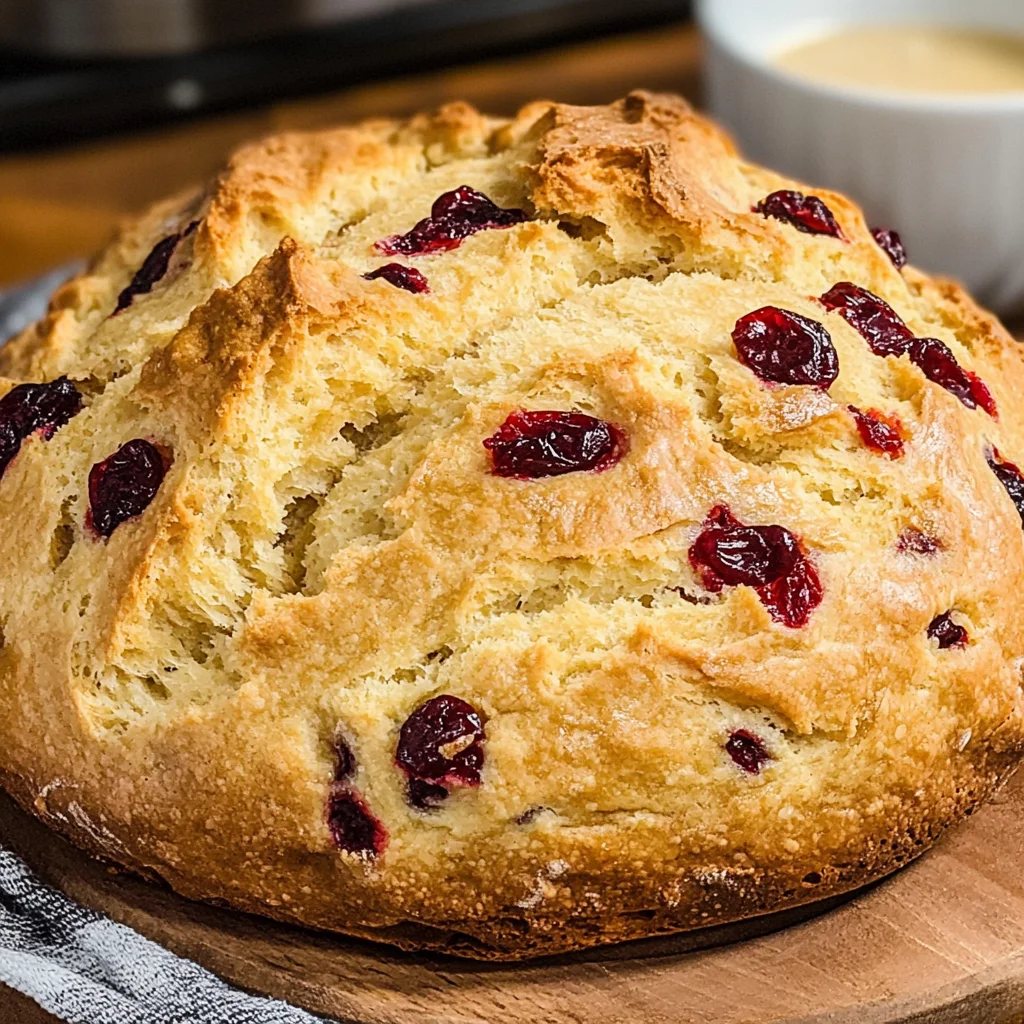
Place your lovingly shaped loaf onto a prepared baking sheet lined with parchment paper or a silicone mat—this non-stick option is absolutely paramount for easy removal later on! Now comes an exciting part: using a sharp knife (take care here!), score an “X” across the top of your loaf about half an inch deep. Not only does this look stunning and rustic, but it also serves an important purpose: scoring helps steam escape while baking, ensuring that your bread rises beautifully and remains light inside—a visual cue that promises an inviting interior waiting for you!
Step 8: The Art of Baking
Preheat your oven now to 375 degrees Fahrenheit—a warm embrace for our bread-to-be! Once heated, slide your baking sheet into the oven and let those heavenly aromas start wafting through your kitchen like a warm hug from grandma! You’ll want to bake for approximately 45-55 minutes; however, keep an eye on things after about 40 minutes have passed because ovens can vary greatly in their heat levels.
The telltale signs of doneness are both visual and auditory: look for a golden-brown crust that’s hard enough to withstand a gentle tap—if it sounds hollow inside when knocked upon (yes, go ahead and knock!), that’s music to my ears! If you have one handy (which I highly recommend), feel free to use a cake tester inserted into the center; if it comes out clean without any sticky remnants clinging onto it, then rejoice—you’ve nailed it! If not quite there yet? No worries at all; pop it back in for another few minutes until perfect.
Final Touches
Step 9: Cooling & Slicing into Bliss
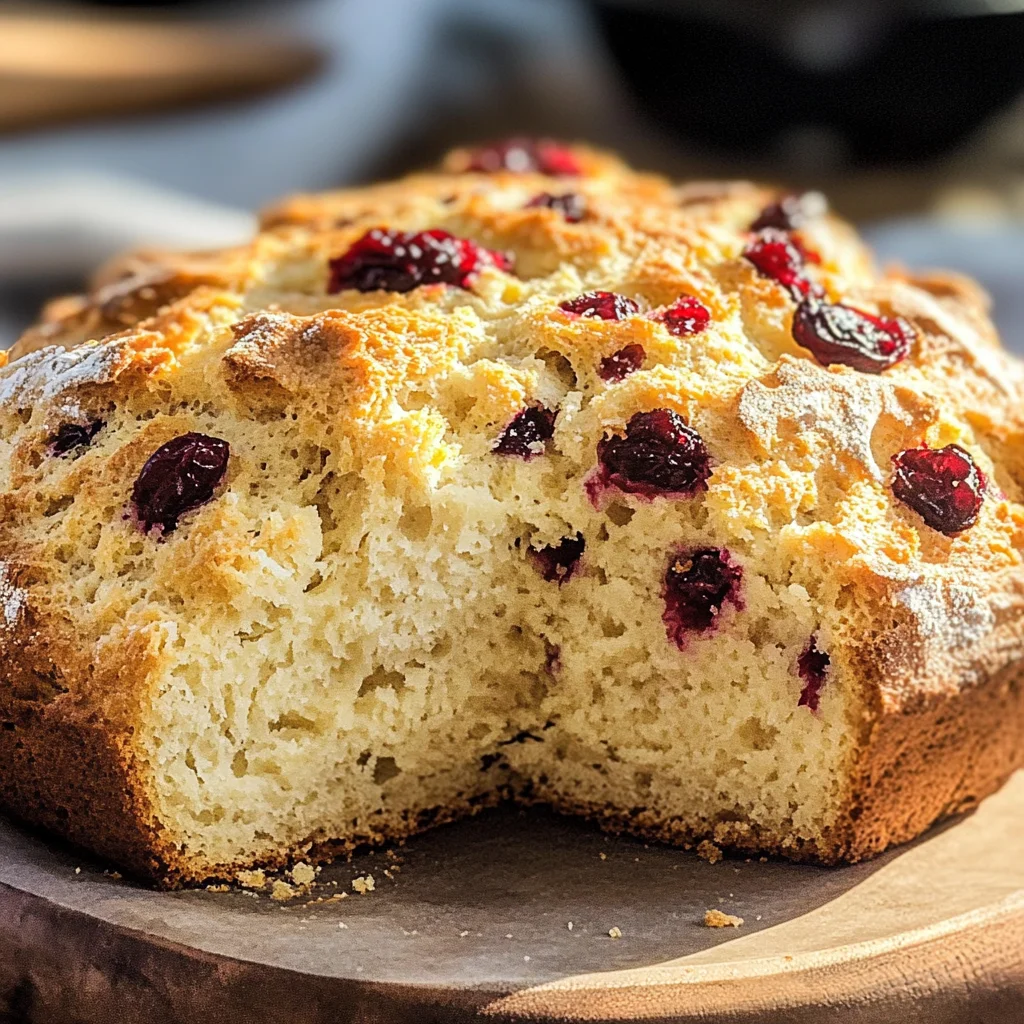
Once you’ve pulled out this glorious loaf from its oven sanctuary—the sight alone will fill your heart with joy—let’s give it some time to cool before slicing into its warm embrace. I know how tempting it is to dive right in (and trust me—I’ve been there), but letting it rest for at least ten minutes ensures that moisture redistributes throughout each slice instead of rushing out when cut too soon. This waiting period enhances flavor while allowing those crusty edges time to settle into their full glory.
After patiently waiting (you can do this!), grab yourself one good serrated knife for slicing through that beautiful crust—and don’t forget butter or perhaps some fresh jam waiting nearby because every bite deserves some adornment! As you slice through each piece revealing its soft orange-kissed interior studded with cranberries glistening like jewels—not only does this bread invite warmth into any meal or afternoon tea gathering—but every mouthful offers comfort akin only found in cherished family traditions.
And remember—the best part? Wrap any leftovers tightly in plastic wrap so they stay fresh at room temperature for up to three days (though I promise they won’t last long). With each bite filled with flavors twinkling from zesty orange notes mingling with sweet-tart cranberry goodness—you’ll understand why I’m so passionate about sharing my version of Cranberry Orange Irish Soda Bread with friends like you! Enjoy every moment spent baking this delightful treasure; may each loaf become part of your culinary legacy just as mine has become woven into my heartfelt memories around family tables. Happy baking!
Storage and Enjoyment Tips for Your Cranberry Orange Irish Soda Bread
Now that you’ve created this delightful Cranberry Orange Irish Soda Bread, it’s time to celebrate the fruits of your labor! The aroma wafting through your kitchen is just a hint of the joy that awaits when you slice into this golden loaf. It’s a bread that not only fills your home with warmth but also nourishes the soul. But what do you do with those leftover slices? Fear not, for I’ve got some fantastic tips to help you preserve the magic of this scrumptious bread!
Storing Leftover Cranberry Orange Irish Soda Bread
To keep your treasured Cranberry Orange Irish Soda Bread fresh and delicious, I recommend storing it in an airtight container at room temperature. This helps retain its crusty exterior while keeping the inside wonderfully moist. It’s best enjoyed within three days of baking, although trust me when I say that it rarely lasts that long in my house! If you’re looking to maintain its quality even longer, try placing a slice of bread in the container; it works wonders in keeping everything soft and tender. When you take a bite after a day or two, you’ll find that the flavors have melded beautifully, creating an even more profound taste experience. If you want to warm it up before serving, simply pop it in the oven for a few minutes or use a toaster; the crust will regain its delightful crunch while the inside warms up perfectly!
Freezing Cranberry Orange Irish Soda Bread for Later
If you’ve baked up a storm and find yourself with extra loaves—what a wonderful problem to have! Freezing is an excellent way to preserve your Cranberry Orange Irish Soda Bread. To do this properly, wrap each loaf tightly in plastic wrap and then place it in a freezer-safe bag or container. This two-step approach ensures no air sneaks in, which could lead to freezer burn. You can keep it frozen for up to three months without sacrificing flavor or texture! When you’re ready to enjoy it again, just remove it from the freezer and let it thaw at room temperature—no need for any complicated defrosting techniques here! Imagine having this brilliant bread ready at your fingertips whenever you crave that comforting taste; it’s convenience at its finest!
Cranberry Orange Irish Soda Bread
Enjoy deliciously moist Cranberry Orange Irish Soda Bread that’s perfect for any occasion! Bake today and indulge in its unique flavors.
- Prep Time: 15 minutes
- Cook Time: 50 minutes
- Total Time: 1 hour 5 minutes
- Yield: Approximately 12 servings 1x
- Category: Dessert
- Method: Baking
- Cuisine: Irish
Ingredients
- 4 3/4 cups all-purpose flour
- 1/4 cup granulated sugar
- 1 teaspoon baking soda
- 1 1/2 teaspoons salt
- 1/2 cup cold unsalted butter (cut into squares)
- 1 3/4 cups buttermilk
- 1 large egg
- 1 tablespoon freshly grated orange zest
- 1 cup dried cranberries
Instructions
- Preheat your oven to 375°F (190°C) and line a baking sheet with parchment paper.
- In a large mixing bowl, whisk together the flour, sugar, baking soda, and salt.
- Cut in the cold butter until the mixture resembles coarse crumbs.
- In another bowl, whisk together the buttermilk, egg, and orange zest until smooth.
- Make a well in the center of the dry ingredients and pour in the wet mixture. Stir gently until combined.
- Fold in the dried cranberries until evenly distributed.
- Turn the dough out onto a floured surface and knead gently until smooth.
- Shape into a round loaf and place on the prepared baking sheet. Score an 'X' on top with a sharp knife.
- Bake for 45-55 minutes or until golden brown and sounds hollow when tapped.
Nutrition
- Serving Size: 1 serving
- Calories: 170
- Sugar: 6g
- Sodium: 250mg
- Fat: 7g
- Saturated Fat: 4g
- Unsaturated Fat: 3g
- Trans Fat: 0g
- Carbohydrates: 24g
- Fiber: 1g
- Protein: 3g
- Cholesterol: 25mg