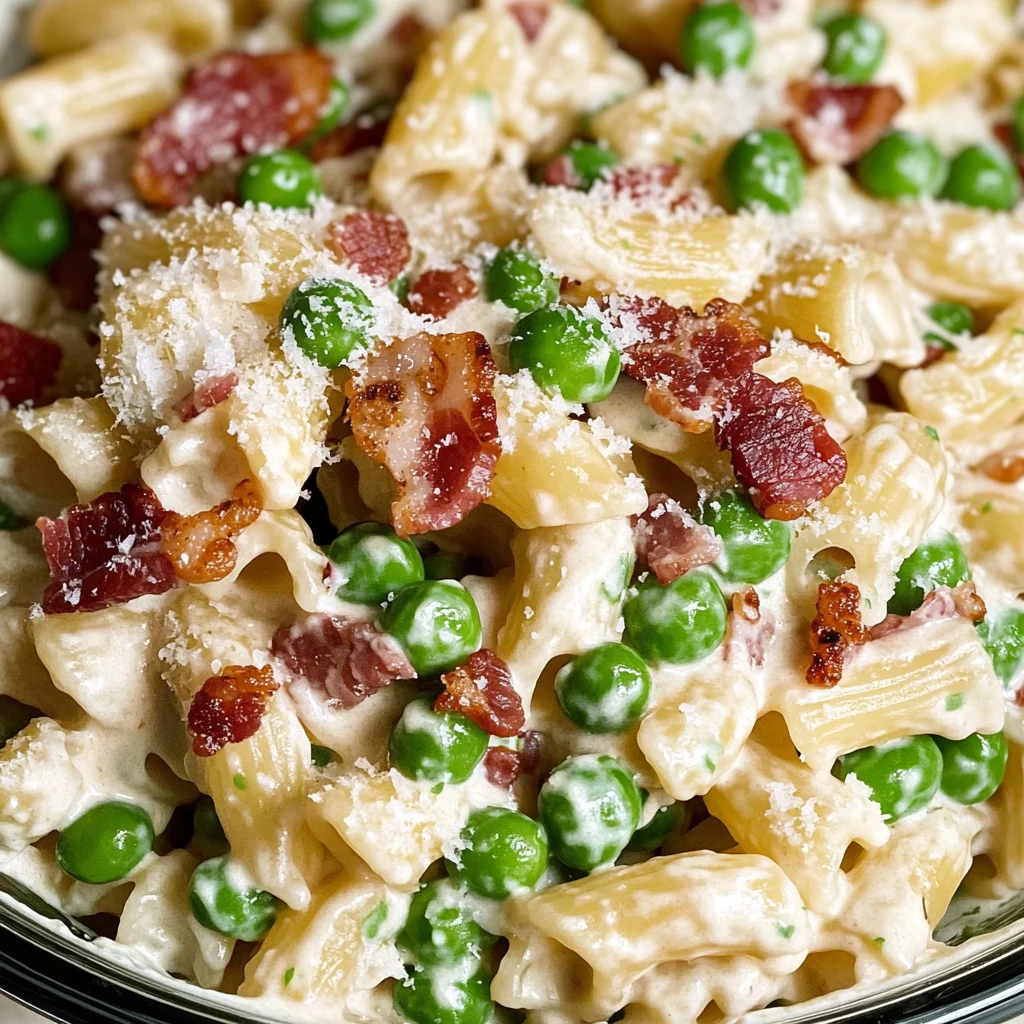
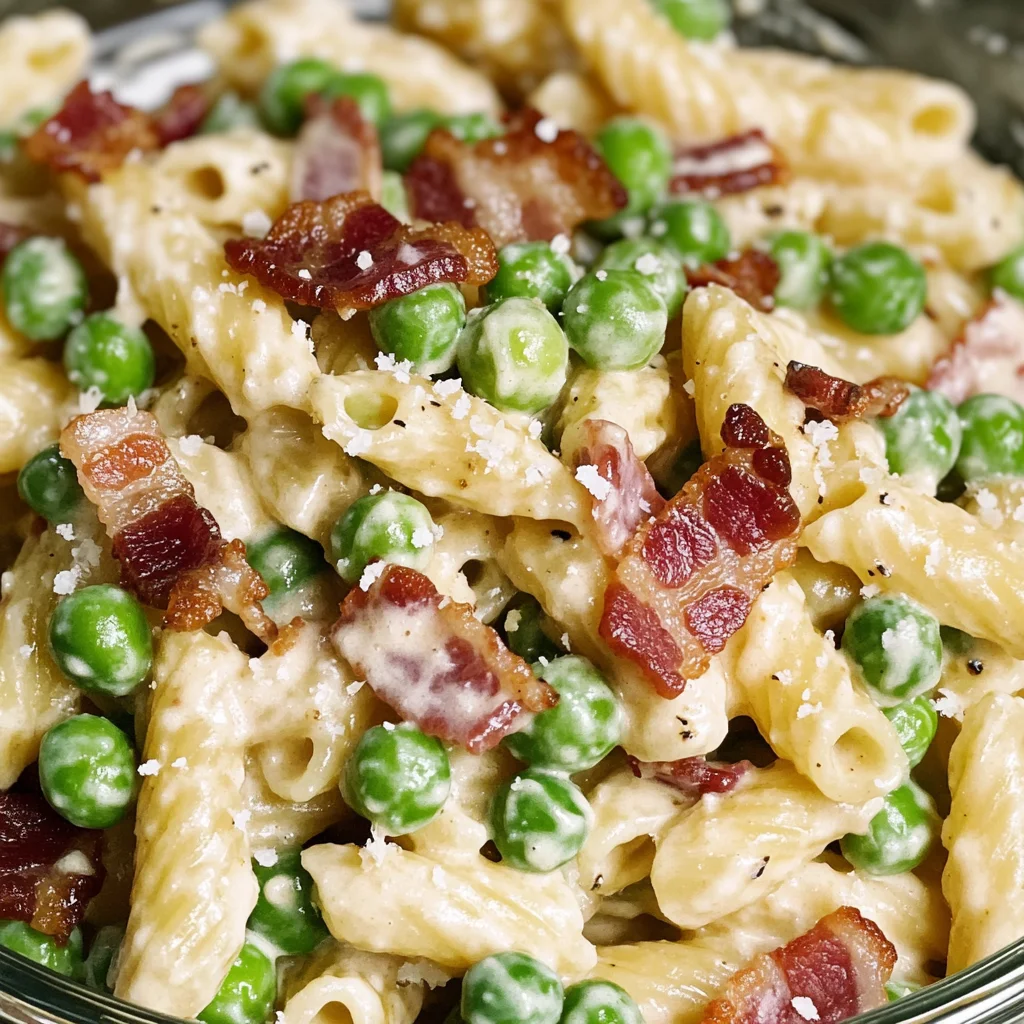
Creamy Pea and Turkey Bacon Pasta Salad
There’s something truly magical about the way food brings us together, isn’t there? It’s more than just nourishment; it’s an experience that resonates with our senses and evokes memories. When I think of my beloved Creamy Pea and Turkey Bacon Pasta Salad, I can’t help but feel a rush of warmth and nostalgia flood over me. This dish is not merely a recipe; it’s a celebration of flavors, textures, and the kind of comfort that whispers sweetly in your ear, urging you to gather around the table with loved ones. The delicate sweetness of peas dances harmoniously with the rich creaminess of a tangy dressing, while the crispness of bacon adds that delightful crunch we all crave. It’s a symphony of flavors that sings to your soul, making it an absolute favorite at parties and family gatherings alike.
As I prepare this delightful pasta salad, I am always reminded how food can bridge generations. My grandmother used to make a version of this for every summer barbecue, always insisting on using fresh ingredients straight from her garden. The joy on her face as she served it was infectious, and you could see everyone savoring each bite as if they were tasting pure love. What I adore about this dish is its versatility—you can whip it up for a casual weeknight meal or dress it up for a festive occasion. Just imagine serving this creamy delight at your next gathering; it’ll soon become everyone’s favorite! Trust me when I say this is not just another pasta salad; this is Creamy Pea and Bacon Pasta Salad—a true masterpiece worth sharing.
Creamy Pea and Turkey Bacon Pasta Salad: A Perfect Blend of Comfort and Flavor
Let’s dive into this wonderful recipe together! This pasta salad marries simplicity with indulgence to create something extraordinary. The creamy dressing envelops each piece of pasta, peas, and crispy bacon in luscious goodness, making every bite feel like a warm hug. Plus, it’s quick to prepare—perfect for those busy weeknights when you want something delicious without spending hours in the kitchen. So grab your apron and let’s embark on this culinary adventure!
Ingredients:
Before we get started, let’s gather our ingredients. Each one plays an essential role in crafting our Creamy Pea and Bacon Pasta Salad.
- 2 cups (about 250g) elbow macaroni: This pasta shape is not just adorable; it’s fantastic at holding onto the creamy dressing! Its little curves trap the sauce beautifully, creating those satisfying bites we all love. When choosing your macaroni, opt for high-quality durum wheat pasta—it holds its shape well even after cooking and creates a lovely chewy texture.
- 1 cup (150g) frozen peas: Sweet and vibrant green, frozen peas are perfect here because they’re harvested at peak freshness and flash-frozen to lock in flavor and nutrients. They bring that delightful pop of color along with a subtle sweetness that balances out the creaminess beautifully. Don’t skip these—they’re essential for that refreshing burst in every mouthful!
- 1 cup (about 120g) crispy turkey bacon: The star ingredient that gives our salad its irresistible crunch! Turkey bacon offers a smoky flavor without being overpowering, ensuring it complements rather than overwhelms other flavors in the dish. When cooking turkey bacon, aim for crispiness—this texture is absolutely paramount for achieving contrast within the creamy salad.
- ¾ cup (about 90g) freshly grated Parmesan cheese: Ahh, Parmesan—the liquid gold of cheeses! Its nutty flavor adds depth to our dressing while also contributing to that irresistible creaminess we crave. Always go for freshly grated Parmesan instead of pre-grated versions; the latter often contains anti-caking agents that can dull its intense flavor.
- ½ cup (120ml) sour cream: This ingredient is crucial for adding richness to our dressing while providing that perfect tanginess that brightens everything up! If you want an even lighter option, feel free to substitute Greek yogurt—it brings similar creaminess while upping the protein content!
- ½ cup (120ml) mayonnaise: Mayonnaise acts as the luscious base for our dressing—smooth and rich with just enough tang to make things exciting! If you’re looking for something lighter or vegan-friendly, try using avocado mayonnaise or any plant-based alternative available at your local store.
- 2 tablespoons (30ml) lemon juice: The zing from freshly squeezed lemon juice is what elevates this dish from ordinary to extraordinary! It cuts through the richness beautifully while adding brightness—a vital element in balancing flavors within any salad. Always use fresh lemons when possible; bottled juice simply can’t compare!
- Salt and pepper to taste: These two essentials are non-negotiable! Salt enhances flavors while pepper adds warmth—a sprinkle here and there makes all the difference in bringing out those beautiful notes we’ve built in our creamy dressing.
Now that we have everything ready let’s move on to making magic happen!
Equipment You’ll Need:
Having the right tools can make all the difference when preparing your dreamy pasta salad! While they may not be ingredients per se, these kitchen companions will help ensure everything goes smoothly as you embark on your culinary journey.
- Large pot: A sturdy large pot is essential for boiling your macaroni perfectly—look for one made from heavy-duty material so it conducts heat evenly. You’ll want enough space for water to circulate freely around each piece of pasta!
- Colander: After boiling your macaroni al dente—a term meaning ‘to the tooth’ which refers to just firm enough—you’ll need a colander to drain off excess water effectively without losing any pasta pieces.
- Mixing bowl: Opt for a large mixing bowl where all flavors come together harmoniously! A glass or ceramic bowl is ideal because they retain cold temperatures well—perfect if you choose to chill your salad before serving.
- Whisk or spatula: Either tool will work wonders in combining your creamy dressing ingredients smoothly without lumps! A whisk helps aerate ingredients nicely while ensuring everything blends together seamlessly—a must-have step!
Now that we have our ingredients gathered and equipment ready let’s start preparing this gorgeous Creamy Pea and Bacon Pasta Salad together!
Step 1: Boil the Macaroni
Start by filling your large pot with water—enough so there’s room for bubbling action once you add salt—and bring it to a rolling boil over high heat. This initial step is crucial because adding salt (about 1 tablespoon per quart) enhances flavor throughout every noodle while also preventing them from sticking together during cooking. Once boiling vigorously like a lively dance party in there, toss in those elbow macaroni noodles with love! Give them a gentle stir initially—not too aggressive though—as they begin softening up after about 7–9 minutes depending on package directions until they’re al dente—that perfect chewy texture where they still hold their shape but aren’t hard anymore!
Remember to taste-test around the 7-minute mark; trust me when I say nothing beats perfectly cooked pasta! Once ready, carefully drain them using your colander but don’t rinse them under cold water yet—that would wash away some precious starches necessary for creating our creamy dream later on.
Step 2: Cook Your Turkey Bacon
While those delightful noodles are dancing away in hot water, it’s time to turn attention towards crispy turkey bacon magic! Heat up either a skillet or frying pan over medium heat—this allows even cooking throughout without burning anything too quickly—and add slices side by side evenly spaced apart so they don’t overlap much (we want maximum crispiness!). Cook them until golden brown on both sides—about 5–7 minutes should do—but keep an eye out as different brands may vary slightly regarding thickness/methods used during production affecting cook times too!
Once perfectly crispy perfection has been achieved based on personal preference (I usually aim somewhere between medium-crisp), remove from heat carefully placing onto paper towels first allowing excess grease absorption before chopping into bite-sized pieces afterward—it adds texture within each mouthful later!
Step 3: Prepare Your Creamy Dressing
With macaroni drained well now resting aside patiently waiting alongside crispy turkey bacon bits gleaming proudly nearby—the next step involves crafting our irresistibly creamy dressing full-of-flavor goodness! In your mixing bowl combine sour cream along with mayonnaise—these two perform beautifully together yielding unbeatable richness balanced perfectly by zesty lemon juice added next stirring gently until fully combined achieving velvety consistency resembling luxurious frosting almost (yum!).
Now comes seasoning time where salt & pepper come into play reminding us never underestimate their power—they elevate flavors beyond mere existence transforming ordinary dishes into extraordinary experiences worthy praising aloud too loudly perhaps even causing applause amongst awaiting guests eagerly anticipating what’s coming next!
Step 4: Combine Everything Together
Alright friends—we’ve reached one of my favorite parts where everything finally comes together creating culinary harmony bursting forth like fireworks exploding across July skies celebrating life itself through deliciousness found within simple pleasures shared openly amongst loved ones gathered around tables filled laughter & joyfulness alike! Begin by adding warm macaroni directly into seasoned creamy dressing mixture followed closely behind by vibrant green peas alongside crispy chopped turkey bacon crumbles sprinkled generously atop offering magnificent crunch contrasts against softness below seamlessly intermingling across every forkful taken indulging souls truly grateful feeling blessed sharing meals created lovingly through hands working tirelessly crafting happiness served daily upon plates awaiting eager mouths ready devour what awaits them ahead…
And there you have it—the glorious beginnings of creating this deeply satisfying masterpiece called Creamy Pea And Bacon Pasta Salad which will undoubtedly leave lasting impressions upon those who partake experiencing blissful sensations dancing throughout taste buds begging second servings immediately following firsts gone far too quickly leaving hearts full smiles shining brightly illuminating faces everywhere reminding us why we cook share stories express love through food shared among family friends cherished moments celebrated year-after-year bringing us closer together reaffirming bonds formed originally forged long ago perhaps amidst laughter tears triumphs defeats life lived fully engaged passionately enjoying every moment captured forever etched memories lasting lifetimes beyond…
Stay tuned as we continue building upon these steps unraveling secrets hidden beneath surface revealing depths explored diving deeper into realms unknown unveiling treasures awaiting discovery right inside kitchens worldwide filled excitement anticipation wonderment leading onward journeys filled adventures culinary delights await…
Step 5: The Pasta Dance – Cooking the Perfect Noodles
Now that we have our ingredients prepped and ready to go, it’s time to dive into one of the most crucial parts of our Creamy Pea and Bacon Pasta Salad: cooking the pasta. This is not just about boiling water and tossing in some noodles; it’s an art form that requires a bit of patience and attention to detail. Start by bringing a large pot of salted water to a rolling boil. You want your water to be like a bubbling cauldron—this is essential because the salt enhances the flavor of the pasta as it cooks, ensuring every bite is deliciously seasoned. Once the water is boiling, add in your choice of pasta—shells or rotini work beautifully here.
Cook the pasta according to package instructions, usually around 8-10 minutes for al dente perfection, which means they should be tender but still have a slight bite when you chew them. Trust me on this one; overcooked pasta will turn mushy and lose its lovely texture, which is absolutely non-negotiable in a salad like this! As the pasta cooks, keep an eye on it and stir occasionally—this not only helps prevent sticking but also ensures that every piece of pasta gets evenly cooked. You’ll know your noodles are ready when they’re firm yet tender; take a quick taste test if you’re unsure! Once done, drain them well in a colander, but don’t forget to reserve about half a cup of that starchy pasta water; we’ll need it later to create our luscious dressing.
Step 6: The Peas Are Key – Preparing Our Green Goodness
While the pasta dances away in its bubbling bath, let’s turn our attention to those beautiful peas that are going to elevate our salad from delightful to downright extraordinary. Fresh or frozen peas are perfect here; if you’re using frozen ones, there’s no need for thawing! Just toss them into the boiling pot with your drained pasta during the last minute of cooking. This will brighten their color and infuse them with warmth without losing their vibrant green hue or crisp texture. If you’re opting for fresh peas, simply blanch them in boiling water for 1-2 minutes until they become tender yet still retain that satisfying crunch.
This step is so important because peas bring not only flavor but also an incredible burst of sweetness that complements the creamy dressing we’re about to whip up. Plus, their bright green color adds such a beautiful contrast against the rich backdrop of your creamy pasta salad. After you’ve blanched or cooked them as directed, immediately plunge them into an ice bath (a bowl filled with ice and cold water) to halt the cooking process and lock in that gorgeous green shade. Trust me on this; it’s like giving your peas a refreshing spa day!
Step 7: Creamy Dream Dressing – Whipping Up That Luscious Sauce
Now let’s talk about what makes this Creamy Pea and Bacon Pasta Salad truly sing: our dressing! In a medium-sized mixing bowl, combine ½ cup of mayonnaise with ¼ cup of Greek yogurt for that tangy creaminess that will make every bite utterly intoxicating. This combination not only provides richness but also balances out those sweet peas and adds depth without being overwhelmingly heavy. To this mixture, add in two tablespoons of freshly squeezed lemon juice—this is crucial as it brightens up all those flavors—and one clove of minced garlic for an aromatic punch.
But we’re not done yet! Season generously with salt and black pepper to taste, allowing those flavors to meld beautifully together. Here’s where you can get creative—consider adding in a teaspoon of Dijon mustard for an extra layer of sophistication or even finely chopped fresh herbs like dill or chives for an unexpected twist! Once everything is combined into that creamy dressing, taste it (yes, go ahead!) and adjust any seasonings as needed; remember, this dressing is what ties all those wonderful ingredients together.
Step 8: The Grand Assembly – Bringing It All Together
Now comes my favorite part—the assembly! In your largest mixing bowl (you’ll want plenty of room), combine your perfectly cooked pasta and blanched peas along with any other goodies you might be adding—like diced red bell peppers for crunch or even some sliced green onions for freshness. Gently fold everything together with love—this isn’t just mixing; it’s creating harmony among flavors! Then comes that dreamy dressing we prepared earlier—pour it over the entire mixture and stir gently until everything is coated in creamy goodness.
This step isn’t just about tossing ingredients together; it’s where all those individual components come alive as they intermingle on your palate! If it feels too thick at first glance (which can happen sometimes), don’t hesitate to add a splash of reserved pasta water bit by bit until you reach your desired consistency—it should be creamy but not soupy! Remember to take pauses throughout this process; savor how each ingredient contributes its unique flavor while maintaining balance—we want each bite singing in harmony!
Next Major Phase – Chilling Your Masterpiece
Step 9: Chill Out – The Importance of Resting Time
Once you’ve mixed everything beautifully together, it’s time for perhaps one of the most transformative steps: chilling your Creamy Pea and Bacon Pasta Salad before serving it up at your next gathering or family dinner! Transfer your creation into an airtight container or cover your mixing bowl tightly with plastic wrap—you want to lock all those flavors in while they mingle pleasantly together. Now here’s where patience pays off: refrigerate for at least one hour—or even better, let it sit overnight if you can resist diving in right away!
Why chill? Well, during this resting period, all those lovely flavors get acquainted with each other—they deepen and enhance so beautifully over time! The coolness also allows all textures to settle into their perfect state—crisp veggies remain crunchy while everything else becomes harmoniously creamy without losing any character. I promise you; skipping this step would mean missing out on layers upon layers of flavor development that make each bite truly extraordinary! So resist temptation just a little longer; when you’re ready to serve up this crowd-pleaser at room temperature or slightly chilled from the fridge, you’ll be rewarded with smiles all around.
In conclusion, my friends, creating this Creamy Pea and Bacon Pasta Salad takes love and care at every step—from selecting fresh ingredients through crafting each component thoughtfully together—and I hope you feel inspired as you embark on making this dish yours! Enjoy every glorious bite knowing you’ve created something special that’s meant to be shared with laughter around the table!
Storage and Enjoyment Tips for Your Creamy Pea and Turkey Bacon Pasta Salad
The moment you’ve been waiting for has arrived! Your kitchen is filled with the delightful aroma of your freshly made Creamy Pea and Bacon Pasta Salad, and I can just imagine the anticipation bubbling up inside you. After all that love and care you’ve poured into crafting this dish, it’s not just ready to be eaten; it’s a celebration of flavors that deserves to shine! But before you dive in, let’s chat about how to keep it fresh and delicious for those moments when you want to savor it later.
Storing Leftover Creamy Pea and Bacon Pasta Salad
To ensure your Creamy Pea and Bacon Pasta Salad maintains its vibrant flavors and creamy texture, you’ll want to store it in an airtight container. This will lock in the freshness, keeping your salad as delightful as when you first made it. Ideally, keep it in the refrigerator where it will stay good for up to three days. Just remember, the longer it sits, the more the pasta will soak up the dressing, so if you’re looking for that lush creaminess, enjoy it within a day or two. A nifty little trick I learned is placing a slice of bread in the container alongside your pasta salad. It helps absorb excess moisture, keeping everything wonderfully fresh! The flavors actually meld beautifully after a day in the fridge, making each bite even more profoundly satisfying. When you’re ready to serve it again, simply toss it gently to redistribute any dressing that may have settled—trust me on this!
Freezing Components for Later
If you’re planning ahead or simply want to enjoy your Creamy Pea and Bacon Pasta Salad at a later date, consider freezing components of this dish. While I wouldn’t recommend freezing the entire salad due to its creamy nature (you want to avoid any graininess upon thawing), you can freeze cooked pasta separately. Just make sure to undercook it slightly so that when you reheat, it doesn’t become mushy. Store your cooled pasta in a freezer-safe bag or container, where it can stay frozen for up to three months. When you’re ready to whip up a quick meal, simply thaw overnight in the fridge or toss straight into boiling water for a few minutes until heated through. This is such a fantastic option for busy weeknights; having prepped ingredients makes dinner feel like a breeze! Imagine pulling out that frozen pasta from your stash and transforming it into an exquisite meal without much effort—it’s pure magic!
With these storage tips under your belt, you’re all set to enjoy your Creamy Pea and Bacon Pasta Salad again and again!
Creamy Pea and Turkey Pasta Salad

Indulge in the delightful experience of our Creamy Pea and Turkey Pasta Salad, where comfort meets vibrant flavors. This dish is perfect for summer gatherings or a cozy family dinner, combining al dente pasta with sweet peas and crispy turkey bacon, all enveloped in a rich, creamy dressing. It’s a comforting bowl of goodness that invites sharing and laughter around the table. Quick to prepare and easy to customize, this pasta salad will soon become a staple in your recipe repertoire. Get ready to enjoy a dish that not only tantalizes the taste buds but also warms the heart!
- Prep Time: 15 minutes
- Cook Time: 10 minutes
- Total Time: 25 minutes
- Yield: Serves about 6 people 1x
- Category: Salad
- Method: Boiling
- Cuisine: American
Ingredients
- 2 cups elbow macaroni
- 1 cup frozen peas
- 1 cup crispy turkey bacon
- ¾ cup freshly grated Parmesan cheese
- ½ cup sour cream
- ½ cup mayonnaise
- 2 tablespoons lemon juice
- Salt and pepper to taste
Instructions
- Boil elbow macaroni in salted water until al dente (7-9 minutes). Drain and set aside.
- In a skillet, cook turkey bacon over medium heat until crispy. Chop into bite-sized pieces.
- In a mixing bowl, whisk together sour cream, mayonnaise, lemon juice, salt, and pepper.
- Combine cooked macaroni, peas, and turkey bacon in a large bowl. Pour the dressing over and mix gently until coated.
- Chill for at least one hour before serving for flavors to meld.
Nutrition
- Serving Size: 1 cup (240g)
- Calories: 350
- Sugar: 2g
- Sodium: 780mg
- Fat: 19g
- Saturated Fat: 6g
- Unsaturated Fat: 11g
- Trans Fat: 0g
- Carbohydrates: 36g
- Fiber: 3g
- Protein: 15g
- Cholesterol: 30mg