Deviled Eggs Recipe
There’s something utterly captivating about deviled eggs, don’t you think? As I sit here reminiscing about gathering around the table with family and friends, these little gems always find their way into the spotlight. They embody warmth, connection, and that delightful blend of flavors that dance on your palate—creamy, tangy, and just a hint of sweetness from the pickle relish. When I prepare this Deviled Eggs Recipe, it feels like I’m not just cooking; I’m creating a moment, a shared experience that transforms ordinary gatherings into cherished memories. The rich yellows of the egg yolks mixed with bright green relish and a dusting of paprika create not just a dish but a visual feast that beckons everyone to indulge.
Deviled eggs are more than just appetizers; they are steeped in tradition and nostalgia. I promise you, every bite tells a story. Whether it’s at a summer barbecue, holiday feast, or simply a cozy dinner at home, these creamy delights bring joy wherever they go. And can we talk about how versatile they are? You can tweak the ingredients to suit your taste or dietary preferences—perhaps adding a dash of hot sauce for some heat or swapping out the relishes for something more adventurous! But at their core, they remain wonderfully simple yet profoundly satisfying. Today, let’s embark on this culinary journey to create your very own Deviled Eggs that will surely impress your loved ones.
Deviled Eggs Recipe: A Creamy Delight for Every Occasion
Let’s dive right into making these scrumptious deviled eggs together! It’s all about blending flavors and textures to create something truly extraordinary. With just a handful of ingredients and some love poured into each step, you’ll soon see why deviled eggs have earned their place as a beloved staple in many kitchens.
Ingredients:
As we gather our ingredients for this delicious adventure, keep in mind that each one plays an essential role in creating those perfectly creamy deviled eggs you’ve been dreaming of. Let’s savor the significance of each ingredient!
- 12 large eggs. The star of our show! When selecting eggs, look for quality—freshness is key. Farm-fresh eggs have vibrant yolks that contribute to both flavor and color in our filling. Large eggs give us ample yolk to work with while ensuring enough whites to cradle our luscious filling. Trust me; fresh eggs make all the difference when it comes to that perfect texture.
- 4 1/2 tablespoons mayonnaise (use less if you like them less creamy). This silky ingredient adds richness and moisture to our yolk mixture, creating that signature creaminess we all adore. If you’re feeling adventurous or aiming for a lighter option, consider using Greek yogurt as an alternative—it offers tanginess while cutting down on calories! Remember to adjust according to your preference; if you prefer less creaminess, feel free to dial back the mayo!
- 1 tablespoon prepared yellow mustard. This is where the classic flavor starts to shine through! The yellow mustard contributes acidity and brightness that balances out the richness of the mayonnaise and egg yolks beautifully. It brings that familiar comfort we associate with traditional deviled eggs while enhancing their flavor profile without overwhelming it.
- 2 teaspoons Dijon mustard. Ahh, Dijon—the sophisticated cousin of yellow mustard! Its sharper notes add depth and complexity to our filling. This little touch elevates our dish from mundane to marvelous! Plus, it complements the sweetness from other ingredients perfectly, creating a harmonious blend of flavors.
- 4 tablespoons sweet or dill pickle relish, drained. Here comes the magic! The relish introduces delightful sweetness (if you choose sweet) or zesty tang (if you go dill) that contrasts beautifully against the creamy backdrop we’ve created so far. Whichever type you choose will impart its unique charm—sweet relish provides nostalgic comfort while dill brings brightness and freshness!
- Salt. A pinch here goes a long way in enhancing all those vibrant flavors we’ve layered together in our filling! It’s absolutely paramount not only for seasoning but also for bringing out each ingredient’s natural essence—so don’t skip it!
- Pepper. Just like salt, pepper is crucial for balancing our flavors. A few cracks from freshly ground black pepper will introduce warmth and subtle spice without overpowering our delicate mix.
- Paprika. Finally, we sprinkle on paprika—not just for aesthetics but also for its mild smokiness which beautifully contrasts against our creamy filling. It’s like adding an exclamation point at the end of each half—making it visually appealing while enhancing flavor too!
Equipment You’ll Need:
Before we start whipping up these delightful bites, let’s talk about some essential tools you’ll want by your side as steadfast partners in this culinary endeavor! Having the right equipment makes everything smoother and ensures success every step of the way.
- Large pot – This is where you’ll boil your eggs—choose one spacious enough to hold all twelve without crowding them together too closely! The goal here is even cooking; crowded pots can lead to unevenly cooked eggs which isn’t ideal for our perfect deviled egg filling.
- Ice bath bowl – After boiling those beauties up nicely, submerging them in ice water stops further cooking immediately and helps prevent those unsightly grey rings around the yolk caused by overcooking! Not only does this improve appearance but also preserves texture.
- Mixing bowl – Once we’ve separated those yolks from whites (which we’ll do shortly), you’ll need somewhere lovely to combine everything together seamlessly into one velvety mixture—which brings us closer to achieving that ultimate creamy consistency!
- Fork or hand mixer – You have options here! Using a fork gives you control over how chunky or smooth you want your filling while using an electric mixer creates an ultra-creamy result with minimal effort involved—a win-win either way!
Now that we’re prepped with ingredients and tools galore let’s jump into preparing this Deviled Eggs Recipe!
Step 1: Boiling Perfection
First things first: let’s start by boiling those beautiful large eggs you’ve chosen! Place them gently into your large pot before covering them completely with cold water—this ensures even cooking throughout each egg’s body since starting them cold helps prevent cracking during heating up later on as well! Turn up high heat until water reaches a rolling boil—this process takes mere minutes so don’t wander off too far lest you miss it bubbling away joyfully beneath its lid! Once boiling occurs? Cover tightly & turn off heat immediately yet allow them sit undisturbed between 10–15 minutes depending upon how well-cooked you’d prefer yolks inside (I usually recommend leaning towards ‘hard-boiled’).
Step 2: The Ice Bath
After letting those lovely eggs rest post-boil time frame mentioned earlier… carefully drain out hot water before transferring them straight into an ice bath bowl filled with cold water & ice cubes galore—we’re talking serious chill here folks!! Allowing them cool rapidly prevents overcooking whilst simultaneously aiding shell removal down road ahead later on when ready assembly occurs too!! Let sit here until cooled significantly (~3–5 minutes is perfect)—you’ll know they’re ready once touching outer shell feels pleasantly cool beneath fingertips rather than disturbingly warm still lingering around moments ago!!
Step 3: Unveiling Delicious Yolks
Once cooled completely & ready-to-go? Gently crack open each egg along its equator before peeling away shells revealing golden-yellow beauties nestled inside awaiting transformation ahead!! Take care during this step; patience pays off handsomely as rushing might leave behind unwanted bits clinging stubbornly onto whites making presentation less appealing overall later down line when arranging plates & serving guests eventually too…
Step 4: Blending Flavors Together
Now comes perhaps my favorite part—time mixing!! Grab yourself trusty mixing bowl where all fabulous ingredients await incorporation within luscious egg-yolk base created earlier on during peeling process previously described above… Add mayo first followed closely by mustards (both types!), along with pickle relish drained properly beforehand ensuring no excess liquid interferes here either—in fact trust me here—drainage matters greatly towards achieving ideal creaminess desired ultimately!! Lastly sprinkle salt & pepper generously over top ensuring even seasoning throughout mixture evenly distributed prior using fork/hand mixer blend until smooth consistency achieved effortlessly (should take mere seconds honestly!).
With each step unfolding beautifully together before us—it won’t be long now until everyone gets their hands on these heavenly bites filled with history & love encapsulated within every single half served forth onto eager plates surrounding table waiting patiently nearby amidst laughter echoing throughout home sweet home…
Stay tuned as we continue through crafting these delicious Deviled Eggs together—I assure you it’s only going get better from here on out!!
The Art of Assembling Your Deviled Eggs Recipe
Step 5: Gently Combine the Yolk Mixture
Now that your egg yolks have been carefully extracted, it’s time to create that creamy filling that will make your deviled eggs truly unforgettable. In a mixing bowl, add in the yolks along with 4 1/2 tablespoons of mayonnaise—I know it sounds like a lot, but trust me on this; it’s what gives that luscious mouthfeel we all love. If you prefer a slightly less creamy texture, feel free to use a bit less mayonnaise. Next, incorporate 1 tablespoon of prepared yellow mustard and 2 teaspoons of Dijon mustard. This combination is non-negotiable because each type of mustard brings its own unique flavor profile; the yellow mustard adds a slight tang, while the Dijon introduces a sophisticated zest that elevates the entire dish.
Now, let’s not forget about the 4 tablespoons of sweet or dill pickle relish, depending on your preference. This relish adds a delightful sweetness and crunch that contrasts beautifully with the creaminess of the yolks. As you mash everything together—using a fork for that rustic touch or a hand mixer for a smoother finish—take a moment to appreciate how these simple ingredients are transforming into something utterly intoxicating. You want the mixture to be smooth yet slightly chunky; this texture will ensure there are little bursts of flavor with every bite. Remember, don’t rush this step! A little patience goes a long way in achieving that perfect consistency.
Step 6: Fill Those Egg Whites with Love
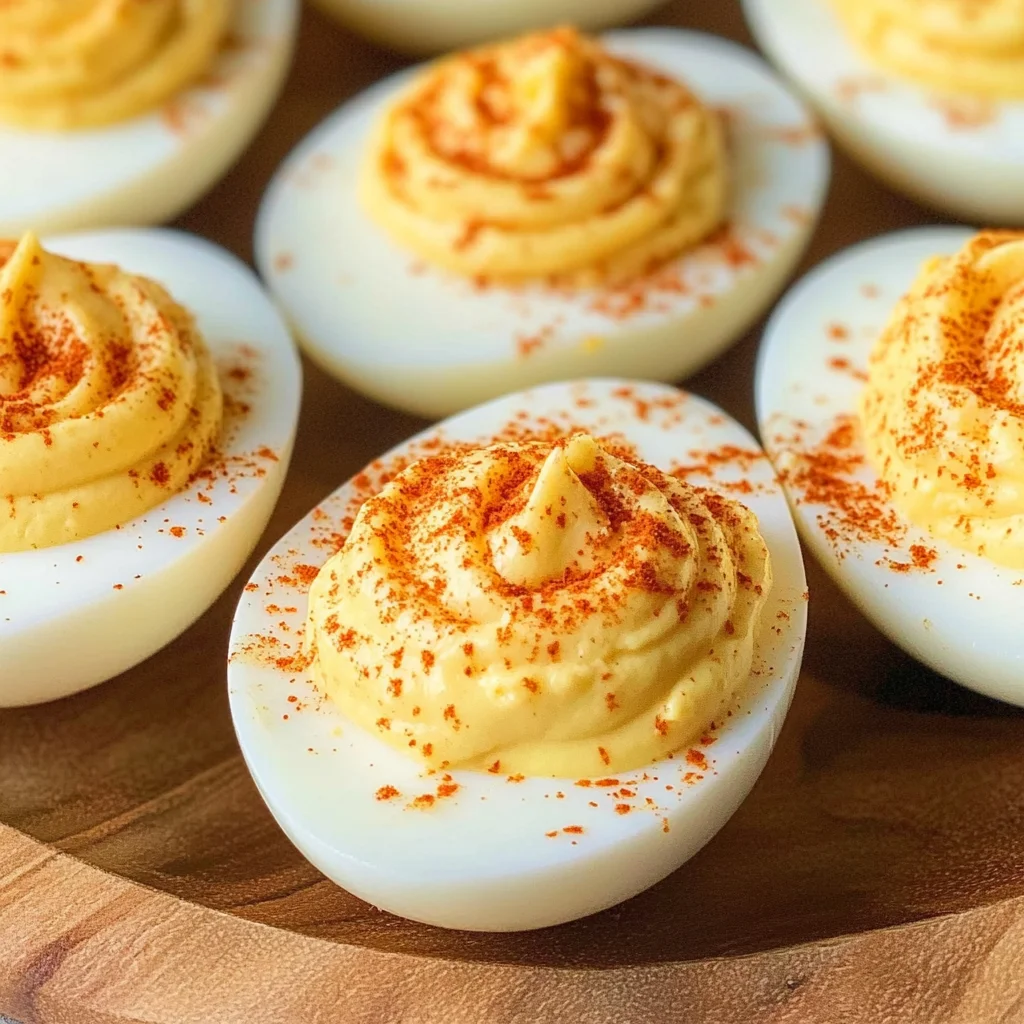
With your yolk mixture beautifully combined, it’s time to fill those lovely egg whites that you’ve so carefully prepared. You can either spoon the mixture directly into each half or, for an extra touch of elegance, transfer it into a pastry bag fitted with a star tip for some beautiful piping. I personally love using the piping method because it adds a lovely visual appeal—a feast for both the eyes and the palate! If you choose to go this route, fill your pastry bag and squeeze gently from the top downwards while guiding it in circles as you release pressure at the bottom. This creates lovely swirls that look as good as they taste.
As you fill each egg white half, make sure not to overfill them; we want them to be just right—like a gentle hug in food form! And if you find yourself with some leftover yolk mixture (which is rare but happens!), don’t worry; I encourage you to taste it! It’s absolutely divine and might just become your secret snack while finishing up this recipe. Trust me on this part—it will be hard not to sneak tastes!
Step 7: The Finishing Touch
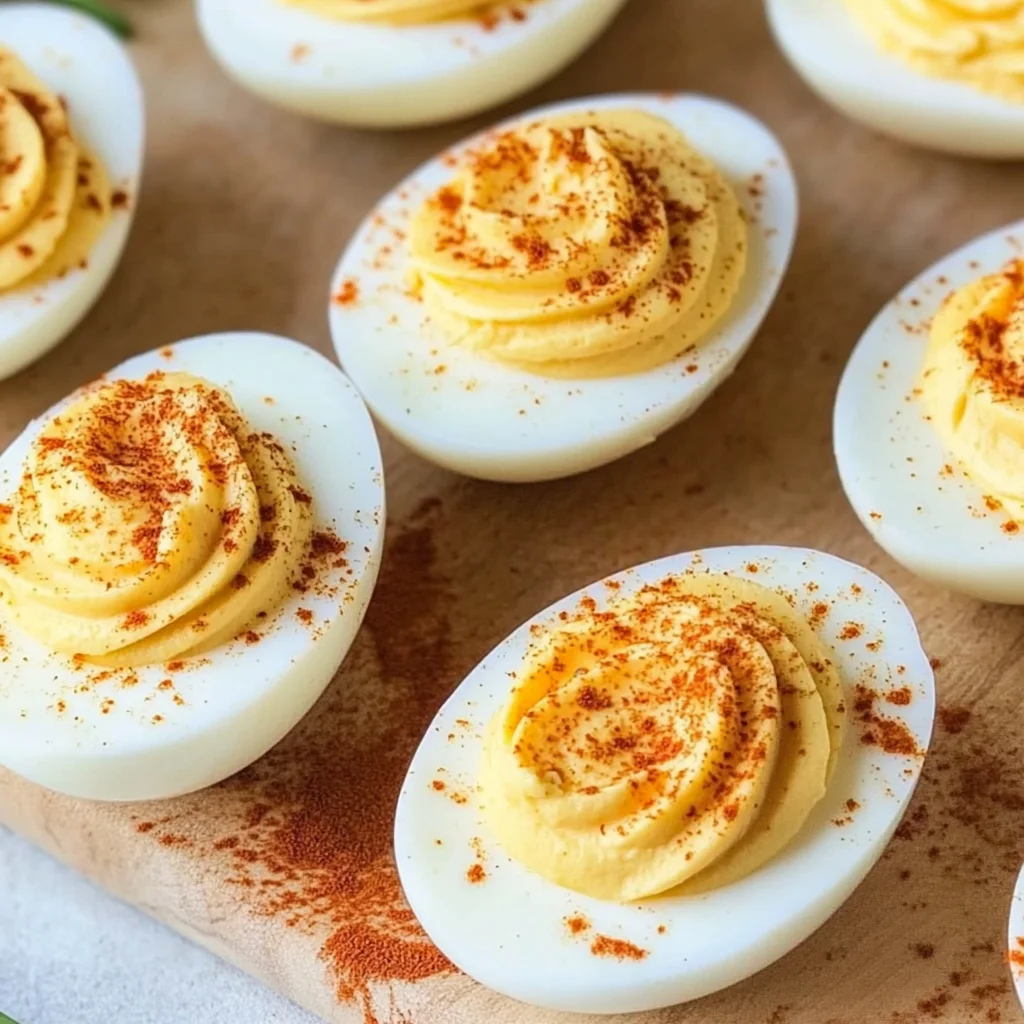
Now comes one of my favorite parts—the sprinkling of paprika! This is where your deviled eggs take on their final form and transform from delicious to extraordinary. Grab your paprika shaker and sprinkle lightly over each filled egg half; just enough to create beautiful red speckles without overwhelming the other flavors. The paprika not only adds an appealing color contrast but also contributes an earthy depth that enhances each bite. If you’re feeling adventurous, consider using smoked paprika for an added layer of flavor; it brings an utterly intoxicating smokiness that pairs perfectly with the creamy filling.
As you’re adding this final touch, take a moment to admire your handiwork; those vibrant hues and creamy textures are nothing short of art! This step might seem small, but it’s absolutely paramount in ensuring every element shines through when served. A little detail can elevate an ordinary dish into something truly special.
Step 8: Chill Out for Ultimate Flavor
Once you’ve sprinkled paprika over your masterpieces, it’s important to allow them some time to chill out in the refrigerator before serving. This is crucial! Chilling helps meld those flavors together beautifully—allowing all those wonderful components to marry into one cohesive bite—and trust me when I say that patience pays off here! Ideally, let them sit for at least 30 minutes, but if you have time, an hour or even longer is even better!
While they chill, the textures will firm up slightly, making them easier to handle when serving and enhancing their overall taste experience. Plus, there’s something deeply satisfying about biting into a cold deviled egg on a warm day; it’s refreshing yet indulgent at once! So resist the urge to serve them right away; give them this well-deserved rest because I promise you will be rewarded with profoundly satisfying bites when they’re finally ready.
Conclusion:
As we wrap up this delightful journey through my cherished Deviled Eggs Recipe, I can’t help but feel a swell of excitement at what we’ve created together. This recipe isn’t just about combining ingredients; it’s about embracing flavors that dance together in a symphony of deliciousness—the creaminess from the mayonnaise mixed with the tanginess from mustard and relish creates an utterly intoxicating experience. Add in that sprinkle of paprika on top, and you have yourself not just a dish but an invitation to savor life’s moments.
This recipe is truly a must-try—not only because of its incredible taste but also due to its ability to bring joy while making it. Picture yourself whipping these up for family gatherings, brunches with friends, or even cozy nights at home where comfort food reigns supreme. The process itself is therapeutic; spooning that creamy filling back into each egg white feels like an art form, reminding us that cooking can be both a science and a heartwarming ritual.
When serving these beautiful deviled eggs, imagine pairing them with crisp veggie sticks or buttery crackers for delightful contrast. Or perhaps enjoy one alongside a refreshing salad for lunch—every bite bursts with flavor! For an afternoon pick-me-up during some leisurely weekend entertaining, serve them alongside chilled sparkling water infused with lemon or cucumber—what a splendid combination! And let’s not forget about enhancing their presentation by garnishing with fresh herbs like chives or dill for an even more appealing look.
Feeling adventurous? This recipe is wonderfully adaptable! If you’re craving something different, try adding avocado for a creamy twist or incorporating spices like sriracha for those who enjoy some heat—the possibilities are endless! You could even swap out pickle relish for finely chopped olives or capers if you’re searching for something uniquely savory. Whatever variation you choose, I encourage you to make this recipe your own and share your experiences with friends and family. So go ahead—grab those ingredients and embark on this culinary adventure; I can’t wait for you to taste how extraordinary these deviled eggs truly are!
Deviled Eggs Recipe

Deviled eggs are the ultimate crowd-pleaser, perfect for any gathering or a cozy night at home. This Deviled Eggs Recipe transforms simple hard-boiled eggs into creamy, flavorful bites that everyone will love. With a delightful blend of mayonnaise, mustard, and pickle relish, each egg half offers a tangy sweetness balanced by a hint of smokiness from the paprika. Whether you serve them at a festive party or as a snack for yourself, these deviled eggs are sure to impress your family and friends. Plus, they are incredibly easy to make! Let’s get started on this delicious culinary adventure.
- Prep Time: 15 minutes
- Cook Time: 15 minutes
- Total Time: 30 minutes
- Yield: Makes 24 servings (12 whole deviled eggs) 1x
- Category: Appetizer
- Method: Boiling
- Cuisine: American
Ingredients
- 12 large eggs
- 4 1/2 tablespoons mayonnaise
- 1 tablespoon prepared yellow mustard
- 2 teaspoons Dijon mustard
- 4 tablespoons sweet or dill pickle relish (drained)
- Salt and pepper (to taste)
- Paprika (for garnish)
Instructions
- Boil the eggs: Place the eggs in a large pot and cover with cold water. Bring to a rolling boil, then cover and remove from heat. Let sit for 10–15 minutes.
- Ice bath: Transfer the boiled eggs to an ice bath for 3–5 minutes until cooled. Peel the shells carefully.
- Prepare filling: In a mixing bowl, combine yolks with mayonnaise, yellow mustard, Dijon mustard, pickle relish, salt, and pepper. Mash until smooth yet slightly chunky.
- Fill the egg whites: Spoon or pipe the yolk mixture into each egg white half.
- Garnish: Sprinkle paprika over the filled eggs before serving.
Nutrition
- Serving Size: 1 egg half (30g)
- Calories: 70
- Sugar: 0g
- Sodium: 95mg
- Fat: 5g
- Saturated Fat: 1g
- Unsaturated Fat: 3g
- Trans Fat: 0g
- Carbohydrates: 1g
- Fiber: 0g
- Protein: 6g
- Cholesterol: 186mg