Espresso juice Cookies
There’s something truly magical about the experience of baking cookies, and when it comes to creating these delightful Espresso juice Cookies, it feels like a thrilling dance between rich flavors and comforting aromas. Picture this: the moment you open your oven door, a warm wave of chocolate and espresso envelops your kitchen, inviting you to indulge in something extraordinary. These cookies are not just desserts; they’re an experience that melds tradition with a touch of modern flair. The combination of natural cocoa powder and instant espresso powder creates a symphony of flavors that is both bold and soul-satisfying, while the creamy white chocolate adds a luxurious finish that will have you savoring each bite. Trust me, once you’ve tasted these cookies, you’ll understand why they deserve a special place in your recipe repertoire.
As we embark on this culinary journey together, I want to share not just the how but also the why behind every step we take. Each ingredient in our Espresso juice Cookies plays a vital role in creating that perfect texture and flavor balance. From the deep notes of espresso to the subtle sweetness of white chocolate, every component interacts harmoniously to elevate simple cookie dough into a dessert experience that’s truly gratifying. So grab your apron, and let’s make some magic happen in your kitchen!
Espresso juice Cookies
: A Sweet Indulgence with Bold Flavors
These Espresso juice Cookies are more than just a sweet treat; they’re a celebration of flavors that come together beautifully. With every bite, you’re treated to the richness of cocoa and coffee, balanced with the creamy delight of white chocolate—a combination that’s bound to impress friends and family alike. Whether you’re sharing them during cozy gatherings or simply indulging in an afternoon pick-me-up, these cookies are sure to become a beloved favorite.
Ingredients:
Before we dive into the baking process, let’s take a moment to appreciate each ingredient that goes into our Espresso juice Cookies. Each one serves its purpose in crafting cookies that are not only delicious but also satisfyingly textured.
- 1 cup all-purpose flour (gluten-free if needed). Flour acts as the backbone of our cookie dough, providing structure and stability. Opt for high-quality all-purpose flour for best results; if you need a gluten-free option, look for blends specifically designed for baking to ensure your cookies rise beautifully without compromising flavor or texture.
- 2/3 cup natural unsweetened cocoa powder. This ingredient brings depth and richness to our cookies while contributing an irresistible chocolate flavor that pairs stunningly with espresso. Be sure to choose natural cocoa powder rather than Dutch-processed for an authentic taste; it’s lighter in color and has a slightly tangy flavor profile that enhances our cookie’s overall complexity.
- 2 Tablespoons instant espresso powder. Instant espresso elevates our cookies by infusing them with robust coffee flavor without needing any liquid coffee—perfect for achieving that intense taste! Look for high-quality brands; this little boost will create a deeply satisfying experience with every bite.
- 1 teaspoon baking soda. This leavening agent is critical for helping our cookies rise properly. It reacts with acidic components like cocoa powder, creating carbon dioxide bubbles that give our baked goods their lightness. Always check the expiration date on your baking soda; stale baking soda won’t provide the lift we need!
- 1/2 teaspoon kosher salt. Salt elevates flavors across the board—it enhances sweetness while balancing bitterness from cocoa and espresso. Kosher salt is preferred here because its larger crystals dissolve slowly during mixing, distributing flavor evenly throughout our cookie dough.
- 1/2 cup unsalted butter (room temperature). Butter is essential for achieving that tender texture we crave in cookies. Room temperature butter allows for better creaming with sugars, leading to air incorporation which makes our cookies light and fluffy instead of dense and chewy.
- 1/2 cup granulated sugar. This sugar contributes sweetness while helping achieve tenderness through moisture retention when baked. Granulated sugar promotes browning due to caramelization during baking—an essential element in developing those enticing flavors we love.
- 1/2 cup light brown sugar (packed). Brown sugar adds moisture and creates chewiness thanks to its molasses content; this balance complements our other ingredients wonderfully by enhancing their flavors while keeping our cookies soft.
- 1 large egg (room temperature). Eggs act as binding agents in cookie dough while providing additional moisture—crucial for achieving that perfect balance between crisp edges and chewy centers! Using room temperature eggs helps them incorporate more smoothly into the mixture.
- 1 teaspoon vanilla extract & 1 1/2 teaspoons vanilla extract (alcohol-free). Vanilla is more than just an aromatic enhancement; it adds depth to our cookie’s flavor profile—making everything taste sweeter without additional sugar! The alcohol-free version ensures everyone can enjoy these delightful treats guilt-free.
- 1 Tablespoon milk. Milk adds moisture which aids in achieving our desired consistency while also enriching flavors—a small yet mighty addition!
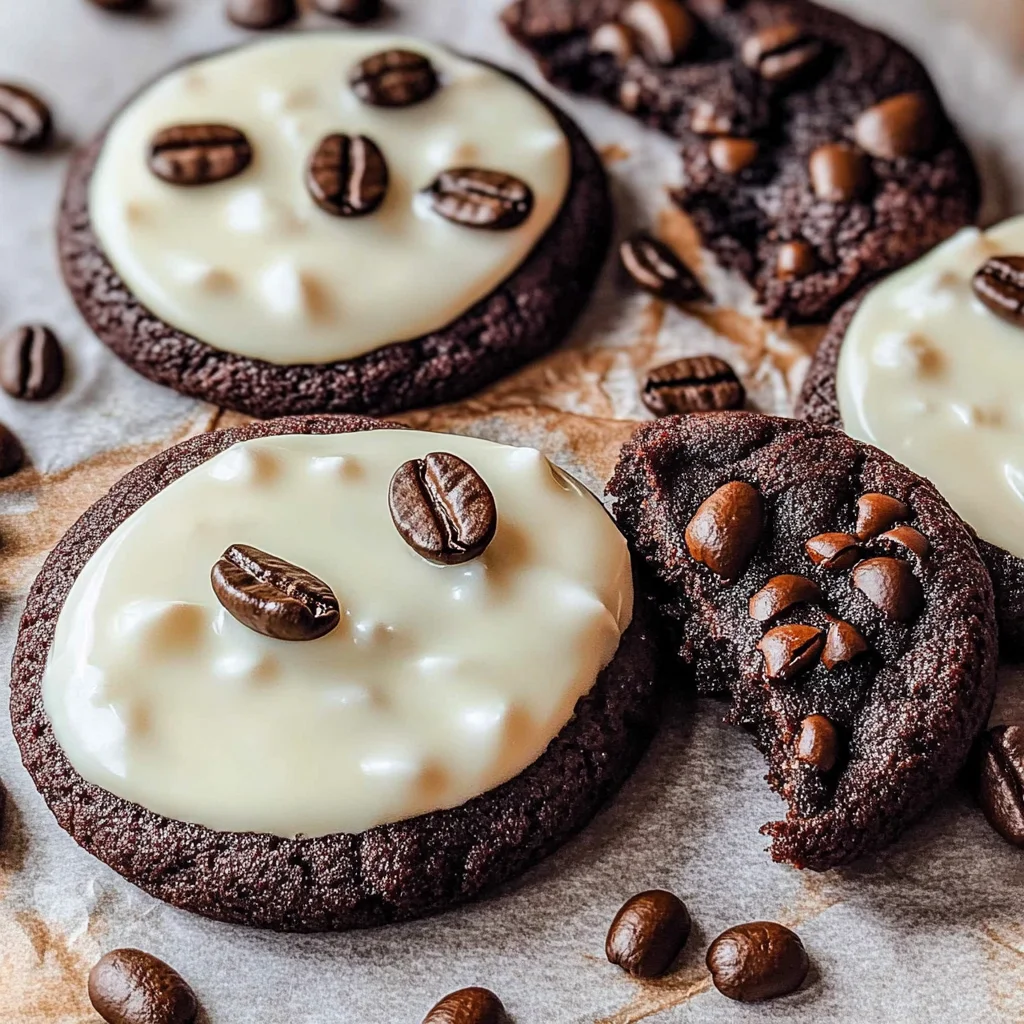
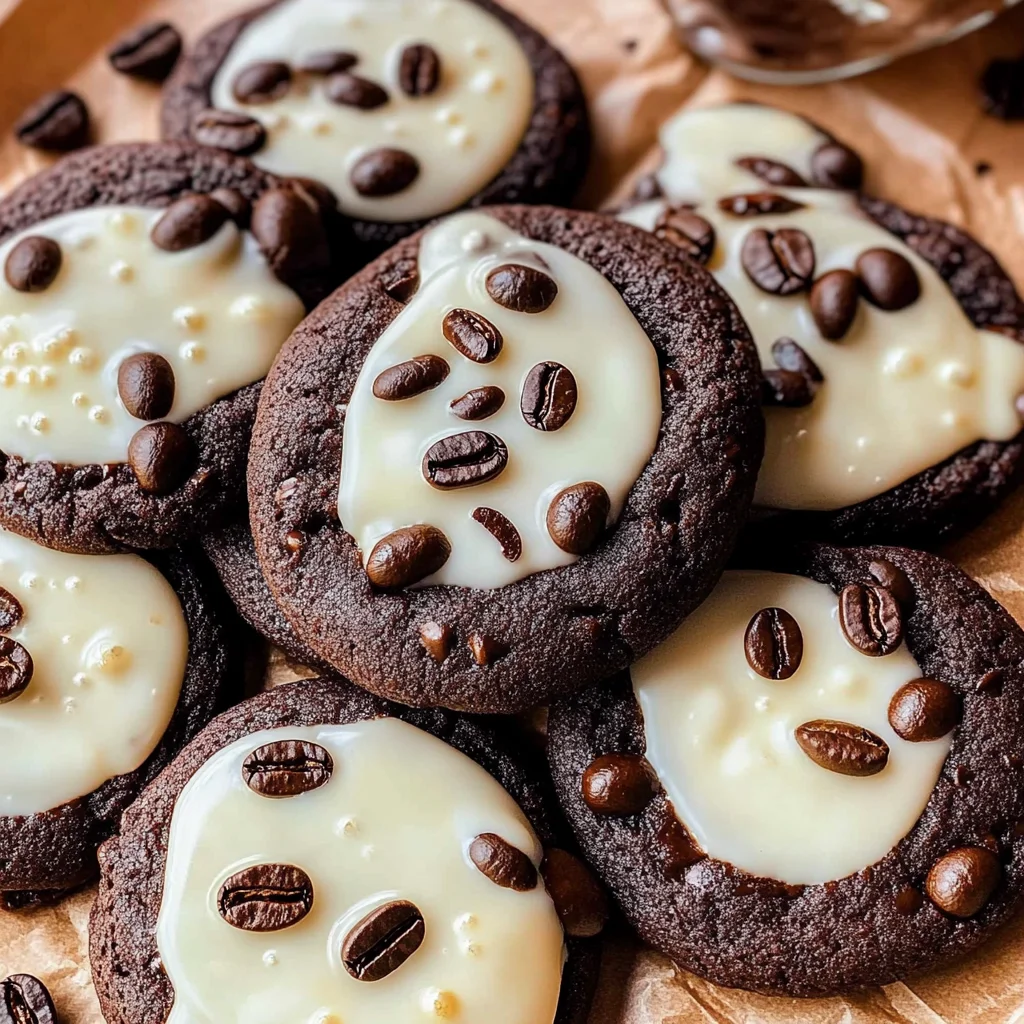
- 10-12 ounces premium white chocolate. The creamy sweetness of white chocolate perfectly complements the boldness of espresso and cocoa—creating a harmonious blend that’s utterly intoxicating! Aim for high-quality bars or chips where cocoa butter is among the first ingredients listed for optimal melting properties.
- Coffee beans to garnish. These are not just decorative—they’re an invitation! Placing whole coffee beans atop each dipped cookie serves as both beautiful presentation and a hint at the delightful flavors waiting inside!
Equipment You’ll Need:
Now that we’ve gathered all our ingredients, let’s talk about the tools we’ll need on this baking adventure! Having the right equipment makes all the difference—not only does it streamline your process, but it also ensures consistent results every time you bake these delicious Espresso juice Cookies.
- Mixing bowls – A set of various sizes will help you separate dry from wet ingredients easily without any fuss! Opt for sturdy glass or stainless steel bowls—they hold up well against electric mixers while allowing you to see how well combined your mixtures are.
- Electric mixer or stand mixer fitted with paddle attachment – This tool is vital for effortlessly creaming butter and sugars until fluffy! While you can mix by hand if you’re feeling particularly strong (or nostalgic), using an electric mixer saves time—even if it means fewer arm workouts!
- Baking sheets lined with parchment paper – These sheets not only prevent sticking but also make cleanup so much easier! Parchment paper helps achieve evenly baked bottoms without excess browning—ensuring those perfect edges we’re after!
- Cookie scoop (medium size) – A medium-sized scoop (about 3 tablespoons) guarantees uniformity in size—resulting in even baking times across all your cookies! If you don’t have one handy? You can use two spoons instead; just don’t be surprised if they turn out slightly different sizes!
With everything prepared—the ingredients ready, tools at hand—we’re primed for success as we prepare these extraordinary Espresso juice Cookies together!
Step 1: Chilling Is Key
The first crucial step involves preparing your cookie dough before anything else—and trust me when I say chilling is absolutely paramount here! Begin by whisking together your dry ingredients: flour, cocoa powder, instant espresso powder, baking soda, and salt until they’re well combined—this process ensures even distribution throughout your dough later on! Once you’ve got everything mixed nicely in one bowl set it aside temporarily as you move onto creaming those butters and sugars…
Step 2: Creaming Butter & Sugars
In another bowl (preferably large enough), beat together room temperature butter along with granulated sugar & brown sugar using either an electric mixer or stand mixer fitted with paddle attachment on medium-high speed until light & fluffy—about 2–3 minutes should do! This step incorporates air into your mixture—a non-negotiable aspect when striving towards lightness within baked goods like cookies…
Step 3: Mixing In Wet Ingredients
Now it’s time to add warmth & richness through egg(s), both types of vanilla extract (one being alcohol-free) plus milk into this airy blend created earlier—it might seem daunting at first but trust me—it’ll come together beautifully! Beat all these additions until fully incorporated & smooth…
Step 4: Combining Wet & Dry Ingredients
Next comes what I consider one most satisfying parts—bringing everything together harmoniously! Lower down mixer speed before gradually adding previously whisked dry ingredients into wet mixture until just combined… Don’t overmix here—we want those lovely pockets of air retained from earlier creaming action so each bite remains soft yet substantial once baked!
Now that we’ve laid out some foundational steps leading towards creating these fabulous Espresso juice Cookies let’s continue exploring how we can transform this luscious dough into divine treats that’ll surely win over hearts everywhere…
Step 5: Combining Wet and Dry Ingredients
Now that your butter-sugar mixture has reached that delightful, fluffy state, it’s time to introduce the dry ingredients into the party! Lower your mixer speed to avoid a flour explosion—trust me, nobody wants to wear cocoa powder today. Gradually add the whisked dry ingredients into the wet mixture, allowing them to blend together until just combined. This step is crucial because over-mixing can lead to tough cookies; we want them soft and chewy, not resembling a dense brownie. As you mix, keep an eye on the texture—the dough should start coming together beautifully, forming a rich, chocolatey mass that feels slightly sticky but not overly wet.
You’ll know it’s time to stop mixing when you can no longer see any flour streaks. Scraping down the sides of the bowl during this process is non-negotiable; it ensures that every bit of that velvety goodness is incorporated evenly. This harmonious blending of flavors is what makes these Espresso juice Cookies truly extraordinary—the instant espresso powder will start releasing its intoxicating aroma, filling your kitchen with a scent that promises deliciousness in every bite. Don’t rush this step; let the ingredients meld together like old friends reuniting after years apart.
Step 6: The Crucial Chilling Time
Once everything is combined, it’s time for one of the most vital steps in cookie-making: chilling the dough. Transfer your luscious cookie dough into an airtight container or wrap it tightly in plastic wrap—this is where patience comes into play! Pop it in the refrigerator for at least 2 hours, but if you can spare more time (ideally overnight), do so! Why chill? Well, chilling allows the fats in the butter to solidify again after being creamed with sugar. This crucial moment prevents your cookies from spreading too much while baking, resulting in thick and chewy centers with those lovely crisp edges we all crave.
While you’re waiting, take a moment to appreciate how anticipation can transform cooking into an experience. Imagine all those flavors—espresso, cocoa, and vanilla—melding and deepening over time. It’s like letting a fine wine breathe before serving! If you’re in a hurry and decide just two hours will suffice, that’s okay too; just know that longer chilling times yield thicker cookies with richer flavors. So go ahead and embrace the wait—it’s part of what makes baking feel so rewarding!
Step 7: Prepping for Baking Bliss
After your dough has chilled to perfection (and believe me, it will be worth every minute), it’s time to prepare for baking! Preheat your oven to 350°F (that’s about 175°C) while you line two large baking sheets with parchment paper—a step that ensures easy clean-up and prevents sticking. If your dough was snug in the fridge for more than 24 hours, give it about 15-30 minutes at room temperature to soften slightly before scooping. This little tip helps prevent any frustration when dealing with overly hard dough; we want ease here!
Using a medium cookie scoop (which holds about 3 tablespoons of dough), scoop out generous portions of your chilled mixture and drop them onto the prepared sheets about 2-3 inches apart. This spacing is important because they will spread as they bake—you want them to have room to grow into those beautiful cookies we’re dreaming about! The dough will be sticky; don’t fret if it feels challenging to handle—just wet your hands slightly to manage any stickiness effectively. Trust me on this detail; it makes all the difference!
Step 8: Baking Your Perfect Espresso Juice Cookies
With your cookie dough nestled on those baking sheets like little pillows of joy ready for their transformation, slide them into your preheated oven! Bake these beauties for about 10-12 minutes. What should you look for? The edges should appear set and firm while the tops retain a slight softness—remember not to overbake! They may look underbaked when you take them out; this is perfectly normal as they will continue cooking on the baking sheet once removed from the oven.
Let them cool on the cookie sheet for about five minutes before transferring them to a wire rack—a crucial step that allows them to firm up without losing their delightful chewiness inside. As they cool, take a moment to inhale that heavenly aroma wafting through your home; it’s nothing short of intoxicating! Each batch will make approximately 13 cookies depending on how generous you’ve been with each scoop—and trust me, you’ll want at least one batch hanging around for late-night snacking or sharing with friends who stop by unexpectedly.
And there you have it—a comprehensive journey through making beautiful Espresso juice Cookies filled with richness and love at every turn. I promise you’ll savor every moment spent creating these delights as much as you do eating them! Enjoy every bite!
Storage and Enjoyment Tips for Your Espresso juice Cookies
Now that your kitchen is filled with the irresistible aroma of freshly baked Espresso juice Cookies, it’s time to revel in the joy of sharing (or maybe just indulging a little)! These delightful cookies, with their rich chocolatey flavor and the enchanting kick of espresso, are perfect for any occasion or simply as a treat during your afternoon coffee break. But what’s even better? Knowing how to store these little gems so they remain as delicious as the moment they came out of the oven.
Storing Leftover Espresso juice Cookies
To ensure your Espresso juice Cookies remain fresh and scrumptiously delightful, it’s essential to choose the right storage container. I recommend using an airtight container; this is absolutely paramount in preserving their soft texture and rich flavors. When stored correctly at room temperature, these cookies can last up to five days—though I doubt they’ll last that long! If you’re worried about them drying out, consider placing a slice of bread in the container with them; this clever trick helps maintain moisture while adding a unique twist to the overall experience. Trust me when I say that even after a few days, these cookies will retain their deeply satisfying flavor and inviting aroma. For an extra treat, try warming them slightly in the microwave for about 10 seconds before savoring; it brings back that fresh-baked goodness!
Freezing Espresso juice Cookies for Later
If you find yourself with more cookies than you can handle (or maybe you just want to save some for later), freezing is an excellent option that offers incredible convenience! To freeze your Espresso juice Cookies, simply place them in a single layer on a baking sheet and pop them into the freezer for about an hour until they’re firm. Once frozen, transfer them into a freezer-safe bag or container, ensuring they are well-sealed to avoid freezer burn. They can stay frozen for up to three months without losing any of their delectable charm! When you’re ready to enjoy one (or several), there’s no need for defrosting—just pop them straight into the oven at 350°F for about 5-7 minutes until warmed through. This method not only saves time but also allows you to indulge in that fresh-out-of-the-oven experience whenever your sweet tooth calls!
Espresso juice Cookies

Indulge in the delightful experience of baking with these Espresso juice Cookies. Combining the bold flavors of rich cocoa and robust espresso, these treats are accentuated by the creamy sweetness of white chocolate. Perfect for any occasion, whether it’s a cozy gathering or a simple afternoon pick-me-up, these cookies are sure to impress. Their unique flavor profile makes them a must-have addition to your dessert repertoire. Plus, they are easy to make, alcohol-free, and can be enjoyed by everyone. Get ready to elevate your cookie game with this delightful recipe!
- Prep Time: 30 minutes
- Cook Time: 12 minutes
- Total Time: 42 minutes
- Yield: About 13 cookies 1x
- Category: Dessert
- Method: Baking
- Cuisine: American
Ingredients
- 1 cup all-purpose flour (gluten-free if needed)
- 2/3 cup natural unsweetened cocoa powder
- 2 tablespoons instant espresso powder
- 1 teaspoon baking soda
- 1/2 teaspoon kosher salt
- 1/2 cup unsalted butter (room temperature)
- 1/2 cup granulated sugar
- 1/2 cup light brown sugar (packed)
- 1 large egg (room temperature)
- 1 teaspoon vanilla extract (alcohol-free)
- 1 tablespoon milk
- 10–12 ounces premium white chocolate
Instructions
- In a bowl, whisk together flour, cocoa powder, espresso powder, baking soda, and salt. Set aside.
- In another bowl, cream room-temperature butter with granulated and brown sugars until light and fluffy.
- Add egg and vanilla extract to the creamed mixture; blend until smooth.
- Gradually mix in dry ingredients until just combined; avoid over-mixing.
- Chill the dough in the refrigerator for at least 2 hours.
- Preheat oven to 350°F (175°C) and line baking sheets with parchment paper.
- Scoop chilled dough onto prepared sheets, spacing them about 2 inches apart.
- Bake for 10-12 minutes until edges are set; allow cooling on sheets for five minutes before transferring to wire racks.
- Melt white chocolate and dip half of each cookie into it; let set on parchment paper.
Nutrition
- Serving Size: 1 cookie (approximately 30g)
- Calories: 150
- Sugar: 12g
- Sodium: 80mg
- Fat: 7g
- Saturated Fat: 4g
- Unsaturated Fat: 2g
- Trans Fat: 0g
- Carbohydrates: 20g
- Fiber: 1g
- Protein: 2g
- Cholesterol: 15mg