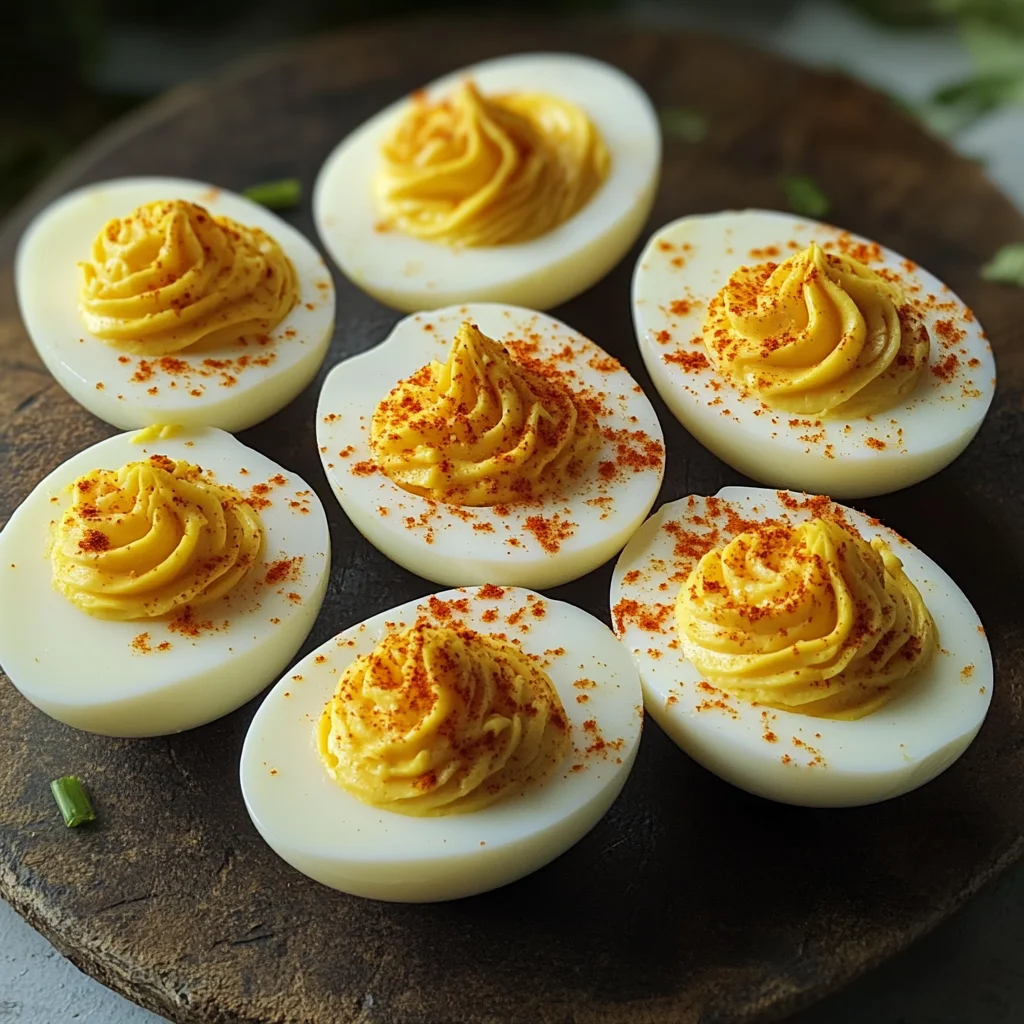
Gordon Ramsay’s Deviled Eggs (Ava’s Messy Version)
There’s something profoundly satisfying about preparing a dish that dances on the fine line between simplicity and elegance. Gordon Ramsay’s Deviled Eggs (Ava’s Messy Version) are not just about the ingredients; they capture the essence of togetherness, of sharing laughter and stories over a platter of deliciousness. Imagine, if you will, a sunny afternoon where your friends gather around, drawn in by the delightful aroma wafting through your kitchen. The creamy filling, kissed by a hint of tanginess and spice, nestles within perfectly cooked egg whites, creating an experience that is as much about flavor as it is about connection. I promise you, these deviled eggs are creamy, punchy, and utterly enjoyable. Each bite is a small revelation that reminds us why we gather around the table in the first place.
The beauty of this recipe lies not just in its taste but in its ability to evoke memories and spark conversations. Deviled eggs have long been a staple at gatherings—from picnics to family holidays—offering a nostalgic comfort that can transport us back to simpler times. Perhaps it was your grandmother’s special touch or a friend’s twist that inspired you to explore this dish further. Personally, I’ve always been captivated by how versatile they can be, allowing for endless variations and creative expressions. With Gordon Ramsay’s Deviled Eggs (Ava’s Messy Version), we’re embracing a certain delightful chaos—because let’s be honest, things might get messy when you’re cooking! But isn’t that part of the charm? So roll up your sleeves; let’s dive into this culinary adventure together!
Gordon Ramsay’s Deviled Eggs (Ava’s Messy Version): A Delightful Twist on a Classic
As we embark on this culinary journey, I want you to feel the excitement bubbling up within you! These deviled eggs are not just appetizers; they’re little bites of happiness that can light up any gathering or quiet evening at home. Trust me when I say that once you master this recipe, you’ll find yourself making them time and time again for every occasion—be it brunch with friends or an impromptu dinner party.
Ingredients:
Let’s start with our star players—the ingredients! Each one plays a vital role in crafting those beautifully creamy deviled eggs.
- 6 large eggs: The foundation of our recipe! Choosing large eggs is non-negotiable here because they provide ample space for our luscious filling while ensuring that each bite remains satisfying. Look for eggs with vibrant yolks; they indicate freshness and promise rich flavor. Fresh eggs also peel more easily after boiling—a crucial step for maintaining the integrity of our delicate egg whites.
- 3 tbsp mayonnaise: This ingredient adds an indulgent creaminess that binds everything together beautifully. Not all mayonnaises are created equal! For best results, opt for high-quality mayonnaise made with simple ingredients; it elevates the flavor profile significantly. If you’re feeling adventurous, try making your own! It only takes a few minutes and will have your guests raving about how fresh everything tastes.
- 1 tsp Dijon mustard: This condiment brings not just tanginess but also depth to our filling. Dijon mustard has a sharper taste compared to yellow mustard, which complements the richness of the mayonnaise without overpowering it. Don’t skip this step—this little teaspoon transforms our mixture into something truly extraordinary!
- 1 tsp apple cider vinegar (or white grape juice vinegar + tiny honey drop): The acidity from vinegar balances out the richness of the mayo and yolks beautifully. Apple cider vinegar offers subtle notes of sweetness while providing that necessary zing to cut through heaviness—a truly essential component! If you prefer using white grape juice vinegar with a hint of honey instead, go for it! It adds an unexpected layer of sweetness that’s simply delightful.
- Salt & pepper, to taste: Seasoning is key in bringing all these flavors together harmoniously. A pinch of salt enhances every bite while freshly cracked black pepper adds warmth and complexity to our filling. Tasting as you go is crucial here; don’t hesitate to adjust according to your palate!
- Paprika (or cayenne + paprika), for garnish: This finishing touch is what elevates your deviled eggs from ordinary to show-stopping! Paprika lends both color and mild smokiness while cayenne can bring in a touch of heat if you’re feeling adventurous. Sprinkle generously over your filled egg halves right before serving—it not only looks stunning but adds an aromatic element that will entice everyone at the table.
Equipment You’ll Need:
Now that we’ve gathered our ingredients let’s ensure we have all the right tools at hand! Having quality equipment makes every cooking experience smoother and far more enjoyable.
- Large pot: A sturdy pot is essential for boiling those eggs evenly without overcrowding them. Choose one with enough depth so water can cover them completely for even cooking—this will help avoid any frustrating mishaps!
- Ice bath setup: You’ll need a large bowl filled with ice water ready to go before boiling those eggs! This step is absolutely paramount because cooling down the eggs quickly stops further cooking and makes peeling easier later on.
- Mixing bowl: Once those yolks are separated from their whites after peeling, you’ll need a good-sized mixing bowl for mashing them smoothly into submission along with all those heavenly additions we talked about earlier!
- Piping bag or spoon: While piping bags offer precision (and look quite fancy!), using a simple spoon works wonders too—especially if things get messy during filling time! Just make sure whatever tool you use helps create lovely swirls or dollops atop each egg half.
- Whisk or fork: You’ll want something reliable for mashing those yolks until they’re velvety smooth alongside their flavorful partners-in-crime—mayonnaise and mustard!
Now that we have everything set up perfectly let’s dive into preparing these delicious bites!
Step 1: Boiling Those Perfect Eggs
Begin by bringing about enough water in your large pot to cover six large eggs comfortably when submerged fully—that’s critical for uniform cooking! Once you’ve got it boiling away joyfully like it’s eager to work magic on our humble ingredients, lower the heat slightly before gently lowering those beauties into their hot bath using a slotted spoon or ladle (no splashes!). Afterward, bring back up to boil and cook them precisely for 15 minutes; this duration allows the yolks to become firm yet still creamy enough without turning chalky—a common pitfall many fall victim too!
Step 2: Ice Bath Time!
Once those 15 minutes have passed with perfection achieved inside our beloved pot—the moment has arrived—you must act fast! Carefully transfer each egg into your prepared ice bath using tongs or once again relying on your trusty slotted spoon—this is crucial because it halts any further cooking immediately while also shocking them into peeling easily later on after chilling completely (around 10 minutes). Trust me; this method works wonders!
Step 3: The Delicate Peeling Process
Now comes one of my favorite parts—the gentle peeling ceremony! Once cooled thoroughly under cold running water if necessary (it helps loosen stubborn shells), tap each egg lightly against an edge before starting from either end as you begin removing shells carefully—it requires patience but yields beautiful results when done right! Remember how satisfying it feels when they peel cleanly without leaving chunks behind? That’s what we’re aiming for here!
Step 4: Preparing The Filling
With all our lovely peeled gems laid out before us like precious treasures waiting patiently—we’re ready now to tackle our filling masterpiece! Slice each egg lengthwise with precision so their perfect yolks sit comfortably awaiting transformation in their mixing bowl nearby where they’ll soon meet mayonnaise goodness alongside zesty Dijon mustard plus apple cider vinegar drizzle enhancing flavors collectively while adding seasoning salt n’ pepper until everything melds beautifully together into one harmonious blend whipped until smooth as silk—this step defines whether you’ll get creamy texture versus grainy mess so take care here folks!
Let’s pause here as we take pride in crafting such wonderful deviled delights together before moving ahead towards filling those hollowed-out whites next—and trust me; things only get better from here on out once we reach garnishing stage showcasing vibrant colors atop each little miracle awaiting eager taste buds craving satisfaction ahead…
Step 5: Filling the Whites with Love and Care
Now that you’ve crafted that luscious filling, it’s time for the moment of truth: filling those egg whites! Trust me, this step is where your Gordon Ramsay’s Deviled Eggs (Ava’s Messy Version) truly start to shine. You can either spoon the creamy mixture into the hollows of the egg whites or, if you’re feeling adventurous (and I promise, it’s worth it), grab a piping bag. Using a piping bag gives you that iconic swirl we all associate with gourmet deviled eggs, and who doesn’t want to impress their friends? Just fill your piping bag with the yolk mixture, ensuring there are no air bubbles inside. When you’re ready, snip off a small corner of the bag—just enough to let that creamy goodness flow out smoothly.
As you fill each egg white half, take a moment to appreciate the texture of that filling; it should be smooth and velvety, just like a cloud of flavor waiting to burst in your mouth. If you find the filling is too thick and doesn’t pipe easily, don’t worry! You can add a touch more mayonnaise or even a splash of vinegar to loosen it up. This step is crucial because it ensures every bite is utterly intoxicating. The goal here is not only functionality but also aesthetics; you want each egg to look invitingly delicious on your serving platter. Don’t rush this part! Take your time to create those little mounds that make each deviled egg feel special and cared for.
Step 6: Garnishing Like a Pro
Garnishing might seem like an afterthought, but I assure you it’s absolutely paramount in elevating your Gordon Ramsay’s Deviled Eggs (Ava’s Messy Version). This is where your eggs go from simply delicious to show-stopping! Grab your paprika or cayenne pepper—both are excellent choices depending on whether you want to add warmth or heat. A light sprinkle over each filled egg not only adds a pop of color that makes them visually appealing but also brings an exciting layer of flavor that dances on your palate.
Now, let’s talk about technique: when garnishing, aim for a gentle shake rather than dumping spice directly onto the eggs. Picture yourself as an artist sprinkling their masterpiece with finesse—less is often more! If you’re feeling extra creative (and I always encourage my friends to be!), consider adding fresh herbs like chopped chives or parsley for a fresh burst of color and taste. This simple act transforms your dish into something that looks professionally made while also adding depth and nuance. They say we eat with our eyes first, so make sure these beauties are dressed beautifully before they hit the table!
Step 7: Serving Your Deviled Eggs with Heart
At this stage, I can almost hear those delightful gasps from family and friends as they catch sight of your stunning Gordon Ramsay’s Deviled Eggs (Ava’s Messy Version). But before you serve them up on fancy platters (or whatever you have lying around), let’s talk about timing. These little gems are best enjoyed immediately after garnishing since that way you’ll experience their full flavor profile and creamy texture at its peak. However, if you’re preparing for an event or gathering later in the day, feel free to cover them gently with plastic wrap and chill them in the fridge for up to two hours.
Why chill? Allowing them to rest in the refrigerator helps meld those incredible flavors together even more profoundly while keeping everything cool and refreshing for your guests. Imagine biting into one—every element harmonizing beautifully! But don’t forget! If they sit too long wrapped tightly without airflow, the moisture can condense and make them soggy—definitely not what we want here! So aim for just enough time in the fridge without losing that fresh burst of flavor.
Step 8: The Final Touches
Now we arrive at perhaps one of my favorite moments—the grand reveal! As you prepare to set down those perfect Gordon Ramsay’s Deviled Eggs (Ava’s Messy Version), take a moment to appreciate all the love poured into each aspect—from boiling those eggs just right to creating that smooth filling and garnishing with flair. Presentation matters so much when serving food; consider placing them on a beautiful platter lined with greens like arugula or lettuce leaves which will not only enhance their appearance but also provide a lovely contrast against their creamy texture.
If you’re feeling particularly fancy (and who wouldn’t?), consider drizzling a tiny bit of olive oil over top before serving; it adds an elegant sheen while enhancing richness without overpowering those delightful flavors you’ve painstakingly crafted. Remember that cooking is about sharing joy; watching your loved ones enjoy these bites will be satisfying beyond measure. Serve them alongside crisp veggies or crackers for some added crunch if you’d like—this dish shines as both an appetizer or part of a vibrant spread at any gathering!
Conclusion:
As we wrap up this delicious journey through Gordon Ramsay’s Deviled Eggs (Ava’s Messy Version), I can’t help but feel a little giddy about everything we’ve explored together. From boiling those eggs just right to crafting that utterly creamy filling that feels like liquid gold on your tongue, every step brings us closer to something truly extraordinary. The way those rich yolks meld with mayonnaise and mustard creates a symphony of flavors that dances on your palate, while the gentle kick from paprika adds just enough spice to keep things exciting. This recipe is not just about food; it’s about creating memories around the table with those we hold dear.
Why should you dive into making these deviled eggs? Because they are not only delicious but also incredibly fun to prepare! Picture yourself piping that creamy goodness into each egg white—it truly feels like an art form! These beauties shine at every occasion—from casual family dinners to festive gatherings with friends—and let me tell you, there’s nothing quite like pulling out a platter filled with these vibrant bites and watching everyone’s faces light up in delight. They are perfect snacks for game nights or elegant appetizers at holiday parties; no matter when you serve them, they will steal the show!
Imagine savoring one with a crisp glass of lemonade on a warm afternoon picnic or pairing them with crunchy vegetable sticks for an irresistible snack break while binge-watching your favorite series. The possibilities are endless! For a truly decadent experience, why not serve them alongside some homemade hummus and pita chips? Or perhaps complement them with a light salad drizzled with zesty vinaigrette? Each bite evokes memories of laughter shared over good food.
Feeling adventurous? This recipe is wonderfully adaptable! You could swap out apple cider vinegar for lemon juice if you’re looking for that bright citrus note or add fresh herbs like dill or chives for an aromatic twist that will elevate each bite even further. If you’re in the mood for something spicy, try adding finely chopped jalapeños or sriracha into the filling mix for an unexpectedly delightful kick! The beauty of these deviled eggs lies in their versatility—each variation tells its own story while maintaining that comforting essence we all love so much. So go ahead, experiment freely! I wholeheartedly invite you to try this recipe, make it your own, and share your experiences with me—I can’t wait to hear how it turns out!
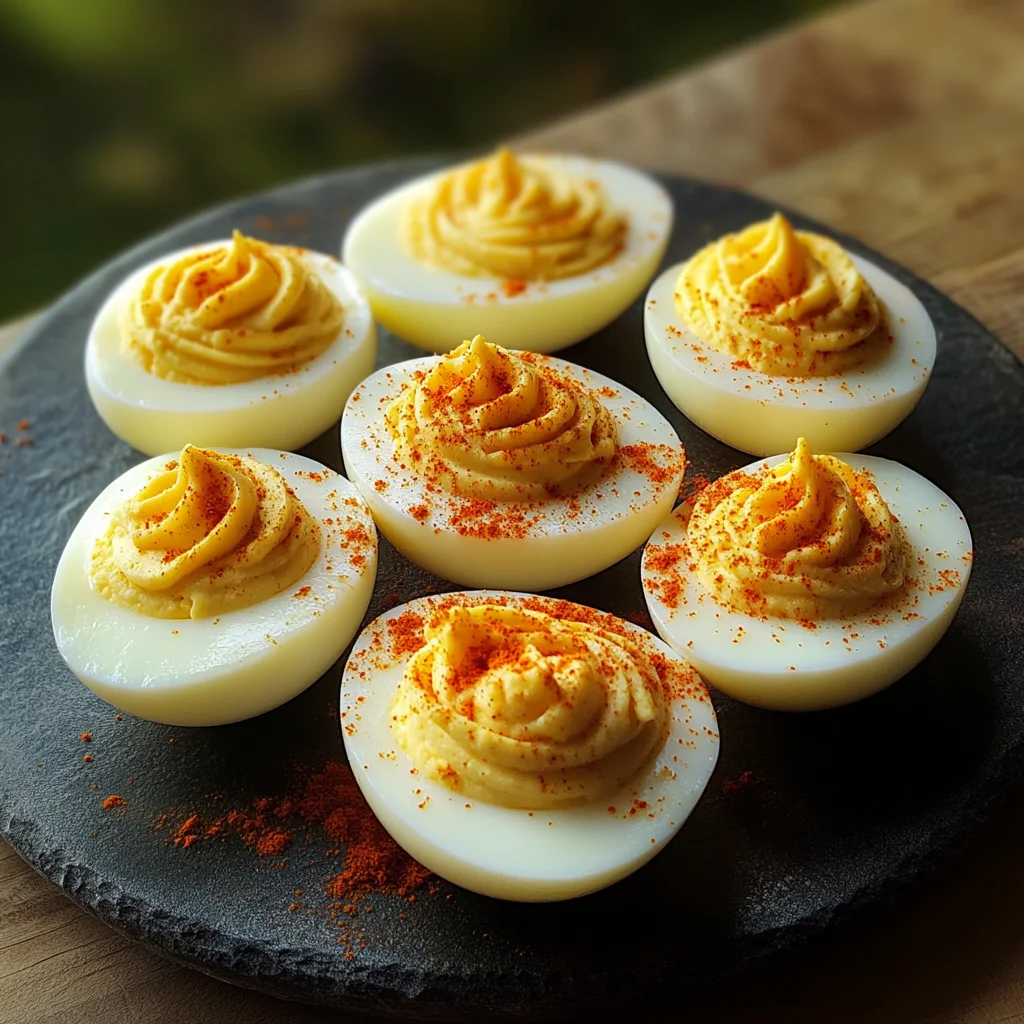
Gordon Ramsay’s Deviled Eggs (Ava’s Messy Version)

Gordon Ramsay’s Deviled Eggs (Ava’s Messy Version) are a delightful twist on the classic appetizer that brings a burst of flavor and creativity to any gathering. These creamy bites feature perfectly cooked egg whites filled with a rich mixture of mayonnaise, Dijon mustard, and apple cider vinegar, delivering a tangy yet indulgent experience. Whether you’re hosting brunch or a casual dinner party, these deviled eggs will impress your guests and spark joyful conversations around the table. With their easy preparation and endless possibilities for customization—think spicy jalapeños or fresh herbs—this recipe is sure to become a staple in your culinary repertoire!
- Prep Time: 20 minutes
- Cook Time: 15 minutes
- Total Time: 35 minutes
- Yield: 12 servings 1x
- Category: Appetizer
- Method: Boiling
- Cuisine: American
Ingredients
- 6 large eggs
- 3 tbsp mayonnaise
- 1 tsp Dijon mustard
- 1 tsp apple cider vinegar (or white grape juice vinegar + tiny honey drop)
- Salt & pepper, to taste
- Paprika (or cayenne + paprika), for garnish
Instructions
- Boil the eggs: Place eggs in a large pot, cover with water, and bring to a boil. Reduce heat and simmer for 15 minutes. Transfer to an ice bath for 10 minutes.
- Peel the eggs: Gently tap each egg on the counter, then peel under running water.
- Prepare the filling: Slice eggs in half lengthwise, removing yolks into a mixing bowl. Mash yolks with mayonnaise, Dijon mustard, apple cider vinegar, salt, and pepper until smooth.
- Fill the egg whites: Use a piping bag or spoon to fill each egg white half with the yolk mixture.
- Garnish: Sprinkle paprika or cayenne over each filled egg before serving.
Nutrition
- Serving Size: 1 deviled egg
- Calories: 70
- Sugar: 0.2g
- Sodium: 55mg
- Fat: 5.0g
- Saturated Fat: 1.5g
- Unsaturated Fat: 3.0g
- Trans Fat: 0g
- Carbohydrates: 1g
- Fiber: 0g
- Protein: 6g
- Cholesterol: 186mg