Irish Soda Farls
There’s something truly magical about bread making, isn’t there? It’s as if every knead, every fold, every rise brings you closer to something extraordinary. When I think of comfort food that transcends mere sustenance, my thoughts drift to Irish Soda Farls—a delightful bread that embodies warmth and tradition. This isn’t just a recipe; it’s an experience steeped in culture and history. The simplicity of this buttermilk-based bread, cut into charming quadrants and cooked until puffed and golden, offers a symphony of flavors that dances on your taste buds and fills your kitchen with an intoxicating aroma. Each bite is like a hug from the past, reminding us that sometimes, the most profound connections come from the simplest ingredients.
I’ve always been captivated by how Irish Soda Farls can transform a quiet breakfast into a cherished moment shared with loved ones. The beauty of this bread lies not only in its flavor but also in its versatility—it can grace your table at any hour, whether paired with butter and jam for a comforting breakfast or served as part of an Ulster Fry for lunch or dinner. Imagine slicing into these warm farls, their crusty exterior giving way to a soft, fluffy interior while the butter melts into liquid gold. Trust me when I say that each farl carries with it a piece of Irish heritage, bridging generations through shared meals and stories.
Irish Soda Farls: A Heartwarming Taste of Tradition
Now let’s dive into making these lovely Irish Soda Farls! I promise you; they are easier than you might think. With just a handful of ingredients and minimal fuss, you’ll find yourself transported to the lush green hills of Ireland with every warm mouthful. Whether you’re an experienced baker or someone who’s just starting out in the kitchen, this recipe is approachable and rewarding—perfect for anyone looking to create something truly special without spending hours slaving away.

Ingredients:
As we embark on this culinary journey together, let’s take a moment to appreciate each ingredient that plays a vital role in crafting our Irish Soda Farls. Each element contributes not only flavor but also texture and character to our beloved bread.
- 2 cups (250 grams) all-purpose flour (plus more for dusting). This humble ingredient forms the backbone of our soda farls. When choosing flour, look for high-quality all-purpose varieties that offer good protein content—this is what gives our bread structure while still allowing it to be tender. Dusting your work surface with extra flour not only prevents sticking but also helps create a beautiful crust during cooking. Remember, the interaction between flour and liquid will ultimately determine the texture of your farls; we want them soft yet sturdy enough to hold their shape.
- 3/4 teaspoon baking soda. Here’s where the magic happens! Baking soda acts as our leavening agent—a crucial component because traditional soda bread relies on this chemical reaction rather than yeast to rise. It creates those lovely air pockets within the dough that make every bite light and fluffy. Ensure your baking soda is fresh; old leavening agents can lead to lackluster results—you want that delightful puff!
- 1/2 teaspoon salt. Salt is often referred to as nature’s flavor enhancer for good reason! In our Irish Soda Farls, it elevates the taste profile beautifully by highlighting the natural sweetness of the flour while balancing out the richness brought by butter later on. It’s essential to incorporate salt evenly throughout your dough; this ensures consistent flavor in every single farl.
- 1 cup (240 milliliters) buttermilk (divided). Buttermilk is truly one of those magical ingredients that brings depth and moisture into baked goods. Its acidity reacts with our baking soda, helping our dough rise beautifully while imparting an incredibly rich flavor that makes these farls utterly irresistible. If you don’t have buttermilk on hand, fear not! You can easily make your own by mixing regular milk with a splash of vinegar or lemon juice—just let it sit for about 5-10 minutes before using!
- Butter and jam (for serving). Ahh, what better way to enjoy warm farls than with generous pats of creamy butter and dollops of sweet jam? The rich buttery goodness melts effortlessly into the warm bread while the jam adds delightful sweetness—a perfect pairing that awakens those nostalgic feelings associated with home-cooked meals.
Equipment You’ll Need:
Now that we have our ingredients ready, let’s talk about some tools that will make this process smoother and more enjoyable! While they may not be edible themselves, having the right equipment is absolutely paramount when it comes to achieving success in any recipe.
- Large mixing bowl: A spacious bowl allows you plenty of room to mix all your dry ingredients without making too much mess—trust me; nobody enjoys cleaning up flour explosions! It also provides ample space for kneading if you choose to do so later on.
- Sharp knife: This simple tool becomes essential when cutting our dough into neat quadrants or “farls.” A sharp knife ensures clean cuts which allow for even cooking—no one likes unevenly shaped bread!
- Skillet: A heavy-bottomed skillet works wonders here! It provides even heat distribution which helps in achieving that perfect golden-brown crust while keeping the inside soft and fluffy. You could use cast iron or non-stick; both will yield delicious results.
- Measuring cups and spoons: Precision is key in baking! Accurate measurements ensure consistent results every time you whip up these delightful breads—so don’t skip this step!
Preparing the Irish Soda Farls
Step 1: Mixing Dry Ingredients
Let’s kick things off by combining our dry ingredients—the foundation upon which our tasty farls will rise! In a large mixing bowl, gently whisk together 2 cups of all-purpose flour along with 3/4 teaspoon baking soda and 1/2 teaspoon salt until they’re well combined. This step is crucial because it ensures even distribution of your leavening agent (baking soda) throughout the flour mixture—nobody wants clumps hiding away in their dough! Take a moment here: inhale deeply—the powdery fragrance mingling with hints of salt brings back such comforting memories for me each time I prepare this recipe.
Step 2: Creating Your Dough
Next comes one of my favorite parts: creating our dough! Make a well in the center of your dry mixture; imagine it as a little nest waiting patiently for its filling. Pour 3/4 cup (180 milliliters) of buttermilk into this well—watch how it soaks into those dry ingredients like rain soaking into parched earth! Gently mix everything together using your hands or a spoon until it starts forming clumps—that’s how we know we’re on track! If at any point your dough feels too crumbly or dry (which can happen depending on various factors like humidity), drizzle in tiny amounts of the remaining buttermilk until everything just comes together beautifully without being overly sticky.
Step 3: Shaping Our Dough
Now comes another satisfying step: shaping our dough into its final form! Lightly flour your work surface—this prevents sticking—and turn out your dough onto it gently without squishing out all its air pockets (we want those bubbles!). Pat it down gently until you create a circle roughly half an inch thick—the thickness matters here because we want those farls nice and fluffy once cooked through! Don’t rush through this process; take pride in shaping something lovely from simple ingredients—it’s incredibly rewarding!
Step 4: Cutting Into Quadrants
Using that trusty sharp knife from earlier (I hope you’ve kept it handy!), carefully cut through your round dough circle into four equal quadrants—these are affectionately known as “farls.” Picture perfect slices are key here because they’ll ensure even cooking when placed onto hot skillets later on! As you slice through each piece, visualize what it’ll look like golden brown on your plate—deliciousness awaits!
Stay tuned as we continue exploring how these beautiful farls come alive under heat…
Crafting Your Perfect Irish Soda Farls
Step 5: Heat the Skillet to Perfection
Now that you have your beautifully shaped farls ready to go, it’s time to focus on the skillet. This is where the magic happens! Place a large skillet over medium-low heat and allow it to warm up gently. Why medium-low, you ask? Cooking on too high of a heat can lead to burnt outsides and gooey insides—definitely not the delightful experience we’re aiming for! While the skillet heats, sprinkle a light dusting of flour across the surface. This step is crucial as it prevents sticking and creates a lovely golden crust when cooking. As the flour sizzles, you’ll know you’re on the right track; the aroma will start filling your kitchen like an invitation to indulge in something utterly delicious.
Step 6: The Initial Sizzle
With your skillet now at just the right temperature, it’s time to add those farls! Gently place them in the skillet, ensuring they have some space between them—this isn’t a crowded party; each farl deserves its own area to shine without getting squished! Depending on the size of your skillet, you may need to work in batches. That’s perfectly fine; good things come to those who wait! Allow them to cook undisturbed for about 4-6 minutes. You’ll want to keep an eye on them during this time; patience is key! The bottom should take on a beautiful golden hue. You’ll know it’s ready when you can see little bubbles forming on top of each farl—this means they are puffing up nicely, creating that tender, fluffy interior we all adore.
Step 7: Flipping for Golden Perfection
Once those first sides are beautifully browned and inviting, it’s flip time! Using a spatula, gently turn each farl over. Be careful here; we want them to stay intact and keep their lovely shape. As they cook on this second side, reduce the heat slightly if needed—it’s important to avoid any burnt bits while ensuring they cook through completely. This step allows both sides of your farls to achieve that perfect balance of texture: crispy outside but soft and pillowy inside. Keep checking after about 3-4 minutes; when they are done, insert a toothpick or skewer into the thickest part of one of the farls—it should come out clean with no raw dough clinging to it. If it’s still wet or sticky, give them another minute or two until they’re perfectly cooked through.
Step 8: The Art of Serving Warm
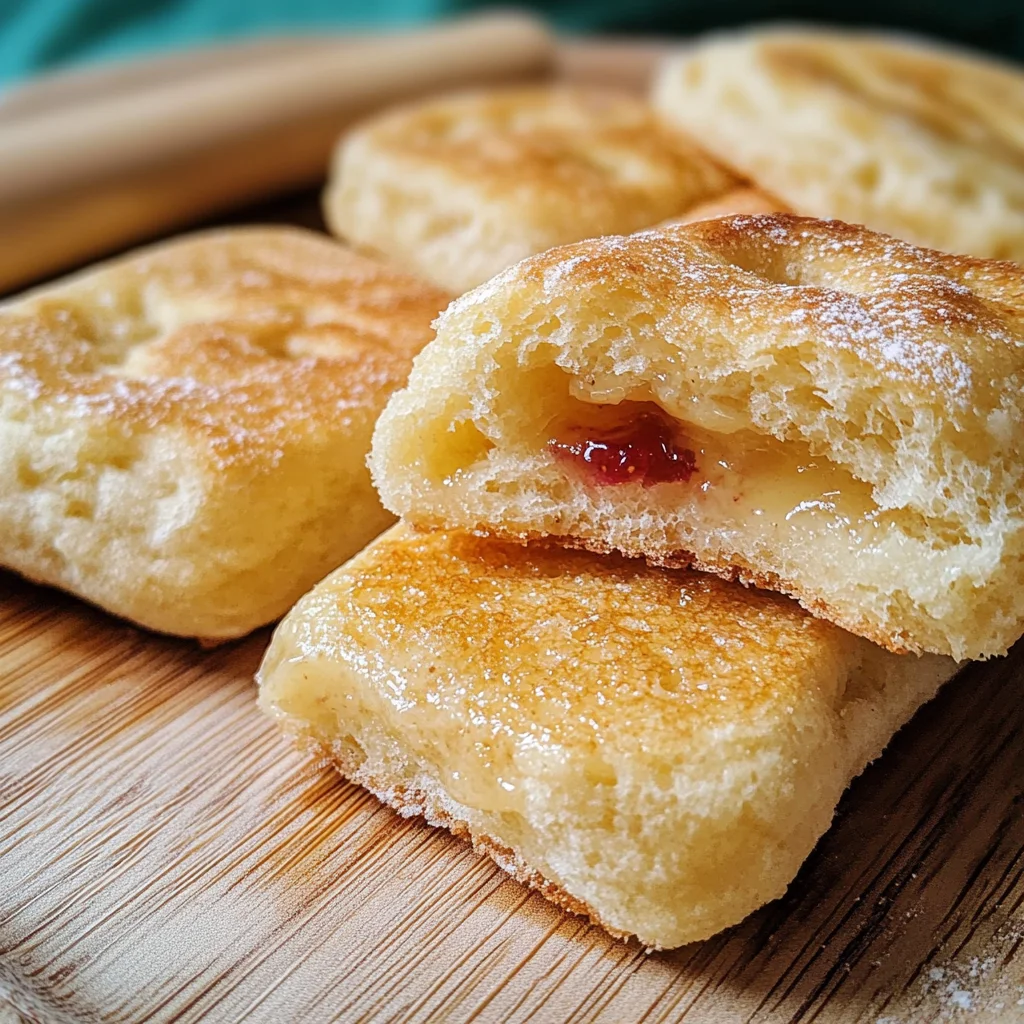
At last, we reach one of my favorite moments—the serving! Carefully remove each farl from the skillet and place them onto a plate lined with a clean kitchen towel; this helps keep them warm while absorbing any excess oil. Trust me when I say there’s nothing quite as satisfying as biting into a warm soda farl straight off the skillet. They are best enjoyed fresh but can be stored for later enjoyment if needed (though I highly recommend devouring them immediately!). As you prepare for serving, consider what makes these little beauties truly extraordinary: a generous smear of creamy butter that melts into every nook and cranny and perhaps a dollop of your favorite jam—think raspberry or strawberry for that sweet-tart contrast! The combination is an absolute delight—a symphony of flavors that will leave you longing for more.
Final Touches: Elevating Your Experience
Step 9: The Joyful Finishing Touches
As you present these glorious Irish Soda Farls at breakfast or brunch, don’t forget about how important ambiance is! Lay out some fresh fruit alongside your fare or perhaps some honeycomb for drizzling—these additions not only look beautiful but also elevate your meal from simple bread to something extraordinarily inviting. Remember that food is about sharing joy with others and creating memories around the table. Each bite should transport you back to Ireland’s rolling green hills or cozy kitchens filled with laughter and warmth.
I promise you, whether enjoyed solo with coffee in hand or served up at a gathering with friends and family, these Irish Soda Farls will become a cherished staple in your home just like they have in mine. Trust me on this one—you won’t regret making this remarkable recipe part of your culinary repertoire!
Storage and Enjoyment Tips for Your Irish Soda Farls
Oh, my friends, the moment has finally arrived! You’ve crafted these delightful Irish Soda Farls, and the aroma wafting through your kitchen is nothing short of intoxicating. Whether you’ve decided to savor them fresh off the skillet or save a few for later, let’s talk about how to preserve that magic. After all, good food deserves to be treasured, not wasted!
Storing Leftover Irish Soda Farls
To keep your Irish Soda Farls as fresh as the day they were made, I recommend storing them in an airtight container at room temperature. This will keep their texture soft and inviting for up to two days. If you’re like me and want to stretch that deliciousness a bit longer, place a slice of bread within the container—this simple trick helps maintain moisture and keeps your farls from drying out too quickly. When you take them out after storage, you’ll discover they still hold onto that delightful crumb and flavor you fell in love with right after cooking! For those moments when you crave that warm, comforting bite again, simply reheat them in a skillet over low heat for a couple of minutes on each side until they’re warmed through and that buttery scent fills the air once more.
Freezing Irish Soda Farls for Later
Thinking ahead? Freezing your Irish Soda Farls is an excellent option! To do so properly, allow them to cool completely before wrapping each farl tightly in plastic wrap or placing them in a freezer-safe bag. This way, they can stay frozen for up to three months without losing their charm. When the craving strikes, just pull one or two from the freezer and let them thaw in the fridge overnight or pop them directly into a warm skillet. The joy of having homemade bread on hand whenever you desire is absolutely marvelous—imagine pulling out a perfectly golden farl whenever your heart desires a comforting snack or quick breakfast! Trust me; it’s a game-changer for busy mornings or lazy afternoons.
Irish Soda Farls
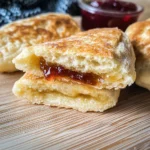
Irish Soda Farls are a delightful, traditional Irish bread that brings warmth and comfort to any meal. This easy recipe yields soft, fluffy farls that are perfect for breakfast or as a side dish at any time of day. With just a handful of ingredients, you’ll find yourself creating these charming quadrants in no time. The aroma of freshly cooked bread will fill your kitchen, making it hard to resist enjoying them warm with a smear of creamy butter and a dollop of your favorite jam. Whether served solo or alongside hearty soups, these soda farls bridge generations through shared meals and cherished memories.
- Prep Time: 10 minutes
- Cook Time: 15 minutes
- Total Time: 25 minutes
- Yield: Makes 4 servings 1x
- Category: Breakfast
- Method: Cooking
- Cuisine: Irish
Ingredients
- 2 cups all-purpose flour (plus more for dusting)
- 3/4 teaspoon baking soda
- 1/2 teaspoon salt
- 1 cup buttermilk (divided)
- Butter and jam (for serving)
Instructions
- In a large mixing bowl, whisk together flour, baking soda, and salt until combined.
- Make a well in the center and pour in 3/4 cup of buttermilk. Mix gently until clumps form; add more buttermilk if needed to achieve dough consistency.
- On a floured surface, pat the dough into a circle about 1/2 inch thick.
- Cut into four equal quadrants (farls) using a sharp knife.
- Heat a skillet over medium-low heat and dust with flour. Cook each farl for about 4-6 minutes per side until golden brown and puffed.
Nutrition
- Serving Size: 1 farl (60g)
- Calories: 150
- Sugar: 0g
- Sodium: 250mg
- Fat: 3g
- Saturated Fat: 1g
- Unsaturated Fat: 2g
- Trans Fat: 0g
- Carbohydrates: 28g
- Fiber: 1g
- Protein: 4g
- Cholesterol: 5mg