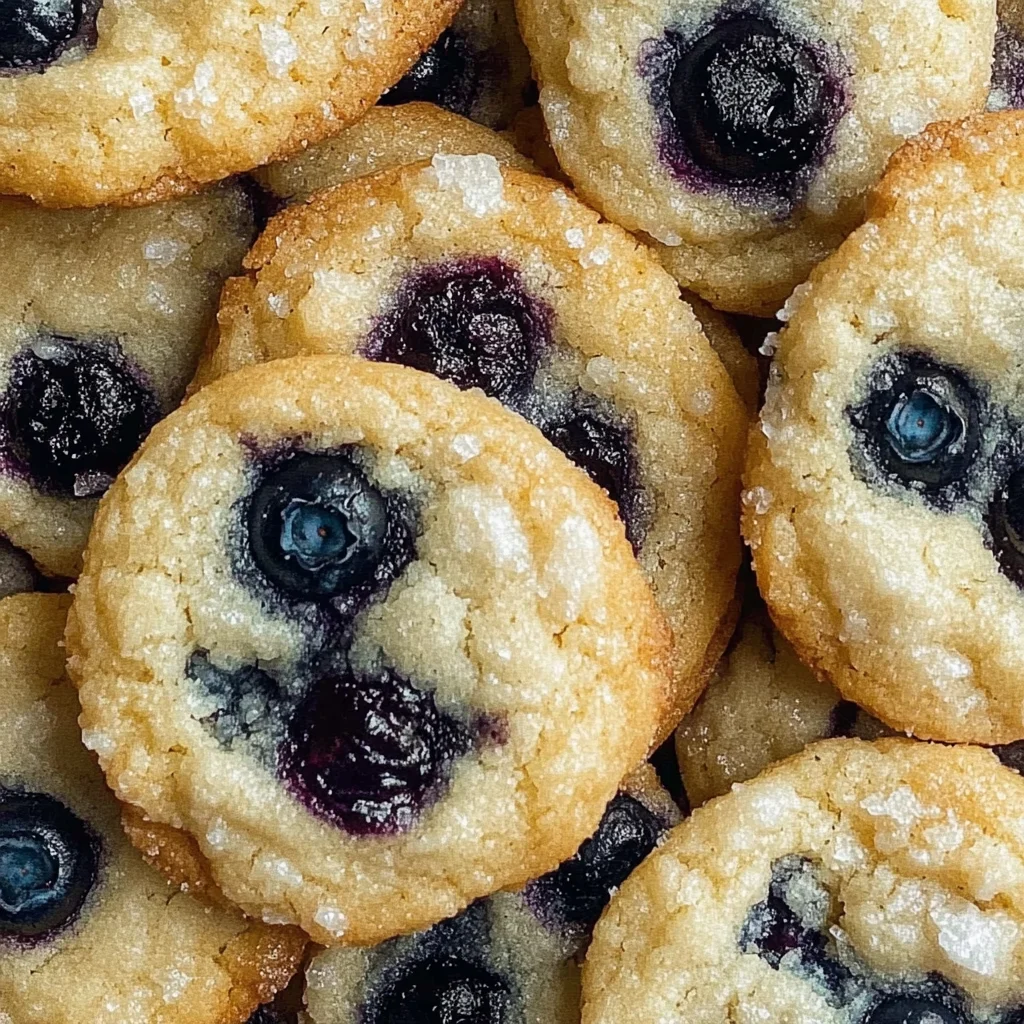
Lemon Blueberry Cookies Recipe
There’s something utterly magical about the combination of lemon and blueberry, isn’t there? It’s like a joyful embrace between tangy brightness and sweet juiciness. When I think of these flavors, my heart dances with memories of sunlit summer afternoons, picnics in the park, and the cheerful laughter of friends gathered around a table. This Lemon Blueberry Cookies Recipe encapsulates all that joy and nostalgia, transforming simple ingredients into a delightful treat that feels like a warm hug. Each bite is a symphony of flavors that transports you to a sunny garden filled with blooming flowers. The soft, chewy texture paired with the burst of fresh blueberries creates an experience that is both refreshing and comforting — perfect for any occasion.
What makes this recipe even more special is its simplicity. You won’t need to chill the dough or pull out multiple bowls; everything comes together in one bowl, making it not just delicious but also incredibly convenient! I’ve always been captivated by recipes that manage to deliver big flavor without requiring hours in the kitchen. With these Lemon Blueberry Cookies, you can whip up a batch in about 30 minutes — yes, you heard that right! Whether you’re baking for a family gathering, an impromptu celebration, or simply craving something sweet, these cookies are your go-to solution.
Lemon Blueberry Cookies Recipe: Sweet Sunshine in Every Bite
Let me take you on this culinary journey where we transform everyday ingredients into something extraordinary. These Lemon Blueberry Cookies are not just cookies; they are little bites of sunshine that will brighten your day with every crumb. The zesty lemon paired with juicy blueberries creates a flavor profile that’s as vibrant as spring itself. So grab your apron and let’s get started on this delightful adventure!
Ingredients:
As we embark on this flavorful journey together, it’s essential to understand the role each ingredient plays in making our cookies not just good, but truly phenomenal.
- 2½ cups (300 g) all-purpose flour: Flour is the backbone of our cookie dough. It provides structure and stability while ensuring our cookies maintain their soft and chewy texture. When measuring flour, it’s crucial to avoid packing it down into your measuring cup; instead, spoon it lightly into the cup and level it off for accurate results. If you’re looking for alternatives due to dietary preferences, you can use a gluten-free all-purpose blend — just make sure it’s designed for baking!
- 1 tsp cornstarch: This ingredient might seem small but trust me when I say it’s absolutely paramount! Cornstarch works wonders in creating a tender cookie by preventing gluten formation during mixing. This results in cookies that are soft and chewy rather than tough or dense. It’s like a secret weapon in your baking arsenal!
- 1 tsp baking powder: Baking powder is our leavening agent here — it helps our cookies rise beautifully while creating their delightful airy texture. The reaction between baking powder and moisture produces carbon dioxide bubbles during baking, which gives our cookies that lovely lift. Always check your baking powder’s expiration date; old leavening agents can lead to flat cookies.
- ¼ tsp baking soda: Complementing the baking powder, baking soda adds an extra boost to our cookies while contributing to browning due to its alkaline nature. This means we get those gorgeous golden edges that are both visually appealing and deliciously crispy.
- ½ tsp salt: Never underestimate salt’s importance! A pinch of salt enhances all other flavors present in our cookies without making them taste salty at all; it’s what makes those sweet notes sing! Always opt for fine sea salt for consistent flavor distribution throughout your dough.
- 1½ cups (300 g) granulated sugar: Sugar does more than sweeten; it also influences texture and color! In this recipe, granulated sugar helps create crispy edges while keeping the center chewy — pure cookie magic! Don’t be tempted to reduce sugar; these cookies need this balance for optimal sweetness.
- 3 small or medium lemons (or 2 large lemons), zested: Fresh lemon zest is where the real excitement lies! It infuses our cookies with vibrant citrusy aromas that evoke images of sun-drenched orchards. Make sure you’re using organic lemons if possible; their peels are free from pesticides and will give you cleaner zest.
- 1 cup (226 g) unsalted butter, melted: Butter brings richness and depth to every bite of these cookies. Melting it ensures easy incorporation into our dough while also helping achieve that coveted chewy texture as opposed to creaming softened butter which can lead to fluffier cookies.
- 1 large egg (US), room temperature: Eggs provide moisture along with binding properties essential for cookie structure. Room temperature eggs mix more easily into the batter than cold ones do; plus they help create a more uniform bake!
- 1 large egg yolk (US), room temperature: Adding an extra yolk boosts moisture content significantly while enriching flavor further—this step is non-negotiable if you want those luxuriously tender bites!
- 1 tsp (5 ml) vanilla extract: A splash of vanilla extract ties everything together seamlessly by adding warmth and complexity to our cookie’s flavor profile without overpowering the bright lemony notes.
- 1 cup (105 g) fresh blueberries: The star of our show! Fresh blueberries burst with juiciness when baked into these cookies creating pockets of sweetness throughout each bite. If using frozen berries instead due to seasonal availability—simply toss them directly into the batter without thawing first!
- ¼ cup (50 g) granulated sugar for rolling (optional): If you’re feeling fancy—or simply want an extra touch of sweetness—rolling your cookie dough balls in sugar before baking adds a beautiful sparkly finish while giving them slightly crisp exteriors.
Equipment You’ll Need:
Now that we have all our ingredients ready to shine, let’s talk about some essential tools you’ll need on this exciting baking adventure! Having the right equipment makes everything smoother and much more enjoyable as we create these delectable treats together.
- Mixing bowls – A set of reliable mixing bowls is indispensable when preparing any recipe from scratch. Look for sturdy materials such as glass or stainless steel since they withstand heat well during mixing processes like melting butter or whisking eggs.
- Whisk – A good quality whisk is key here! It allows us to incorporate air effectively when combining wet ingredients like butter and sugar which leads us toward achieving lightness within every cookie bite.
- Spatula or wooden spoon – You’ll want something sturdy yet gentle enough to fold delicate ingredients like blueberries into your dough without breaking them apart completely—enter stage left: trusty spatula!
- Cookie scoop – Using a medium cookie scoop ensures uniformity across your cookie batch so they bake evenly—a vital step if you want all those golden edges we spoke about earlier!
- Parchment paper – Line your baking sheet with parchment paper instead of greasing it directly—this prevents sticking while allowing easier cleanup afterward—trust me on this one!
With these tools at hand along with those incredible ingredients lined up neatly beside you—it’s time we dive right into preparing these delightful Lemon Blueberry Cookies!
Step 1: Preheating & Preparing Your Baking Sheet
Before we get too far ahead in this exciting process let’s begin by preheating our oven! Set it at 375°F (190°C)—this temperature will ensure perfectly baked cookies with just-right crispy edges while keeping centers delightfully chewy throughout every bite! While waiting on preheat magic happening inside your oven—line a large baking sheet using parchment paper; this simple act eliminates stress later when removing those scrumptious morsels post-baking time has come around—you’ll thank yourself later!
Step 2: Melting Butter
Next up—the melted butter! Start by placing half a cup alongside another bowl suitable enough for microwaving purposes—heat until fully liquefied but be careful not boiling away any precious liquid gold goodness—we’re aiming towards ultimate creamy richness here after all! Afterward allow cooling off period lasting roughly ten minutes before moving onto next steps involving other components coming together soon after—I promise you won’t regret taking necessary precautions here because achieving ideal consistency plays significant role later down road during final mixing stages ahead!
Step 3: Mixing Dry Ingredients
While patiently awaiting melted butter cooling off phase concluding—let’s shift gears now towards assembling dry ingredients portion readying ourselves nicely preparing dough mixture shortly thereafter! Grab another bowl then add flour followed closely behind cornstarch alongside both types of leaveners including baking powder plus soda along coarse sea salt measure gently leveling off tops ensuring accuracy matters greatly here too—it often gets overlooked yet can dramatically affect outcomes overall if rushed through carelessly skipping steps entirely leaving potential disaster lurking nearby instead—a risk worth avoiding at all costs trust me!
Step 4: Whisking Sugar & Zest Together
Here comes my favorite part—the glorious union between sugar plus zest combined effortlessly creating aromatic bliss within moments upon touching each other inside larger mixing bowl reserved solely meant housing wet ingredients shortly thereafter once butter cool enough joins festive party happening within boundaries surrounding beautiful citrus aroma wafting through air already captivating senses deeply before even reaching stage where actual mixing occurs next revealing true magic unfolding odds stacked high against anyone doubting validity behind claims made thus far—they’re about witness firsthand how simple transformations lead incredible results ultimately leaving everyone wanting more seconds guaranteed afterwards too!
Stay tuned as we continue bringing this delightful Lemon Blueberry Cookies Recipe to life step by step with love infused throughout every phase along way ensuring success follows closely behind each move made confidently onward through process leading ultimately towards heavenly bites awaiting discovery soon enough ahead…
Step 5: Bringing It All Together
Now, it’s time to unite our dry and wet ingredients in a beautiful marriage of flavors and textures. Gently stir the dry mixture into the bowl with your luscious lemony concoction. This is where the magic happens! I want you to take your time with this step; don’t rush it. The goal here is to mix just until you see no more flour streaks, allowing for a tender cookie texture that melts in your mouth. Overmixing can lead to cookies that are tough rather than soft and chewy, which is absolutely non-negotiable for this Lemon Blueberry Cookies Recipe! As you blend the ingredients, watch as they transform into a cohesive dough, golden in hue and fragrant with citrus.
Once your dough is just combined, it’s time for those delightful blueberries to join the party! Whether you’re using fresh or frozen berries, gently fold them into the mixture with a spatula or wooden spoon, taking care not to mash them into oblivion—after all, we want those plump bursts of flavor in every bite! If you are using frozen blueberries, I recommend giving them a quick rinse under cold water before adding them to prevent the dough from turning an unappetizing shade of blue. Trust me on this; we want our cookies to be as visually appealing as they are delicious!
Step 6: Scooping Out Sweetness
With your dough now perfectly blended and studded with vibrant blueberries, it’s time for one of my favorite parts—scooping! Using a medium cookie scoop (about 2 tablespoons or 30 ml), take generous portions of your cookie dough and shape them into balls. This step not only ensures that your cookies are uniform in size—allowing for even baking—but also contributes to their charming round appearance when they come out of the oven. If you’d like to take these cookies up a notch (and who wouldn’t?), roll each ball in granulated sugar before placing them on your lined baking sheet. This optional step adds a delightful sweetness on the outside and creates a beautiful sparkle that catches the light.
As you place your cookie balls onto the baking sheet, make sure to leave about 3 inches (8 cm) between each one. This space is crucial because as they bake, they will spread out beautifully. You might be tempted to overcrowd the pan for efficiency’s sake; however, resist that urge! Proper spacing allows each cookie to develop its own delightful texture and ensure that crispy edges surround a soft center—a combination that’s utterly intoxicating.
Step 7: Baking Your Perfect Lemon Blueberry Cookies
Now comes the moment we’ve all been waiting for—baking these little gems! Preheat your oven to 375°F (190°C) if you haven’t already, allowing it ample time to reach temperature while you prepare your dough. This preheating step is absolutely paramount because starting with a hot oven guarantees that your cookies will rise beautifully rather than spread out flat. Once you’re ready, slide that cookie-laden sheet into the oven and set your timer for about 10-12 minutes.
Keep an eye on those cookies as they bake! You’ll know they’re done when the edges appear set and lightly golden brown while still maintaining a plush center—think of them as little pillows of joy waiting to be devoured! If you’re unsure about doneness, I always suggest erring on the side of under-baking slightly because they will continue cooking on the baking sheet once removed from the oven. A light golden edge paired with a soft middle is what makes these cookies so profoundly satisfying.
Step 8: The Cooling Ritual
After that heavenly aroma fills your kitchen and signals that it’s time to take them out (trust me when I say it’s hard not to dive right in!), allow those chewy lemon blueberry cookies to cool on the baking sheet for about 3-4 minutes. This resting period is crucial as it gives them time to firm up just enough so that when you transfer them onto a cooling rack—they don’t fall apart like delicate little butterflies. During this brief wait, take a deep breath and get ready for pure bliss!
Once they’ve cooled slightly but are still warm—because who doesn’t love warm cookies?—gently transfer them onto a wire rack using a spatula. Allowing them to cool completely at room temperature helps maintain their soft texture while allowing any remaining steam to escape—a vital process that prevents sogginess. As you let these beauties cool down fully, you’ll notice how their flavors deepen and meld together beautifully—the result is truly extraordinary!
Final Touches: Enjoying Your Masterpiece
Step 9: Savoring Each Bite
Ahh, now comes my favorite part—savoring every delicious bite of these lemon blueberry cookies! Once cooled completely, you can either enjoy them right away or store any leftovers (if there are any!) in an airtight container at room temperature for up to three days—or pop them into the fridge if you prefer an extra chill during warmer months. But let’s be real; who can resist devouring these right out of the oven?
As you take your first bite, let yourself be enveloped by that symphony of flavors—the tangy brightness from freshly zested lemons dancing playfully with juicy blueberries bursting forth like summer sunshine in every mouthful! There’s something so heartwarming about sharing these cookies with friends or family over coffee or tea; it creates a moment filled with laughter and connection that transcends mere food.
I promise you, making these Lemon Blueberry Cookies Recipe isn’t just about nourishing our bodies; it’s about creating memories and fostering relationships through shared experiences around food. So gather loved ones around—you’ll soon find yourself exchanging smiles over these irresistible treats! Happy baking! 🍋💙
Storage and Enjoyment Tips for Your Lemon Blueberry Cookies Recipe
Now that you’ve baked your delightful Lemon Blueberry Cookies, the moment of enjoyment is truly at hand! The aroma wafting through your kitchen is enough to make anyone’s mouth water, and I cannot wait for you to dive into the chewy, zesty goodness of these cookies. But what happens if you find yourself with a few leftovers? Don’t worry; I’ve got you covered with some fantastic storage tips to ensure every bite remains as scrumptious as the first.
Storing Leftover Lemon Blueberry Cookies Recipe
To keep your cookies fresh and bursting with flavor, store them in an airtight container. A glass or plastic container works wonders, but be sure to line it with parchment paper if you’re stacking the cookies on top of one another—this helps prevent sticking and ensures they retain their delightful texture. If stored properly at room temperature, these cookies can last about 4-5 days, although I doubt they’ll last that long! For those of you who want to elevate the freshness factor even further, consider placing a slice of bread in the container; this little trick helps maintain moisture and keeps your cookies soft and chewy. After a few days, while they may lose a touch of their initial crispness, the flavors will still shine through beautifully. When you’re ready to indulge again, simply let them sit at room temperature for a moment or give them a gentle pop in the microwave for about ten seconds. Trust me when I say that this quick reheat will bring back that soft, gooey center we all adore!
Freezing Lemon Blueberry Cookies for Later
If you want to save some of these incredible treats for later (which is an excellent idea), freezing them is a perfect option! To freeze your Lemon Blueberry Cookies properly, start by allowing them to cool completely on a wire rack—this step is crucial because it prevents condensation from forming in the freezer bag. Once cooled, place them in a freezer-safe bag or an airtight container lined with parchment paper between layers. Make sure to remove as much air as possible before sealing—this will help prevent freezer burn and maintain that heavenly flavor. These cookies can be stored in the freezer for up to three months without losing their delightful taste and texture. When you’re ready to enjoy them again, simply take them out and let them thaw at room temperature for about 30 minutes or pop them directly into the oven at 350°F (175°C) for just 5-7 minutes until warm. The convenience of having these delicious cookies available at a moment’s notice is simply irresistible!
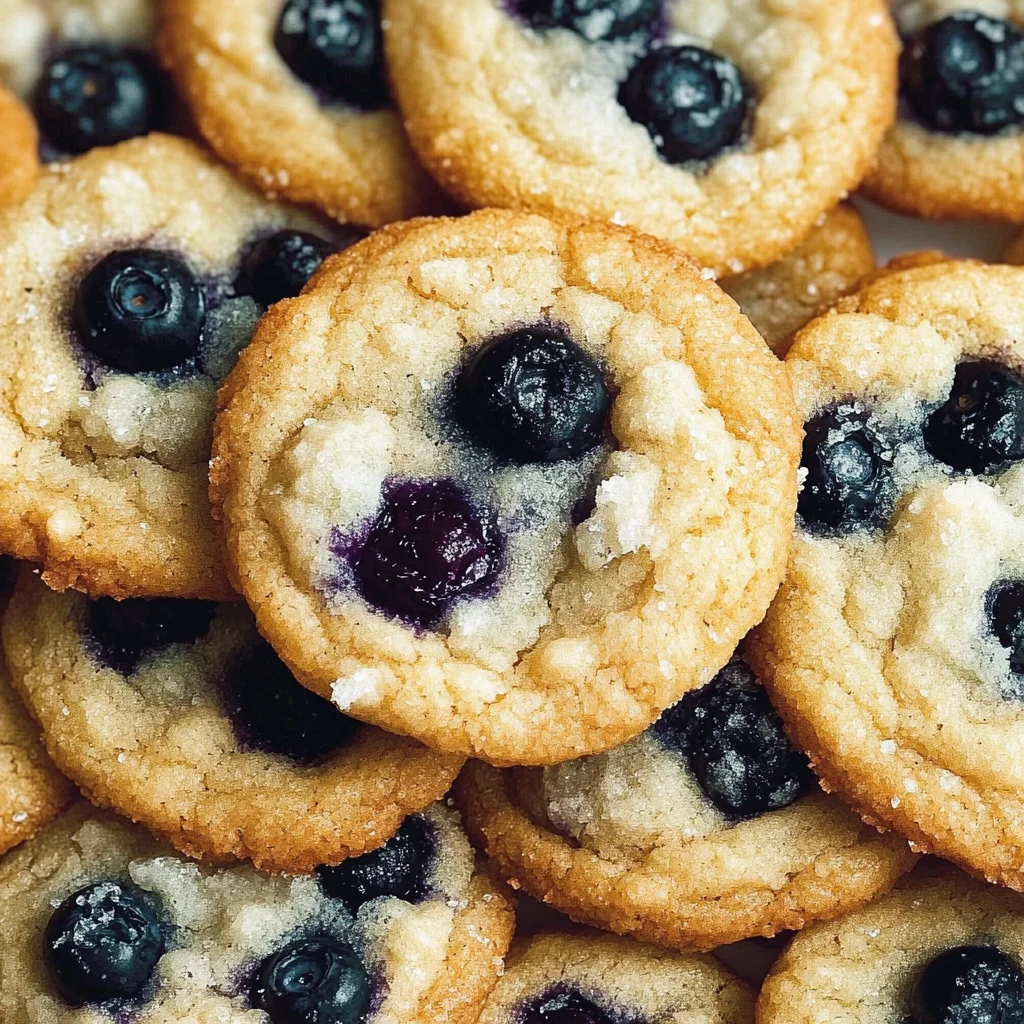
Lemon Blueberry Cookies

Indulge in the delightful flavors of our Lemon Blueberry Cookies Recipe, where zesty lemon meets juicy blueberries for a treat that’s as refreshing as it is comforting. These cookies bring back memories of sunlit afternoons and cheerful gatherings, making them perfect for any occasion. With a soft and chewy texture, each bite bursts with fruity sweetness, inviting you to savor every moment. Best of all, this simple recipe comes together in just about 30 minutes, using minimal equipment and ingredients. Whether you’re baking for a celebration or just because, these cookies are bound to be a hit!
- Prep Time: 15 minutes
- Cook Time: 10 minutes
- Total Time: 25 minutes
- Yield: Approximately 24 cookies 1x
- Category: Dessert
- Method: Baking
- Cuisine: American
Ingredients
- 2½ cups all-purpose flour
- 1 tsp cornstarch
- 1 tsp baking powder
- ¼ tsp baking soda
- ½ tsp salt
- 1½ cups granulated sugar
- Zest of 3 small lemons (or 2 large lemons)
- 1 cup unsalted butter, melted
- 1 large egg, room temperature
- 1 large egg yolk, room temperature
- 1 tsp vanilla extract
- 1 cup fresh blueberries
Instructions
- Preheat oven to 375°F (190°C) and line a baking sheet with parchment paper.
- In a bowl, whisk together flour, cornstarch, baking powder, baking soda, and salt.
- In another bowl, mix melted butter and sugar until well combined. Stir in lemon zest, egg, egg yolk, and vanilla until smooth.
- Gradually add dry ingredients to wet ingredients and mix until just combined. Gently fold in blueberries.
- Using a cookie scoop, drop dough onto the prepared sheet, leaving space between each ball. If desired, roll the dough balls in sugar before baking.
- Bake for 10-12 minutes or until edges are lightly golden but centers remain soft.
- Cool on the baking sheet for a few minutes before transferring to a wire rack.
Nutrition
- Serving Size: 1 cookie (35g)
- Calories: 150
- Sugar: 10g
- Sodium: 100mg
- Fat: 7g
- Saturated Fat: 4g
- Unsaturated Fat: 2g
- Trans Fat: 0g
- Carbohydrates: 21g
- Fiber: <1g
- Protein: <1g
- Cholesterol: 20mg