Lemon Rolls
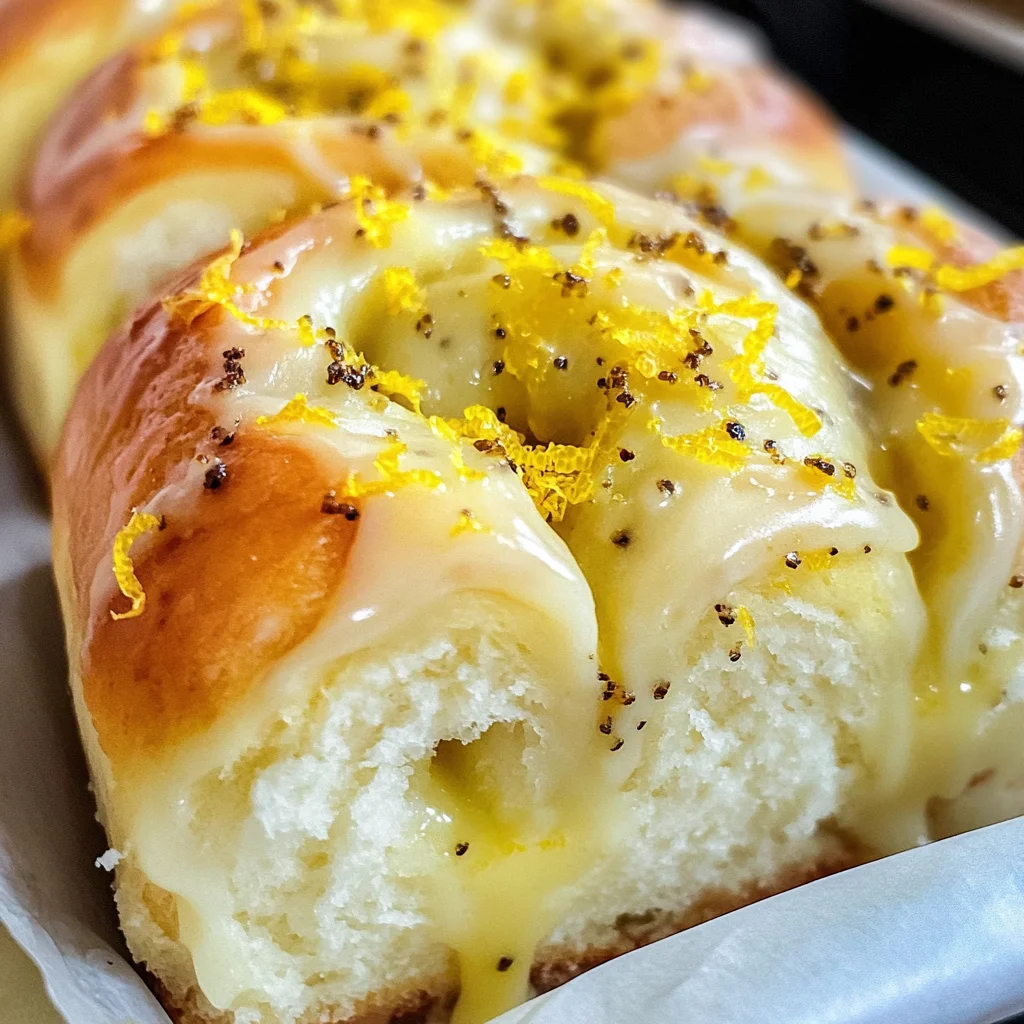
There’s something utterly enchanting about the aroma of freshly baked lemon rolls wafting through your kitchen. It’s a fragrance that dances in the air, wrapping around you like a warm hug, whispering promises of sweet, citrusy delight. These Lemon Rolls are more than just a breakfast treat; they represent moments shared, memories created, and laughter that echoes through time. The first bite reveals soft, fluffy dough cradling a gooey center that bursts with zesty lemon flavor, while the sweet icing drizzled on top shines like liquid gold, inviting you to take another bite. As you savor this delightful creation, you’ll find yourself transported to sun-drenched summer mornings where the world feels just a bit brighter.
I’ve always been captivated by recipes that tell a story, and these Lemon Rolls do exactly that. They are perfect not only for brightening your own mornings but also for sharing with friends and family during brunch gatherings or cozy weekend breakfasts. Imagine gathering around the table with loved ones as you pull apart each roll, revealing its luscious filling beneath. The joy in their eyes as they taste these treats is priceless! This recipe is straightforward yet brimming with flavor; it’s an invitation to step into your kitchen and create something truly extraordinary together.
Lemon Rolls: A Bright Start to Your Day
These Lemon Rolls are soft, fluffy, and bursting with vibrant lemon flavor—ideal for any summer morning or brunch gathering! I promise you’ll fall in love with the combination of sweet and tangy flavors topped with a luscious icing that brings everything together beautifully. Trust me when I say these rolls will become a cherished addition to your baking repertoire!

Ingredients:
Let’s embark on this delicious journey together by gathering our ingredients! Each component plays a vital role in crafting perfect Lemon Rolls that promise to delight your taste buds.
- 4 1/4 cups (530g) all-purpose flour. Flour is the backbone of our rolls; it provides structure and texture. I recommend using high-quality all-purpose flour for balanced results—look for one with a protein content around 10-12%. This allows the rolls to rise beautifully while still maintaining that tender crumb we crave. As we knead our dough, we may need to add extra flour if it feels too sticky, so keep some on hand!
- 4 1/2 tsp (14g or 2 packets) instant dry yeast. Yeast is essential for creating those fluffy rolls we adore! Instant dry yeast is my go-to because it doesn’t require proofing in water; it can be mixed directly into the dry ingredients. The key here is freshness—make sure your yeast hasn’t expired; otherwise, it won’t activate properly, leaving your dough dense instead of airy.
- 1 Tbsp + 1 tsp poppy seeds – optional. These little gems add both beauty and a subtle crunch to our rolls! While entirely optional, I can assure you they elevate the overall experience visually and texturally. If you’re looking for even more zestiness, consider using lemon-flavored poppy seeds if you can find them.
- 1 tsp fine salt (6g). Salt isn’t just about seasoning; it plays a critical role in enhancing flavor while also controlling yeast activity during fermentation. Choosing fine salt helps it dissolve quickly into the dough without leaving gritty remnants behind—a small detail that makes all the difference!
- 1 cup (240g) buttermilk at room temperature. Buttermilk adds moisture and tenderness to our rolls while giving them a distinctive tanginess that pairs perfectly with lemon zest. If you don’t have buttermilk on hand, simply mix one cup of milk with a tablespoon of vinegar or lemon juice and let it sit for about five minutes until curdled—voilà!
- 1/2 cup (100g) granulated sugar. Sugar not only sweetens our rolls but also feeds the yeast during fermentation, helping them rise beautifully! I suggest using granulated sugar because its fine texture dissolves easily without leaving any graininess behind.
- 1/2 cup (113g) unsalted butter at room temperature. Butter adds richness and flavor; be sure it’s softened so we can cream it smoothly with sugar later on. The quality of butter matters here—opt for unsalted butter so we can control the salt content throughout the recipe.
- 2 large eggs at room temperature (112g). Eggs contribute moisture and act as binding agents in our dough; they also help create that delightful fluffy texture we’re after! Room temperature eggs mix more evenly into the batter compared to cold eggs straight from the fridge.
- 2 Tbsp fresh lemon zest (or zest from 2 large lemons) (6g). Ahh—the zest! This is where we capture pure lemon essence without any bitterness from the pith underneath. Freshly grated lemon zest will infuse our rolls with vibrant citrus notes—don’t skip this step!
- 1/2 cup (100g) granulated sugar & 1/2 cup (100g) packed light brown sugar for filling – These sugars will blend together beautifully in our filling mixture! Granulated sugar contributes sweetness while brown sugar adds depth due to its molasses content—this combination creates an incredibly satisfying flavor profile.
- 2 Tbsp fresh lemon zest (or zest from 2 large lemons) (6g) – Adding more lemon zest into our filling ensures every bite bursts with citrus goodness!
- 1/2 cup (113g) unsalted butter softened – We’ll spread this softened butter generously over our rolled-out dough before sprinkling on sugars and zest—it creates an irresistible gooey center.
- 2 cups powdered sugar (250g) & 1/4 cup fresh lemon juice (60g) & 2 Tbsp melted unsalted butter (28g) – These three ingredients come together to form our dreamy icing! Powdered sugar dissolves easily into glazes while giving them body; fresh lemon juice brightens up flavors perfectly without being overly tart; melted butter adds smoothness and richness.
- Fresh Lemon Zest – We’ll sprinkle some additional zest over our icing once applied—it’s like adding confetti on top of celebration cakes!
You might want to prepare your workspace now by lining your 9 x 13-inch pan with parchment paper—this will make transferring those heavenly rolls easy peasy later on!
Equipment You’ll Need:
Before diving into preparation, let’s ensure we have all necessary tools at hand! Having proper equipment not only streamlines our process but also enhances enjoyment along every step of this culinary adventure.
- Stand Mixer w/ Dough Hook or Danish Dough Whisk – A stand mixer equipped with a dough hook makes kneading easier than ever while allowing hands-free operation! If you prefer mixing by hand instead, go for a Danish whisk—it’s perfect for incorporating dry ingredients quickly before moving onto kneading.
- Ruler – Trust me when I say precision matters! A ruler comes in handy when measuring out rolled dough thickness or ensuring equal-sized pieces before cutting those beautiful rolls.
- Dental Floss – Yes—you read right! Unsweetened dental floss serves as an excellent tool for slicing through rolled-up dough without squishing them down—a gentle cut ensures those lovely swirls remain intact when baked!
In gathering these essentials alongside ingredients mentioned earlier—we are fully equipped to create something incredibly special together!
Preparing the Lemon Rolls
Step 1: Mixing Those Dry Ingredients
Begin by grabbing your stand mixer bowl or mixing bowl if you’re opting to whisk by hand today! Start off by combining your all-purpose flour along with instant dry yeast, poppy seeds if using them, and fine salt into one harmonious blend—this process lays down a solid foundation for developing flavors later on through fermentation processes within dough rising cycles! It’s essential here not just to mix but allow air pockets created during stirring which helps bolster future rise potential via yeast activity later down line as well…
Step 2: Creaming Butter & Sugar
Now let’s cream together that soft unsalted butter along with granulated sugar until light yellow ribbons form within mixture itself—I’m talking about achieving fluffy clouds here folks! This step is crucial because it incorporates air pockets within fats leading us towards achieving airy textures once baked off… If there’s one thing I learned early on: don’t rush this part—patience pays off big time here!
Step 3: Adding Wet Ingredients
Once creamed well enough—you should see consistency change color slightly lighter than original shade—that means success already achieved thus far… Now add those room-temperature eggs one at-a-time ensuring complete incorporation before throwing in beloved buttermilk alongside zesty wonders from freshly grated lemons—we’re setting ourselves up nicely now believe me—you’ll want every drop of tangy goodness packed inside!
Step 4: Kneading Into Perfection
Once everything’s combined beautifully into dough-like formation—I recommend switching over from paddle attachment onto dough hook attachment if using stand mixer… Begin kneading slowly initially until everything incorporates seamlessly before ramping up speed slightly—aiming towards achieving smooth elastic-like quality seen typically among well-kneaded bread recipes out there… What happens next? Well—the magic truly begins unfolding right under fingertips after resting period granted post-kneading duties fulfilled…
Baking Your Perfect Lemon Rolls
The moment has finally arrived—the oven preheats at a cozy 350°F (180°C), filling your kitchen with anticipation!
Step 9: Baking – Transforming Dough into Golden Perfection
Once preheated, place your pan filled with those lovely lemon rolls on the middle rack of your oven. Let them bake for about 25-28 minutes until they turn an irresistible golden brown on top and fill your home with an utterly intoxicating aroma that makes everyone wonder what deliciousness awaits them! As they bake away merrily in their own little world of heat and love, keep an eye on their progress; ovens can be sneaky sometimes.
To check doneness without ruining their beautiful shape or gooey center, gently tap one roll—it should sound hollow when fully baked through. If they’re browning too quickly (which can happen), feel free to cover them loosely with aluminum foil halfway through baking—this will prevent over-browning while ensuring they still cook through perfectly inside. And oh my goodness—the sheer joy you’ll feel as you pull them out will be worth every minute spent waiting!
Step 10: Icing – The Sweet Final Touch
As those luscious lemon rolls cool slightly on a wire rack (if you can resist diving straight in!), let’s whip up that divine icing which takes these treats from amazing to truly extraordinary! In a medium bowl, combine powdered sugar with fresh lemon juice—a sprinkle of extra zest here never hurts either! Mix until smooth and creamy; I recommend adjusting thickness by adding more powdered sugar if you prefer something thicker or more lemon juice if you’d like something drippier—the choice is yours!
This icing isn’t just there for show—it adds that delightful tangy sweetness which perfectly complements our dreamy lemon rolls’ flavor profile! Once rolled out onto generous swirls atop each warm roll (trust me on this one), watch as they soak into every nook and cranny while cooling down just enough for that heavenly glaze effect we all crave!
And there you have it—your Lemon Rolls are ready for devouring! Serve them warm at brunch gatherings or enjoy as an indulgent breakfast treat throughout summer mornings—they’re bound to become family favorites faster than you can say “lemony goodness.” I hope you cherish every bite as much as I do; after all, making memories in the kitchen is what it’s all about!
Storage and Enjoyment Tips for Your Lemon Rolls
Now that your lemon rolls have baked to golden perfection and filled your kitchen with an utterly intoxicating aroma, it’s time to revel in the joy of enjoying these delightful treats! I can just imagine you pulling them out of the oven, the warm, fluffy rolls shining with that luscious lemon icing, ready to be devoured. But let’s talk about how to keep that lemony goodness around a little longer because trust me, you’ll want these on hand for those moments when life calls for a burst of sunshine!
Storing Leftover Lemon Rolls
To ensure your leftover lemon rolls stay as delightful as they were fresh from the oven, it’s essential to store them properly. I recommend placing them in an airtight container at room temperature. If you have a lot left over (which might be unlikely because they’re so delicious!), you could also wrap them tightly in plastic wrap before putting them in the container. They’ll keep beautifully for about 2-3 days, but here’s a pro tip: to maintain their moisture and softness, consider placing a slice of bread inside the container with them. This little trick helps keep the air from drying out those lovely rolls! After a day or two, while they may lose a bit of their fluffiness, I promise you they will still taste heavenly—just pop them in the microwave for about 10 seconds to bring back some warmth and gooeyness.
Freezing Lemon Rolls for Later
Now, if you find yourself with an abundance of these scrumptious lemon rolls—or if you’re simply looking ahead—freezing is a fantastic option! To freeze them properly, let the rolls cool completely first. Then wrap each roll individually in plastic wrap and place them in a freezer-safe bag or container; this way, you can take out just what you need without thawing the entire batch. They will keep well for up to three months in the freezer. When you’re ready to enjoy one again, simply remove it from its wrapping and let it thaw at room temperature or warm it up directly from frozen in your microwave or oven. Imagine having that fresh-baked aroma wafting through your kitchen again on a busy morning—it’s such a treat and incredibly convenient!
Lemon Rolls

There’s something magical about biting into a warm Lemon Roll, each fluffy layer revealing a luscious citrus filling that dances on your palate. These delightful rolls transform any breakfast or brunch into a sunny celebration, with their sweet and tangy flavor profile topped off by a creamy icing. Perfect for sharing with friends and family, these Lemon Rolls are not just a treat; they are an experience that brings joy to the table.
- Prep Time: 30 minutes
- Cook Time: 28 minutes
- Total Time: 58 minutes
- Yield: Approximately 12 servings 1x
- Category: Breakfast
- Method: Baking
- Cuisine: American
Ingredients
- 4 1/4 cups all-purpose flour
- 4 1/2 tsp instant dry yeast
- 1 cup buttermilk
- 1/2 cup granulated sugar
- 1/2 cup unsalted butter
- 2 large eggs
- 2 Tbsp fresh lemon zest
- 2 cups powdered sugar
- 1/4 cup fresh lemon juice
Instructions
- In a mixing bowl, combine flour, yeast, and salt.
- Cream together softened butter and granulated sugar until light and fluffy.
- Add eggs one at a time, followed by buttermilk and lemon zest; mix until smooth.
- Gradually incorporate the dry ingredients until the dough forms.
- Knead the dough for about 5 to 7 minutes until soft and slightly tacky.
- Let the dough rise in a greased bowl for about 45 minutes until doubled in size.
- Roll out dough into a rectangle, spread with softened butter, and sprinkle with sugars and more lemon zest.
- Roll tightly into a log and cut into individual rolls using dental floss.
- Place in a greased pan for a second rise of about 30 minutes.
- Bake at 350°F for 25-28 minutes until golden brown.
- For the icing, combine powdered sugar and fresh lemon juice; drizzle over warm rolls.
Nutrition
- Serving Size: 1 serving
- Calories: 260
- Sugar: 18g
- Sodium: 160mg
- Fat: 10g
- Saturated Fat: 6g
- Unsaturated Fat: 3g
- Trans Fat: 0g
- Carbohydrates: 38g
- Fiber: <1g
- Protein: 4g
- Cholesterol: 30mg