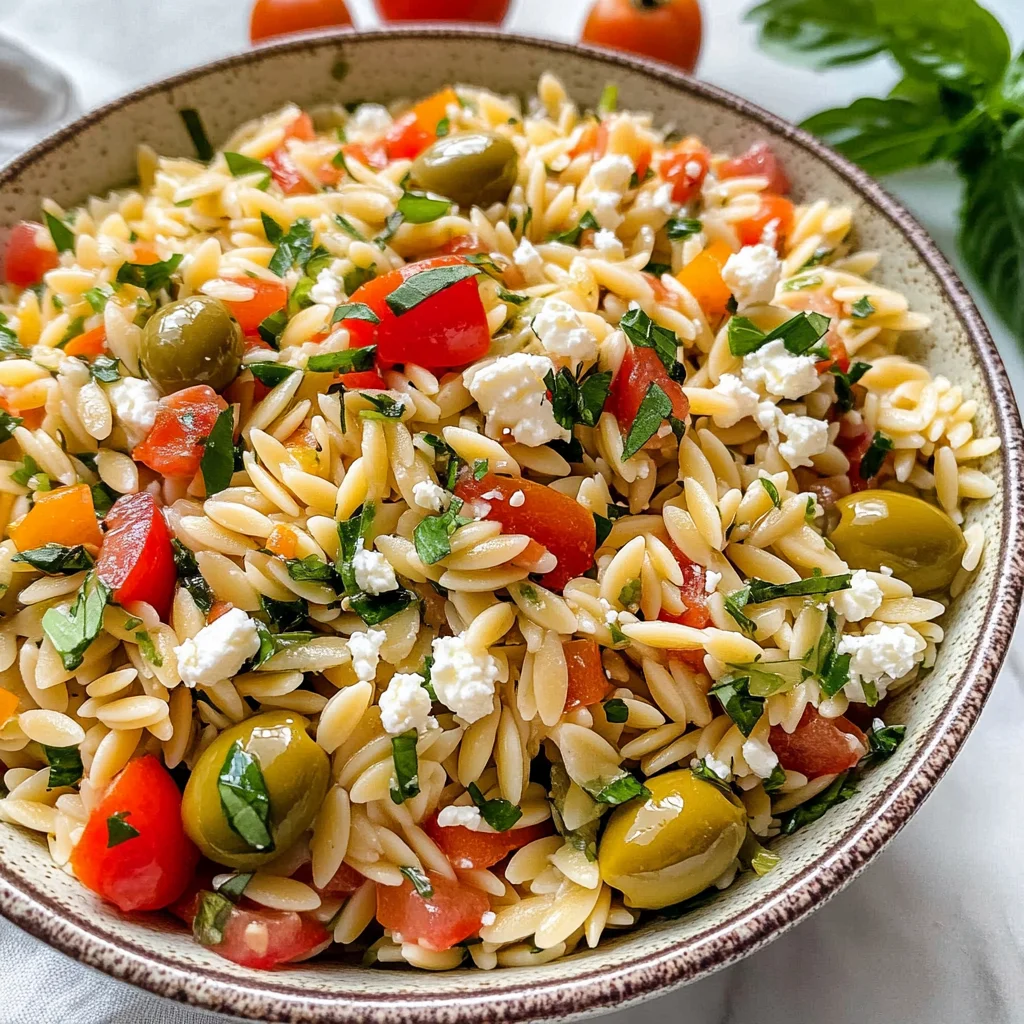
Light Orzo Olive Salad
There’s something profoundly satisfying about preparing a dish that not only nourishes our bodies but also brings joy and connection to our lives. The Light Orzo Olive Salad is more than just a recipe; it’s a celebration of fresh ingredients dancing together in harmony, creating a symphony of flavors that transports you to sun-drenched Mediterranean shores. Picture this: the earthy aroma of whole wheat orzo wafting through your kitchen as it cooks, mingling with the briny richness of oil-cured olives and the fresh crunch of green onions. This is a dish that embodies the essence of simplicity and health, yet it bursts with such vibrant character that each bite feels like a hug from an old friend.
I’ve always been captivated by recipes that are not just meals but experiences crafted with love and intention. This Light Orzo Olive Salad fits that bill perfectly! It’s a dish I often turn to when I’m seeking a quick lunch or when I want to impress guests without spending hours in the kitchen. It’s light, refreshing, and incredibly versatile—perfect for warm days when you crave something satisfying yet not heavy. Whether you’re prepping meals for busy weekdays or looking for a delightful side dish to accompany your dinner, this salad checks all the boxes. And trust me, once you take that first bite, you’ll understand why it’s become one of my go-to recipes.
Light Orzo Olive Salad: A Bright and Flavorful Delight
Let’s dive into this lovely recipe together! With its combination of whole wheat orzo, vibrant olives, and fresh herbs, this salad is truly an experience waiting to happen. Each ingredient plays its part in creating a melody that sings on your palate. Plus, it’s so easy to whip up—you’ll wonder how you ever lived without it!
Ingredients:
As we embark on this culinary journey, let me walk you through each ingredient that makes this Light Orzo Olive Salad so special. Every single component contributes not just flavor but also texture and vibrancy to the mix.
- 1 1/2 cups whole wheat orzo – This pasta is the heart of our salad. Whole wheat orzo not only adds a nutty flavor but also brings a nutritious punch with its higher fiber content compared to regular pasta. When cooked properly—al dente is ideal—it provides a delightful chewiness that complements the other ingredients beautifully. Look for high-quality brands; they will ensure your orzo cooks evenly without becoming mushy. If you’re in need of an alternative due to dietary preferences, quinoa could be an excellent substitute!
- 3/4 cup chopped oil-cured olives – Olives are where the flavor really starts to pop! Their rich brininess adds depth and complexity to our salad while providing healthy fats that are essential for absorbing vitamins from those fresh veggies. Oil-cured olives have such an irresistible texture—they’re chewy yet tender—and their concentrated flavor is simply unbeatable. If you can’t find oil-cured olives, Kalamata or green olives can work in a pinch; just make sure they’re packed in good quality oil for maximum taste.
- 3 large green onions, sliced thinly (both white and green parts) – Green onions offer an aromatic crunch that brightens up our salad beautifully. The white parts give us that sharp onion flavor while the green tops add a sweet freshness—together they create balance in every bite. When selecting green onions at the market, look for firm stalks with vibrant green tops; limp greens indicate age and loss of flavor.
- 3 tablespoons olive oil – Ahh, liquid gold! Olive oil brings richness and smoothness to our Light Orzo Olive Salad while helping to meld all those glorious flavors together. It’s essential not just for taste but also as a healthy source of monounsaturated fats which we all need in our diets. I recommend using extra virgin olive oil for its superior taste—it elevates every ingredient it touches!
- Salt and pepper, to taste – These two humble seasonings are absolutely paramount in bringing out all the flavors within our salad! Salt highlights sweetness and balances bitterness while pepper adds just a hint of spice. Don’t rush these steps; add them gradually during preparation so you can adjust according to your preference.
- 1/2 cup freshly chopped parsley – Fresh herbs are key players in making any dish feel vibrant and alive! Parsley contributes an uplifting freshness and color contrast against the earthiness of the orzo and olives. When choosing parsley at the store, opt for bright green leaves without any wilting—this indicates maximum freshness.
- Dash of white grape juice vinegar – This unique vinegar introduces a subtle sweetness while still offering acidity—a non-negotiable element when balancing flavors! It cuts through richness and brightens up heavier components like olives and olive oil beautifully.
- 10 grape tomatoes, cut in half (optional) – If you’re looking to add pops of color and juicy sweetness, toss some halved grape tomatoes into your salad! They provide wonderful moisture and freshness which enhances every bite; plus they visually elevate your dish too!
- 1/2 cup crumbled feta cheese (optional) – Feta cheese is another layer of flavor altogether—its tangy creaminess contrasts perfectly with the briny olives while adding creaminess that rounds out textures beautifully. If you’re avoiding dairy altogether or want a lighter option, try using crumbled tofu seasoned with lemon juice instead!
Equipment You’ll Need:
Having the right tools makes cooking feel not just easier but more enjoyable too! Think of them as essential partners in creating something wonderful together.
- Large pot – A sturdy large pot is crucial for boiling your orzo evenly without overcrowding it—this ensures perfect cooking results every time! Make sure it’s big enough so that there’s plenty of room for stirring without splashing water everywhere.
- Colander – After cooking your pasta comes my favorite part—draining it! Using a colander keeps everything tidy while allowing excess water escape effortlessly so you’re left with perfectly cooked orzo ready for mixing.
- Mixing bowl – A spacious mixing bowl gives us room to play as we combine our ingredients harmoniously! It’s important here because tossing everything together needs space—you want those beautiful colors scattered throughout rather than clumped together.
- Chef’s knife – A good chef’s knife will be your best friend as you chop those fresh vegetables like green onions and parsley with ease! A sharp knife ensures clean cuts which help release flavors better than if you’re hacking away at them with dull blades.
Preparing the Light Orzo Olive Salad
Step 1: Cooking Your Orzo
Start by filling your large pot about three-quarters full with water and bring it to a rolling boil over high heat—this step creates steam which helps cook pasta evenly throughout without becoming gummy later on. Once boiling fiercely, generously salt the water until it tastes like sea water; this is crucial because it infuses flavor directly into your pasta as it cooks! Add your 1 1/2 cups whole wheat orzo carefully into the bubbling cauldron while giving it an initial stir to prevent sticking (nobody wants clumpy pasta!). Set your timer according to package instructions—usually around 8–10 minutes—but keep tasting frequently after about 7 minutes until it reaches al dente perfection: firm yet tender enough so that each piece still has bite when chewed.
Step 2: Draining & Cooling
Once cooked perfectly al dente (this should take no longer than 10 minutes), remove from heat immediately then carefully pour everything into your trusty colander placed over the sink (be cautious here—the steam can be quite intense!). Allow excess water to drain away completely before letting cool slightly at room temperature—the cooling process helps prevent any sogginess later when mixed with other ingredients!
Step 3: Mixing It All Together
Now comes one of my absolute favorite parts—bringing everything together into one beautiful bowl! In your mixing bowl now add those freshly chopped oil-cured olives along with thinly sliced green onions—their contrasting textures create excitement right off the bat! Pour in three tablespoons liquid gold (extra virgin olive oil) followed by seasoning generously with salt & pepper until balanced perfectly according to palate preferences—we want layers upon layers of flavors here folks!
Step 4: Finishing Touches
Next introduce half cup freshly chopped parsley along with dash white grape juice vinegar—the acidity from vinegar will brighten up all those rich components nicely ensuring nothing feels flat at all! Gently fold everything until well combined—it’s important not to overmix here since we don’t want any mushy bits ruining texture fun throughout salad experience ahead!
Stay tuned for more steps where we’ll add optional ingredients like tomatoes & feta before serving this delightful dish!
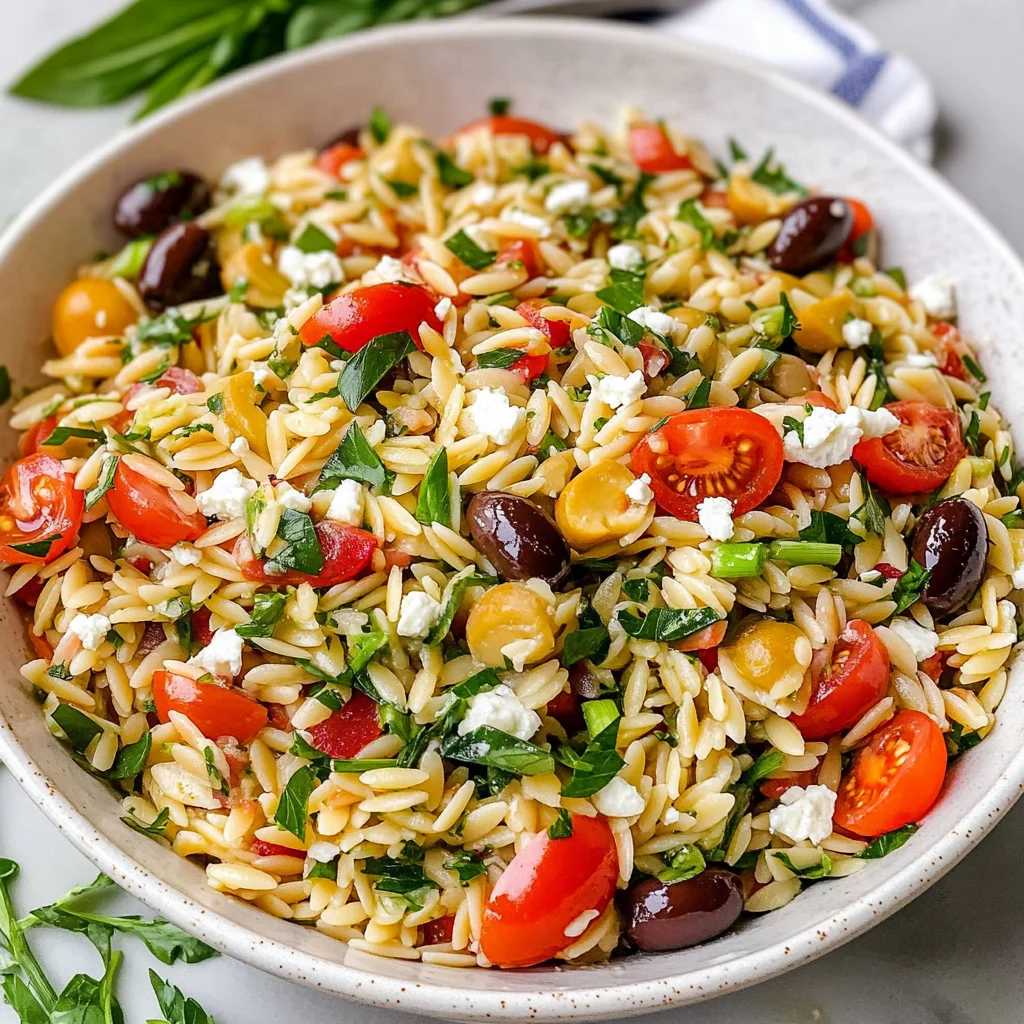
Light Orzo Olive Salad: A Refreshing Delight
Step 5: Cooking the Orzo to Perfection
Now that you’ve gathered your ingredients and prepped your workspace, it’s time to cook the whole wheat orzo. Bring a large pot of salted water to a rolling boil—this is crucial because salting the water enhances the flavor of the pasta itself. Once bubbling, gently add 1 ½ cups of orzo and stir it immediately to prevent sticking. As it cooks, you’ll want to keep an eye on it, stirring occasionally for even cooking. Whole wheat orzo typically takes about 8-10 minutes to reach that perfect al dente texture, where it’s tender but still has a slight bite. Trust me on this: undercooked or overcooked pasta can make or break your dish!
As the orzo cooks, be sure to taste it a minute or two before the suggested cooking time ends. You’re looking for that delightful firmness; it should have just a bit of resistance when bitten into. Once it’s done, drain the pasta in a colander and rinse it briefly with cold water. This step isn’t just about stopping the cooking process; rinsing also helps remove excess starch, which can make your salad gummy instead of beautifully light and refreshing. Spread it out on a baking sheet to cool completely while you prepare the other ingredients—this little patience will pay off later when everything comes together harmoniously.
Step 6: Preparing Your Flavorful Mix-Ins
While your orzo cools, let’s dive into those delicious mix-ins that will elevate your salad to new heights! Start by chopping ¾ cup of oil-cured olives; their rich, briny flavor will become an integral part of our dish. I’ve always been captivated by how olives bring such a depth of flavor with just a few bites—truly extraordinary! Next up are those vibrant green onions. Slice three large green onions thinly, using both the white and green parts. The white part gives you that lovely sharpness while the green adds freshness and color to our salad.
Once you’ve prepped these glorious ingredients, toss them into a large mixing bowl along with ½ cup of freshly chopped parsley—this herb is not only aromatic but also adds a bright punch that complements the olives beautifully. A dash of white grape juice vinegar comes next; this subtle acidity balances out the richness from the olives and brings everything together in sheer harmony. Don’t rush this step; take a moment to appreciate how these flavors meld together in your bowl—the intoxicating aroma is just a preview of what’s to come!
Step 7: Bringing It All Together
Now that we have all our components ready and waiting, it’s time for everyone to join forces in one big, beautiful bowl! Add your cooled orzo into the same mixing bowl where you combined all those fabulous mix-ins. Drizzle 3 tablespoons of high-quality olive oil over the top—this liquid gold will coat every ingredient and create an utterly satisfying mouthfeel as you dig in later. Season generously with salt and pepper; these simple yet essential seasonings are non-negotiable if you want each component’s unique flavor profiles to shine through.
As you combine everything together, don’t be afraid to get in there with your hands (clean ones, of course) or use two large forks for gentle tossing. You want each piece of orzo enveloped in that olive oil dressing while ensuring every flavorful morsel is distributed evenly throughout the salad. Keep an eye on texture here; if it seems too dry after mixing everything together, feel free to add another drizzle of olive oil until you’ve achieved that perfect balance. The goal is for every bite to be bursting with flavor—a symphony of tastes dancing on your palate!
Step 8: Chill for Maximum Flavor Infusion
Now here comes one of my favorite parts—the chilling! After all that hard work in assembling our Light Orzo Olive Salad, I encourage you not to skip this critical step. Transfer your beautifully mixed salad into an airtight container or cover it tightly with plastic wrap and let it chill in the refrigerator for at least 30 minutes—an hour is even better if you can wait! Why chill? Well, allowing those flavors time to mingle creates something truly magical as they deepen and evolve together.
As it chills, you’ll notice how each bite becomes more cohesive—the olive richness blends seamlessly with the fresh herbs and tangy vinegar so that no single flavor overshadows another; instead, they all play their parts beautifully. Plus, serving this salad cold enhances its refreshing qualities—perfect for warm days or whenever you’re craving something light yet filling! When you’re ready to enjoy this dish—or even pack it for lunch—all you need is a quick toss before serving.
Final Touches: Serving Your Light Orzo Olive Salad
Step 9: Garnishing Your Masterpiece
Your patience is about to pay off as we approach the final touches! Just before serving this delightful creation, consider adding some visual appeal—after all, we eat first with our eyes! If you’re feeling adventurous (and I hope you are!), slice up ten ripe grape tomatoes in half and scatter them on top for a burst of color and juiciness right before serving—they add such brightness both visually and taste-wise.
And if you’re inclined toward dairy delights (no judgment here!), sprinkle half a cup of crumbled feta cheese over the finished salad just before serving; its salty creaminess pairs perfectly with those bold olives while providing another layer of flavor complexity that will have everyone coming back for seconds—or thirds! This final flourish isn’t just about aesthetics; it’s about enriching every single bite with diverse textures and flavors that make each mouthful profoundly satisfying.
Once everything’s garnished beautifully and you’re ready to dig in—or share with friends—take a moment to breathe in those incredible aromas wafting from your bowl. The combination of fresh herbs mingling with savory olives alongside creamy feta (if used) creates an inviting atmosphere around any table. I promise you will find joy not only in eating but also in sharing this delightful recipe—a true testament to how food brings us together!
So there you have it—a comprehensive guide on crafting an exquisite Light Orzo Olive Salad that sings with flavors and textures while being effortlessly simple enough for any weeknight dinner or meal prep extravaganza! Enjoy every bite knowing you’ve created something truly special—happy cooking!
Storage and Enjoyment Tips for Your Light Orzo Olive Salad
Now that you’ve crafted your beautiful Light Orzo Olive Salad, it’s time to relish in its vibrant flavors! I can almost hear your taste buds singing with anticipation. But let’s talk about how to savor this delightful dish over the next few days, because trust me, you’re going to want to keep this on hand for easy lunches or quick dinners. The good news is, this salad is incredibly forgiving when it comes to storage, ensuring that every bite remains as delicious as the first.
Storing Leftover Light Orzo Olive Salad
To keep your Light Orzo Olive Salad fresh and flavorful, transferring it into an airtight container is absolutely paramount. Not only does this help seal in all those gorgeous flavors, but it also prevents any unwanted moisture from sneaking in and ruining your salad’s texture. If you store it properly in the fridge, you can expect it to stay delicious for up to three days. Now here’s a little pro tip: if you want to maintain the integrity of the salad even longer, consider placing a slice of bread in the container—this simple trick helps absorb excess moisture! As time goes on, the salad may become a tad softer, but I promise you—the taste will still be utterly intoxicating. When you’re ready to enjoy it again, just give it a gentle stir and perhaps add a touch more olive oil or vinegar if needed to refresh those flavors.
Freezing Components for Later
If you find yourself with leftovers or simply want to prepare ahead of time, freezing components of your Light Orzo Olive Salad can be a fantastic option! While I wouldn’t recommend freezing the entire salad once it’s dressed (as that could lead to an unappetizing texture), you can easily freeze the cooked orzo separately. Just portion it out into freezer-safe bags or containers after allowing it to cool completely. It will keep beautifully in the freezer for about 2-3 months. When you’re ready to use it again, simply thaw it overnight in the refrigerator or pop it in the microwave for a quick heat-up. This method not only saves time but also makes meal prep so much easier and more enjoyable—imagine pulling out a prepped portion and transforming it into a vibrant meal with just a few fresh ingredients!
Light Orzo Olive Salad
Light Orzo Olive Salad is a vibrant dish that celebrates fresh ingredients and Mediterranean flavors. This refreshing salad combines whole wheat orzo, briny oil-cured olives, and crisp green onions, making it the perfect choice for meal prep or a quick lunch. With a zesty dressing of olive oil and white grape juice vinegar, each bite bursts with flavor, providing a satisfying yet light experience. Ideal for warm days or as a delightful side dish at gatherings, this salad is not only simple to prepare but also beautifully adaptable—feel free to incorporate your favorite veggies or herbs. Enjoy this wholesome recipe that nourishes both body and soul!
- Prep Time: 15 minutes
- Cook Time: 10 minutes
- Total Time: 25 minutes
- Yield: Serves 4
- Category: Salad
- Method: Mixing
- Cuisine: Mediterranean
Ingredients
- 1 1/2 cups whole wheat orzo
- 3/4 cup chopped oil-cured olives
- 3 large green onions, sliced
- 3 tablespoons extra virgin olive oil
- Salt and pepper, to taste
- 1/2 cup freshly chopped parsley
- Dash of white grape juice vinegar
- Optional: 10 halved grape tomatoes and/or 1/2 cup crumbled feta cheese
Instructions
- 1. Cook the orzo in salted boiling water for 8-10 minutes until al dente. Drain and cool.
- 2. In a mixing bowl, combine chopped olives, sliced green onions, parsley, and halved tomatoes (if using).
- 3. Add the cooled orzo to the bowl along with olive oil, white grape juice vinegar, salt, and pepper. Mix gently until well combined.
- 4. If desired, sprinkle with feta cheese before serving.
Nutrition
- Serving Size: 1 cup (200g)
- Calories: 320
- Sugar: 2g
- Sodium: 450mg
- Fat: 15g
- Saturated Fat: 2g
- Unsaturated Fat: 12g
- Trans Fat: 0g
- Carbohydrates: 40g
- Fiber: 6g
- Protein: 8g
- Cholesterol: 6mg