Mint Chocolate Chip Snowball Cookies
There’s something utterly magical about a homemade cookie, isn’t there? The aroma wafting through your kitchen, the warmth of freshly baked treats cooling on the counter, and that first bite—oh, that glorious moment when you sink your teeth into something sweet and comforting! Today, I want to share with you one of my all-time favorite recipes: Mint Chocolate Chip Snowball Cookies. These enchanting little gems are not just cookies; they’re an experience—a delightful dance of flavors that evokes the spirit of the holiday season, no matter what time of year it is. The combination of cool mint and rich chocolate creates a symphony of taste that will leave you feeling utterly satisfied.
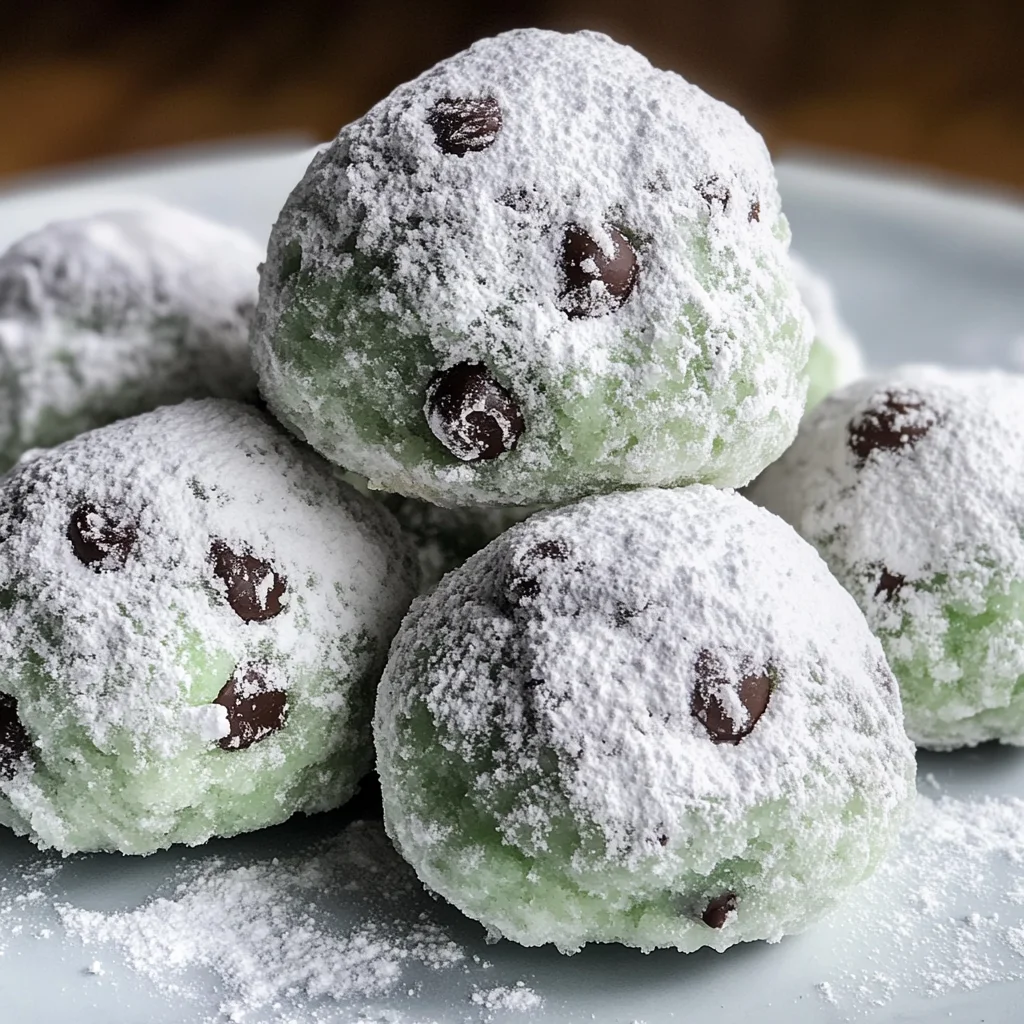
What makes these cookies truly special is their delicate texture. They are light as air yet melt-in-your-mouth delicious, generously dusted with powdered sugar to resemble snowballs glistening in the winter sun. Each bite transports you to a cozy scene where laughter fills the air and warm memories are shared around a table. Trust me when I say that once you take a bite, you’ll be captivated. This recipe balances tradition and innovation beautifully, ensuring that every holiday gathering or casual afternoon treat feels like an occasion to celebrate.
Mint Chocolate Chip Snowball Cookies: A Sweet Escape into Flavor
I can’t wait for you to embark on this culinary journey! Making Mint Chocolate Chip Snowball Cookies is not only rewarding; it’s also a wonderful way to bring joy to those you love. These cookies are perfect for gifting or simply indulging yourself after a long day. So roll up your sleeves, gather those ingredients, and let’s create something extraordinary together!
Ingredients:
As we dive into our ingredient list for these delightful snowball cookies, keep in mind that each component plays a vital role in crafting the perfect treat. Let’s discover what makes each ingredient so essential!
- 1 cup (2 sticks or 226g) Unsalted Butter, softened. This is crucial for achieving that wonderfully creamy texture we’re after in our Mint Chocolate Chip Snowball Cookies. Softened butter allows for easy blending with sugar and combines beautifully with other ingredients to create a light dough. It’s best to take your butter out of the fridge at least an hour before baking so it can reach room temperature—this ensures it creams properly without any lumps. If you’re looking for richness, consider using high-quality European-style butter with a higher fat content; it can elevate your cookies significantly.
- 1/2 cup (100g) Granulated Sugar. This sugar isn’t just here for sweetness; it plays an integral role in texture as well! When combined with the butter during creaming, granulated sugar helps incorporate air into the mixture, resulting in cookies that are fluffy rather than dense. I always recommend measuring sugar accurately—too much can lead to overly sweet cookies that lose their balance, while too little can make them bland.
- 1 teaspoon Pure Vanilla Extract. Ahh, vanilla—the soul of countless desserts! It adds depth and complexity to our cookies while enhancing all other flavors present in the dough. Always opt for pure vanilla extract over imitation; trust me on this! The aroma and flavor profile from pure vanilla is profoundly satisfying and really elevates your baking game.
- 1 teaspoon Peppermint Extract. What would Mint Chocolate Chip Snowball Cookies be without this refreshing burst of peppermint? It’s what sets these cookies apart from traditional snowballs! But beware—peppermint extract can be quite strong, so stick to recommended amounts unless you’re craving an extra kick of minty freshness.
- 2 1/4 cups (270g) All-Purpose Flour. This ingredient serves as the backbone of our cookie dough; it provides structure while allowing those buttery flavors to shine through without overwhelming them. I recommend sifting your flour before measuring—it aerates it and helps prevent clumping—ensuring a light cookie texture when baked.
- 1/4 teaspoon Salt. Salt may seem trivial in sweet recipes but it’s absolutely paramount! A pinch brings out sweetness by balancing flavors and enhancing overall taste profiles remarkably well. It’s like magic—just enough salt makes everything better!
- 1 cup (170g) Mini Chocolate Chips. These tiny morsels are packed with rich cocoa flavor and add delightful pockets of sweetness throughout each cookie. Mini chips melt slightly during baking but still maintain their shape beautifully—perfect for adding charm to our snowballs! Look for high-quality chocolate chips; they make all the difference in flavor.
- 1 1/2 cups (180g) Powdered Sugar (Confectioners’ Sugar), divided. This sugary dusting is what gives our snowball cookies their signature snowy appearance! Using two bowls allows us to coat them first lightly while they’re still warm from baking—a trick that ensures better adherence before finishing with a more generous second coat after they’ve cooled completely.
- Optional: Green Food Coloring. If you’re feeling festive or simply want to give your cookies a fun twist, add some green food coloring! Just a few drops mixed into your dough will yield cheerful little green snowballs reminiscent of fresh mint leaves—a lovely touch for any celebration!

Equipment You’ll Need:
Having the right tools at hand makes all the difference when diving into any baking adventure! While they may not be edible ingredients themselves, these essential partners will ensure your Mint Chocolate Chip Snowball Cookies turn out perfectly every time.
- Mixing Bowls – A good set of mixing bowls is crucial for separating ingredients effectively during prep work; it keeps everything organized and allows you ample space for combining without spills!
- Electric Mixer – An electric mixer will save you time and energy when creaming butter and sugar together—it ensures even incorporation and fluffy texture without straining those arm muscles! If you don’t have one on hand, a sturdy whisk will do; just prepare for some workout action!
- Rubber Spatula – This handy tool is perfect for folding chocolate chips into your dough gently—it helps incorporate without deflating those precious air bubbles created earlier in mixing stages.
- Cookie Scoop – Using a small cookie scoop makes portioning out consistent balls effortless—it guarantees uniformity with size which leads to even baking times across all cookies.
- Baking Sheets & Parchment Paper/Silicone Baking Mats – Quality baking sheets ensure even heat distribution while parchment paper prevents sticking—making clean-up easy too! If you’re using silicone mats instead, they offer non-stick properties as well as reusable convenience.
Preparing the Mint Chocolate Chip Snowball Cookies
Step 1: Preheat Your Oven & Prepare Your Baking Sheets
To start off on the right foot, preheating your oven is essential! Set it at 350°F (175°C), allowing enough time for even heating before popping those delightful little dough balls inside later on. Meanwhile, line two or three large baking sheets with parchment paper or silicone baking mats; this step prevents sticking while also making cleanup afterward much easier—a win-win situation if you ask me!
Step 2: Whisk Together Flour & Salt
In a medium-sized mixing bowl, whisk together your all-purpose flour and salt until evenly combined before setting aside for later use—this process ensures both elements are fully integrated before introducing them into wet ingredients down the line.
Step 3: Creaming Butter & Sugar
Now onto one of my favorite parts—the creaming process! In a large mixing bowl equipped with an electric mixer fitted with paddle attachments (or using good ol’ muscle power), beat softened unsalted butter on medium speed until light and creamy—around 1-2 minutes should do nicely here! Gradually add granulated sugar while continuing mixing until fluffy yet pale; this usually takes about another 2-3 minutes total time spent creaming together these two important players means you’ll achieve perfectly textured cookie dough later on!
Step 4: Incorporate Extracts & Optional Color
Once you’ve reached peak creaminess—in other words—a lovely light-colored mixture ready for further flavor enhancement—beat in both pure vanilla extract along with peppermint extract until just combined (a minute or less should suffice). Here’s where things get fun: if you’re feeling adventurous today (and I bet you are!), add just a few drops of green food coloring at this stage as well—it’s entirely up to personal preference but think about how festive they’ll look once finished!
Stay tuned as we delve deeper into creating these delectable treats together—I promise there’s much more excitement ahead in transforming simple ingredients into something extraordinary!
Step 5: Mixing the Dough – The Heart of Your Cookies
Now that we’ve whisked together our flour and salt, it’s time to dive into the magic of mixing the dough. This step is crucial because it truly brings all of our ingredients together to create a harmonious blend that will transform into those delightful Mint Chocolate Chip Snowball Cookies. Start by lowering your mixer speed to low, and gradually add in the flour mixture. It’s best to do this in about three additions, allowing each batch to incorporate fully before adding more. This gentle approach ensures that your cookies remain tender and crumbly rather than tough. Trust me on this: overmixing is a common pitfall; it can develop the gluten in the flour too much, leading to a denser texture than we desire.
As you mix, watch for that beautiful transformation—the dough will start to come together as you combine the ingredients, forming a soft yet thick consistency. You want this dough to be cohesive but still slightly sticky; if it feels too dry or crumbly, don’t hesitate to add a teaspoon of water or a tiny bit more butter. Remember, the goal here is delicate cookies that melt in your mouth! Once everything is mixed just until combined, stop the mixer and take a moment to savor that sweet aroma wafting from your bowl—this is an early sign of deliciousness ahead!
Step 6: Folding in Chocolate Chips – Adding Joy to Each Bite
This is where the fun really begins! Gently fold in those mini chocolate chips using a rubber spatula. I cannot emphasize enough how important it is to be gentle during this process. You want those little nuggets of chocolate goodness evenly distributed throughout your dough without deflating it. The folding technique helps preserve the airy quality of your cookie dough—something you’ll cherish when you take that first bite. Plus, who doesn’t love discovering those pockets of melted chocolate nestled within each cookie?
As you fold, keep an eye out for even distribution; no one wants their last cookie to be devoid of chocolate! And if you’re like me and believe there’s never too much chocolate—feel free to sneak in an extra tablespoon or two! Once you’ve gently incorporated those chips, you’ll have a thick dough that’s ready for chilling—a step that’s not just a formality but rather an essential part of crafting these heavenly treats.
Step 7: Chilling – The Secret Ingredient for Perfection
Ah, patience—the unsung hero of baking! Now comes an often-overlooked yet absolutely paramount step: refrigerating your dough for at least 30 minutes up to one hour. Why chill? The simple answer lies in science! Cooling the dough allows the butter to solidify again after creaming it with sugar, which results in cookies that hold their shape beautifully while baking instead of spreading out flat. This chilling time also enhances the flavors by giving them a chance to meld together.
So while you’re waiting (and yes, I know waiting can feel like eternity when you’re excited), think about how rewarding it will be when you finally pop those cookies into the oven! If you have some time on your hands—maybe while listening to music or catching up on your favorite show—feel free to let your dough chill longer; just be sure it’s tightly covered so it doesn’t dry out or absorb any fridge odors.
Step 8: Forming Perfect Cookie Balls – Crafting Little Orbs of Delight
Once your dough has chilled and firmed up nicely, it’s time for one of my favorite parts: shaping those adorable cookie balls! Using a small cookie scoop (about one tablespoon), scoop out portions of chilled dough and roll them between your palms into smooth balls roughly one inch in diameter. This step isn’t merely aesthetic; rolling ensures uniformity and even baking, resulting in cookies that all look equally scrumptious.
When placing these dough balls onto your prepared baking sheets, make sure they are spaced about 1-1.5 inches apart. This spacing is vital because as they bake, they’ll expand slightly but should still maintain enough room so they don’t touch each other—a crucial detail for achieving that lovely snowball shape we’re going for! At this point, take a moment and enjoy how magical these little rounds look; they’re ready for their transformation into golden delights!
And there you have it—the entire journey through creating Mint Chocolate Chip Snowball Cookies filled with love and joy! Each bite encapsulates warmth from memories made around kitchen counters filled with laughter—and I hope these become cherished moments in your home as well! Enjoy every sweet morsel!
Storage and Enjoyment Tips for Your Mint Chocolate Chip Snowball Cookies
Now that you’ve crafted these delightful Mint Chocolate Chip Snowball Cookies, the real fun begins! Picture a tray of these snowy treats sitting proudly on your kitchen counter, inviting friends and family to come together and indulge in their sweet charm. If you find yourself with leftovers (though they might vanish quickly!), storing them properly is key to preserving their enchanting flavor and texture. Let’s dive into how to keep this festive delight fresh for days to come!
Storing Leftover Mint Chocolate Chip Snowball Cookies
To maintain the irresistible qualities of your Mint Chocolate Chip Snowball Cookies, it’s best to store them in an airtight container at room temperature. A simple cookie jar or a resealable plastic bag will work wonders, but I recommend a glass container if you have one—it keeps things fresher longer! These cookies will stay delicious for up to a week, but trust me, they taste even better as they sit and absorb the minty essence. To keep them from drying out, consider placing a slice of bread in the container; it’s an old baker’s trick that adds moisture without compromising flavor. When you return for another cookie (and let’s be honest, who wouldn’t?), you’ll find them as soft and sumptuous as the day you baked them. If you’re feeling indulgent, pop them in the microwave for about 10 seconds before enjoying; that little warmth reignites their melt-in-your-mouth magic!
Freezing Mint Chocolate Chip Snowball Cookies for Later
If you want to prolong the joy of these cookies even further, freezing them is a fantastic option! Simply arrange your cooled cookies in a single layer on a baking sheet and place them in the freezer until solid—about an hour should do it. Once frozen, transfer them to a freezer-safe bag or container where they can hang out for up to three months! Freezing not only preserves their delightful flavors but also offers incredible convenience when unexpected guests arrive or when that late-night craving strikes. When you’re ready to enjoy some minty goodness again, just take out the desired number of cookies and let them thaw at room temperature for about 15-20 minutes—or give them a gentle reheat in the microwave. It’s like having a sweet surprise waiting just for you whenever you wish!
Mint Chocolate Chip Snowball Cookies

Indulge in the festive delight of Mint Chocolate Chip Snowball Cookies, a treat that captures the essence of joy and warmth with every bite. These enchanting cookies blend cool mint and rich chocolate into a soft, melt-in-your-mouth texture. Dusted with powdered sugar to resemble glistening snowballs, they are perfect for any gathering, whether it’s a holiday celebration or a cozy afternoon snack. This simple recipe invites you to create unforgettable moments with loved ones as you bake these sweet gems together. Each cookie embodies the spirit of celebration and is sure to leave everyone craving more.
- Prep Time: 20 minutes
- Cook Time: 12 minutes
- Total Time: 32 minutes
- Yield: Approximately 24 cookies 1x
- Category: Dessert
- Method: Baking
- Cuisine: American
Ingredients
- 1 cup Unsalted Butter, softened
- 1/2 cup Granulated Sugar
- 1 teaspoon Pure Vanilla Extract
- 1 teaspoon Peppermint Extract
- 2 1/4 cups All-Purpose Flour
- 1/4 teaspoon Salt
- 1 cup Mini Chocolate Chips
- 1 1/2 cups Powdered Sugar, divided
- Optional: Green Food Coloring
Instructions
- Preheat your oven to 350°F (175°C) and line baking sheets with parchment paper.
- In a mixing bowl, whisk together flour and salt; set aside.
- Cream softened butter and granulated sugar until light and fluffy. Add vanilla and peppermint extracts (and food coloring if using) until combined.
- Gradually add the flour mixture, mixing just until combined. Gently fold in mini chocolate chips.
- Chill the dough for at least 30 minutes.
- Scoop and roll dough into balls, placing them on prepared baking sheets about an inch apart.
- Bake for 10-12 minutes until edges are lightly golden but centers remain pale.
- Cool slightly before rolling in powdered sugar; allow to cool completely before serving.
Nutrition
- Serving Size: 1 cookie
- Calories: 98
- Sugar: 6g
- Sodium: 35mg
- Fat: 5g
- Saturated Fat: 3g
- Unsaturated Fat: 2g
- Trans Fat: 0g
- Carbohydrates: 12g
- Fiber: <1g
- Protein: <1g
- Cholesterol: 15mg