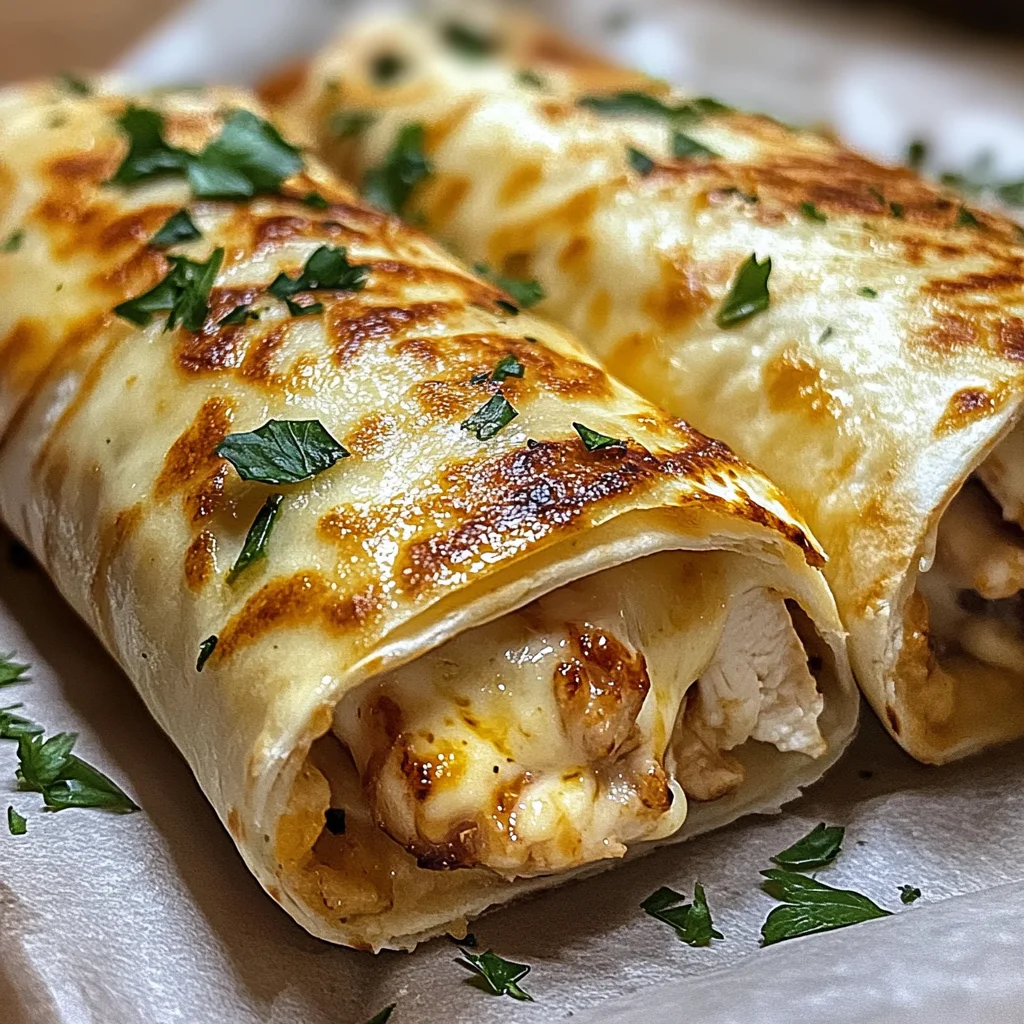
Ooey-Gooey Cheesy Garlic Chicken Wraps You’ll Love!
The kitchen is a sacred place, isn’t it? It’s where the heart finds its rhythm, where love and laughter simmer alongside garlic and cheese. When I think of comfort food, my mind immediately drifts to the divine creation that is my Ooey-Gooey Cheesy Garlic Chicken Wraps You’ll Love! These wraps are not just a meal; they are an experience, a delightful symphony of flavors that dance together in perfect harmony. Imagine biting into a warm, golden wrap filled with tender chicken, melting mozzarella, and a hint of garlic that wafts through the air like an invitation to indulge. Each bite is like a warm hug from an old friend—comforting, satisfying, and utterly delightful.
What makes this recipe so special is its simplicity paired with an explosion of flavor. In just 25 minutes, you can transform everyday ingredients into something extraordinary. This dish has become a staple in my home; it’s perfect for busy weeknights but also elegant enough for gatherings with friends or family. It brings people together around the table and invites them to share stories while savoring every cheesy morsel. Trust me when I say that once you serve these wraps, they’ll quickly become a beloved favorite in your household as well!
Ooey-Gooey Cheesy Garlic Chicken Wraps You’ll Love!: A Cheesy Delight
These wraps encapsulate everything wholesome and comforting about American cuisine—quick to prepare yet bursting with flavor that feels like home. They’re versatile enough to suit any occasion; whether you’re looking for a quick dinner idea or something special for game day, these wraps deliver every time.
Ingredients:
Embarking on this culinary journey starts with gathering your ingredients—the building blocks of deliciousness! Each element plays a vital role in crafting these heavenly wraps, so let’s dive into what you’ll need.
- 2 cups cooked chicken, shredded. Using tender, juicy chicken that has been cooked to perfection is essential here. You can use leftover roast chicken or poach some chicken breasts in seasoned water for added flavor. The beauty of shredded chicken lies in its ability to soak up the flavors from the other ingredients while providing protein that keeps these wraps satisfying without being overly heavy.
- 1 cup shredded mozzarella cheese. Ah, mozzarella—the quintessential cheese for achieving that ooey-gooey texture we’re all craving! When buying mozzarella, look for high-quality cheese that melts beautifully. Fresh mozzarella will impart a delicate creaminess while pre-shredded varieties often contain anti-caking agents; I recommend shredding your own if possible for optimal meltiness and flavor.
- 1/2 cup cream cheese, softened. Cream cheese is the secret weapon in this recipe—it adds richness and enhances the overall creaminess of your filling. Be sure to allow your cream cheese to reach room temperature before mixing; this ensures it blends smoothly with the other ingredients rather than clumping together.
- 1/4 cup garlic, minced. Garlic transforms ordinary dishes into something magical with its aromatic punch! Freshly minced garlic provides an irresistible fragrance and depth of flavor that’s simply non-negotiable in these wraps. Sautéing it lightly releases its natural oils and mellows its sharpness, making every bite utterly intoxicating.
- 1/4 cup fresh parsley, chopped. Fresh parsley isn’t just a garnish; it adds a burst of color and brightness that lifts the entire dish! Its herbaceous notes contrast beautifully with the richness of the cheeses and chicken. Always choose vibrant green parsley—if it’s wilting or yellowing, it won’t provide the same fresh taste.
- 4 large tortillas. The vessel for our delicious filling! Choose tortillas that are soft yet sturdy enough to hold all those gooey fillings without tearing apart during cooking or eating. Whole wheat or spinach tortillas can add nutritional value and flavor variations if you want to switch things up!
- 1 tablespoon olive oil. Olive oil adds richness as well as helping to achieve that lovely golden-brown crust on each wrap when cooked in the skillet. Opt for good quality extra virgin olive oil for its superior taste—it truly makes all the difference in elevating this simple dish.
- Salt and pepper to taste. Don’t underestimate seasoning! A pinch of salt enhances every ingredient’s flavor while freshly cracked black pepper adds warmth and depth to our filling mixture.
Equipment You’ll Need:
Having the right tools at hand makes cooking not just easier but more enjoyable! Here’s what you’ll need as your trusty companions on this flavorful adventure:
- Large mixing bowl – This will be your go-to space where all those wonderful flavors come together harmoniously. A sturdy bowl allows plenty of room for mixing without worrying about spills—important when combining rich ingredients like cheese!
- Skillet – A non-stick skillet is ideal for achieving that beautiful golden brown exterior on your wraps without any sticking mishaps (and trust me—you want them perfectly crisp!). If you don’t have non-stick cookware handy, just be sure to use enough olive oil to prevent sticking.
- Spatula – A wide spatula helps you flip those wraps effortlessly while cooking them until they’re perfectly crisp on both sides! It’s also useful when you’re transferring them from pan to plate after cooking.
Now that we’ve gathered our ingredients and equipment let’s get ready to create some magic in the kitchen!
Step 1: Whip Up That Flavorful Filling
In a large bowl (your new best friend), combine those 2 cups of shredded chicken with 1 cup of shredded mozzarella cheese and 1/2 cup of softened cream cheese—this creamy mixture will be the heart of our wraps! As you mix these ingredients together using a spatula or spoon, take a moment to appreciate how they begin melding into one another; it’s almost poetic as they transform into something greater than their individual parts. The cream cheese acts as glue here—binding everything while adding luscious creaminess that elevates even simple chicken into something truly extraordinary.
Next comes our star player: add 1/4 cup minced garlic along with 1/4 cup chopped fresh parsley into this fragrant mix! Stir gently but thoroughly until all those delightful flavors are evenly distributed throughout every shred of chicken—you want each bite bursting with deliciousness! And remember: seasoning matters! Sprinkle salt and pepper into this mixture according to your taste preferences; I usually start light because we can always adjust later once we assemble our wraps.
Step 2: Assemble Your Delicious Wraps
Now comes one of my favorite parts—the assembly! Lay out those four large tortillas on clean surfaces like countertop or cutting board (you might feel inspired by how beautiful they look already). With a generous scoop (about one-quarter) of our flavorful filling mixture placed in each tortilla’s center, take care not to overstuff them; we want them wrapped snugly without bursting at the seams during cooking!
To form each wrap properly—start by folding one edge over the filling before rolling tightly towards the opposite end while tucking sides inward securely as you go along—it’s like wrapping up precious gifts for loved ones! This technique ensures nothing escapes during frying later on—a crucial step indeed!
Step 3: Get Cooking Those Golden Brown Wraps
With our wraps formed beautifully (and aren’t they just gorgeous?), let’s heat things up on medium heat by adding 1 tablespoon olive oil into our trusty skillet until shimmering gently—a sign it’s ready for action! Carefully place each wrap seam-side down onto hot surface—this allows them time to develop that coveted golden crust while keeping fillings snugly inside where they belong.
Cook each side for approximately three-four minutes—that’s right—don’t rush this step folks—patience pays off here as those glorious flavors deepen through caramelization creating mouthwatering aromas wafting through your kitchen! Keep an eye out for visual cues: once they turn golden brown on one side (you’ll know!), flip gently using spatula before repeating process until both sides boast perfection!
Step 4: Slice & Serve Warm
Once your wraps reach their crispy potential—remove them from skillet carefully onto cutting board or plates where they’ll rest momentarily before slicing into halves or quarters depending upon preference (I love seeing those melty interiors!). Serve warm alongside dipping sauces such as marinara or ranch dressing if desired—and watch how everyone gathers around excitedly awaiting their first bites!
There you have it: Ooey-Gooey Cheesy Garlic Chicken Wraps You’ll Love ready to rock your meal times forevermore! Trust me when I say these will become part cherished memories shared over laughter-filled dinners—you’ll be making them again before long…
Step 5: Roll and Wrap with Love
Now that you have your delicious chicken mixture ready, it’s time to assemble these delightful wraps! Lay out each tortilla on a clean surface—this is where the magic begins. Picture this: a beautifully soft tortilla, just waiting to envelop the ooey-gooey goodness inside. Take about a generous quarter of the chicken mixture and place it in the center of each tortilla. Now comes the fun part—rolling! Gently fold in the sides of the tortilla first, almost like you’re tucking them in for a cozy nap, and then roll from the bottom up, keeping everything snug and secure. Trust me on this; how tightly you roll these wraps makes all the difference in ensuring they hold together during cooking. You want to create little parcels of joy that are tightly sealed but not so tight that they burst open while cooking—find that sweet spot!
As you roll, take a moment to admire how colorful and inviting your wraps look; the vibrant green parsley mingling with the creamy white cheeses and tender chicken creates such an appealing sight! If you find any excess filling peeking out, no worries—just gently tuck it back inside as you finish rolling. This step is absolutely paramount because it sets the foundation for achieving that perfect crispy exterior later on. Once you’ve rolled all four tortillas, set them seam-side down on a plate or cutting board; this helps keep them intact until you’re ready to cook. Don’t rush this step; savor the process and feel proud of what you’re creating!
Step 6: Sizzle It Up on the Skillet
Now we move into one of my favorite moments—the sizzle of your wraps hitting a hot skillet! In a large skillet over medium heat, pour in that tablespoon of olive oil, allowing it to warm up until it shimmers like liquid gold. The oil not only adds flavor but also ensures that your wraps achieve that coveted golden-brown crust on each side—a textural contrast that’s utterly intoxicating when you take your first bite. Once you see those shimmering ripples on the oil’s surface (about 1-2 minutes), it’s time to gently place your wraps seam-side down in the skillet.
Here’s where patience pays off! Let them cook undisturbed for about 3-4 minutes; resist the urge to flip them too soon! You want to allow enough time for that beautiful golden crust to form. As they cook, keep an eye out for sizzling sounds—that’s music to your ears! After about 3-4 minutes, use a spatula to carefully lift one wrap and peek underneath; you’re looking for a deep golden color and a slightly crispy texture. Remember, don’t be surprised if they make some delightful crackling sounds; that’s just their way of saying they’re getting perfectly crispy! Once they are beautifully browned on one side, it’s time to flip them over gently. The goal here is even cooking so both sides get that glorious crunch.
Step 7: Flip and Finish Cooking
After flipping those mouthwatering wraps, allow them to cook for another 3-4 minutes on this side as well. You’ll notice how quickly they start transforming into something truly extraordinary—the cheese will begin melting inside, creating an ooey-gooey interior that’s rich and comforting. This melting process is crucial because it binds all those incredible flavors together while providing that satisfying stretch when you take a bite later on—who doesn’t love that stretchy cheese moment?
As they cook, make sure to adjust your heat if necessary; if things seem too hot or smoking starts happening (we don’t want burnt wraps!), simply lower it slightly—it’s all about finding balance! Keep checking visually for that same lovely golden hue; evenness is key here. And just when you think you’ve reached perfection, give them an extra minute or two if needed—trust me when I say that extra bit will elevate everything about these wraps!
Step 8: Resting – The Secret Ingredient
Once your delicious cheesy garlic chicken wraps are cooked perfectly golden brown on both sides, remove them from the skillet and transfer them onto a cutting board lined with paper towels. This resting step may seem simple but it’s non-negotiable! Allowing your wraps to rest for about 2-3 minutes does wonders—it gives time for those melted cheeses inside to settle slightly instead of oozing out everywhere when sliced.
This brief resting period enhances not only texture but also flavor concentration; think of it as letting all those gorgeous flavors mingle before diving in—they deserve their moment too! While they rest, take this opportunity to prepare any dipping sauces or sides you’d like (a tangy salsa or refreshing guacamole would pair wonderfully). And oh my goodness—the aroma wafting around your kitchen right now? It’s simply heavenly!
Final Touches: Serving Your Ooey-Gooey Cheesy Garlic Chicken Wraps You’ll Love!
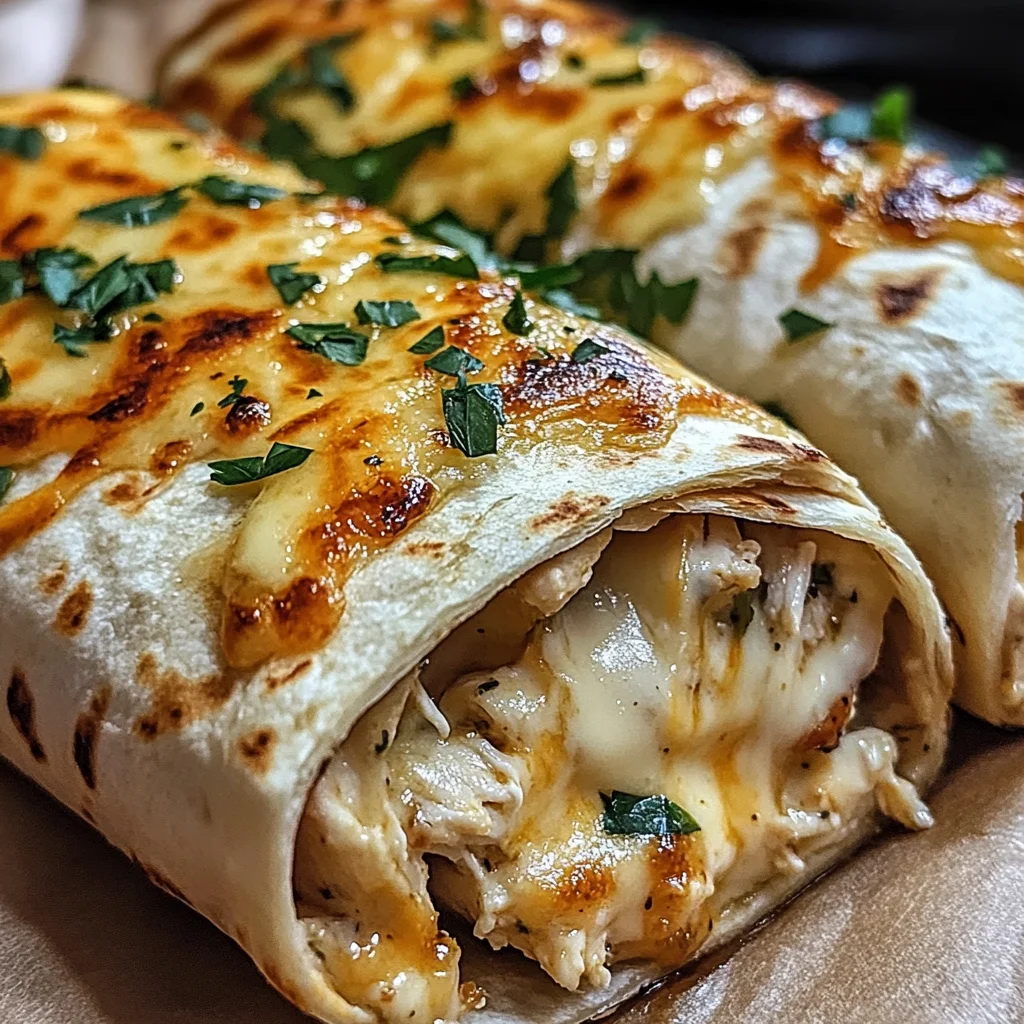
Before serving this delightful dish to eager hands (or maybe just yours!), let’s slice these beauties into manageable pieces. Using a sharp knife, cut each wrap diagonally into halves or quarters—this not only makes them easier to handle but also showcases their gooey interiors beautifully! As you slice through each one, watch as melted cheese stretches enticingly between pieces—a truly mouthwatering sight!
To serve, arrange these gorgeous slices on a platter with maybe some fresh parsley sprinkled atop for an added pop of color and freshness—you want your presentation to be as inviting as they taste! I promise you, once your friends or family see these stunning cheesy garlic chicken wraps laid out before them, they’ll be flocking eagerly around the table in anticipation.
So there we have it—a recipe full of love and flavor: Ooey-Gooey Cheesy Garlic Chicken Wraps You’ll Love! Each bite brings warmth and comfort reminiscent of home-cooked meals shared with loved ones. Enjoy every moment—you’ve earned it after creating something so special from scratch!
Storage and Enjoyment Tips for Your Ooey-Gooey Cheesy Garlic Chicken Wraps You’ll Love!
Now that you’ve crafted these utterly divine Ooey-Gooey Cheesy Garlic Chicken Wraps, it’s time to indulge in the warm, cheesy goodness that’s just waiting for you! But what if you find yourself with a few extras? Don’t worry; I’ve got you covered! These wraps not only taste heavenly fresh, but they also store beautifully for later enjoyment. After all, who wouldn’t want to savor that deliciousness again?
Storing Leftover Ooey-Gooey Cheesy Garlic Chicken Wraps You’ll Love!
To keep your leftover wraps as delightful as when they were first made, I recommend storing them in an airtight container. This is crucial to maintain their soft texture and prevent them from drying out. If you’re planning to enjoy them within the next few days, simply pop them in the fridge where they’ll stay fresh for about three to four days. For longer storage, consider placing a slice of bread in the container with the wraps; this little trick helps retain moisture and keeps everything tasting just right! Trust me on this one—it makes a noticeable difference! When it comes time to reheat those golden morsels, a quick trip to the skillet or microwave will have them tasting almost like new again. Just be sure to wrap them in a damp paper towel if using the microwave—this will help steam them back to perfection while preserving that ooey-gooey experience!
Freezing Your Ooey-Gooey Cheesy Garlic Chicken Wraps for Later
If you want to make these wraps even more convenient, freezing is an excellent option! To do this properly, wrap each individual wrap tightly in plastic wrap or aluminum foil before placing them in a freezer-safe bag. This will protect them from freezer burn and keep those amazing flavors locked in. They can be stored frozen for up to three months without losing their charm. When you’re ready for a quick meal, simply pull one from the freezer and let it thaw overnight in the fridge or pop it directly into a preheated oven at 375°F (190°C) for about 20 minutes until heated through. It’s such an easy way to bring back that cozy comfort food vibe without any fuss. Plus, having these gems stashed away makes weeknight dinners feel like a treat!
So whether you’re enjoying these wraps fresh off the skillet or savoring leftovers later on, I promise you’ll find joy and satisfaction in every bite.
Conclusion:
As we wrap up our delightful journey through making these Oh-So-Ooey-Gooey Cheesy Garlic Chicken Wraps You’ll Love!, I can’t help but feel excited about the wonderful flavors and textures we just created together! From the creamy richness of the cheese mingling with tender chicken and aromatic garlic to that glorious crispy exterior after frying—there’s something truly extraordinary about each bite. The combination of gooey mozzarella with tangy cream cheese creates a symphony of flavors that dances on your palate, leaving you longing for more.
This recipe isn’t just about taste—it’s an experience that brings joy in every step of its preparation! Whether it’s a casual dinner with friends or a cozy family night, these wraps shine through as an unforgettable meal. Imagine pulling them out hot from the skillet; the mouthwatering aroma fills your kitchen while everyone gathers around excitedly. It’s moments like these that create memories worth cherishing—each wrap telling its own story of love and warmth.
When it comes to serving suggestions, let your imagination run wild! Picture savoring one alongside a refreshing garden salad drizzled with zesty vinaigrette or dunking it into a rich homemade marinara sauce for that extra burst of flavor. For an afternoon pick-me-up, pair it with some crunchy veggie sticks and hummus for a delightful snack that hits all the right notes. And if you’re feeling truly indulgent, why not whip up a batch of your favorite creamy dip? The possibilities are endless when it comes to creating memorable meals around these wraps!
Feeling adventurous? This recipe is wonderfully adaptable! You could swap out chicken for juicy grilled vegetables or shredded turkey for an exciting twist on flavor while still keeping everything oozy and cheesy. Add some sautéed spinach or sun-dried tomatoes into the mix for additional layers of flavor that elevate your dish even further. I encourage you to get creative and make this recipe your own—experimenting is part of the fun! So go ahead; dive into this culinary adventure, share your delicious creations with others, and let’s connect over our shared love of food!
Ooey-Gooey Cheesy Garlic Chicken Wraps You’ll Love!
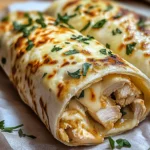
Indulge in the delightful experience of Ooey-Gooey Cheesy Garlic Chicken Wraps You’ll Love! This recipe combines tender, shredded chicken with rich cream cheese and melty mozzarella, all wrapped in a warm tortilla and perfectly browned to create a satisfying crunch. Each bite bursts with savory garlic flavor and is adorned with fresh parsley for a touch of brightness. Ideal for busy weeknights or casual gatherings, these wraps are not only quick to prepare but also versatile enough to please any crowd. Serve them with your favorite dipping sauce for an extra layer of flavor. Experience the ultimate comfort food that promises to bring joy to your table!
- Prep Time: 10 minutes
- Cook Time: 15 minutes
- Total Time: 25 minutes
- Yield: Serves 4
- Category: Dinner
- Method: Frying
- Cuisine: American
Ingredients
- 2 cups cooked chicken, shredded
- 1 cup shredded mozzarella cheese
- 1/2 cup cream cheese, softened
- 1/4 cup garlic, minced
- 1/4 cup fresh parsley, chopped
- 4 large tortillas
- 1 tablespoon olive oil
- Salt and pepper to taste
Instructions
- In a large bowl, mix the shredded chicken, mozzarella cheese, cream cheese, minced garlic, parsley, salt, and pepper until well combined.
- Lay out each tortilla on a clean surface and place a generous quarter of the mixture in the center of each one.
- Roll each tortilla snugly from the bottom up while tucking in the sides.
- Heat olive oil in a skillet over medium heat. Place the wraps seam-side down and cook for about 3-4 minutes per side until golden brown and crispy.
- Remove from skillet and let rest for 2-3 minutes before slicing into halves or quarters.
Nutrition
- Serving Size: 1 wrap (135g)
- Calories: 360
- Sugar: 2g
- Sodium: 600mg
- Fat: 18g
- Saturated Fat: 8g
- Unsaturated Fat: 9g
- Trans Fat: 0g
- Carbohydrates: 30g
- Fiber: 3g
- Protein: 22g
- Cholesterol: 70mg