Pasta Salad with Italian Dressing
There’s something profoundly satisfying about a dish that combines vibrant colors, exciting textures, and a symphony of flavors—like this Pasta Salad with Italian Dressing. It’s not just food; it’s an experience that brings people together, igniting conversations and laughter over a shared table. Picture yourself at a sunny picnic or a family gathering, the tantalizing aroma of fresh vegetables mingling with the zesty notes of Italian dressing wafting through the air. With each bite, you’re greeted by the cheerful crunch of bell peppers, the juicy burst of cherry tomatoes, and the delightful chewiness of rotini pasta. This pasta salad is not merely a side dish; it’s an invitation to savor life in all its colorful glory.
I’ve always been captivated by how simple ingredients can transform into something utterly intoxicating when combined with love and care. This recipe has become a staple for my gatherings—not only for its appealing presentation but also because it embodies that spirit of togetherness we all cherish. It’s easy to prepare yet feels special enough to be served on any occasion, from casual weeknight dinners to festive potlucks. Trust me when I say that once you serve this Pasta Salad with Italian Dressing, your friends will be begging for the recipe!
Ingredients:
As we embark on this culinary journey together, let’s take a moment to appreciate each ingredient that plays a vital role in crafting this delicious Pasta Salad with Italian Dressing. Each component contributes not just flavor but also texture and color, creating a feast for both the eyes and the palate.
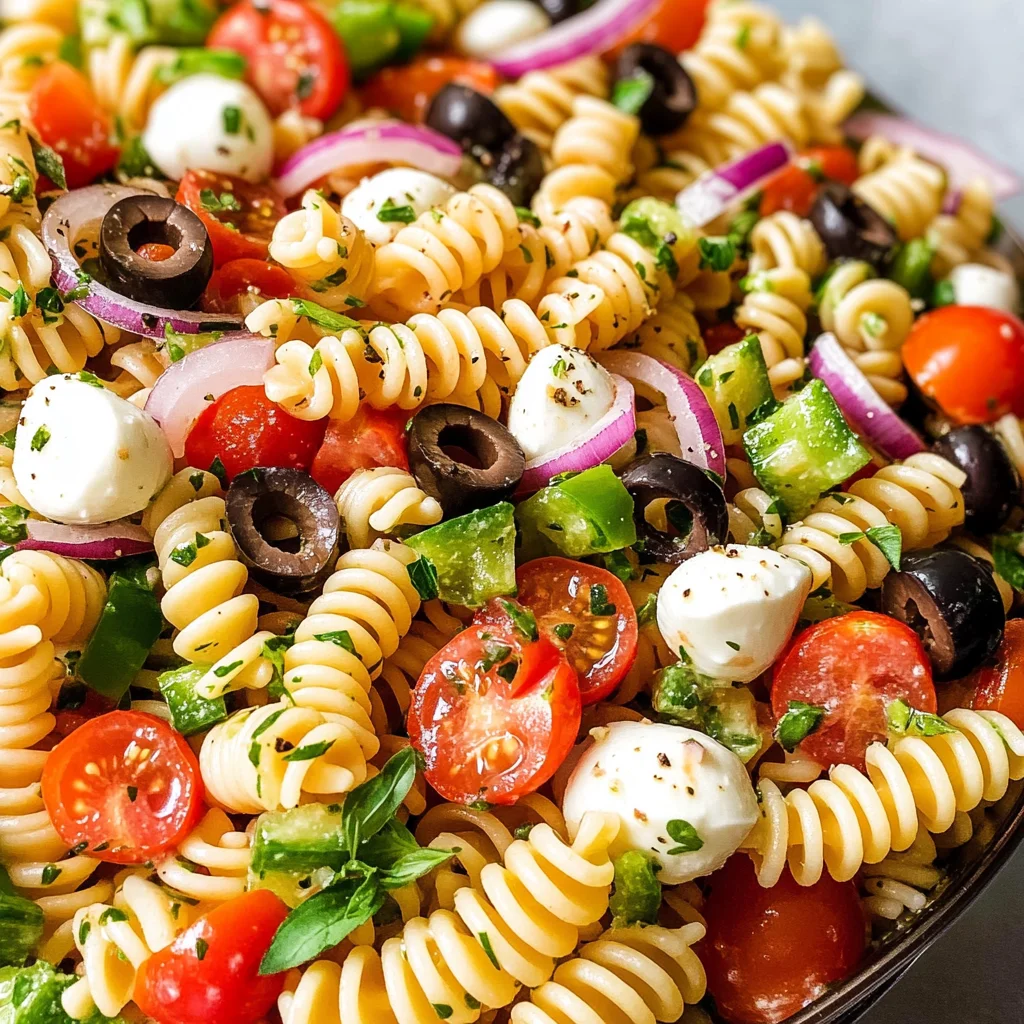
- 1 (1-pound) box tri-color rotini pasta. This playful pasta shape is not only visually appealing but also perfect for holding onto the zesty dressing and capturing bits of flavorful veggies in every bite. The tri-color twist offers an inviting look that immediately draws in guests—who wouldn’t want to dig into such a vibrant dish? When selecting your pasta, look for high-quality options made from durum wheat for optimal texture and cooking performance. Be sure to cook it al dente; this means it should still have a slight bite when you taste it—this texture will hold up beautifully as we mix everything together.
- 1 red bell pepper, chopped. Sweet and crisp, the red bell pepper brings both color and flavor to our salad. Its natural sweetness balances out the zesty dressing while adding crunch that contrasts wonderfully with the tender rotini. When choosing your bell pepper, opt for one that feels heavy for its size with smooth skin—this is usually indicative of freshness. Don’t rush through chopping; aim for uniform pieces so they blend seamlessly into every mouthful.
- 1 green bell pepper, chopped. Similar to its red counterpart but with a slightly sharper taste, the green bell pepper provides an additional layer of complexity while keeping things lively. The vivid green adds another burst of color that enhances visual appeal—a key aspect when serving any dish! As with all vegetables in this salad, make sure to wash them thoroughly prior to chopping to ensure they’re clean and ready to shine in our creation.
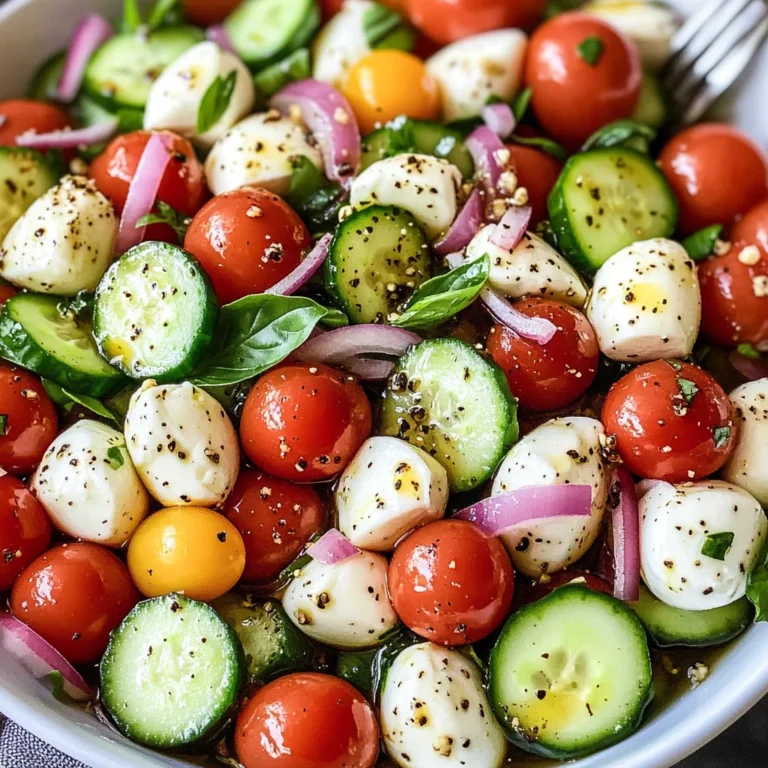
- 2 cups cherry tomatoes, sliced in half. These little jewels are bursting with sweetness and juiciness! Their bright pop against the earthy tones of pasta creates an explosion of flavor with every bite. I recommend using ripe tomatoes—look for ones that yield slightly when gently squeezed but are still firm overall. Halving them allows their juices to mingle effectively with our dressing while maintaining their integrity during mixing.
- 1/2 sliced red onion. The sharpness of red onion adds depth to our salad; its vibrant hue brings another layer of visual delight as well! Soaking sliced onions in cold water for about ten minutes can help mellow their intensity if you find them too pungent—this trick works wonders! Using red onions specifically not only enhances flavor but also grants us those stunning purples amidst our colorful medley.
- 1 cup sliced olives. Adding briny olives infuses our dish with bold Mediterranean flair! They contribute saltiness that complements our other ingredients perfectly while delivering an additional chewy texture that’s simply irresistible. You may choose between black or green olives based on your preference—both varieties bring unique flavors worth experimenting with!
- 8 ounces small mozzarella balls. Known as bocconcini or ciliegine depending on their size, these milky morsels add creaminess that balances out all those crisp veggies beautifully! Opting for fresh mozzarella will elevate your salad tremendously—their soft texture contrasts nicely against al dente pasta while absorbing flavors from our dressing perfectly.
- 1 cup Italian dressing (more if desired). The star player here—the dressing ties everything together! A good quality Italian dressing should be bright and flavorful without overwhelming your ingredients; it should enhance rather than mask their natural tastes. You can either buy store-bought or whip up your own homemade version if you’re feeling adventurous! Remember: if you prefer more tang or richness in flavor profile later on—you can always drizzle extra over before serving!
- 2 tablespoons chopped fresh herbs (parsley or basil). Fresh herbs introduce brightness and aromatic notes essential for lifting flavors throughout this delightful dish! Parsley offers earthiness while basil adds warmth reminiscent of sunny Mediterranean gardens—don’t shy away from experimenting here based on what you have available!
- Shredded parmesan cheese (optional). While optional, sprinkling some freshly grated parmesan just before serving adds an extra layer of umami that’ll elevate your pasta salad experience beyond measure! Cheesy goodness melds flawlessly into every nook & cranny—don’t underestimate how much joy adding this touch may bring!
Equipment You’ll Need:
Before we dive into preparing this delightful Pasta Salad with Italian Dressing, let’s gather our essential kitchen tools! Having the right equipment makes cooking smoother and more enjoyable—it transforms what might feel like chores into moments filled with creativity and joy.
- Large pot – This is where we will cook our rotini pasta until it reaches that perfect al dente stage—a crucial step ensuring delicious results! A large pot allows ample space for boiling water without overflowing while providing room for stirring without risk of splashes.
- Colander – Once your pasta is cooked perfectly, it’s time to drain away excess water efficiently using a colander—this tool prevents soggy noodles from ruining everything we’ve worked hard on thus far!
- Large mixing bowl – A generously sized bowl is essential when tossing all those beautiful ingredients together later on—you want enough room so they can mingle freely without spilling over!
- Cutting board & knife – These trusty companions help us chop veggies safely & efficiently; keeping things organized leads us closer toward culinary success!
- Measuring cups & spoons – Precision matters here—using correct measurements guarantees balanced flavors throughout each mouthwatering bite!
Preparing the Pasta Salad with Italian Dressing
Step 1: Cook Your Rotini Perfectly
Begin by bringing a large pot filled halfway with water to a rolling boil—it should bubble vigorously like energetic little dancers! Don’t forget to add salt generously; think of it as seasoning not only enhancing flavor but also ensuring your noodles absorb some magic during cooking time! Drop in one pound of tri-color rotini once boiling commences; give them occasional gentle stirs throughout cooking process according package instructions until they reach al dente perfection—a texture that holds firm yet tender upon biting down gently.
Once done cooking (usually around 7-10 minutes), carefully drain them using your colander—watch out for steam escaping as you do so! Rinse under cold water briefly afterward—you want those noodles cooled off quickly so they don’t continue cooking further inside themselves which can lead us astray towards mushy disaster instead of delightful goodness we aim for here.
Step 2: Chop Up Fresh Veggies
Next up? Time to showcase those beautiful veggies we gathered earlier! Grab your cutting board along with knife then start chopping away at red & green bell peppers followed by slicing cherry tomatoes in half ensuring maximum juiciness shines through once mixed later on—we’re creating layers upon layers within this masterpiece after all!
Don’t rush yourself during chopping steps—it’s important not just because presentation matters (which trust me does!) but also ensures even distribution among ingredients when tossed together soon after completing these steps—all playing well harmoniously throughout each luscious bite experienced later on during savored moments shared around dining table amongst loved ones!
Step 3: Combine Everything in One Large Bowl
With cooked rotini now chilled down alongside beautifully chopped vegetables ready & waiting… let’s combine them into one big happy family within our large mixing bowl! Start off by adding cooled-down noodles followed closely behind by colorful diced bell peppers plus halved cherry tomatoes along neatly sliced red onions next followed closely behind by briny olives giving us necessary zing before finally tossing small mozzarella balls atop everything above asking them kindly join party happening below them too!
Every ingredient serves purpose bringing unique taste & texture contributing toward overall satisfaction experienced throughout meal shared… oh how exciting this moment feels already knowing flavorful adventure awaits ahead as soon as we finish final touches bringing everything together now shortly thereafter!
Step 4: Dress It Up!
Now comes perhaps most fun part: drizzling liquid gold known as Italian dressing generously over top entire mixture—it’s time truly unleash flavors hidden within each ingredient waiting patiently no longer need remain shy anymore after all work put forth leading up toward this beautiful moment unfolding right before eyes witnessing transformation happen live inside bowl laid out before us!
Sprinkle chopped fresh herbs atop next giving vibrancy further elevating beauty displayed even higher than thought initially achievable… wow what joy seeing colors come alive dancing across surface capturing attention fully inviting everyone nearby join celebration happening right here right now around dining table filled laughter love conversations growing stronger bonds created thanks amazing meals prepared lovingly such as these moments captured forever cherished memories made shared together amongst family friends alike enjoying delectable bites made possible through collective efforts spent creating something truly extraordinary worth savoring deeply experiencing truly profound satisfaction felt upon tasting first bites enjoyed thoroughly afterward immensely grateful knowing served up goodness meant delights everyone gathered share joys surrounding culinary adventures life brings forth constantly evolving experiences kept alive through sharing recipes like these passed down generations inspiring future ones follow footsteps laid forth initially paving paths toward continued exploration delicious foods awaiting discovery endlessly ahead…
And there you have it—the beginning steps toward creating your very own Pasta Salad with Italian Dressing awaits eagerly calling attention inviting everyone gather round share joys experiences brought forth through delightful summation flavors enjoyed endlessly alongside laughter love lingering long after last crumb consumed leaving behind lasting echoes fond memories captured cherished forever more…
Crafting Your Delicious Pasta Salad with Italian Dressing
Step 5: Mixing the Masterpiece
Now that we have our rotini cooked to a perfect al dente, it’s time to bring this delightful dish together. In a large mixing bowl—something spacious enough to accommodate all those vibrant ingredients—you’ll want to gently combine your cooled pasta with the colorful medley of bell peppers, cherry tomatoes, red onions, olives, and those luscious mozzarella balls. Feel free to channel your inner artist here; this is a moment where you can let the colors of your ingredients shine! As you fold everything together with care, be aware that you’re not just mixing, but rather creating a harmonious blend of flavors and textures. The crunchiness of the vegetables will contrast beautifully against the tender pasta and creamy mozzarella, offering each bite a delightful surprise.
This step is absolutely paramount because it lays the foundation for flavor distribution. Each ingredient needs to mingle and get acquainted; after all, we want every forkful of this pasta salad with Italian dressing to burst with deliciousness. Trust me when I say that the more love and attention you give this step, the more profound the final taste will be. So take your time, enjoy the process, and savor the vibrant colors and enticing aromas wafting from your mixing bowl—this is where culinary magic begins!
Step 6: Dressing It Up
Once you’ve achieved that beautiful amalgamation of ingredients, it’s time for perhaps the most exciting part: pouring on that zesty Italian dressing! Grab your favorite bottle or homemade concoction (and if you’re feeling adventurous, I highly recommend making your own for an extra personal touch). Drizzle about one cup over your pasta salad—don’t be shy here! This liquid gold not only adds flavor but also helps in marrying all the individual components into one cohesive dish. As you pour it on, imagine how those tangy notes will infuse through every layer of veggies and pasta.
After drenching everything in dressing, sprinkle in those freshly chopped herbs—be it parsley or basil—and fold gently once more. Fresh herbs are like nature’s confetti; they add brightness and an aromatic punch that elevates this dish from simple to extraordinary! Here’s a little tip: if you’re ever uncertain about how much dressing to use, start with less—you can always add more later if needed. Remember that we want our salad dressed beautifully without drowning it. This careful balance allows each ingredient’s natural flavors to come alive while still being kissed by that delightful Italian flair.
Step 7: Chilling Out for Flavor
Now comes a crucial step that often gets overlooked—the chilling process! Cover your masterpiece tightly with plastic wrap or a lid and place it in the refrigerator for at least two hours. I know waiting can be tough; however, I promise you that this time spent chilling is non-negotiable when it comes to developing flavor. As your pasta salad sits cold in its cozy fridge home, all those vibrant tastes begin to meld together into something truly extraordinary. The chill not only enhances texture but also allows each ingredient to absorb the zesty dressing fully—transforming every bite into an explosion of refreshing goodness.
If you’re planning for a gathering or potluck, try making this salad ahead of time! You can chill it overnight for even deeper flavor penetration. Just think about how fantastic it’ll be when you unveil this colorful creation at dinner or a picnic; everyone will marvel at how juicy and flavorful it is! When it’s finally time to serve up this beauty, don’t forget to give it a gentle stir again before plating—that way you ensure all those flavors stay mixed beautifully.
Step 8: Finishing Touches Before Serving
As you approach serving time—oh what joy!—it’s essential to give your chilled pasta salad one last look-over before presenting it to family or friends. Uncover that bright bowl filled with vibrancy and joy; at this point, you might notice some settling or separation—especially if left overnight—which is perfectly normal! Just gently stir everything together once more so every component remains evenly distributed.
Here’s where I suggest adding an optional sprinkle of shredded parmesan cheese right before serving. This cheesy addition lends an additional layer of richness and umami that pairs impeccably with the acidity of the dressing. If you’re feeling particularly fancy or adventurous, consider adding toasted pine nuts or sunflower seeds for a delightful crunch as well!
After tossing lightly once more with these finishing touches added in, grab some serving utensils and prepare yourself for compliments galore as guests dig in! Don’t forget to encourage everyone to savor each bite slowly—the symphony of flavors will leave them raving about your culinary prowess long after they’ve cleaned their plates!
Final Thoughts on Your Pasta Salad Creation
And there you have it—a stunning Pasta Salad with Italian Dressing ready for any occasion! This dish has become my go-to recipe because not only is it utterly intoxicating in taste but also incredibly versatile; feel free to swap out ingredients based on what’s fresh or seasonal—zucchini ribbons anyone? Or perhaps some sun-dried tomatoes for an extra kick? The possibilities are endless!
I hope as you create this masterpiece in your own kitchen, you’ll feel the warmth of loved ones gathered around sharing stories over bowls filled with laughter and delicious food. Enjoy every moment spent crafting this dish because cooking isn’t just about feeding ourselves—it’s about nourishing our souls too. Happy cooking!
Storage and Enjoyment Tips for Your Pasta Salad with Italian Dressing
Now that you’ve crafted this vibrant Pasta Salad with Italian Dressing, it’s time to savor every bite! This dish not only dazzles at the table but also makes for an incredible meal prep option that can fuel your week ahead. Imagine diving into a bowl of leftover salad, its flavors even more pronounced after mingling in the fridge—a culinary hug on a busy day. Let’s talk about how to store this beauty and keep the experience as delightful as when you first made it!
Storing Leftover Pasta Salad with Italian Dressing
To ensure your pasta salad remains fresh and flavorful, I recommend storing it in an airtight container, which is absolutely key to preserving those delightful flavors. A glass container works wonders, as it doesn’t absorb odors and allows you to see all those beautiful layers of color. When stored properly in the refrigerator, your pasta salad can last up to three days, but trust me, it rarely lasts that long because it’s just too delicious! If you’re worried about the pasta drying out or getting sticky, consider placing a slice of bread in the container—this little trick helps absorb excess moisture while keeping everything perfectly fresh. The flavors will continue to blend beautifully during storage, making each bite taste like a burst of summer—even if it’s winter outside! When you’re ready to enjoy it again, simply scoop out a portion and serve cold; there’s no need for reheating, as the chill complements the zesty dressing wonderfully.
Freezing Pasta Salad with Italian Dressing for Later
If you find yourself with more than enough salad (though I doubt that!), freezing is an excellent option. To freeze your pasta salad properly, divide it into single portions in freezer-safe bags or containers—this way, you can easily grab just what you need later without thawing the whole batch. It can stay frozen for up to two months without losing its charm. When you’re ready to indulge once more, simply transfer a portion from the freezer to the refrigerator and let it thaw overnight. The convenience factor here is superb; imagine having a quick meal ready at your fingertips on those days when cooking feels like climbing Everest! Plus, many of those vibrant veggies will retain their crunch even after freezing—it’s like having summer on standby!
Pasta Salad with Italian Dressing
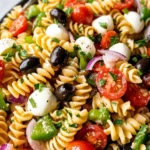
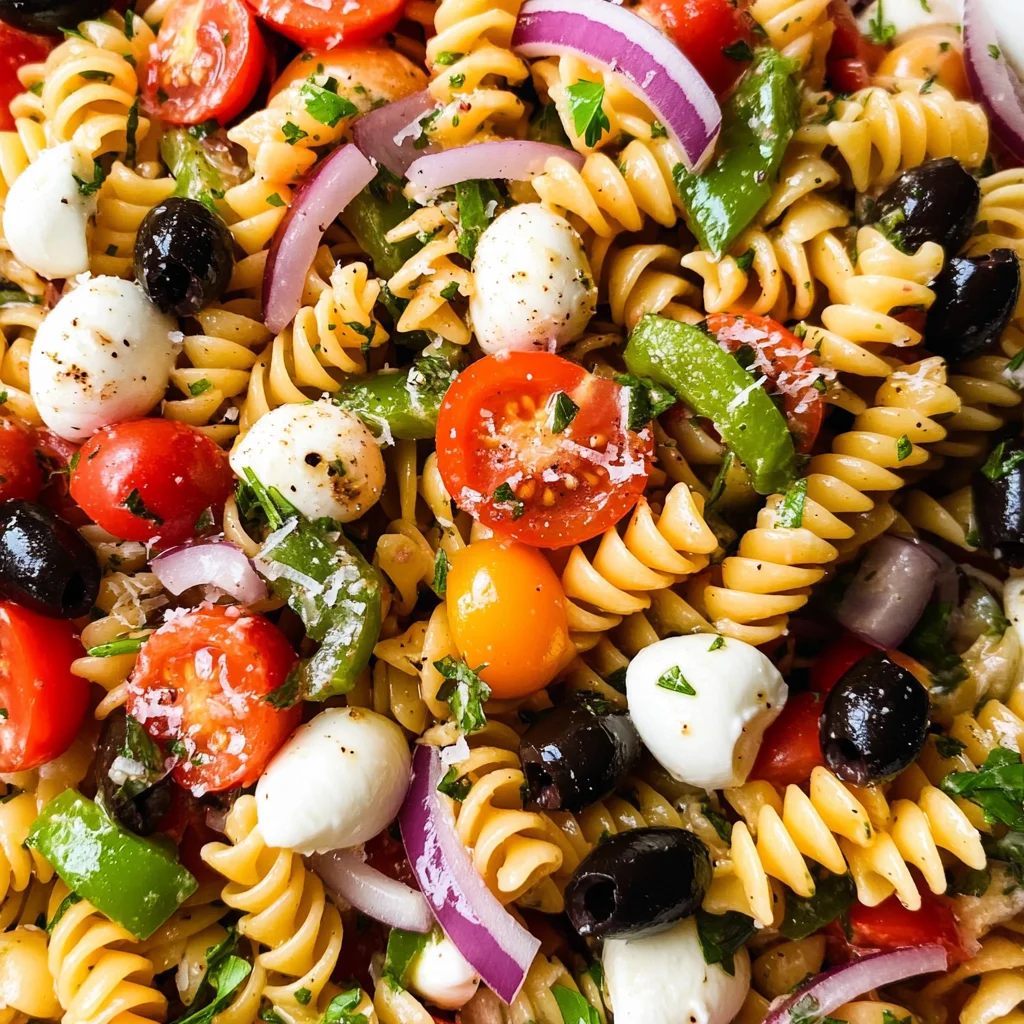
Pasta Salad with Italian Dressing is a vibrant and refreshing dish that combines colorful vegetables with zesty flavors for an unforgettable experience. Perfect for picnics, potlucks, or a light meal at home, this salad features tri-color rotini pasta tossed with sweet bell peppers, juicy cherry tomatoes, briny olives, and creamy mozzarella balls. The homemade Italian dressing ties it all together, enhancing the fresh ingredients while keeping every bite exciting. Easy to prepare and adaptable to your taste preferences, this pasta salad is not only visually appealing but also a delightful crowd-pleaser that brings people together around the table.
- Prep Time: 15 minutes
- Cook Time: 10 minutes
- Total Time: 25 minutes
- Yield: Serves approximately 8 people 1x
- Category: Salad
- Method: Mixing
- Cuisine: Mediterranean
Ingredients
- 1 (1-pound) box tri-color rotini pasta
- 1 red bell pepper, chopped
- 1 green bell pepper, chopped
- 2 cups cherry tomatoes, halved
- 1/2 cup sliced red onion
- 1 cup sliced olives (black or green)
- 8 ounces small mozzarella balls
- 1 cup Italian dressing
- 2 tablespoons chopped fresh herbs (parsley or basil)
Instructions
- Cook the tri-color rotini pasta in a large pot of salted boiling water until al dente (about 7-10 minutes). Drain and rinse under cold water to stop cooking.
- In a large mixing bowl, combine the cooled pasta with the chopped bell peppers, cherry tomatoes, red onion, olives, and mozzarella balls.
- Drizzle the Italian dressing over the mixture and add fresh herbs. Gently fold everything together until well combined.
- Cover and refrigerate for at least two hours to let the flavors meld before serving.
Nutrition
- Serving Size: 1 cup (approximately 200g)
- Calories: 250
- Sugar: 3g
- Sodium: 400mg
- Fat: 12g
- Saturated Fat: 4g
- Unsaturated Fat: 8g
- Trans Fat: 0g
- Carbohydrates: 30g
- Fiber: 3g
- Protein: 9g
- Cholesterol: 20mg