Peanut Butter Easter Eggs
If you’re looking for a delightful treat that combines the creamy richness of peanut butter with the sweetness of white chocolate, you’re in for a real treat! These Peanut Butter Easter Eggs are not only a fun nod to the classic candy we all love, but they also bring a bit of homemade charm to your dessert table. Perfect for Easter celebrations or any family gathering, these little gems are sure to make everyone smile. Plus, they’re super easy to whip up, making them great for busy days when you want to impress.
What I love most about this recipe is how customizable it is. You can get the kids involved in the decorating process, and who doesn’t love that? It’s a fantastic way to bond over something delicious and creative. Whether you’re indulging on a cozy weekend or bringing them to a spring picnic, these Peanut Butter Easter Eggs will be a hit!
Why You’ll Love This Recipe
- Quick and Easy: With just 6 ingredients for the filling, making these treats is a breeze.
- Family-Friendly Fun: Kids will enjoy shaping the eggs and adding their personal touch with sprinkles!
- Customizable Colors: Use natural dyes to create beautiful colors that suit any occasion.
- Make Ahead: Prepare them in advance for stress-free entertaining or as a sweet surprise.
- Delicious Flavor: The combination of peanut butter and white chocolate creates an irresistible taste that’s hard to resist.
Ingredients You’ll Need
Making these Peanut Butter Easter Eggs is simple thanks to wholesome ingredients that you may already have on hand. You’ll love how easy it is to gather everything together!
For the Peanut Butter Filling
- 1 1/4 cup natural, runny peanut butter (no sugar added)
- 1/4 cup maple syrup
- 1/4 cup powdered sugar
- 1/3 cup almond flour
- 1/2 teaspoon vanilla extract
- Pinch of salt
For the Coating
- 8 ounces white chocolate melting wafers (we use Ghirardelli brand)
- 2 teaspoons coconut oil
For Coloring
- 1/2 teaspoon blue spirulina + 1/4 teaspoon matcha powder (or use a 2:1 ratio of any blue and green food dye)
For the Speckles
- 1 teaspoon cocoa powder + 1 tablespoon water
Variations
This recipe is super flexible! Feel free to play around with different flavors and decorations.
- Swap the Nut Butter: Try almond or cashew butter for a different nutty flavor.
- Change the Sweetener: Use agave syrup or honey instead of maple syrup for sweetness.
- Add Chocolate Chips: Mix in some dairy-free chocolate chips into the filling for added texture.
- Get Creative with Dyes: Experiment with other natural colorings like beet juice for pink or turmeric for yellow!
How to Make Peanut Butter Easter Eggs
Step 1: Make the Filling
In a mixing bowl, beat together the peanut butter, maple syrup, powdered sugar, almond flour, vanilla extract, and salt until well combined. This step is crucial because it blends all those wonderful flavors together into a creamy filling that will be shaped into eggs later.
Step 2: Shape the Eggs
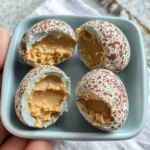
Portion out 2-tablespoon servings of your peanut butter filling. Roll each portion into a ball using your hands. Then gently shape each ball into an oval form—it should look like an egg! This step adds that fun touch that makes them festive.
Step 3: Freeze
Place your shaped eggs on a parchment paper-lined baking sheet and freeze them while you prepare the coating. Freezing helps firm up the filling so it holds its shape when you dip it in chocolate.
Step 4: Prepare the Cocoa Mixture
In a small bowl, whisk together cocoa powder and water until smooth. Set this aside; it will be used later for creating cute speckles on your eggs.
Step 5: Melt the Chocolate
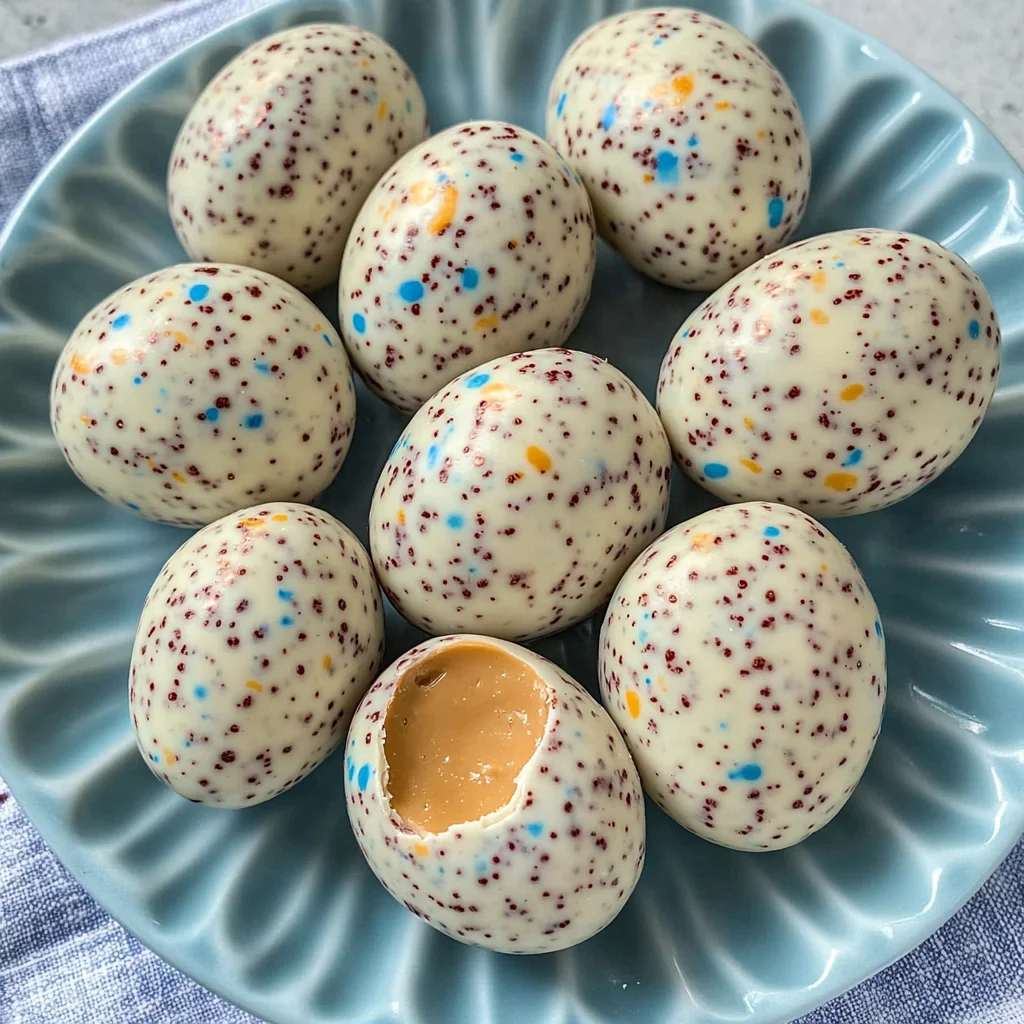
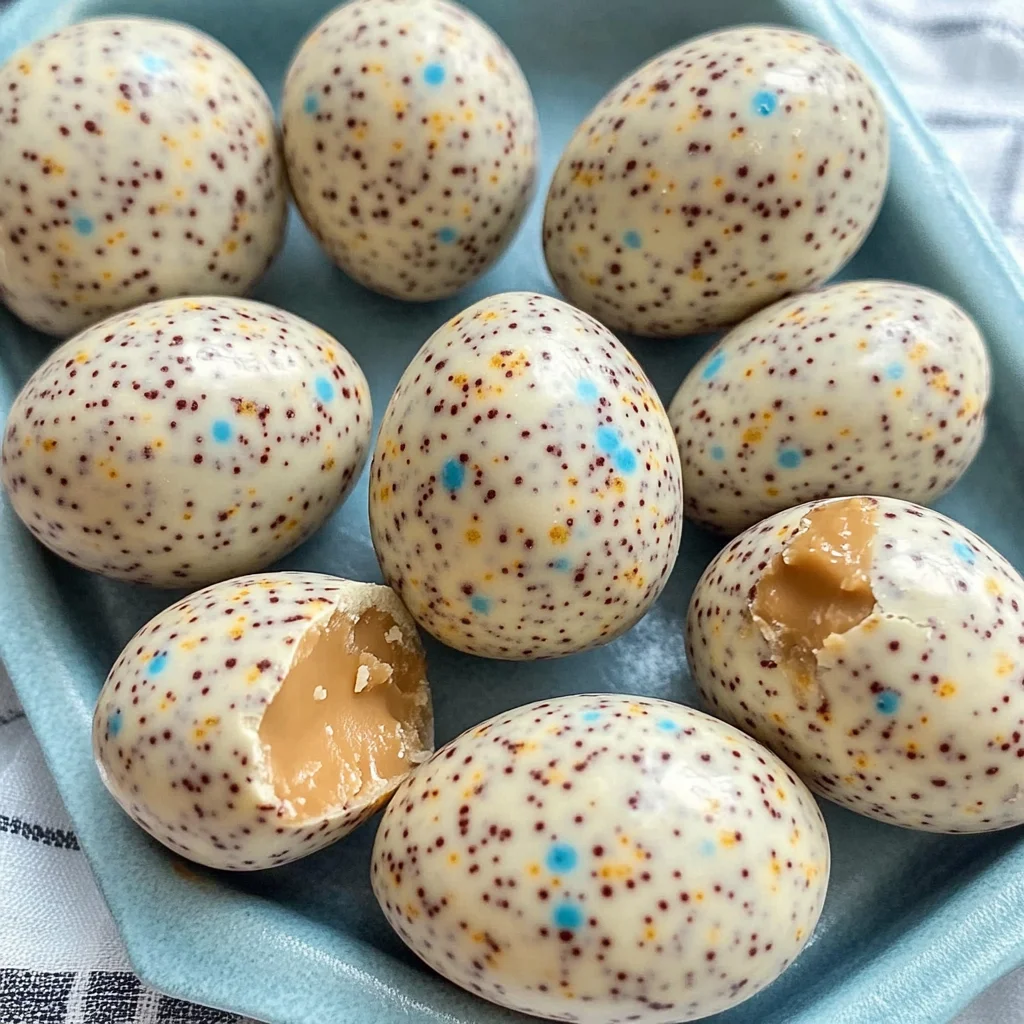
In a microwave-safe bowl, combine white chocolate melting wafers with coconut oil. Microwave in short bursts (15-20 seconds), stirring well between intervals until fully melted. Whisk in spirulina and matcha (or food coloring) until you get your desired hue. This step brings vibrant color to your treats!
Step 6: Coat the Eggs
Coating works best when they are semi-frozen; this helps keep everything neat. Stick a toothpick into one end of an egg and dip it into your melted chocolate mixture. Let it sit briefly so excess chocolate drips off before placing it back on parchment paper—remove that toothpick quickly but carefully!
Step 7: Add Speckles
Now comes the fun part! Dip a pastry brush into your cocoa mixture and flick it over each egg from about eight inches above—it creates adorable speckles! Just remember to wear an apron; things might get messy! Once done, refrigerate until everything sets—about ten minutes should do it.
Now you’re ready to enjoy your delicious Peanut Butter Easter Eggs! They make perfect treats for sharing or simply enjoying at home. Happy indulging!
Pro Tips for Making Peanut Butter Easter Eggs
Making your own Peanut Butter Easter Eggs can be a delightful experience, and these tips will ensure they turn out perfectly every time!
- Use natural peanut butter: Opting for natural peanut butter means no added sugar or unhealthy oils, allowing the pure flavor of peanuts to shine through in your filling.
- Chill before coating: Freezing the peanut butter eggs helps them hold their shape during the dipping process. This step prevents the chocolate from pooling underneath when you set them down.
- Experiment with colors: Don’t be afraid to mix and match different food colorings to achieve a unique look for your eggs. This is a great way to add a personal touch that makes them even more special!
- Practice speckling technique: Flicking cocoa powder at the right distance creates beautiful speckles, but practice on a paper towel first if you’re unsure! A little practice can help you master this fun technique without creating too much mess.
- Store properly: Keep your finished eggs in an airtight container in the refrigerator. This keeps them fresh and ensures they maintain their shape and flavor for longer.
How to Serve Peanut Butter Easter Eggs
These Peanut Butter Easter Eggs are not only delicious but also visually appealing! Here are some fun ways to serve them up.
Garnishes
- Edible flowers: A few edible flowers can give your plate a burst of color and elegance, making your dessert table look festive and inviting.
- Shredded coconut: Sprinkling some shredded coconut around your eggs gives a fun texture and enhances that Easter feel with its fluffy appearance.
Side Dishes
- Fresh fruit platter: A colorful array of seasonal fruits like strawberries, blueberries, and pineapple adds a refreshing contrast to the rich flavors of the peanut butter eggs.
- Carrot sticks with hummus: This healthy option provides a crunchy texture and balances the sweetness of the dessert while keeping with the Easter theme.
- Mini cupcakes: Light and airy mini cupcakes topped with pastel frosting make for an adorable addition that pairs wonderfully with these peanut butter treats.
- Chocolate-covered pretzels: The salty-sweet combination of chocolate-covered pretzels complements the richness of the peanut butter eggs beautifully, creating an irresistible snack spread.
With these serving suggestions, you’re set to impress your family and friends this Easter or any time you want to enjoy something sweet!
Make Ahead and Storage
These Peanut Butter Easter Eggs are a fantastic choice for meal prep! You can make them ahead of time, store them properly, and enjoy delicious treats whenever you crave something sweet.
Storing Leftovers
- Store any leftovers in an airtight container.
- Keep the container in the refrigerator to maintain freshness.
- Enjoy them within a week for the best flavor and texture.
Freezing
- Place the Peanut Butter Easter Eggs in a single layer on a parchment-lined baking sheet.
- Freeze until solid, then transfer to a freezer-safe bag or container.
- They can be frozen for up to 3 months. Just thaw in the fridge before enjoying!
Reheating
- These treats are best enjoyed cold or at room temperature, so there’s no need to reheat!
- If desired, let them sit out for about 15 minutes before serving to soften slightly.
FAQs
If you have questions about making these delightful treats, you’re not alone! Here are some common inquiries.
Can I use other nut butters for these Peanut Butter Easter Eggs?
Absolutely! Almond butter or cashew butter can be great alternatives. Just ensure they’re runny and natural for the best results.
How do I achieve different colors for my Peanut Butter Easter Eggs?
You can mix food coloring into the white chocolate coating for vibrant hues. Spirulina and matcha work well for natural colors!
Can I use regular chocolate instead of white chocolate?
Yes, you can substitute dark or milk chocolate if you prefer. Just remember that this will change the overall flavor profile!
How long do these Peanut Butter Easter Eggs last?
When stored correctly in an airtight container in the fridge, they can last up to a week. For longer storage, freezing is recommended!
Are these Peanut Butter Easter Eggs suitable for kids?
Definitely! These homemade treats are perfect for kids with adult supervision during preparation. They’ll love helping out!
Final Thoughts
These Peanut Butter Easter Eggs are not just a fun treat; they’re a delightful way to bring joy into your kitchen during special occasions or any day! I hope you enjoy making them as much as I did. Share them with family and friends or keep them all to yourself—either way, you’re in for a tasty treat! Happy cooking!
Peanut Butter Easter Eggs
Indulge in the delightful world of homemade Peanut Butter Easter Eggs, a charming treat that combines creamy peanut butter with a luscious white chocolate coating. Perfect for festive occasions or casual gatherings, these sweet treats are sure to impress family and friends alike. Not only are they easy to make, but they also offer a chance for creativity—let the kids join in on the fun by decorating their eggs with vibrant colors and sprinkles. With just a handful of wholesome ingredients and straightforward steps, this recipe is a perfect way to share love and sweetness any time of the year.
- Prep Time: 20 minutes
- Cook Time: 10 minutes
- Total Time: 30 minutes
- Yield: Approximately 12 eggs 1x
- Category: Dessert
- Method: No-Bake
- Cuisine: American
Ingredients
- 1 1/4 cup natural peanut butter (no sugar added)
- 1/4 cup maple syrup
- 1/4 cup powdered sugar
- 1/3 cup almond flour
- 8 ounces white chocolate melting wafers
- 2 teaspoons coconut oil
Instructions
- In a bowl, mix together peanut butter, maple syrup, powdered sugar, almond flour, vanilla extract, and salt until smooth.
- Roll the mixture into 2-tablespoon-sized balls and shape them into ovals resembling eggs.
- Freeze the shaped eggs on a parchment-lined baking sheet for about 30 minutes.
- Melt white chocolate wafers with coconut oil in short intervals until smooth; mix in food coloring if desired.
- Dip each egg into the melted chocolate and place it back on parchment paper. Use cocoa mixture to speckle if desired.
- Refrigerate until set (about 10 minutes) before serving.
Nutrition
- Serving Size: 1 egg (40g)
- Calories: 160
- Sugar: 8g
- Sodium: 70mg
- Fat: 10g
- Saturated Fat: 3g
- Unsaturated Fat: 7g
- Trans Fat: 0g
- Carbohydrates: 15g
- Fiber: 1g
- Protein: 4g
- Cholesterol: 0mg