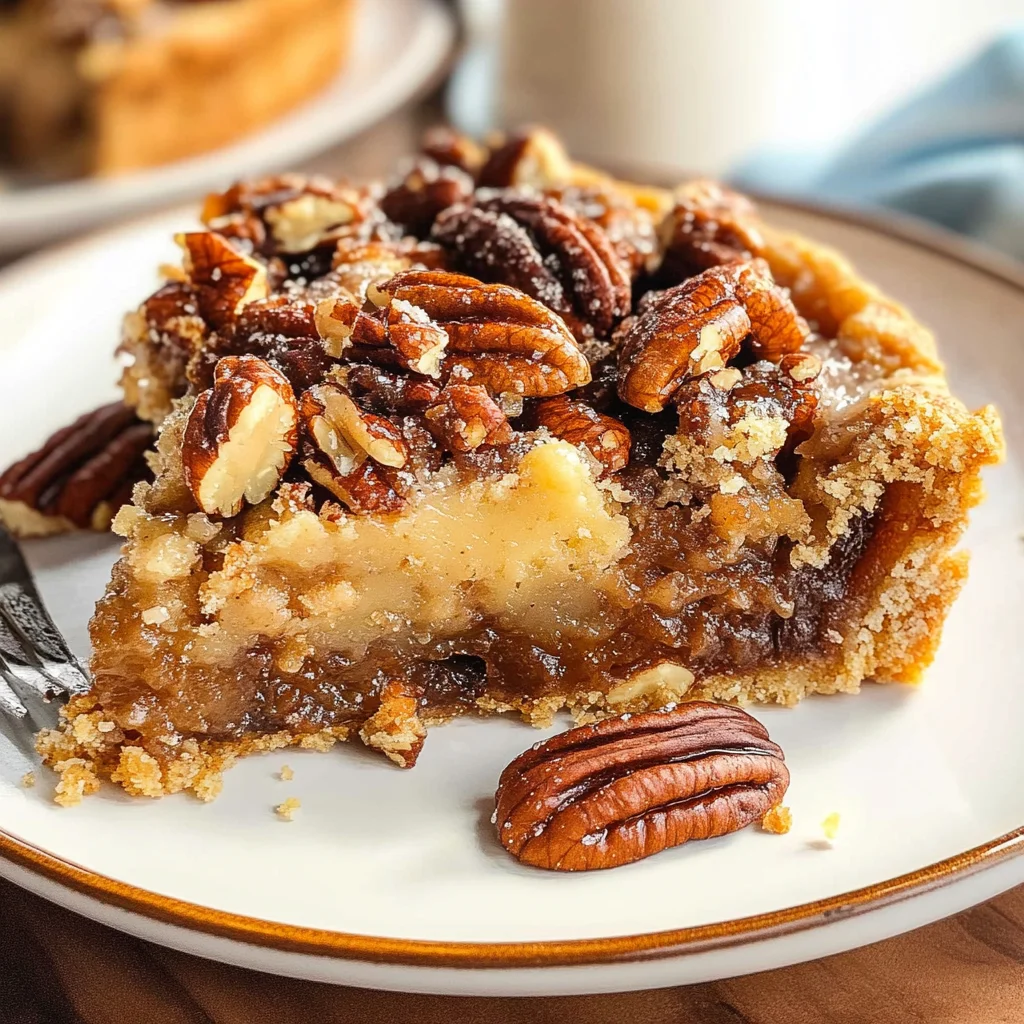
Pecan Pie Dump Cake: Gooey, Buttery, and Outrageously Easy
There’s something truly magical about baking that connects us to our roots and brings a sense of warmth and comfort into our lives. It’s not just about the ingredients; it’s about creating an experience that envelops you in a delightful embrace of scents and flavors. When I think of my favorite desserts, one recipe stands out like a beacon of joy—the Pecan Pie Dump Cake: Gooey, Buttery, and Outrageously Easy. This dessert is more than just a sweet treat; it’s a celebration of simplicity and indulgence wrapped in one glorious package. The moment you pull it from the oven, your home fills with the intoxicating aroma of toasted pecans mingling with buttery goodness, promising a slice of pure delight that beckons you to take a bite.
What I adore most about this recipe is its ability to bridge the gap between classic flavors and modern convenience. Imagine enjoying all the rich, gooey goodness of traditional pecan pie without needing to wrestle with crusts or complicated techniques. The layers of sweetened condensed milk and brown sugar create an almost caramel-like base, while the crunchy pecans add just the right amount of texture—it’s simply divine! Whether you’re baking for a festive gathering or just because you crave something comforting on a cozy weekend, this Pecan Pie Dump Cake will make your heart sing and your taste buds dance. Trust me when I say that once you try it, you’ll be adding it to your list of go-to desserts for years to come.
Pecan Pie Dump Cake: Gooey, Buttery, and Outrageously Easy: A Slice of Heaven
If you’re ready to embark on this culinary journey with me, let’s dive into the details of what makes this Pecan Pie Dump Cake so special. Each ingredient plays a vital role in crafting this easy yet spectacular dessert that is sure to impress anyone lucky enough to have a slice.
Ingredients:
Gathering your ingredients is like assembling the pieces of a beautiful puzzle—each one has its unique role that contributes to the whole masterpiece we’re about to create together.
- 1 can (15 oz) sweetened condensed milk. This creamy nectar acts as the glue that binds everything together in our Pecan Pie Dump Cake: Gooey, Buttery, and Outrageously Easy. It adds sweetness and moisture, turning our cake into an incredibly gooey delight reminiscent of classic pecan pie filling. When selecting sweetened condensed milk, look for brands that use high-quality dairy for the richest flavor.
- 1/2 cup brown sugar, packed. Brown sugar brings depth and richness to our cake thanks to its molasses content. This ingredient enhances not only sweetness but also adds those delightful caramel notes that elevate every bite. Always pack it down firmly when measuring; this ensures we get just the right amount for optimal gooeyness.
- 3 large eggs. Eggs are nature’s perfect binding agent; they provide structure while allowing our cake to rise beautifully in the oven. Be sure they’re at room temperature before mixing them in—this small detail helps them incorporate smoothly into our batter for an even texture throughout.
- 1 tbsp vanilla extract. Ahh, vanilla—the quintessential flavor enhancer! This simple ingredient transforms our cake from ordinary to extraordinary by adding warmth and depth. Always opt for pure vanilla extract if possible; its complex flavor profile is worth every penny compared to imitation versions.
- 2 cups pecan halves. These little gems are what truly set our cake apart! Their crunchy texture provides a wonderful contrast against the gooey filling while their nutty flavor complements all the sweetness beautifully. Toasting them briefly before adding can enhance their flavor further—just keep an eye on them so they don’t burn!
- 1 box (about 15.25 oz) yellow cake mix. This is where we really simplify things! Using boxed cake mix allows us to skip tedious steps while still achieving incredible results—trust me on this! Choose a quality brand without artificial flavors or colors; after all, we want every bite of our Pecan Pie Dump Cake to shine!
- 1 cup (2 sticks) unsalted butter, melted. Butter is life! Not only does it lend richness and moisture to our dump cake, but it also creates that lovely golden crust on top as it bakes away in the oven’s embrace. Make sure it’s fully melted but not bubbling hot when you drizzle it over your cake mix—this ensures even distribution without cooking anything prematurely.
Equipment You’ll Need:
Now that we have all our delightful ingredients gathered up like old friends reuniting at a dinner party, let’s talk about some essential tools that will make this process smoother and more enjoyable! While they may not be ingredients themselves, these kitchen companions are crucial players in ensuring our baking adventure goes off without a hitch.
- 9×13-inch baking dish – This size is absolutely perfect for ensuring even baking across all corners of our dump cake while providing enough space for those delightful layers to meld together as they bake into gooey perfection.
- Mixing bowls – A good set of mixing bowls is essential for combining ingredients efficiently without any spills or messes—a must-have when working with sticky sweetened condensed milk! Opt for glass or stainless steel for maximum durability; trust me—you’ll thank yourself later!
- Whisk – A sturdy whisk will help you combine those wet ingredients smoothly until they’re completely incorporated—there’s something satisfying about watching everything come together into one luscious mixture!
- Rubber spatula – This tool is invaluable when it comes time to scrape down sides and folds gently into mixtures without deflating any air we’ve worked hard to incorporate—an absolute necessity for achieving that perfect texture.
With our ingredients prepped and equipment ready at hand, we’re just moments away from creating something utterly enchanting together!
Preparing the Pecan Pie Dump Cake: Gooey, Buttery, and Outrageously Easy / Making Magic Happen
Step 1: Preheat Your Oven & Prepare Your Dish
The first step towards creating this heavenly dessert begins with preheating your oven to 350°F (175°C). Preheating isn’t just an afterthought—it sets up an ideal environment so your dump cake can rise beautifully from the get-go! While that’s happening, grab your trusty 9×13-inch baking dish and give it a light greasing with some non-stick spray or butter; this step ensures easy release later on when you’re ready to serve up slices filled with gooey goodness.
Step 2: Whisk Together Wet Ingredients
Once your oven has reached its desired temperature and your dish is prepped like a canvas awaiting artful strokes from an artist’s brush, it’s time to whisk together those luscious wet ingredients! In a mixing bowl large enough for some elbow room (you’ll be glad later), combine the sweetened condensed milk with packed brown sugar—a match made in heaven if ever there was one! Add in those three large eggs—their job here is crucial as they bring everything together—and finish off by pouring in fragrant vanilla extract too! Whisk away until these elements blend seamlessly into one another; you want everything fully combined so each slice boasts consistent flavors throughout.
Step 3: Introduce Those Pecans
With your wet mixture ready and waiting patiently on standby like eager supporters cheering their team on from the sidelines, it’s time now introduce those beautiful pecan halves! Gently fold them into this decadent mixture using either a spatula or wooden spoon—be careful not too overmix here; we want those lovely nutty morsels distributed evenly without breaking them apart too much beforehand! Once incorporated thoroughly yet delicately as if handling precious jewels themselves—it’s time pour this dreamlike concoction directly into your greased baking dish.
Step 4: Sprinkle & Drizzle
Now comes my favorite part—the layering magic begins! Grab that yellow cake mix box we set aside earlier—it should feel like holding treasure now—and evenly sprinkle its contents across every inch atop your moist pecan base below; don’t stir anything yet—that’s crucial! Next up comes drizzling melted butter across this entire surface area; aim for coverage as best as possible so each corner gets kissed by liquid gold goodness while simultaneously assuring nice browning later during baking time once placed inside hot oven awaiting transformation into something truly extraordinary!
And there you have it—the first steps toward creating your very own Pecan Pie Dump Cake: Gooey, Buttery, and Outrageously Easy are complete! Stay tuned as we continue unraveling more secrets behind making magic happen through decadent desserts worthy celebrating all occasions—from casual gatherings among friends family festivities alike!
Step 5: The Sweet Symphony of Layers
Now that we’ve poured our luscious sweetened condensed milk mixture into the baking dish, it’s time to create the glorious layers that will make this Pecan Pie Dump Cake truly shine. Grab your box of yellow cake mix and sprinkle it evenly over the surface of that rich filling. This is where the magic really begins! The cake mix acts as a sponge, soaking up all the delightful flavors from the sweetened condensed milk and brown sugar mixture as it bakes. Don’t be tempted to stir or mix at this point—trust me on this; keeping those layers distinct is crucial for achieving that incredible texture you’re aiming for. You want to maintain a delicate balance between the gooey bottom and the cake layer that will form on top.
As you sprinkle, take your time—this isn’t just about dumping ingredients together; it’s about creating a beautiful dessert that looks as good as it tastes. Each spoonful should evoke a sense of excitement, and achieving that starts with this step. Look for an even coating across the entire surface, ensuring no bare spots are left behind. If you notice any clumps, gently break them apart with your fingers. It’s all about ensuring every bite has a delightful combination of flavors and textures waiting for you.
Step 6: The Golden Drizzle
Ah, now we come to my favorite step—the buttery drizzle! Melt one cup (that’s two sticks) of unsalted butter until it’s liquid gold, then take a deep breath and prepare for some serious transformation. Drizzling melted butter evenly across the dry cake mix is non-negotiable; it’s what will create that beautiful golden crust on top while also adding richness to the entire dessert. As you pour, let your heart guide your hand—aim for every nook and cranny of the dry mix, ensuring it’s all generously coated with that buttery goodness.
Why is this step so important? Well, butter not only adds flavor but also moisture and structure to our cake layer. As it bakes, the butter seeps into the cake mix below, creating a deliciously moist crumb while simultaneously forming a slightly crisp topping that contrasts beautifully with the gooey filling underneath. This duality in textures is what makes eating this dessert such a profoundly satisfying experience! Just remember—don’t skimp on this part; every drop of butter counts!
Step 7: Baking to Perfection
With everything layered beautifully in place, it’s finally time to pop your creation into the oven! Set your timer for 45-50 minutes at 350°F (175°C) and let the magic unfold. While it’s baking, resist the urge to open that oven door too soon; I promise you, patience is key here! As your cake bakes away, you’ll be enveloped in an utterly intoxicating aroma wafting through your kitchen—a warm embrace that promises sweet indulgence.
Keep an eye on it during those last few minutes; you’re looking for a gorgeous golden-brown color bubbling up around the edges. The center may still jiggle slightly when you give it a gentle shake—that’s completely normal! What you’re aiming for is that golden crust combined with bubbly goodness peeking through as evidence that everything is coming together perfectly. Remember, every oven can be slightly different due to its calibration or hot spots; so if yours tends to run hotter or cooler than average, adjust accordingly by adding or reducing time by a few minutes.
Step 8: Cooling Down – The Waiting Game
Once you’ve pulled your Pecan Pie Dump Cake from the oven—oh my goodness, isn’t it beautiful?—it’s crucial to let it cool for about 15-20 minutes before serving. I know waiting can feel agonizing when you have something so delectable in front of you! But trust me on this; allowing it to rest is essential for letting all those layers settle and firm up just enough so that each bite holds its shape beautifully when served.
During cooling, you’ll notice how those lovely layers meld together even more harmoniously—it’s like they are getting cozy after their time in the heat! Plus, serving it warm allows all those gooey flavors to burst forth with each spoonful while still being manageable enough to scoop out without creating a messy situation (though I wouldn’t judge if there were some mess involved!). So grab yourself a cup of coffee or tea during those precious moments of anticipation—it’ll make indulging in this sweet treat even more rewarding!
Final Touches: The Ultimate Indulgence
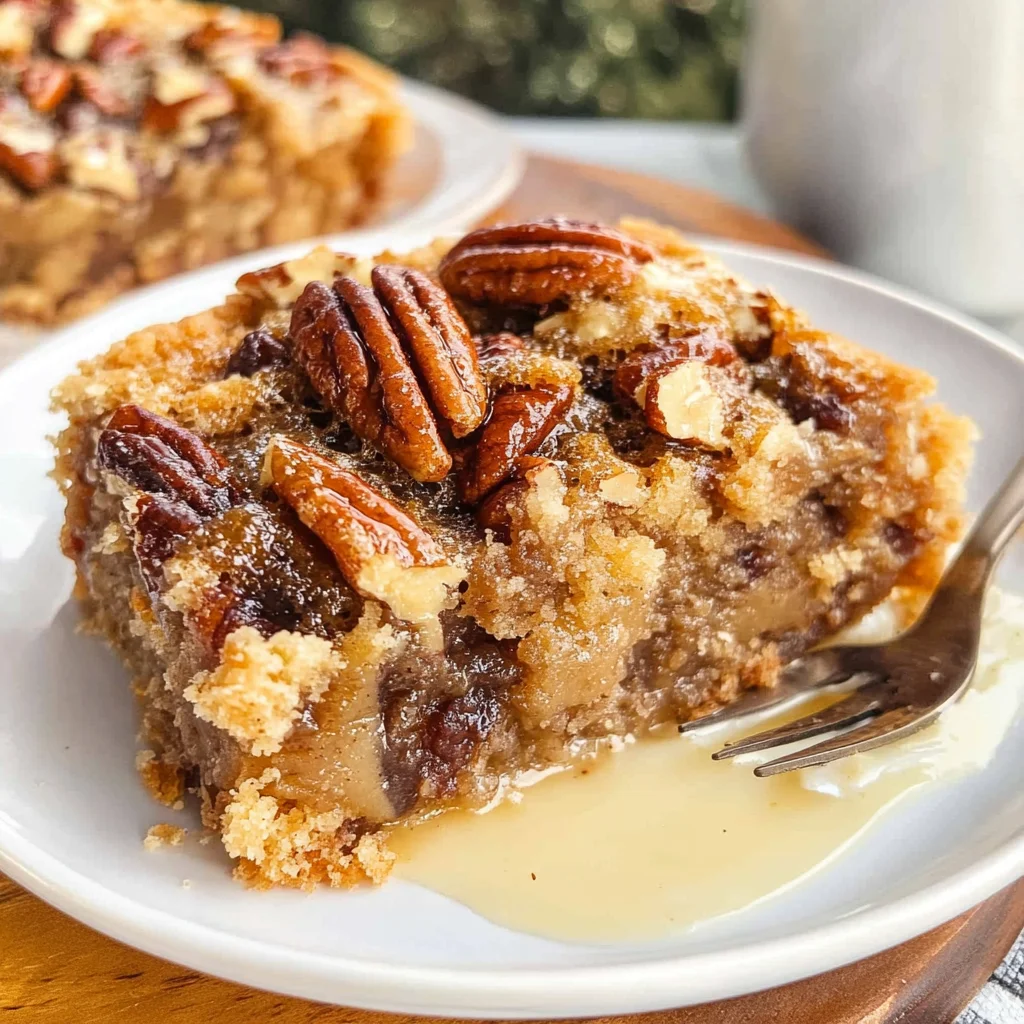
Now comes one of my favorite parts—serving up this decadent delight! Once your Pecan Pie Dump Cake has cooled just enough so you can handle it without burning your fingertips off (not ideal), grab yourself a generous scoop of vanilla ice cream to accompany each slice. This addition elevates everything from merely delicious to utterly extraordinary! The cold creaminess contrasts beautifully with the warm gooey filling—a symphony of temperatures dancing together on your palate.
As you serve each portion onto plates, take care to include both those crunchy pecans on top and plenty of that luscious filling beneath—it’s all about balance here! And don’t forget to drizzle any remaining syrupy goodness from the baking dish over each slice for extra indulgence. Trust me when I say this dessert isn’t just food; it’s an experience meant to be shared with loved ones around a table filled with laughter and joy.
So go ahead—dive into this Pecan Pie Dump Cake: Gooey, Buttery, and Outrageously Easy—and relish every moment shared over bites bursting with flavor! Whether it’s an everyday celebration or special occasion, I promise you won’t be disappointed—your tastebuds will thank you later! Happy baking!
Storage and Enjoyment Tips for Your Pecan Pie Dump Cake: Gooey, Buttery, and Outrageously Easy
With your Pecan Pie Dump Cake freshly baked and the golden, gooey top glistening in front of you, it’s time to indulge! The aroma wafting through your kitchen is simply irresistible, promising a bite of sweet, nutty bliss that will warm your heart and fill your home with joy. But what if there’s some left over? Fear not, my friends! This delightful dessert has some tricks up its sleeve when it comes to storage.
Storing Leftover Pecan Pie Dump Cake: Gooey, Buttery, and Outrageously Easy
To keep your leftover Pecan Pie Dump Cake at its best, you’ll want to transfer it to an airtight container. If you’re like me and can’t resist the sight of that luscious dessert sitting on the counter, you can also cover it tightly with plastic wrap or aluminum foil. It will stay fresh at room temperature for about 2-3 days; however, if you want to extend its life a bit longer, popping it in the fridge is a great idea—up to a week! I highly recommend placing a slice of bread in the container with it; this little trick helps maintain moisture while preventing that dreaded drying out. Even after a few days in storage, you’ll find that the flavors only deepen and meld together beautifully. When you’re ready to enjoy it again (and trust me, you will be), simply warm individual servings in the microwave for about 20 seconds—it’s absolutely divine when served warm!
Freezing Pecan Pie Dump Cake for Later
If you find yourself with more than enough cake (though I doubt that!), freezing is a fantastic option! To do this properly, allow the cake to cool completely before slicing it into squares. Wrap each piece tightly in plastic wrap and then place them in an airtight freezer bag or container. If stored properly, your Pecan Pie Dump Cake can last for up to 3 months in the freezer without losing any of its delightful charm! The beauty of freezing slices means you can pull them out one by one whenever you’re craving something sweet or need a quick dessert for unexpected guests. Just let it thaw in the refrigerator overnight or pop it straight into the microwave for a quick treat. Trust me on this—it’s such a convenient way to ensure that deliciousness is always just moments away!
Pecan Pie Dump Cake: Gooey, Buttery, and Outrageously Easy
Indulge in the magic of baking with our Pecan Pie Dump Cake: Gooey, Buttery, and Outrageously Easy! This delightful dessert combines the rich flavors of sweetened condensed milk and brown sugar to create a luscious, caramel-like base. Topped with crunchy pecans and a golden cake layer, it’s an effortless treat that promises to bring warmth and joy to any occasion. Perfect for gatherings or cozy weekends at home, this recipe requires minimal effort yet delivers maximum flavor. Whether served warm with a scoop of vanilla ice cream or enjoyed on its own, each slice offers a comforting experience that will leave everyone craving more. Dive into this delicious adventure today!
- Prep Time: 10 minutes
- Cook Time: 50 minutes
- Total Time: 1 hour
- Yield: Serves approximately 12 people 1x
- Category: Dessert
- Method: Baking
- Cuisine: American
Ingredients
- 1 can (15 oz) sweetened condensed milk
- 1/2 cup packed brown sugar
- 3 large eggs
- 1 tbsp vanilla extract
- 2 cups pecan halves
- 1 box (15.25 oz) yellow cake mix
- 1 cup (2 sticks) unsalted butter, melted
Instructions
- Preheat your oven to 350°F (175°C) and grease a 9×13-inch baking dish.
- In a large mixing bowl, whisk together the sweetened condensed milk, brown sugar, eggs, and vanilla until smooth.
- Fold in the pecans gently and pour the mixture into the prepared baking dish.
- Evenly sprinkle the yellow cake mix over the filling without stirring.
- Drizzle melted butter over the top of the cake mix to ensure even coverage.
- Bake for 45-50 minutes until golden brown and bubbly around the edges.
- Allow to cool for 15-20 minutes before serving.
Nutrition
- Serving Size: 1 slice (approximately 125g)
- Calories: 350
- Sugar: 23g
- Sodium: 210mg
- Fat: 22g
- Saturated Fat: 10g
- Unsaturated Fat: 10g
- Trans Fat: 0g
- Carbohydrates: 36g
- Fiber: 1g
- Protein: 5g
- Cholesterol: 80mg