Pistachio Chocolate Lava Cakes Recipe
There’s something truly magical about the first bite of a molten chocolate lava cake, isn’t there? The moment you break into that rich, dark exterior, and a river of warm, gooey chocolate flows out like liquid gold, it’s an experience that transcends mere dessert—it becomes a revelation. Now imagine that same sensation, but with an added twist of delightful pistachio cream at its core! This Pistachio Chocolate Lava Cakes Recipe is not just about satisfying a sweet tooth; it’s about indulging in a symphony of flavors that dances on your palate. I promise you, the bittersweet notes of dark chocolate harmonizing with the nutty richness of pistachio will have you falling head over heels.
Baking these little beauties is more than just following a set of instructions; it’s about creating a moment to share with loved ones. Whether it’s a special dinner party or an intimate gathering, these cakes are sure to steal the spotlight and warm hearts. As the aroma wafts through your kitchen—rich chocolate mingling with the earthy scent of pistachios—you’ll find yourself transported to a place where comfort meets elegance. So grab your apron and let’s embark on this delicious journey together!
Pistachio Chocolate Lava Cakes Recipe: A Sweet Surprise Awaits
Welcome to one of my absolute favorite recipes! These Pistachio Chocolate Lava Cakes are perfect for satisfying those intense dessert cravings while still impressing your friends and family with something unique and flavorful. Trust me when I say that these individual cakes will become a staple in your dessert repertoire once you see how easy they are to make—and how utterly intoxicating they taste.
Ingredients:
Let’s dive into our ingredient list! Each component plays a crucial role in crafting these decadent little cakes, so I want to ensure you understand why they matter.
- 1/2 cup white chocolate chips. This ingredient forms the foundation of our luscious pistachio center. White chocolate is sweet and creamy, balancing beautifully with the nuttiness of the pistachio paste while adding that velvety texture we crave in desserts. When choosing white chocolate chips, look for high-quality options without any artificial additives; this makes all the difference in flavor and texture.
- 1/4 cup pistachio paste (unsweetened or lightly sweetened). Ah, pistachio paste—the star of our lava filling! Its rich flavor adds depth and complexity to each cake. If you can find unsweetened pistachio paste, that’s fantastic because it allows you to control the sweetness level more effectively. This nutty concoction melds perfectly with the white chocolate, creating an indulgent surprise at the center that will leave everyone guessing about its divine flavor.
- 1 tablespoon heavy cream. This is essential for achieving that silky-smooth consistency in our filling. Heavy cream adds richness and helps bind everything together beautifully without being too runny or thick. Remember, quality counts here too—opt for fresh cream without additives for the best results.
- Pinch of salt. You might wonder why we need salt in dessert—a simple pinch does wonders by enhancing all those wonderful flavors we’ve got going on here! It balances sweetness while bringing out the best in both the chocolate and pistachios.
For the Chocolate Lava Cake
- 1/2 cup (115g) unsalted butter. Butter is crucial in creating that tender crumb we all love in baked goods. Ensure it’s softened to room temperature before using; this allows it to cream properly with sugars later on, ensuring even distribution throughout your batter. If you’re feeling adventurous, try using European-style butter for an extra rich flavor!
- 4 ounces (115g) dark chocolate (60–70%), chopped. Dark chocolate provides not only flavor but also that signature fudgy texture we associate with lava cakes. The higher cocoa content gives depth—a bittersweet contrast against our sweet filling—and ensures that melting moment when you cut into them is absolutely mesmerizing.
- 2 large eggs & 2 large egg yolks. These are non-negotiable here! Eggs provide structure while also contributing moisture to our cake batter—essential for achieving that soft yet stable outer layer surrounding our molten center.
- 1/3 cup (70g) granulated sugar. Sugar does more than just sweeten; it caramelizes during baking, helping create that slight crispness on top while keeping our centers delightfully gooey.
- 1/8 teaspoon salt again plays its important role here by enhancing sweetness while balancing flavors across our cake.
- 2 tablespoons all-purpose flour contributes just enough structure without making our cakes dense—this is key for achieving that perfect molten interior!
- Cocoa powder for dusting acts as both decoration and flavor enhancer; it adds depth while preventing sticking—no one wants their cakes stuck inside their ramekins!
- Chopped pistachios for garnish (optional) adds not just visual appeal but also crunch, making each bite even more delightful.
Now that we’ve gathered all these wonderful ingredients together, let’s talk about how we’re going to transform them into something extraordinary!
Equipment You’ll Need:
Before we start mixing things up in the kitchen, let’s take a moment to discuss some essential tools you’ll need on this baking adventure! Having the right equipment can make all the difference between a smooth process and a frustrating one.
- Ramekins (6-ounce size) – These little pots are perfect for baking individual servings of lava cake! They hold just enough batter for each serving while allowing heat circulation around each cake so they bake evenly—a key factor in getting those beautiful molten centers!
- Mixing bowls (various sizes) – You’ll need sturdy mixing bowls for combining ingredients at different stages—from melting chocolate to whisking eggs—having various sizes makes managing different elements easier.
- Double boiler or microwave-safe bowl – You can use either method to melt your white chocolate without scorching it—a double boiler ensures gentle heating while microwaving offers speed if you’re careful not to overdo it!
- Spatula – A good silicone spatula is essential for folding batter gently without deflating it—it also helps scrape every last bit from bowls so nothing goes wasted!
- Baking tray – Using one makes transferring ramekins into and out of hot ovens safe and straightforward—don’t underestimate this tool during busy baking sessions!
Now we’re equipped with knowledge AND tools—we’re ready to dive headfirst into making these heavenly Pistachio Chocolate Lava Cakes!
Step 1: Creating Your Luscious Pistachio Filling
Let’s kick off by preparing that dreamy pistachio filling! In a heatproof bowl—your trusty double boiler works wonders here—melt together ½ cup of white chocolate chips along with 1 tablespoon of heavy cream over simmering water until smooth and silky like satin fabric under your fingertips. If you’re opting for microwave melting instead, be sure to do this in 20-second intervals while stirring until melted completely — this prevents scorching since white chocolate can be temperamental if left unattended! Once melted completely, stir in ¼ cup of unsweetened or lightly sweetened pistachio paste along with just a pinch of salt until everything melds beautifully into one harmonious mixture. This step is crucial because it creates that creamy center which will enchant everyone when they break open their cakes later on! Spoon this luscious blend into small silicone molds or an ice cube tray—aiming for six equal discs—and pop them into your freezer for at least an hour until solidified; trust me when I say you don’t want any mushy centers when serving these up later!
Step 2: Preparing Your Ramekins
While those delightful discs chill away happily in their icy home, let’s turn our attention toward prepping our ramekins! Preheat your oven to a cozy 425°F (220°C) so it’s warmed up and ready when we’re finished assembling everything together later on. Take six 6-ounce ramekins and generously grease them with unsalted butter—the reason behind this step? We don’t want sticky situations ruining our beautiful creations as they emerge from their molds later! After greasing them well, dust each ramekin lightly with cocoa powder by shaking it around like confetti before turning upside-down—this gives not only visual appeal but also enhances flavor subtly as mentioned earlier! Once done prepping these little pots of magic comfortably resting atop a sturdy baking tray awaits their delicious fate within warm oven walls soon enough…
Step 3: Crafting That Fudgy Chocolate Batter
Now let’s move along swiftly into making what truly makes lava cakes so spectacular—the batter itself! Start by melting together ½ cup unsalted butter along with four ounces dark chocolate (60–70% cocoa), stirring frequently until everything marries seamlessly into one luxurious pool of chocolaty goodness—you can use either saucepan over low heat or microwave if preferred but remember patience pays off here as well since burnt chocolate can ruin everything quickly! Meanwhile—in another medium-sized mixing bowl—whisk together two whole eggs plus two egg yolks along with ⅓ cup granulated sugar alongside ⅛ teaspoon salt until thickened slightly resembling pale sunshine after beating vigorously around two minutes—it should feel airy yet substantial at once before slowly incorporating melted chocolate mixture gently ensuring no streaks remain visible afterwards… Finally add two tablespoons all-purpose flour gradually folding gently through avoiding overmixing which could lead us astray from fluffy textures desired throughout baking process ahead!
Step 4: Assembling The Magic
With everything now prepared beautifully—including those frozen pistachio discs—we’re ready for assembly time where dreams come true inside those adorable ramekins! Take approximately two tablespoons worth of your luscious chocolate batter mix and spoon carefully onto bottom surface within each greased vessel forming base layer underneath future heavenly filling awaiting its glorious destiny… Next up comes placing one frozen pistachio disc lovingly atop each base layer followed by covering them entirely once again using remaining batter leaving roughly three-quarters full overall inside each ramekin—that way there’ll be room left above giving ample space needed during rising action happening inside hot oven moments away from arrival soon enough… Don’t rush this step; take care as every detail matters leading towards satisfaction achieved upon breaking open warm treats later down road…
And there you have it—the first steps towards creating these incredible Pistachio Chocolate Lava Cakes are complete! With each detail lovingly crafted thus far leading us closer toward dessert bliss awaiting patiently ahead—I hope you’re feeling as excited as I am right now because trust me when I say there’s nothing quite like witnessing pure joy spread across faces upon serving these exquisite delights straight from oven onto plates shortly thereafter… Keep going strong—we’re almost there together!
Step 5: Assemble the Lava Cakes with Love
Now comes the most exhilarating part of our Pistachio Chocolate Lava Cakes Recipe—assembling these little wonders! Grab your prepared ramekins and the luscious chocolate batter you just made. Spoon about 2 tablespoons of this velvety mixture into the bottom of each greased ramekin, spreading it gently to create an even base. This initial layer is crucial because it forms the cake’s foundation, ensuring that our molten center has a cozy home to nestle in. By using just the right amount of batter, you’re creating enough space for that gooey pistachio surprise we’ve all been dreaming about.
Next, take your frozen pistachio discs—those beautiful green circles filled with nutty goodness—and place one in the center of each ramekin atop the chocolate layer. Trust me on this; this step is where the magic happens! The pistachio filling will create that iconic “lava” effect when the cakes are baked. Cover each disc with another spoonful or two of chocolate batter until they’re about three-quarters full. Be mindful not to overfill; we want them to have room to rise and puff beautifully without spilling over. As you gently smooth the top, breathe in that intoxicating aroma of rich chocolate—it’s a sign that something truly extraordinary is coming together.
Step 6: Bake Your Delicious Creations
With your lava cakes assembled, it’s time to send them off into the heat of the oven! Preheat your oven to a sizzling 425°F (220°C). This high temperature is absolutely paramount because it creates a quick bake that sets the outer layer while keeping that dreamy center molten. Place your ramekins on a baking tray for easy handling; trust me, it’s much easier than trying to maneuver them individually in and out of the oven! As they bake, keep an eye on them through that oven window—it’s almost like watching magic unfold.
Bake for about 11 to 13 minutes, but be vigilant as ovens can vary quite a bit. You want those edges firm and slightly puffed up while the center still jiggles ever so slightly when you gently shake them. Why does this matter? If you bake them too long, you’ll lose that glorious liquid core, which is what makes these cakes so special and utterly addictive. So don’t rush this step! The anticipation should build as you watch them rise and set—a true testament to patience and love in pastry making.
Step 7: The Art of Resting
Once your beautiful lava cakes are out of the oven, resist the urge to dig in immediately! Letting them rest for just one minute may feel like an eternity, but it’s essential for achieving that ideal texture. During this brief moment away from heat, the outer layer will continue cooking slightly while allowing those molten centers to stabilize just enough for easy release from their ramekins. If you skip this crucial resting period, you risk having your cakes collapse or disintegrate when turned out onto plates.
After a minute has passed—you can practically taste the excitement—gently run a knife around the edges of each ramekin if needed. This small act can mean all the difference in ensuring that each cake releases cleanly without losing its shape or integrity. I promise you; seeing those perfectly formed cakes flip onto your plates will be a moment worth celebrating!
Step 8: Serve with Joy
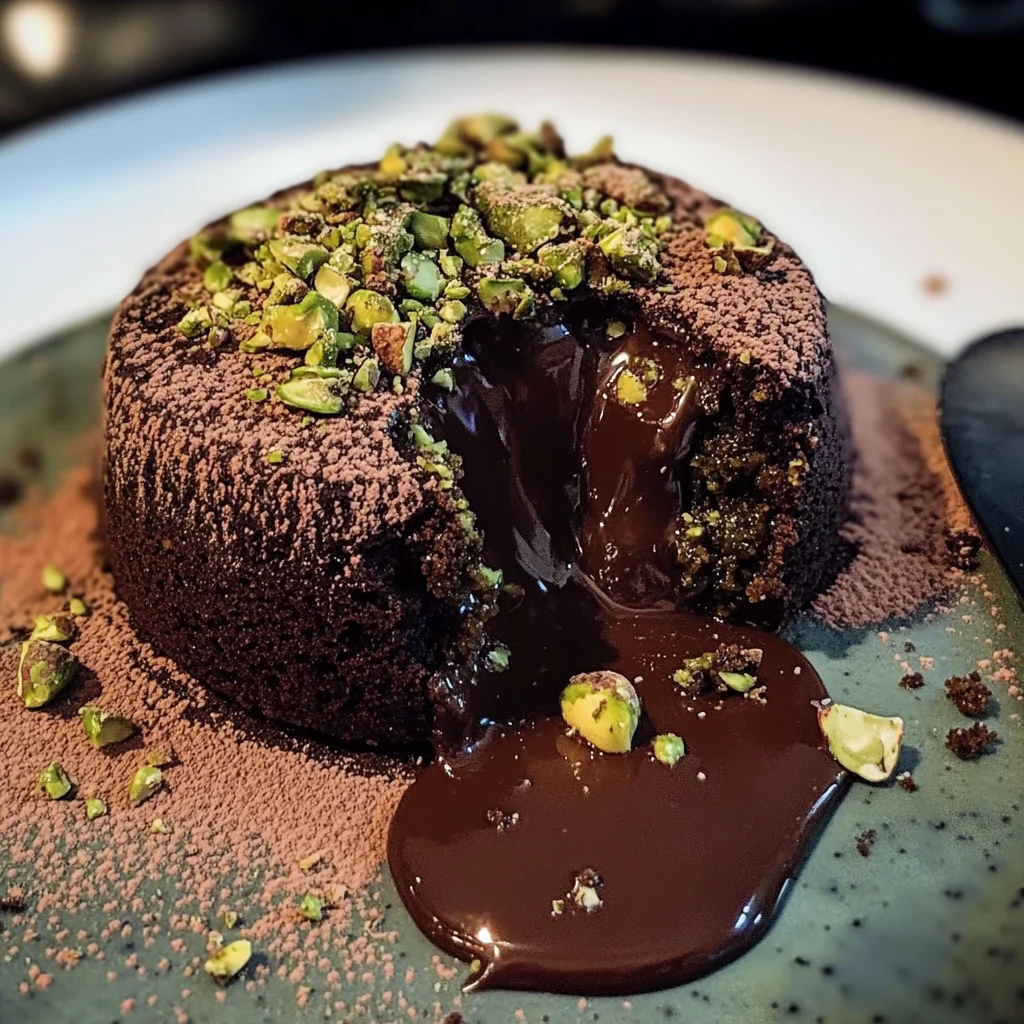
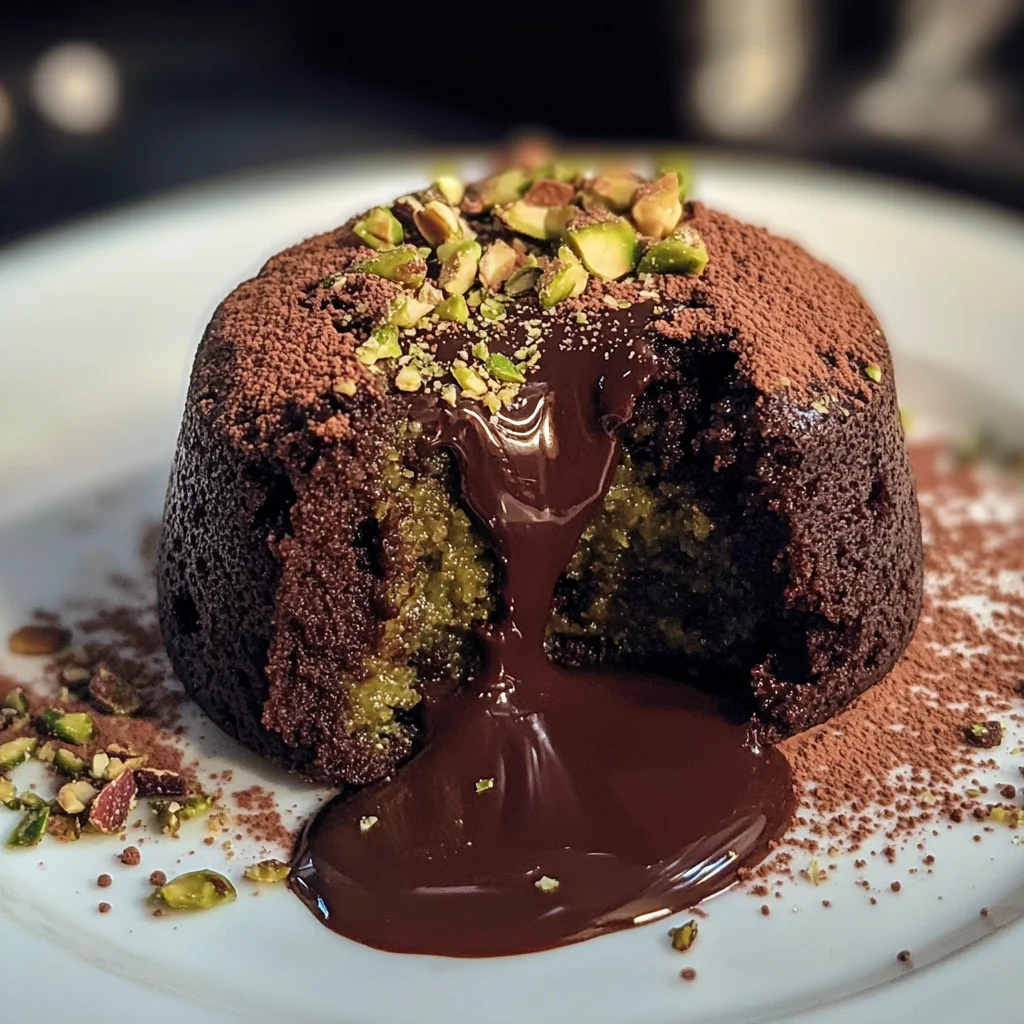
Now it’s finally time for my favorite moment—the reveal! Carefully invert each ramekin onto serving plates with confidence; if they don’t fall out immediately, give them a gentle tap on the bottom. What emerges should be nothing short of magnificent—a warm chocolate shell awaiting its grand unveiling to reveal that deliciously gooey pistachio center! At this point, consider garnishing your masterpiece with some finely chopped pistachios for added texture and visual appeal; their vibrant color contrasts beautifully against that rich chocolate hue.
Serve immediately while they’re still warm, allowing everyone to enjoy that delightful flow of molten pistachio goodness as they cut into their cakes. There’s something profoundly satisfying about watching someone take their first bite—seeing their eyes light up as they experience that perfect balance of flavors and textures is what cooking is all about! So gather your loved ones around and share these heavenly treats; I guarantee they’ll leave everyone craving more.
Conclusion:
As we wrap up this delicious journey through the creation of your own Pistachio Chocolate Lava Cakes, I hope you’re feeling as giddy as I do every time I make them. There’s something truly extraordinary about the marriage of rich chocolate and nutty pistachios—the way they dance together creates an unforgettable symphony of flavors that elevates any dining experience from ordinary to exceptional. Each bite offers not just taste but also texture; that crisp exterior gives way to an utterly intoxicating molten center that leaves everyone at the table enchanted.
This recipe is more than just a dessert; it’s an experience waiting to happen! Whether you’re celebrating a special occasion or simply indulging on a cozy evening at home, these cakes shine brightly in any scenario. They are accessible enough for beginner bakers yet sophisticated enough to impress seasoned chefs alike. Just imagine pulling these beauties from the oven: the warm aroma envelops your kitchen while friends gather around in anticipation—a moment that fills hearts with joy and stomachs with delight.
Imagine savoring one with a dollop of freshly whipped cream alongside some juicy raspberries; the tanginess of the berries cuts through the richness beautifully. For an afternoon pick-me-up, serve one alongside a steaming cup of coffee or tea—pure bliss! And if you’re feeling adventurous, why not drizzle a bit of caramel sauce over the top? The sweetness perfectly complements those earthy pistachios and luscious chocolate.
Feeling adventurous? This recipe is wonderfully adaptable! You could swap in different nut pastes like almond or hazelnut for unique twists that still deliver on flavor while keeping that signature molten surprise intact. You might even experiment with adding spices like cardamom or cinnamon into your chocolate batter for an unexpected layer of warmth and comfort. I invite you to dive into this creative culinary adventure—try it out, share your experiences with me, and let’s connect over our love for baking!
Pistachio Chocolate Lava Cakes
Indulge your senses with our Pistachio Chocolate Lava Cakes Recipe, where rich dark chocolate meets a luxurious pistachio surprise. Each individual cake features a molten core that flows out like liquid gold upon cutting, creating an unforgettable dessert experience. Perfect for special occasions or intimate gatherings, these elegant treats are as delightful to look at as they are to eat. With a harmonious blend of flavors and textures, this recipe ensures you captivate the hearts of your loved ones with each delectable bite.
- Prep Time: 20 minutes
- Cook Time: 13 minutes
- Total Time: 33 minutes
- Yield: Serves 6
- Category: Dessert
- Method: Baking
- Cuisine: American
Ingredients
- 1/2 cup white chocolate chips
- 1/4 cup pistachio paste (unsweetened or lightly sweetened)
- 1 tablespoon heavy cream
- Pinch of salt
- 1/2 cup unsalted butter
- 4 ounces dark chocolate (60–70%), chopped
- 2 large eggs
- 2 large egg yolks
- 1/3 cup granulated sugar
- 1/8 teaspoon salt
- 2 tablespoons all-purpose flour
Instructions
- Preheat oven to 425°F (220°C) and grease six 6-ounce ramekins with unsalted butter.
- Melt white chocolate chips and heavy cream together until smooth; stir in pistachio paste and salt. Freeze the mixture into discs.
- Melt butter and dark chocolate together until combined. In a separate bowl, whisk eggs, yolks, sugar, and salt until thick.
- Fold the melted chocolate mixture into the egg mixture; add flour gently until combined.
- Spoon batter into ramekins, place frozen pistachio discs in the center, then cover with remaining batter.
- Bake for 11 to 13 minutes until edges are set but centers jiggle slightly. Let rest for 1 minute before serving.
Nutrition
- Serving Size: 1 cake (130g)
- Calories: 350
- Sugar: 22g
- Sodium: 170mg
- Fat: 22g
- Saturated Fat: 10g
- Unsaturated Fat: 10g
- Trans Fat: 0g
- Carbohydrates: 34g
- Fiber: 2g
- Protein: 6g
- Cholesterol: 150mg